


在这部分Qt5 C++编程教程中,我们创建第一个程序。我们展示一个工具提示和各种鼠标光标。我们在屏幕中间放置窗口并且引入信号和槽机制。
简单的示例
我们从一个非常简单的示例开始。
/* 这个示例在屏幕上展示了一个基本窗口。 */
// 包含了必要的头文件
#include <QApplication>
#include <QWidget>
int main(int argc, char *argv[]) {
// 这是一个应用程序对象。每个Qt5应用程序必需创建这个对象。
QApplication app(argc, argv);
// 这是主要的widget
QWidget window;
// 这里我们调整了这个widget大小并且为主窗口设置了标题。
// 在这种情况中,QWidget是我们的主窗口。
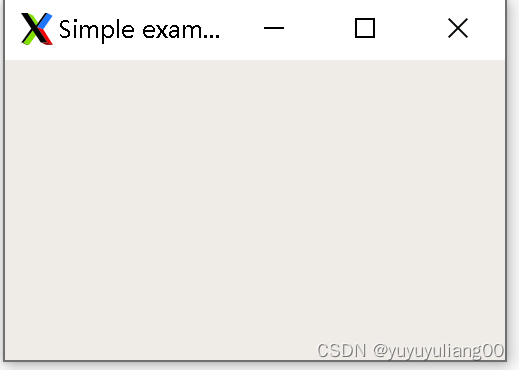
window.resize(250, 150);
window.setWindowTitle("Simple example");
最终,在屏幕上显示了这个widget。
window.show();
exec方法启动了这个程序的主循环。
return app.exec();
}以下步骤是编译这个程序的过程:
1)创建一个verysimple目录,并且进入这个目录:
[blctrl@localhost qt5]$ mkdir verysimple
[blctrl@localhost qt5]$ cd verysimple
[blctrl@localhost verysimple]$ ls
2) 编写一个名为verysimple.cpp的程序源文件,内容与上面展示的源文件一致,然后编译一个名为verysimple.pro的文件,内容如下:
[blctrl@localhost verysimple]$ ls
verysimple.cpp  verysimple.pro
[blctrl@localhost verysimple]$ cat verysimple.pro
######################################################################
# Automatically generated by qmake (3.1) Wed Jul 5 11:23:11 2023
######################################################################
QT       += core gui

greaterThan(QT_MAJOR_VERSION, 4): QT += widgets printsupport


TEMPLATE = app
TARGET = verysimple
INCLUDEPATH += .

# The following define makes your compiler warn you if you use any
# feature of Qt which has been marked as deprecated (the exact warnings
# depend on your compiler). Please consult the documentation of the
# deprecated API in order to know how to port your code away from it.
DEFINES += QT_DEPRECATED_WARNINGS

# You can also make your code fail to compile if you use deprecated APIs.
# In order to do so, uncomment the following line.
# You can also select to disable deprecated APIs only up to a certain version of Qt.
#DEFINES += QT_DISABLE_DEPRECATED_BEFORE=0x060000    # disables all the APIs deprecated before Qt 6.0.0

# Input
SOURCES +=verysimple.cpp
3) 执行qmake命令,后生产一个Makefile文件:
[blctrl@localhost verysimple]$ qmake
Info: creating stash file /home/blctrl/qt5/verysimple/.qmake.stash
[blctrl@localhost verysimple]$ ls
Makefile  verysimple.cpp  verysimple.pro
4) 执行make命令,在当前路径下生成一个verysimple的可执行文件:
[blctrl@localhost verysimple]$ make
g++ -c -pipe -O2 -g -pipe -Wall -Wp,-D_FORTIFY_SOURCE=2 -fexceptions -fstack-protector-strong --param=ssp-buffer-size=4 -grecord-gcc-switches -m64 -mtune=generic -O2 -std=gnu++11 -Wall -W -D_REENTRANT -fPIC -DQT_DEPRECATED_WARNINGS -DQT_NO_DEBUG -DQT_PRINTSUPPORT_LIB -DQT_WIDGETS_LIB -DQT_GUI_LIB -DQT_CORE_LIB -I. -I. -isystem /usr/include/qt5 -isystem /usr/include/qt5/QtPrintSupport -isystem /usr/include/qt5/QtWidgets -isystem /usr/include/qt5/QtGui -isystem /usr/include/qt5/QtCore -I. -isystem /usr/include/libdrm -I/usr/lib64/qt5/mkspecs/linux-g++ -o verysimple.o verysimple.cpp
g++ -Wl,-O1 -Wl,-z,relro -o verysimple verysimple.o   -lQt5PrintSupport -lQt5Widgets -lQt5Gui -lQt5Core -lGL -lpthread
[blctrl@localhost verysimple]$ ls
Makefile  verysimple  verysimple.cpp  verysimple.o  verysimple.pro
5) 运行verysimple程序,其将在屏幕中产生一个如下的窗口:
工具提示
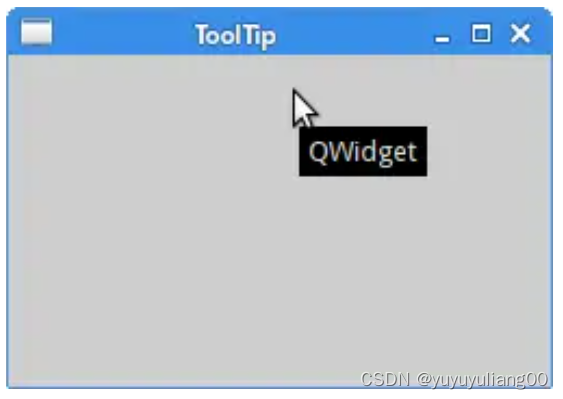
工具提示是程序中有关项目的特定提示。以下示例将展示在Qt5编程库中如何创建要给工具提示。
/* 示例显示了对主QWidget进行工具提示 */
#include <QApplication>
#include <QWidget>

int main(int argc, char *argv[]) {

  QApplication app(argc, argv);

  QWidget window;

  window.resize(350, 250);
  window.setWindowTitle("ToolTip");
  // 这个示例展示了用于主QWidget的工具提示
  // 用setToolTip方法为QWidget部件设置工具提示
  window.setToolTip("QWidget");
  window.show();

  return app.exec();
}
运行结果如下:
Qt5光标
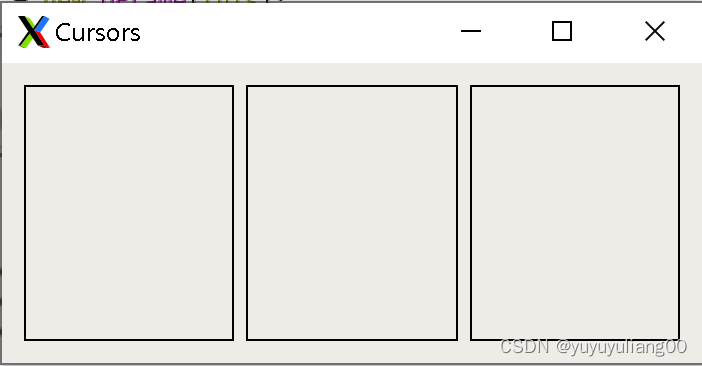
一个光标是一个小图标,它只是了鼠标点的位置。在本例中,将展示在程序中能够使用的各种光标。
/* 在本例中,使用了三个frames。每个frame有一个不同的光标设置 */
#include <QApplication>
#include <QWidget>
#include <QFrame>
#include <QGridLayout>


class Cursors : public QWidget{
public:
    Cursors(QWidget * parent = nullptr);
};

Cursors::Cursors(QWidget * parent):
    QWidget(parent){
    // 创建一个QFrame部件。
    auto * frame1 = new QFrame(this);
    // 用setFrameStype方法设置frame风格。这种方法可以看到frames的边框。
    frame1->setFrameStyle(QFrame::Box);
    // 用setCursor方法为这个frame设置光标。
    frame1->setCursor(Qt::SizeAllCursor);

    auto * frame2 = new QFrame(this);
    frame2->setFrameStyle(QFrame::Box);
    frame2->setCursor(Qt::WaitCursor);

    auto * frame3 = new QFrame(this);
    frame3->setFrameStyle(QFrame::Box);
    frame3->setCursor(Qt::PointingHandCursor);
    // 这将把所有frames组合进一行。
    auto * grid = new QGridLayout(this);
    grid->addWidget(frame1,0,0);
    grid->addWidget(frame2,0,1);
    grid->addWidget(frame3,0,2);

    setLayout(grid);
}

int main(int argc, char *argv[])
{
    QApplication a(argc, argv);

    Cursors windows;

    windows.resize(350, 150);
    windows.setWindowTitle("Cursors");
    windows.show();

    return a.exec();
}
运行以上程序,将得到以下窗口,当鼠标移动到一个frame中,将显示不同光标形状。
Qt5 PushButton
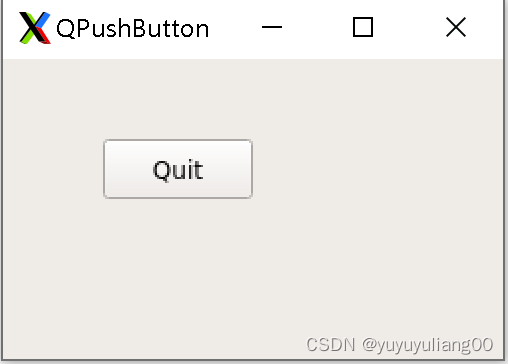
在本例中,首次使用信号和槽的概念。
#include <QApplication>
#include <QWidget>
#include <QPushButton>

class MyButton : public QWidget{
public:
    MyButton(QWidget * parent = nullptr);
    QPushButton * quitBtn;
};

MyButton::MyButton(QWidget * parent)
    :  QWidget(parent){
    // 创建一个新的QPushButton。用setGeometry方法手动调整其大小并且在窗口中放置其位置。
    quitBtn = new QPushButton("Quit", this);
    quitBtn->setGeometry(50,40,75,30);

    // 当点击这个按钮,产生一个clicked信号。一个slot是一个响应这个信号的方法。
    // 在本例中,它是主程序对象的quit槽。qApp是一个全局指针,它指向本应用程序对象。
    // 在QApplication头文件中定义了它。
    connect(quitBtn, &QPushButton::clicked, qApp, &QApplication::quit);

}

int main(int argc, char *argv[])
{
    QApplication a(argc, argv);

    MyButton windows;

    windows.resize(250,150);
    windows.setWindowTitle("QPushButton");
    windows.show();

    return a.exec();
}
运行以上程序,结果如下,点击这个Quit按钮后,将退出程序。
信号和槽的窗口示例
这部分展示部件如何通信。本例代码分成了三个文件。
plusminus.h是本例中的头文件,在此文件中定义了两个槽和一个标签部件。
#ifndef PLUSMINUS_H
#define PLUSMINUS_H

#include <QWidget>
#include <QApplication>
#include <QPushButton>
#include <QLabel>

class plusminus : public QWidget
{
    // Q_OBJECT宏必需被包含在声明它们自己信号和槽的类中。
    Q_OBJECT
public:
    explicit plusminus(QWidget *parent = nullptr);

signals:

public slots:
    void OnPlus();
    void OnMinus();

private:
    QLabel *lbl;
};

#endif // PLUSHMINUS_H
plusminus.cpp文件是以上plusminus.h头文件的实现。
/*  有两个按钮和一个标签部件。 我们用按钮增加或减小这个标签显示的数值 */
#include "plusminus.h"
#include <QGridLayout>


plusminus::plusminus(QWidget *parent) : QWidget(parent)
{
    auto * plsBtn = new QPushButton("+", this);
    auto * minBtn = new QPushButton("-", this);
    lbl = new QLabel("0", this);

    auto * grid = new QGridLayout(this);
    grid->addWidget(plsBtn, 0 ,0);
    grid->addWidget(minBtn, 0 ,1 );
    grid->addWidget(lbl, 1, 1);

    setLayout(grid);
    // 连接clicked信号和它们的槽
    connect(plsBtn, &QPushButton::clicked, this, &plusminus::OnPlus);
    connect(minBtn, &QPushButton::clicked, this, &plusminus::OnMinus);
}

// 在OnPlus方法中,获取标签的当前值。标签部件显示一个字符串值
// 必需把其转成整数。将数值增加1,并且设置标签显示这个新值。转换一个数值为字符串值。
void plusminus::OnPlus()
{
    int val = lbl->text().toInt();
    val++;
    lbl->setText(QString::number(val));
}

void plusminus::OnMinus()
{
    int val = lbl->text().toInt();
    val--;
    lbl->setText(QString::number(val));
}
主程序main.cpp,如下
#include <QApplication>
#include "plusminus.h"
int main(int argc, char *argv[])
{
QApplication a(argc, argv);
plusminus window;
window.resize(300,180);
window.setWindowTitle("Plush Minus");
window.show();
return a.exec();
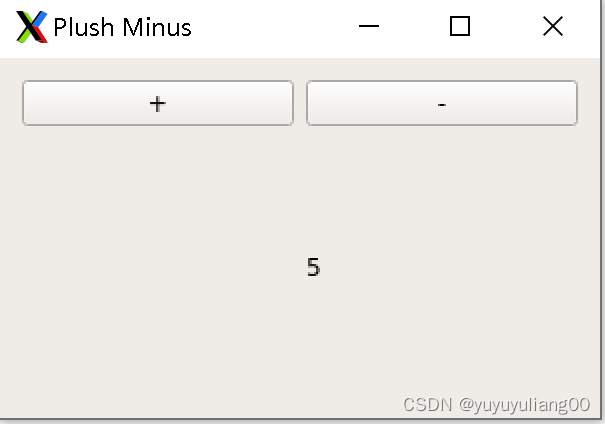
}运行以上程序,结果如下,点击"+"按钮,标签上显示的数值增加1,点击"-"按钮,标签上显示的数值减少1。


 2840
2840


 被折叠的 条评论
为什么被折叠?
被折叠的 条评论
为什么被折叠?
 到【灌水乐园】发言


