


上一篇总结了Service常用的一些方法,不过还有一个用法就是AIDL。那什么是AIDL呢,给一个定义吧。
AIDL:aidl是 Android Interface definition language的缩写,一看就明白,它是一种android内部进程通信接口的描述语言,通过它我们可以定义进程间的通信接口(偷懒网上抄别人的,哈哈)
不多说了,直接看看怎么用吧。
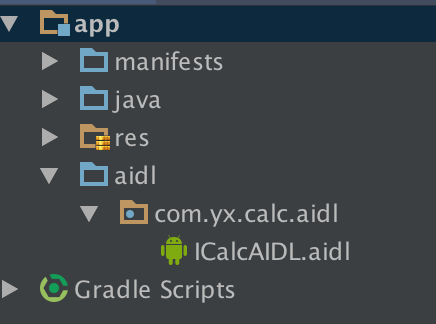
首选,建立一个aidl文件
目录结构

接口文件代码:
// ICalcAIDL.aidl
package com.yx.calc.aidl;

// Declare any non-default types here with import statements

interface ICalcAIDL {
    /**
     * Demonstrates some basic types that you can use as parameters
     * and return values in AIDL.
     */
    void basicTypes(int anInt, long aLong, boolean aBoolean, float aFloat,
            double aDouble, String aString);

            int add(int x , int y);
            int min(int x , int y );
}
这里有3个方法,一个是创建时自动生成的,暂时不用理会。第二个是我们测试用是方法,输入2个int值做加法运算。第三个是做减法运算(为什么是这个两个方法?学习时别人就是这么用的,照抄喽,呵呵)
创建完接口文件,我们就要去创建一个具体的Service类了
package aidl.tongbu.com.aidl;

import android.app.Service;
import android.content.Intent;
import android.os.IBinder;
import android.os.RemoteException;

import com.yx.calc.aidl.ICalcAIDL;


public class CalcService extends Service {

    @Override
    public IBinder onBind(Intent intent)
    {
        return mBinder;
    }


    private final ICalcAIDL.Stub mBinder = new ICalcAIDL.Stub()
    {
        @Override
        public void basicTypes(int anInt, long aLong, boolean aBoolean, float aFloat,
                        double aDouble, String aString)
        {

        }


        @Override
        public int add(int x, int y) throws RemoteException
        {
            return x + y;
        }

        @Override
        public int min(int x, int y) throws RemoteException
        {
            return x - y;
        }

    };
}
这个Service里最主要的就是要自己实现一个Binder的类也就是ICalcAIDL.Stub这个Binder的子类。(如果大家像我一样这么写的时候会提示找不到我们刚才创建的接口文件,不用急。从新编译一下项目就好了)。这个类里就是实现接口文件的方法,一个加法,一个减法,很简单。
还有一点就是把我们实例化的BInder对象在onBind()方法里返回,这点很重要,不然白弄了。
还有就是去注册这个Service。
<service android:name=".CalcService">
            <intent-filter>
                <action android:name="com.yx.aidl.calc" />

                <category android:name="android.intent.category.DEFAULT" />
            </intent-filter>
        </service>
这里面配置了一个action,目的是为了客户端连接的时候方便。
到此服务端就没什么了,接下来去看看客户端。
客户端也是一样去创建一个一模一样的aidl接口文件。
然后就是去activity里去连接服务端的Service了,代码如下:
package adil.example.com.client;

import android.content.ComponentName;
import android.content.Context;
import android.content.Intent;
import android.content.ServiceConnection;
import android.os.IBinder;
import android.os.RemoteException;
import android.support.v7.app.ActionBarActivity;
import android.os.Bundle;
import android.util.Log;
import android.view.View;
import android.widget.Toast;

import com.yx.calc.aidl.ICalcAIDL;

public class MainActivity extends ActionBarActivity {

    private ICalcAIDL mCalcAidl;

    private ServiceConnection mServiceConn = new ServiceConnection()
    {

        @Override
        public void onServiceConnected(ComponentName name, IBinder service)
        {
            Log.e("client", "onServiceConnected");
            mCalcAidl = ICalcAIDL.Stub.asInterface(service);
        }

        @Override
        public void onServiceDisconnected(ComponentName name)
        {
            Log.e("client", "onServiceDisconnected");
            mCalcAidl = null;
        }
    };

    @Override
    protected void onCreate(Bundle savedInstanceState) {
        super.onCreate(savedInstanceState);
        setContentView(R.layout.activity_main);
    }

    /**
     * 点击BindService按钮时调用
     * @param view
     */
    public void bindService(View view)
    {
        Intent intent = new Intent();
        intent.setAction("com.yx.aidl.calc");
        bindService(intent, mServiceConn, Context.BIND_AUTO_CREATE);
    }
    /**
     * 点击unBindService按钮时调用
     * @param view
     */
    public void unbindService(View view)
    {
        unbindService(mServiceConn);
    }
    /**
     * 点击12+12按钮时调用
     * @param view
     */
    public void addInvoked(View view) throws Exception
    {

        if (mCalcAidl != null)
        {
            int addRes = mCalcAidl.add(12, 12);
            Toast.makeText(this, addRes + "", Toast.LENGTH_SHORT).show();
        } else
        {
            Toast.makeText(this, "服务器被异常杀死,请重新绑定服务端", Toast.LENGTH_SHORT)
                    .show();

        }

    }

    /**
     * 点击50-12按钮时调用
     * @param view
     */
    public void minInvoked(View view) throws Exception
    {

        if (mCalcAidl != null)
        {
            int addRes = mCalcAidl.min(58, 12);
            Toast.makeText(this, addRes + "", Toast.LENGTH_SHORT).show();
        } else
        {
            Toast.makeText(this, "服务端未绑定或被异常杀死,请重新绑定服务端", Toast.LENGTH_SHORT)
                    .show();

        }

    }
}
首选这个activity里有一个绑定服务的bindService方法,目的就是去绑定服务端的服务。Intent的配置就是通过隐式调用,进行绑定的。
这个ServiceConnection的实现就是为了连接成功后拿到服务端的AIDL的对象也就是mCalcAidl,这样就可以用他去调用对应的方法,实现进程间的通信目的。
private ServiceConnection mServiceConn = new ServiceConnection()
    {

        @Override
        public void onServiceConnected(ComponentName name, IBinder service)
        {
            Log.e("client", "onServiceConnected");
            mCalcAidl = ICalcAIDL.Stub.asInterface(service);
        }

        @Override
        public void onServiceDisconnected(ComponentName name)
        {
            Log.e("client", "onServiceDisconnected");
            mCalcAidl = null;
        }
    };
剩下的就很简单了,用mCalcAidl进行想要的通信结束后就是unbindService的解绑定方法。
到此,整个AIDL的通信就完成了,还是很简单的。
接下来再说说Service的一个子类,IntentService
调用方通过 startService(Intent)启动服务,IntentService为每一个Intent开启一个单独的工作线程,并且在任务完成时自动终止服务
这种“工作队列处理器”模式通常用于某个程序主线程之外的后台任务。IntentService类简化了这种机制。要使用这种工作队列模式,只使用继承IntentService并实现onHandleIntent(Intent)方法。IntentService会接受Intents,启动工作线程,并在合适的时候终止服务。
代码很短,主要就是继承IntentService,然后复写onHandleIntent方法,根据传入的intent来选择具体的操作。
public class MyIntentService extends IntentService {

    public MyIntentService(String name) {
        super(name);
    }
    public MyIntentService() {
        super("MyIntentService");
    }

    @Override
    protected void onHandleIntent(Intent arg0) {
        try {
            //做一些耗时操作,比如上传图片等
        } catch (InterruptedException e) {
            e.printStackTrace();
        }
    }
}
看起来好像很厉害的样子是吧,咱们看看鸿祥哥对于这个的分析(学习嘛,原帖的地址
IntentService源码解析
public abstract class IntentService extends Service {
    private volatile Looper mServiceLooper;
    private volatile ServiceHandler mServiceHandler;
    private String mName;
    private boolean mRedelivery;

    private final class ServiceHandler extends Handler {
        public ServiceHandler(Looper looper) {
            super(looper);
        }

        @Override
        public void handleMessage(Message msg) {
            onHandleIntent((Intent)msg.obj);
            stopSelf(msg.arg1);
        }
    }


    public IntentService(String name) {
        super();
        mName = name;
    }


    public void setIntentRedelivery(boolean enabled) {
        mRedelivery = enabled;
    }

    @Override
    public void onCreate() {
                super.onCreate();
        HandlerThread thread = new HandlerThread("IntentService[" + mName + "]");
        thread.start();

        mServiceLooper = thread.getLooper();
        mServiceHandler = new ServiceHandler(mServiceLooper);
    }

    @Override
    public void onStart(Intent intent, int startId) {
        Message msg = mServiceHandler.obtainMessage();
        msg.arg1 = startId;
        msg.obj = intent;
        mServiceHandler.sendMessage(msg);
    }


    @Override
    public int onStartCommand(Intent intent, int flags, int startId) {
        onStart(intent, startId);
        return mRedelivery ? START_REDELIVER_INTENT : START_NOT_STICKY;
    }

    @Override
    public void onDestroy() {
        mServiceLooper.quit();
    }


    @Override
    public IBinder onBind(Intent intent) {
        return null;
    }


    protected abstract void onHandleIntent(Intent intent);
}
可以看到它在onCreate里面初始化了一个HandlerThread,就是每次调用onStartCommand的时候,通过mServiceHandler发送一个消息,消息中包含我们的intent。然后在该mServiceHandler的handleMessage中去回调onHandleIntent(intent);就可以了。
当任务完成销毁Service回调onDestory,可以看到在onDestroy中释放了我们的Looper:mServiceLooper.quit()。
主要就是利用了一下HandlerThread,那么这个又是怎么回事,下回复习的时候就在总结一下HandlerThread。


 255
255

 被折叠的 条评论
为什么被折叠?
被折叠的 条评论
为什么被折叠?
 到【灌水乐园】发言


