


操作系统:macOS Sierra 10.12.4
1.安装
安装基于TensorFlow的Keras
查看Keras官方文档->Installation
已安装TF
采用pip安装方式Keras
sudo pip install keras
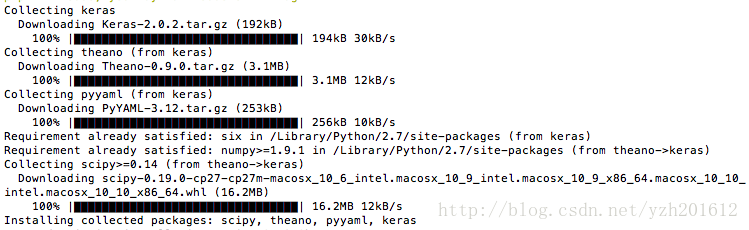
因系统已有scipy-0.13.0b1,于是自动卸载并准备安装scipy-0.19.0。但卸载操作报错:权限不够
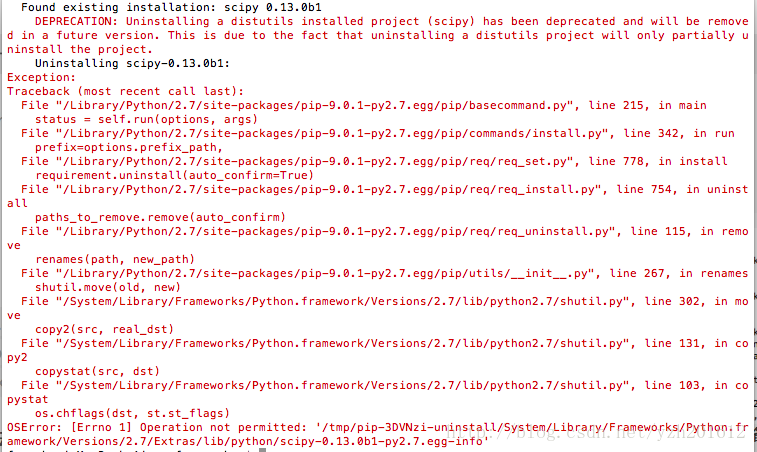
类似问题在之前更新numpy时出现过,当时系统还未升级到10.12,并且已有两个版本的numpy,python默认使用了旧版本numpy。当时采取的措施是手动删除旧版numpy。其他办法可查看此问答(How can I upgrade numpy?—Stack Overflow)。
出现此类问题的原因,这里(Mac系统10.11及以上升级numpy、scipy等python包报错解决方案)有解释和解决办法。
安装成功:

2.实例测试
在此采用mnist_cnn.py进行测试
'''Trains a simple convnet on the MNIST dataset.

Gets to 99.25% test accuracy after 12 epochs
(there is still a lot of margin for parameter tuning).
16 seconds per epoch on a GRID K520 GPU.
'''

from __future__ import print_function
import keras
from keras.datasets import mnist
from keras.models import Sequential
from keras.layers import Dense, Dropout, Flatten
from keras.layers import Conv2D, MaxPooling2D
from keras import backend as K

batch_size = 128
num_classes = 10
epochs = 12

# input image dimensions
img_rows, img_cols = 28, 28

# the data, shuffled and split between train and test sets
(x_train, y_train), (x_test, y_test) = mnist.load_data()

if K.image_data_format() == 'channels_first':
    x_train = x_train.reshape(x_train.shape[0], 1, img_rows, img_cols)
    x_test = x_test.reshape(x_test.shape[0], 1, img_rows, img_cols)
    input_shape = (1, img_rows, img_cols)
else:
    x_train = x_train.reshape(x_train.shape[0], img_rows, img_cols, 1)
    x_test = x_test.reshape(x_test.shape[0], img_rows, img_cols, 1)
    input_shape = (img_rows, img_cols, 1)

x_train = x_train.astype('float32')
x_test = x_test.astype('float32')
x_train /= 255
x_test /= 255
print('x_train shape:', x_train.shape)
print(x_train.shape[0], 'train samples')
print(x_test.shape[0], 'test samples')

# convert class vectors to binary class matrices
y_train = keras.utils.to_categorical(y_train, num_classes)
y_test = keras.utils.to_categorical(y_test, num_classes)

model = Sequential()
model.add(Conv2D(32, kernel_size=(3, 3),
                 activation='relu',
                 input_shape=input_shape))
model.add(Conv2D(64, (3, 3), activation='relu'))
model.add(MaxPooling2D(pool_size=(2, 2)))
model.add(Dropout(0.25))
model.add(Flatten())
model.add(Dense(128, activation='relu'))
model.add(Dropout(0.5))
model.add(Dense(num_classes, activation='softmax'))

model.compile(loss=keras.losses.categorical_crossentropy,
              optimizer=keras.optimizers.Adadelta(),
              metrics=['accuracy'])

model.fit(x_train, y_train,
          batch_size=batch_size,
          epochs=epochs,
          verbose=1,
          validation_data=(x_test, y_test))
score = model.evaluate(x_test, y_test, verbose=0)
print('Test loss:', score[0])
print('Test accuracy:', score[1])
下载原文件,或新建文件并复制以上代码。
运行后,会自动下载mnist数据集,格式为npz。下载过程过慢且无进度显示,看能不能单独下载再导入。找到mnist.load_data()定义如下:
from ..utils.data_utils import get_file
import numpy as np


def load_data(path='mnist.npz'):
    """Loads the MNIST dataset.

    # Arguments
        path: path where to cache the dataset locally
            (relative to ~/.keras/datasets).

    # Returns
        Tuple of Numpy arrays: `(x_train, y_train), (x_test, y_test)`.
    """
    path = get_file(path, origin='https://s3.amazonaws.com/img-datasets/mnist.npz')
    f = np.load(path)
    x_train = f['x_train']
    y_train = f['y_train']
    x_test = f['x_test']
    y_test = f['y_test']
    f.close()
    return (x_train, y_train), (x_test, y_test)
另外官方文档中对mnist数据集导入说明如下:
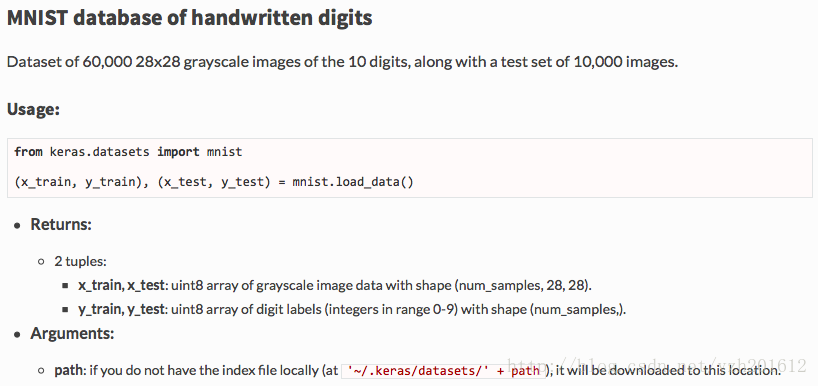
于是可以单独从https://s3.amazonaws.com/img-datasets/mnist.npz 处下载数据集,然后添加到系统~/.keras/datasets/目录下。
$ cp -i ~/Downloads/mnist.npz ~/.keras/datasets 再次运行程序,顺利导入并开始训练,如下图:

12个epochs后结果为:
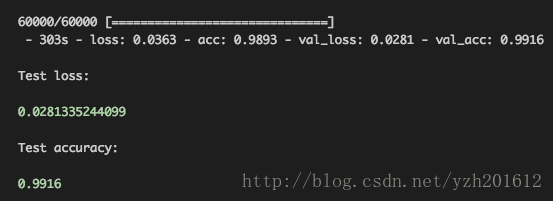
代码中说到:16 seconds per epoch on a GRID K520 GPU,12轮大概3分钟多。
但是我用笔记本跑的,没用GPU加速,配置还低,结果一共跑了快一个小时…


 2670
2670

 被折叠的 条评论
为什么被折叠?
被折叠的 条评论
为什么被折叠?
 到【灌水乐园】发言


