QRadioButton 单选按钮
QRadioButton 是 PyQt6 里的单选按钮控件,这篇教学会介绍如何在 PyQt6 窗口里加入 QRadioButton 单选按钮,并进行一些基本的样式设定,以及进行按钮群组和点击事件的设定。
快速预览:
加入QRadioButton单选按钮
QRadioButton 位置设定
QRadioButton 状态设定
QRadioButton 样式设定
QRadioButton 点击事件
加入QRadioButton单选按钮
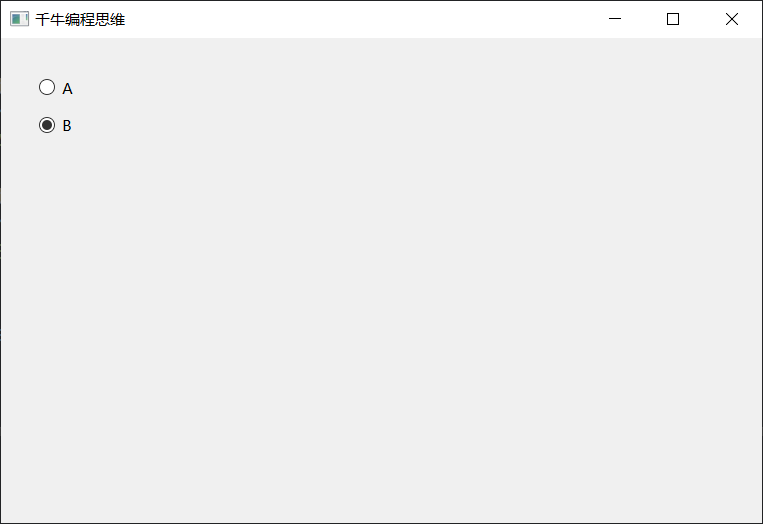
建立 PyQt6 窗口物件后,透过 QtWidgets.QRadioButton(widget)方法,就能在指定的控件中建立单选按钮,下方的程式码执行后,会加入两个 QRadioButton 按钮 ,并使用 setText() 方法加入文字。
注意,放在同样控件里的 QRadioButton 视为同一个群组,会套用「单选」的规则,例如下方程式码的两个 QRadioButton 都放在 Form 里,所以只能择一选择。
from PyQt6 import QtWidgets
import sys
app = QtWidgets.QApplication(sys.argv)
Form = QtWidgets.QWidget()
Form.setWindowTitle('千牛编程思维')
Form.resize(300, 200)
rb_a = QtWidgets.QRadioButton(Form)
rb_a.setGeometry(30, 30, 100, 20)
rb_a.setText('A')
rb_b = QtWidgets.QRadioButton(Form)
rb_b.setGeometry(30, 60, 100, 20)
rb_b.setText('B')
Form.show()
sys.exit(app.exec())
class 写法:
from PyQt6 import QtWidgets
import sys
class MyWidget(QtWidgets.QWidget):
def __init__(self):
super().__init__()
self.setWindowTitle('千牛编程思维')
self.resize(320, 240)
self.ui()
def ui(self):
self.rb_a = QtWidgets.QRadioButton(self)
self.rb_a.setGeometry(30, 30, 100, 20)
self.rb_a.setText('A')
self.rb_b = QtWidgets.QRadioButton(self)
self.rb_b.setGeometry(30, 60, 100, 20)
self.rb_b.setText('B')
if __name__ == '__main__':
app = QtWidgets.QApplication(sys.argv)
Form = MyWidget()
Form.show()
sys.exit(app.exec())

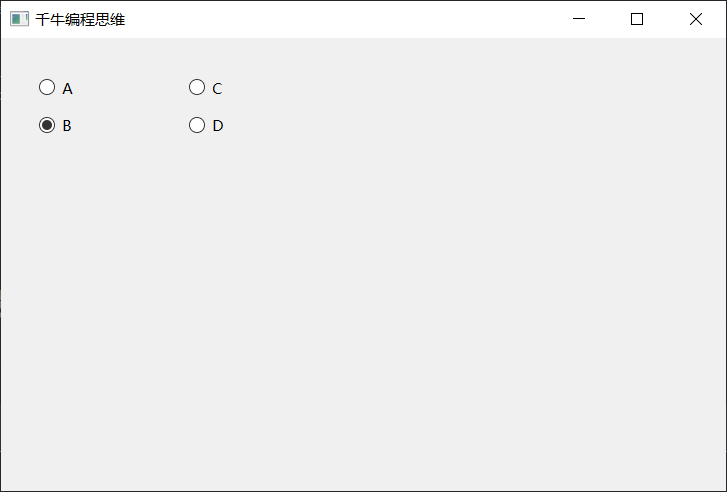
如果有「多组」QRadioButton,则可以使用 QtWidgets.QButtonGroup(widget)方法建立按钮群组,然后将归类为同一组的 QRadioButton 加入同一个 QButtonGroup,就能分别进行单选的动作。
from PyQt6 import QtWidgets
import sys
app = QtWidgets.QApplication(sys.argv)
Form = QtWidgets.QWidget()
Form.setWindowTitle('千牛编程思维')
Form.resize(320, 240)
rb_a = QtWidgets.QRadioButton(Form)
rb_a.setGeometry(30, 30, 100, 20)
rb_a.setText('A')
rb_b = QtWidgets.QRadioButton(Form)
rb_b.setGeometry(30, 60, 100, 20)
rb_b.setText('B')
group1 = QtWidgets.QButtonGroup(Form) # 按鈕群組
group1.addButton(rb_a)
group1.addButton(rb_b)
rb_c = QtWidgets.QRadioButton(Form)
rb_c.setGeometry(150, 30, 100, 20)
rb_c.setText('C')
rb_d = QtWidgets.QRadioButton(Form)
rb_d.setGeometry(150, 60, 100, 20)
rb_d.setText('D')
group2 = QtWidgets.QButtonGroup(Form)
group2.addButton(rb_c)
group2.addButton(rb_d)
Form.show()
sys.exit(app.exec())
class 写法:
from PyQt6 import QtWidgets
import sys
class MyWidget(QtWidgets.QWidget):
def __init__(self):
super().__init__()
self.setWindowTitle('千牛编程思维')
self.resize(320, 240)
self.ui()
def ui(self):
self.rb_a = QtWidgets.QRadioButton(self)
self.rb_a.setGeometry(30, 30, 100, 20)
self.rb_a.setText('A')
self.rb_b = QtWidgets.QRadioButton(self)
self.rb_b.setGeometry(30, 60, 100, 20)
self.rb_b.setText('B')
self.group1 = QtWidgets.QButtonGroup(self) # 按鈕群組
self.group1.addButton(self.rb_a)
self.group1.addButton(self.rb_b)
self.rb_c = QtWidgets.QRadioButton(self)
self.rb_c.setGeometry(150, 30, 100, 20)
self.rb_c.setText('C')
self.rb_d = QtWidgets.QRadioButton(self)
self.rb_d.setGeometry(150, 60, 100, 20)
self.rb_d.setText('D')
self.group2 = QtWidgets.QButtonGroup(self)
self.group2.addButton(self.rb_c)
self.group2.addButton(self.rb_d)
if __name__ == '__main__':
app = QtWidgets.QApplication(sys.argv)
Form = MyWidget()
Form.show()
sys.exit(app.exec())

QRadioButton 位置设定
透过下列 QRadioButton 方法,可以将 QRadioButton 控件定位到指定的位置:
| 方法 | 参数 | 说明 |
|---|---|---|
| 移动 | x, y | 设定 QRadioButton 在摆放的父控件中的 xy 坐标,x 往右为正,y 往下为正,尺寸根据内容自动延伸。 |
| 设置几何() | X,X,Y,W,H | 设定 QRadioButton 在摆放的父控件中的 xy 坐标和长宽尺寸,x 往右为正,y 往下为正,如果超过长宽尺寸,预设会被裁切无法显示。 |
下方的程式码执行后会放入四个 QRadioButton,两个使用 move() 定位,另外两个使用 setGeometry() 方法定位。
from PyQt6 import QtWidgets
import sys
app = QtWidgets.QApplication(sys.argv)
Form = QtWidgets.QWidget()
Form.setWindowTitle('千牛编程思维')
Form.resize(320, 240)
rb_a = QtWidgets.QRadioButton(Form) # 单选按钮 A
rb_a.move(30, 30)
rb_a.setText('A')
rb_b = QtWidgets.QRadioButton(Form) # 单选按钮 C
rb_b.move(30, 60)
rb_b.setText('B')
rb_c = QtWidgets.QRadioButton(Form) # 单选按钮 D
rb_c.setGeometry(150, 30, 100, 20)
rb_c.setText('C')
rb_d = QtWidgets.QRadioButton(Form) # 单选按钮 E
rb_d.setGeometry(150, 60, 100, 20)
rb_d.setText('D')
Form.show()
sys.exit(app.exec())
class 写法:
from PyQt6 import QtWidgets
import sys
class MyWidget(QtWidgets.QWidget):
def __init__(self):
super().__init__()
self.setWindowTitle('千牛编程思维')
self.resize(320, 240)
self.ui()
def ui(self):
self.rb_a = QtWidgets.QRadioButton(self) # 单选按钮 A
self.rb_a.move(30, 30)
self.rb_a.setText('A')
self.rb_b = QtWidgets.QRadioButton(self) # 单选按钮 C
self.rb_b.move(30, 60)
self.rb_b.setText('B')
self.rb_c = QtWidgets.QRadioButton(self) # 单选按钮 D
self.rb_c.setGeometry(150, 30, 100, 20)
self.rb_c.setText('C')
self.rb_d = QtWidgets.QRadioButton(self) # 单选按钮 E
self.rb_d.setGeometry(150, 60, 100, 20)
self.rb_d.setText('D')
if __name__ == '__main__':
app = QtWidgets.QApplication(sys.argv)
Form = MyWidget()
Form.show()
sys.exit(app.exec())

QRadioButton 状态设定
透过下列几种方法,可以设定 QRadioButton 的状态:
| 方法 | 参数 | 说明 |
|---|---|---|
| 设置已禁用() | 布尔 | 是否停用,预设 False 启用,可设定 True 停用。 |
| 已检查过() | 布尔 | 是否勾选,预设 False 不勾选,可设定 True 勾选,若同一组有多个勾选,则以最后一个为主。 |
| 切换开关 | 勾选状态切换。 |
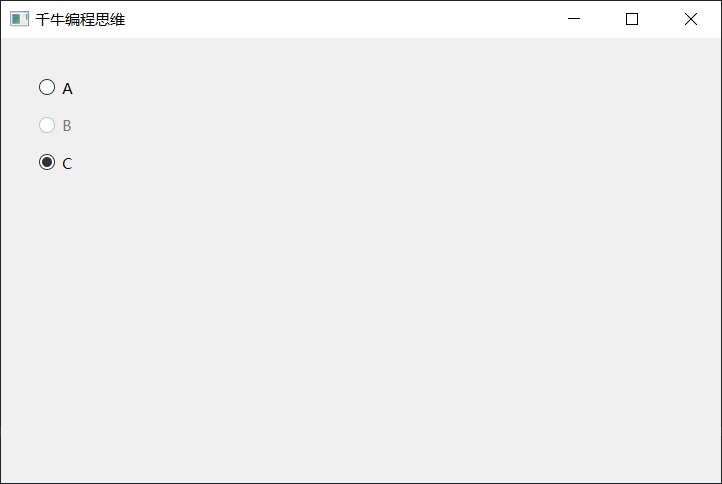
下面的程式码执行后,QRadioButton B 会停用,QRadioButton C 会预先勾选。
from PyQt6 import QtWidgets
import sys
app = QtWidgets.QApplication(sys.argv)
Form = QtWidgets.QWidget()
Form.setWindowTitle('千牛编程思维')
Form.resize(320, 240)
rb_a = QtWidgets.QRadioButton(Form)
rb_a.setGeometry(30, 30, 100, 20)
rb_a.setText('A')
rb_b = QtWidgets.QRadioButton(Form)
rb_b.setGeometry(30, 60, 100, 20)
rb_b.setText('B')
rb_b.setDisabled(True) # 停用
rb_c = QtWidgets.QRadioButton(Form)
rb_c.setGeometry(30, 90, 100, 20)
rb_c.setText('C')
rb_c.setChecked(True) # 预先勾选
Form.show()
sys.exit(app.exec())
class 写法:
from PyQt6 import QtWidgets
import sys
class MyWidget(QtWidgets.QWidget):
def __init__(self):
super().__init__()
self.setWindowTitle('千牛编程思维')
self.resize(320, 240)
self.ui()
def ui(self):
self.rb_a = QtWidgets.QRadioButton(self)
self.rb_a.setGeometry(30, 30, 100, 20)
self.rb_a.setText('A')
self.rb_b = QtWidgets.QRadioButton(self)
self.rb_b.setGeometry(30, 60, 100, 20)
self.rb_b.setText('B')
self.rb_b.setDisabled(True) # 停用
self.rb_c = QtWidgets.QRadioButton(self)
self.rb_c.setGeometry(30, 90, 100, 20)
self.rb_c.setText('C')
self.rb_c.setChecked(True)
if __name__ == '__main__':
app = QtWidgets.QApplication(sys.argv)
Form = MyWidget()
Form.show()
sys.exit(app.exec())

QRadioButton 样式设定
如果会使用网页 CSS 语法,就能透过 setStyleSheet() 设定 QRadioButton 样式,在设计样式上也较为弹性好用,下方的程式码执行后,会套用 CSS 样式语法,将 QRadioButton 设定为蓝色字,当滑鼠移到按钮上,就会触发 hover 的样式而变成红色字。
from PyQt6 import QtWidgets
import sys

app = QtWidgets.QApplication(sys.argv)

Form = QtWidgets.QWidget()
Form.setWindowTitle('千牛编程思维')
Form.resize(320, 240)

rb_a = QtWidgets.QRadioButton(Form)
rb_a.setGeometry(30, 30, 100, 20)
rb_a.setText('A')

# 设置按钮A的样式
rb_a.setStyleSheet('''
    QRadioButton {
        color: #00f;
    }
    QRadioButton:hover {
        color:#f00;
    }
''')

rb_b = QtWidgets.QRadioButton(Form)
rb_b.setGeometry(30, 60, 100, 20)
rb_b.setText('B')

# 设置按钮B的样式
rb_b.setStyleSheet('''
    QRadioButton {
        color: #00f;
    }
    QRadioButton:hover {
        color:#f00;
    }
''')

Form.show()
sys.exit(app.exec())
class 写法:
from PyQt6 import QtWidgets
import sys

class MyWidget(QtWidgets.QWidget):
    def __init__(self):
        super().__init__()
        self.setWindowTitle('千牛编程思维')
        self.resize(320, 240)
        self.ui()

    def ui(self):
        self.rb_a = QtWidgets.QRadioButton(self)
        self.rb_a.setGeometry(30, 30, 100, 20)
        self.rb_a.setText('A')

        # 设置按钮A的样式
        self.rb_a.setStyleSheet('''
            QRadioButton {
                color: #00f;
            }
            QRadioButton:hover {
                color:#f00;
            }
        ''')

        self.rb_b = QtWidgets.QRadioButton(self)
        self.rb_b.setGeometry(30, 60, 100, 20)
        self.rb_b.setText('B')

        # 设置按钮B的样式
        self.rb_b.setStyleSheet('''
            QRadioButton {
                color: #00f;
            }
            QRadioButton:hover {
                color:#f00;
            }
        ''')

if __name__ == '__main__':
    app = QtWidgets.QApplication(sys.argv)
    Form = MyWidget()
    Form.show()
    sys.exit(app.exec())

如果使用 setDisabled(True) 将 QRadioButton 设定为「停用」,也可透过 disabled 的样式表进行样式的设定,下方的程式码执行后,单选按钮 B 会变成浅灰色
from PyQt6 import QtWidgets
import sys

app = QtWidgets.QApplication(sys.argv)

Form = QtWidgets.QWidget()
Form.setWindowTitle('千牛编程思维')
Form.resize(320, 240)

rb_a = QtWidgets.QRadioButton(Form)
rb_a.setGeometry(30, 30, 100, 20)
rb_a.setText('A')
rb_a.setStyleSheet('''
    QRadioButton {
        color: #00f;
    }
    QRadioButton:hover {
        color:#f00;
    }
''')

rb_b = QtWidgets.QRadioButton(Form)
rb_b.setGeometry(30, 60, 100, 20)
rb_b.setText('B')
rb_b.setStyleSheet('''
    QRadioButton {
        color: #00f;
    }
    QRadioButton:hover {
        color:#f00;
    }
    QRadioButton:disabled {
        color:#ccc;
    }
''')
rb_b.setDisabled(True)   # 停用按鈕 B

Form.show()
sys.exit(app.exec())
class 写法:
from PyQt6 import QtWidgets
import sys

class MyWidget(QtWidgets.QWidget):
    def __init__(self):
        super().__init__()
        self.setWindowTitle('千牛编程思维')
        self.resize(320, 240)
        self.ui()

    def ui(self):
        self.rb_a = QtWidgets.QRadioButton(self)
        self.rb_a.setGeometry(30, 30, 100, 20)
        self.rb_a.setText('A')

        # 设置按钮A的样式
        self.rb_a.setStyleSheet('''
            QRadioButton {
                color: #00f;
            }
            QRadioButton:hover {
                color:#f00;
            }
        ''')

        self.rb_b = QtWidgets.QRadioButton(self)
        self.rb_b.setGeometry(30, 60, 100, 20)
        self.rb_b.setText('B')

        # 设置按钮B的样式
        self.rb_b.setStyleSheet('''
            QRadioButton {
                color: #00f;
            }
            QRadioButton:hover {
                color:#f00;
            }
            QRadioButton:disabled {
                color:#ccc;
            }
        ''')
        self.rb_b.setDisabled(True)   # 停用按鈕 B

if __name__ == '__main__':
    app = QtWidgets.QApplication(sys.argv)
    Form = MyWidget()
    Form.show()
    sys.exit(app.exec())

QRadioButton 点击事件
如果要侦测勾选了哪个 QRadioButton,有两种常用的方法,第一种是透过 QButtonGroup() 将 QRadioButton 包装成同一个群组,使用 addButton() 添加按钮时,可设定第二个按钮的 ID 参数,设定后使用 buttonClicked.connect(fn)方法,就能侦测是否勾选按钮,并能夠过函数,执行 checkedId() 取得勾选按钮的 ID,下方的程式码执行后,会在勾选不同按钮时,透过 QLabel 显示对应的勾选按钮的 ID。
from PyQt6 import QtWidgets
import sys

app = QtWidgets.QApplication(sys.argv)

Form = QtWidgets.QWidget()
Form.setWindowTitle('千牛编程思维')
Form.resize(320, 240)

rb_a = QtWidgets.QRadioButton(Form)
rb_a.setGeometry(30, 60, 100, 20)
rb_a.setText('A')

rb_b = QtWidgets.QRadioButton(Form)
rb_b.setGeometry(150, 60, 100, 20)
rb_b.setText('B')

def show():
    label.setText(str(group.checkedId()))

group = QtWidgets.QButtonGroup(Form)
group.addButton(rb_a, 1)
group.addButton(rb_b, 2)
group.buttonClicked.connect(show)

label = QtWidgets.QLabel(Form)
label.setGeometry(30, 30, 100, 20)

Form.show()
sys.exit(app.exec())
class 写法 ( 注意不能使用 show 作为方法名称,会覆写基类的 show 方法造成无法显示 ):
from PyQt6 import QtWidgets
import sys

class MyWidget(QtWidgets.QWidget):
    def __init__(self):
        super().__init__()
        self.setWindowTitle('千牛编程思维')
        self.resize(320, 240)
        self.ui()

    def ui(self):
        self.label = QtWidgets.QLabel(self)
        self.label.setGeometry(30, 30, 100, 20)

        self.rb_a = QtWidgets.QRadioButton(self)
        self.rb_a.setGeometry(30, 60, 100, 20)
        self.rb_a.setText('A')

        self.rb_b = QtWidgets.QRadioButton(self)
        self.rb_b.setGeometry(150, 60, 100, 20)
        self.rb_b.setText('B')

        self.group = QtWidgets.QButtonGroup(self)
        self.group.addButton(self.rb_a, 1)
        self.group.addButton(self.rb_b, 2)
        self.group.buttonClicked.connect(self.showId)

    def showId(self):
        self.label.setText(str(self.group.checkedId()))

if __name__ == '__main__':
    app = QtWidgets.QApplication(sys.argv)
    Form = MyWidget()
    Form.show()
    sys.exit(app.exec())

第二种方法则是使用 toggled() 的方法,将函数与各个按钮绑定,接著就能透过 text() 取得按钮文字,透过 isChecked() 取得按钮勾选状态。
from PyQt6 import QtWidgets
import sys

app = QtWidgets.QApplication(sys.argv)

Form = QtWidgets.QWidget()
Form.setWindowTitle('千牛编程思维')
Form.resize(320, 240)

def show(rb):
    label.setText(rb.text() + ':' + str(rb.isChecked()))

rb_a = QtWidgets.QRadioButton(Form)
rb_a.setGeometry(30, 60, 100, 20)
rb_a.setText('A')
rb_a.toggled.connect(lambda: show(rb_a))

rb_b = QtWidgets.QRadioButton(Form)
rb_b.setGeometry(150, 60, 100, 20)
rb_b.setText('B')
rb_b.toggled.connect(lambda: show(rb_b))

group = QtWidgets.QButtonGroup(Form)
group.addButton(rb_a)
group.addButton(rb_b)

label = QtWidgets.QLabel(Form)
label.setGeometry(30, 30, 100, 20)

Form.show()
sys.exit(app.exec())
class 的写法 ( 注意不能使用 show 作为方法名称,会覆写基类的 show 方法造成无法显示 ):
from PyQt6 import QtWidgets
import sys

class MyWidget(QtWidgets.QWidget):
    def __init__(self):
        super().__init__()
        self.setWindowTitle('千牛编程思维')
        self.resize(320, 240)
        self.ui()

    def ui(self):
        self.label = QtWidgets.QLabel(self)
        self.label.setGeometry(30, 30, 100, 20)

        self.rb_a = QtWidgets.QRadioButton(self)
        self.rb_a.setGeometry(30, 60, 100, 20)
        self.rb_a.setText('A')

        self.rb_b = QtWidgets.QRadioButton(self)
        self.rb_b.setGeometry(150, 60, 100, 20)
        self.rb_b.setText('B')
        self.rb_a.toggled.connect(lambda: self.showState(self.rb_a))  # 绑定函数

        self.group = QtWidgets.QButtonGroup(self)
        self.group.addButton(self.rb_a)
        self.group.addButton(self.rb_b)
        self.rb_b.toggled.connect(lambda: self.showState(self.rb_b))  # 绑定函数

    def showState(self, rb):
        self.label.setText(rb.text() + ':' + str(rb.isChecked()))  # 取得按钮状态

if __name__ == '__main__':
    app = QtWidgets.QApplication(sys.argv)
    Form = MyWidget()
    Form.show()
    sys.exit(app.exec())


 1757
1757


 被折叠的 条评论
为什么被折叠?


