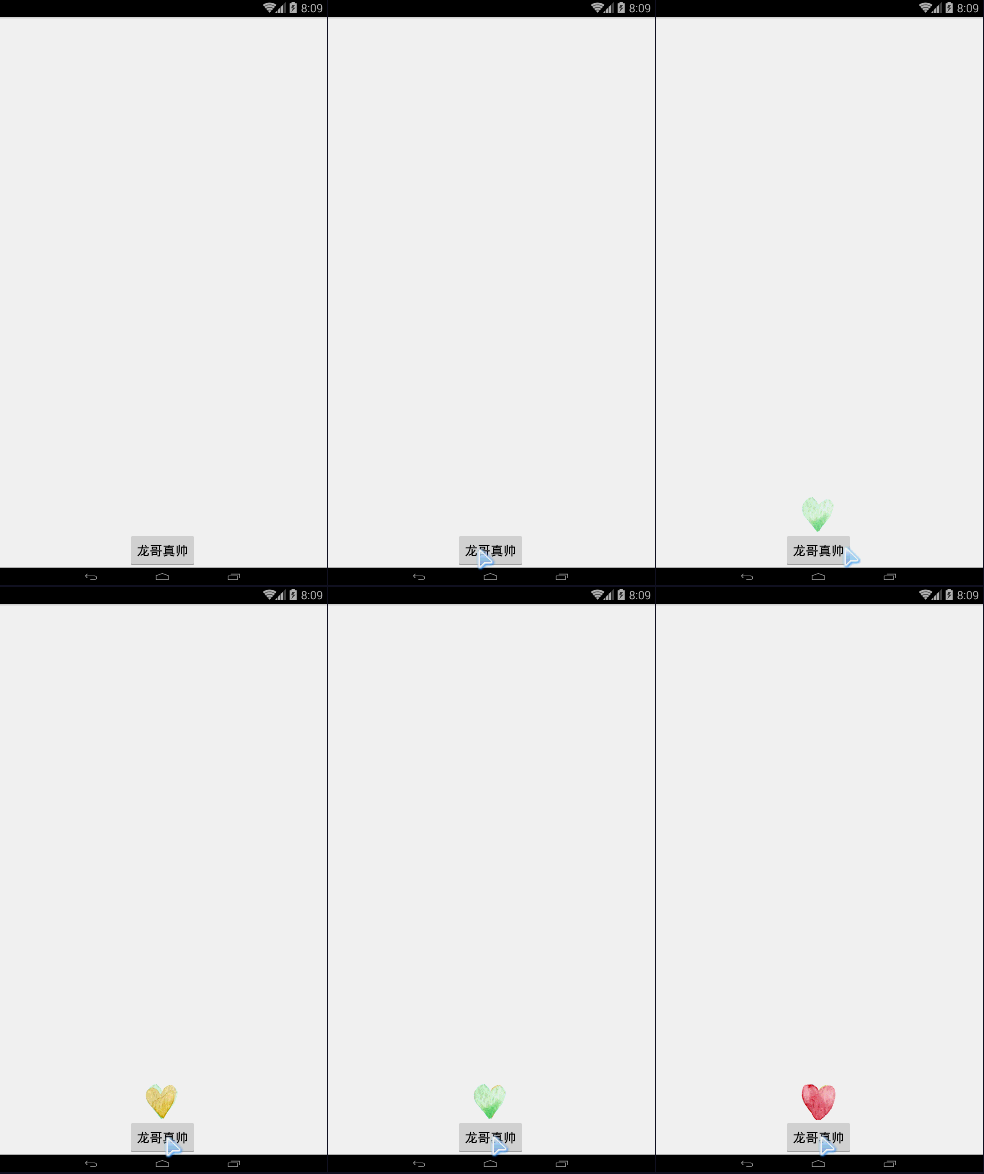
这些天项目比较闲,于是在网上闲逛,忽然看到有一篇关于贝塞尔曲线的博客,于是就百度了一下。发现这货用处还真不少。兴趣大起!找了几个相关的案例看了看。照着撸了遍代码,今天就借此主题来完成我的第一篇博客吧!
自从月初开了博客,打算每周一至两篇!结果发现自己水平真的有限。于是乎变成现在的两周一篇,老夫汗颜+手动滑稽!虽然没啥技术含量,算是对自己的一个交代以及算是一个学习的笔记!至于不懂贝塞尔是干嘛的童鞋请自行百度,相关博客不少,这里不再啰嗦!废话不多说!代码撸起来,先上效果图:
作为自定义View的初学者,可能看到这个瞬间就晕了,别急,我们一步步来分析:
1、首先点击Button界面上动态增加一个ImageView(硬编码布局肯定行不通,而且系统提供能够叠加View的Layout只能是RelativeLayout和FrameLayout);

2、ImageView添加到界面时会有一个缩放的动画和透明度的变化(属性动画)

3、当动画完成后按照贝塞尔曲线路径进行移动

4、逐渐透明最后消失不见

分析完毕,瞬间感觉So easy对不对?
代码撸起来:
一、动态添加ImageView:
布局文件:
<LinearLayout xmlns:android="http://schemas.android.com/apk/res/android"
    android:layout_width="match_parent"
    android:layout_height="match_parent"
    android:orientation="vertical">

    <com.example.lovebezier.LoveBezierLayout
        android:id="@+id/id_LoveLayout"
        android:layout_width="match_parent"
        android:layout_height="0dp"
        android:layout_weight="1"></com.example.lovebezier.LoveBezierLayout>

    <Button
        android:id="@+id/btn_addLove"
        android:layout_width="wrap_content"
        android:layout_height="wrap_content"
        android:layout_gravity="center_horizontal"
        android:text="龙哥真帅" />

</LinearLayout>
Activity:
public class MainActivity extends Activity implements View.OnClickListener {

    private Button mBtn_addLove;
    private LoveBezierLayout id_LoveLayout;

    @Override
    protected void onCreate(Bundle savedInstanceState) {
        super.onCreate(savedInstanceState);
        setContentView(R.layout.activity_main);
        init();
    }

    private void init() {
        id_LoveLayout = (LoveBezierLayout) findViewById(R.id.id_LoveLayout);
        mBtn_addLove = (Button) findViewById(R.id.btn_addLove);
        mBtn_addLove.setOnClickListener(this);
    }

    @Override
    public void onClick(View v) {
        id_LoveLayout.addLove();
    }
}
BezierLayout:
package com.example.lovebezier;

import android.content.Context;
import android.graphics.drawable.Drawable;
import android.util.AttributeSet;
import android.widget.ImageView;
import android.widget.RelativeLayout;
import java.util.Random;

/**
 * 自定义View
 */
public class LoveBezierLayout extends RelativeLayout {


    private Drawable a, b, c, d;
    private Drawable[] drawables;

    /**
     * 爱心的高宽
     */
    private int dWidth, dHeight;


    /**
     * 自定义View的高宽
     */
    private int mWidth, mHeight;

    /**
     * 随机数
     */
    private Random mRandom;
    /**
     * ImageView的布局属性
     */
    private LayoutParams mParams;

    public LoveBezierLayout(Context context) {
        this(context, null);
    }

    public LoveBezierLayout(Context context, AttributeSet attrs) {
        this(context, attrs, 0);
    }

    public LoveBezierLayout(Context context, AttributeSet attrs, int defStyleAttr) {
        super(context, attrs, defStyleAttr);
        init();
    }

    private void init() {
        mRandom = new Random();

        a = getResources().getDrawable(R.mipmap.a);
        b = getResources().getDrawable(R.mipmap.b);
        c = getResources().getDrawable(R.mipmap.c);
        d = getResources().getDrawable(R.mipmap.d);
        drawables = new Drawable[]{a, b, c, d};

        //得到Drawable的高宽,由于我们使用的图片大小相差不大。简略只取一个图片的值
        dWidth = a.getIntrinsicWidth();
        dHeight = a.getIntrinsicHeight();

        mParams = new LayoutParams(dWidth, dHeight);
        mParams.addRule(CENTER_HORIZONTAL, TRUE);//横向居中
        mParams.addRule(ALIGN_PARENT_BOTTOM);//对齐父空间底部
    }

    @Override
    protected void onMeasure(int widthMeasureSpec, int heightMeasureSpec) {
        super.onMeasure(widthMeasureSpec, heightMeasureSpec);
        mWidth = getMeasuredWidth();
        mHeight = getMeasuredHeight();
    }

    public void addLove() {
        //每次点击,新增一个ImageView
        ImageView imageView = new ImageView(getContext());
        imageView.setImageDrawable(drawables[mRandom.nextInt(4)]);
        imageView.setLayoutParams(mParams);
        addView(imageView);//添加到界面中
    }
}
第一步比较简单,自定义一个View继承自RelativeLayout,对外暴露一个addLove()方法,每次点击动态添加一个ImageView,效果如下:
二、添加起始动画
我们对addLove()方法稍加修改,加入我们的起始动画:
public void addLove() {
        //每次点击,新增一个ImageView
        ImageView imageView = new ImageView(getContext());
        imageView.setImageDrawable(drawables[mRandom.nextInt(4)]);
        imageView.setLayoutParams(mParams);
        addView(imageView);//添加到界面中

        //开始添加动画效果集合
        AnimatorSet set = getAnimatorSet(imageView);
        set.setTarget(imageView);
        set.start();
    }

    //动画集合
    private AnimatorSet getAnimatorSet(ImageView imageView) {
        //添加alpha动画
        ObjectAnimator alphaAnim = ObjectAnimator.ofFloat(imageView, "alpha", 0.3f, 1f);

        //添加缩放动画
        ObjectAnimator scaleX = ObjectAnimator.ofFloat(imageView,"scaleX",0.2f,1f);
        ObjectAnimator scaleY = ObjectAnimator.ofFloat(imageView,"scaleY",0.2f,1f);

        //添加起始动画集合
        AnimatorSet startAnimatorSet = new AnimatorSet();
        startAnimatorSet.setDuration(500);//动画持续时间
        startAnimatorSet.playTogether(alphaAnim,scaleX,scaleY);
        startAnimatorSet.setTarget(imageView);

        return startAnimatorSet;
    }
**效果如下:**
在android3.0之后多了一个动画,那就是属性动画,顾名思义,就是作用在View的属性上,我们可以让View的属性实现动画效果。
说到这里我们不得不介绍ObjectAnimator类,这个也是在实际开发中用的最多的,追根溯源,我们发现ObjectAnimator继承自ValueAnimator,我们通过ofFloat方法来获得一个ObjectAnimator实例,有必要提一下的是从源码中可以看到该方法接收N个参数,第一个是我们要设置动画的对象,第二个参数给哪个属性设置动画,后面两个参数表示控件从0.3f透明度变为不透明,后面的参数也可以传N多个,实现不同的效果,如:ObjectAnimator animator = ObjectAnimator.ofFloat(imageView, “alpha”, 0.1f,1f,0.5f,1f);可以实现从0.1透明度到不透明再到半透明,最后回到不透明。
三、添加贝塞尔曲线动画
1、首先我们在添加完其实动画的下面继续添加一个属性动画,代码如下:
  //动画集合
    private AnimatorSet getAnimatorSet(ImageView imageView) {
        //添加alpha动画
        ObjectAnimator alphaAnim = ObjectAnimator.ofFloat(imageView, "alpha", 0.3f, 1f);

        //添加缩放动画
        ObjectAnimator scaleX = ObjectAnimator.ofFloat(imageView, "scaleX", 0.2f, 1f);
        ObjectAnimator scaleY = ObjectAnimator.ofFloat(imageView, "scaleY", 0.2f, 1f);

        //添加起始动画集合
        AnimatorSet startAnimatorSet = new AnimatorSet();
        startAnimatorSet.setDuration(500);//动画持续时间
        startAnimatorSet.playTogether(alphaAnim, scaleX, scaleY);
        startAnimatorSet.setTarget(imageView);

        //得到贝塞尔动画
        ValueAnimator bezierValueAnim = getBezierValueAnim(imageView);

        //同样我们需要通过AnimatorSet将贝塞尔动画和起始动画集合结合起来
        AnimatorSet set = new AnimatorSet();
        //设置动画集合作用的目标,这里需要注意与上不同的是startAnimatorSet是playTogether类型的动画集合
        //而当前的set动画集合是playTogether类型的集合,所以最好不要设置持续时间,由系统自己去统计
        set.setTarget(imageView);
        set.playSequentially(startAnimatorSet, bezierValueAnim);

        return set;
    }

    //贝塞尔曲线动画
    private ValueAnimator getBezierValueAnim(final ImageView imageView) {
        //第一个坐标,起始坐标为layout的底部并且横向居中;为了美观我们应该将让爱心逐渐上升
        PointF pointf0 = new PointF(mWidth / 2 - dWidth / 2, mHeight - dHeight);
        PointF pointf1 = new PointF(mRandom.nextInt(mWidth), mRandom.nextInt(mHeight / 2) + mHeight / 2);
        PointF pointf2 = new PointF(mRandom.nextInt(mWidth), mRandom.nextInt(mHeight / 2));
        PointF pointf3 = new PointF(mRandom.nextInt(mWidth), 0);

        //自定义估值器,用来产生贝塞尔坐标
        BezierEvaluator evaluator = new BezierEvaluator(pointf1, pointf2);
        //属性动画不仅能改变控件的属性,同样也可以改变我们自定义的属性,通过OfObject();
        ValueAnimator valueAnimator = ValueAnimator.ofObject(evaluator, pointf0, pointf3);
        valueAnimator.addUpdateListener(new ValueAnimator.AnimatorUpdateListener() {
            @TargetApi(Build.VERSION_CODES.HONEYCOMB_MR1)
            @Override
            public void onAnimationUpdate(ValueAnimator animation) {
                //拿到我们自定义估计器返回的PointF对象,不断的更新imageView的坐标
                PointF pointF = (PointF) animation.getAnimatedValue();
                imageView.setX(pointF.x);
                imageView.setY(pointF.y);

            }
        });
        //设置作用目标及持续时间
        valueAnimator.setTarget(imageView);
        valueAnimator.setDuration(3000);


        return valueAnimator;
    }
}自定义贝塞尔曲线估值器:
贝塞尔公式 :
package com.example.lovebezier;

import android.animation.TypeEvaluator;
import android.graphics.PointF;

/**
 * Created by Administrator on 2016/3/27.
 */
public class BezierEvaluator implements TypeEvaluator<PointF> {

    private PointF pointF1, pointF2;

    public BezierEvaluator(PointF f1, PointF f2) {
        this.pointF1 = f1;
        this.pointF2 = f2;
    }

    @Override
    public PointF evaluate(float t, PointF pointF0, PointF pointF3) {
        //套用贝塞尔公式
        PointF pointF = new PointF();

        pointF.x = pointF0.x * (1 - t) * (1 - t) * (1 - t)
                + 3 * pointF1.x * t * (1 - t) * (1 - t)
                + 3 * pointF2.x * t * t * (1 - t)
                + pointF3.x * t * t * t;

        pointF.y = pointF0.y * (1 - t) * (1 - t) * (1 - t)
                + 3 * pointF1.y * t * (1 - t) * (1 - t)
                + 3 * pointF2.y * t * t * (1 - t)
                + pointF3.y * t * t * t;
        return pointF;
    }
}
效果如下:
这里需要注意的是:
1、我们首先通过PointF进行ImageView的坐标定位,随机产生四个坐标值,为了美观,加入简单的逻辑算法,在自定义估值器的时候需要TypeEvaluator,传入一个泛型,我们将PointF作为坐标传入,通过贝塞尔公式得到坐标值后再将PointF返回;最后通过ValueAnimtor实现动画效果
2、在得到贝塞尔动画后,再创建一个AnimtorSet,将前面的startAnimatorSet和bezierValueAnim添加进去,最后按照playSequentially()方式执行;
优化:
到此,基本效果已经实现,但是imageView会之一停留在顶部,So:
//贝塞尔曲线动画
    private ValueAnimator getBezierValueAnim(final ImageView imageView) {
        //第一个坐标,起始坐标为layout的底部并且横向居中;为了美观我们应该将让爱心逐渐上升
        PointF pointf0 = new PointF(mWidth / 2 - dWidth / 2, mHeight - dHeight);
        PointF pointf1 = new PointF(mRandom.nextInt(mWidth), mRandom.nextInt(mHeight / 2) + mHeight / 2);
        PointF pointf2 = new PointF(mRandom.nextInt(mWidth), mRandom.nextInt(mHeight / 2));
        PointF pointf3 = new PointF(mRandom.nextInt(mWidth), 0);

        //自定义估值器,用来产生贝塞尔坐标
        BezierEvaluator evaluator = new BezierEvaluator(pointf1, pointf2);
        //属性动画不仅能改变控件的属性,同样也可以改变我们自定义的熟悉,通过OfObject();
        ValueAnimator valueAnimator = ValueAnimator.ofObject(evaluator, pointf0, pointf3);
        valueAnimator.addUpdateListener(new ValueAnimator.AnimatorUpdateListener() {
            @TargetApi(Build.VERSION_CODES.HONEYCOMB_MR1)
            @Override
            public void onAnimationUpdate(ValueAnimator animation) {
                //拿到我们自定义估计器返回的PointF对象,不断的更新imageView的坐标
                PointF pointF = (PointF) animation.getAnimatedValue();
                imageView.setX(pointF.x);
                imageView.setY(pointF.y);
                //为了美观我们再加上透明度的渐变。直到ImageView消失
                imageView.setAlpha(1 - animation.getAnimatedFraction());//getAnimatedFraction返回动画进行的百分比,api12以上支持

            }
        });
        //设置作用目标及持续时间
        valueAnimator.setTarget(imageView);
        valueAnimator.setDuration(3000);
        //同样我们为了美观可以随机增加不同的效果,添加插值器
        valueAnimator.setInterpolator(interpolators[mRandom.nextInt(interpolators.length)]);

        return valueAnimator;
    }
我们在动画过程中加入ImageView的alpha属性变化,以及在动画中加入插值器,效果图:
进一步优化:
虽然所有的效果都实现了,但是千万别忘了。在Android系统中给ImageView添加图片是最容易OOM的,所以我们要时刻记得将ImageView进行回收
public void addLove() {
        //每次点击,新增一个ImageView
        final ImageView imageView = new ImageView(getContext());
        imageView.setImageDrawable(drawables[mRandom.nextInt(4)]);
        imageView.setLayoutParams(mParams);
        addView(imageView);//添加到界面中

        //开始添加动画效果集合
        AnimatorSet set = getAnimatorSet(imageView);
        //为了性能优化,在动画完成后回收ImageView
        set.addListener(new AnimatorListenerAdapter() {
            @Override
            public void onAnimationEnd(Animator animation) {
                super.onAnimationEnd(animation);
                removeView(imageView);
            }
        });
        set.start();
    }
AnimatorSet.addListener()方法中可以传入AnimatorListenerAdapter或者Animator.AnimatorListener,由于我们只需要关心动画结束状态,故,我们只需要传入AnimatorListener然后重写onAnimationEnd()方法即可!
************************华丽丽的分割线**************************
源码地址:http://download.csdn.net/detail/zhang2030940/9474038
以上为个人手写,转载请表明出处:http://blog.csdn.net/zhang2030940/article/details/50993461
如有bug反馈或建议,烦请留言或麻花疼:214628175!
共同进步,加油!
至此。第一篇博客到此结束,比较简单,但收获不少,整整写了三小时!最后也祝大家的技术越来越niubi!


 1509
1509

 被折叠的 条评论
为什么被折叠?


