


原文链接: http://ramhiser.com/2016/01/05/installing-tensorflow-on-an-aws-ec2-instance-with-gpu-support/
原文作者在第一段就说啦,如果想省事的话,直接用他的AMI就好啦~
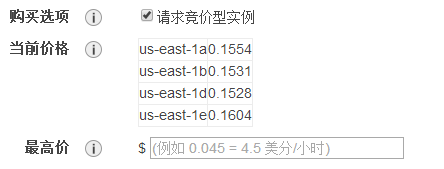
使用AWS的好处是便宜,使用竞价性的价格每小时只要几毛钱,而且以后随时随地都可以跑程序啦~~

还不太明白的小伙伴可以参考youtube上的教程,自备梯子:
CSC321: Using TensorFlow on AWS
The following post describes how to install TensorFlow 0.6 on an Amazon EC2 Instance with GPU Support. I also created a Public AMI (ami-e191b38b) with the resulting setup. Feel free to use it.
UPDATED (28 Jan 2016): The latest TensorFlow build requires Bazel 0.1.4. Post now reflects this. Thanks to Jim Simpson for his assistance.
UPDATED (28 Jan 2016): The AMI provided now exports env variables in ~/.bashrc.
The following things are installed:
- Essentials
- Cuda Toolkit 7.0
- cuDNN Toolkit 6.5
- Bazel 0.1.4 (Java 8 is a dependency)
- TensorFlow 0.6
To get going, I recommend requesting a spot instance. Can your instance go away? Sure. But
0.07/hrismuchnicerthan
0.65/hr when you are figuring things out. I launched a single g2.2xlarge instance using the Ubuntu Server 14.04 LTS AMI.
After launching your instance, install the essentials:
sudo apt-get update

sudo apt-get upgrade

sudo apt-get install -y build-essential git python-pip libfreetype6-dev libxft-dev libncurses-dev libopenblas-dev gfortran python-matplotlib libblas-dev liblapack-dev libatlas-base-dev python-dev python-pydot linux-headers-generic linux-image-extra-virtual unzip python-numpy swig python-pandas python-sklearn unzip wget pkg-config zip g++ zlib1g-dev

sudo pip install -U pip
TensorFlow requires installing CUDA Toolkit 7.0. To do this, run:
wget http://developer.download.nvidia.com/compute/cuda/repos/ubuntu1410/x86_64/cuda-repo-ubuntu1410_7.0-28_amd64.deb

sudo dpkg -i cuda-repo-ubuntu1410_7.0-28_amd64.deb

rm cuda-repo-ubuntu1410_7.0-28_amd64.deb

sudo apt-get update

sudo apt-get install -y cuda
At some point, you get the following message: Reboot your computer and verify that the NVIDIA graphics driver can be loaded. I mean, it’s 2016. But whatevs. We’ll reboot in a moment. Now, we need to download cuDNN from Nvidia’s site.
After filling out an annoying questionnaire, you’ll download a file named cudnn-6.5-linux-x64-v2.tgz. You need to transfer it to your EC2 instance: I did this by adding it to my Dropbox folder and using wget to upload it. Once you have uploaded it to your home directory, run the following:
tar -zxf cudnn-6.5-linux-x64-v2.tgz && rm cudnn-6.5-linux-x64-v2.tgz

sudo cp -R cudnn-6.5-linux-x64-v2/lib* /usr/local/cuda/lib64/

sudo cp cudnn-6.5-linux-x64-v2/cudnn.h /usr/local/cuda/include/
Okay, now reboot:
sudo rebootNext up, we’ll add some environment variables. You may wish to add these to your ~/.bashrc.
export CUDA_HOME=/usr/local/cuda

export CUDA_ROOT=/usr/local/cuda

export PATH=$PATH</span>:<span class="nv">$CUDA_ROOT/bin

export LD_LIBRARY_PATH=$LD_LIBRARY_PATH</span>:<span class="nv">$CUDA_ROOT/lib64
Getting closer. We need to install Bazel 0.1.4, which requires Java 8. For more details, see this comment.
Install Java 8 first.
sudo add-apt-repository -y ppa:webupd8team/java

sudo apt-get update

# Hack to silently agree license agreement

echo debconf shared/accepted-oracle-license-v1-1 select true | sudo debconf-set-selections

echo debconf shared/accepted-oracle-license-v1-1 seen true | sudo debconf-set-selections

sudo apt-get install -y oracle-java8-installer
Now for Bazel. (Thanks to Jim Simpson for this block.)
sudo apt-get install pkg-config zip g++ zlib1g-dev

https://github.com/bazelbuild/bazel/releases/download/0.1.4/bazel-0.1.4-installer-linux-x86_64.sh

chmod +x bazel-0.1.4-installer-linux-x86_64.sh

./bazel-0.1.4-installer-linux-x86_64.sh --user

rm bazel-0.1.4-installer-linux-x86_64.sh
Okay, almost done. Let’s clone the TensorFlow repo and initialize all submodules using their default settings.
git clone --recurse-submodules https://github.com/tensorflow/tensorflow

cd tensorflow
Finally, we are going to build TensorFlow with GPU support using CUDA version 3.0 (currently required on AWS) via the unofficial settings.
TF_UNOFFICIAL_SETTING=1 ./configureWhen you see the following message, type 3.0 to use CUDA version 3.0:
Please specify a list of comma-separated Cuda compute capabilities you want to build with.

You can find the compute capability of your device at: https://developer.nvidia.com/cuda-gpus.

Please note that each additional compute capability significantly increases your build time and binary size.

[Default is: "3.5,5.2"]: 3.0
If you forget to type 3.0, you’ll get the following error later on:
Ignoring gpu device (device: 0, name: GRID K520, pci bus id: 0000:00:03.0) with Cuda compute capability 3.0. The minimum required Cuda capability is 3.5.
Other than that, I went with all the default options, resulting in the nice message:
WARNING: You are configuring unofficial settings in TensorFlow. Because some external libraries are not backward compatible, these settings are largely untested and unsupported.
Pffft. Anyway, last steps. These take quite a while (~24 minutes for me).
bazel build -c opt --config=cuda //tensorflow/cc:tutorials_example_trainer

bazel build -c opt --config=cuda //tensorflow/tools/pip_package:build_pip_package

bazel-bin/tensorflow/tools/pip_package/build_pip_package /tmp/tensorflow_pkg

sudo pip install --upgrade /tmp/tensorflow_pkg/tensorflow-0.6.0-cp27-none-linux_x86_64.whl
Congrats! TensorFlow is installed. At this point, if you launch Python and run the following code, you’ll see a lot of nice messages indicating your GPU is set up properly:
import tensorflow as tf

tf_session = tf.Session()

x = tf.constant(1)

y = tf.constant(1)

tf_session.run(x + y)
You can also check that TensorFlow is working by training a CNN on the MNIST data set.
python ~/tensorflow/tensorflow/models/image/mnist/convolutional.py# Lots of output followed by GPU-related things…
I tensorflow/stream_executor/cuda/cuda_gpu_executor.cc:909] successful NUMA node read from SysFS had negative value (-1), but there must be at least one NUMA node, so returning NUMA node zero
I tensorflow/core/common_runtime/gpu/gpu_init.cc:103] Found device 0 with properties:
name: GRID K520
major: 3 minor: 0 memoryClockRate (GHz) 0.797
pciBusID 0000:00:03.0
Total memory: 4.00GiB
Free memory: 3.95GiB
I tensorflow/core/common_runtime/gpu/gpu_init.cc:127] DMA: 0
I tensorflow/core/common_runtime/gpu/gpu_init.cc:137] 0: Y
I tensorflow/core/common_runtime/gpu/gpu_device.cc:702] Creating TensorFlow device (/gpu:0) -> (device: 0, name: GRID K520, pci bus id: 0000:00:03.0)
I tensorflow/core/common_runtime/gpu/gpu_bfc_allocator.cc:42] Allocating 3.66GiB bytes.
I tensorflow/core/common_runtime/gpu/gpu_bfc_allocator.cc:52] GPU 0 memory begins at 0x7023e0000 extends to 0x7ec556000
I tensorflow/core/common_runtime/gpu/gpu_bfc_allocator.cc:66] Creating bin of max chunk size 1.0KiB
I tensorflow/core/common_runtime/gpu/gpu_bfc_allocator.cc:66] Creating bin of max chunk size 2.0KiB
…
Initialized!
Epoch 0.00
Minibatch loss: 12.053, learning rate: 0.010000
Minibatch error: 90.6%
Validation error: 84.6%
Epoch 0.12
Minibatch loss: 3.282, learning rate: 0.010000
Minibatch error: 6.2%
Validation error: 6.9%
Epoch 0.23
Minibatch loss: 3.466, learning rate: 0.010000
Minibatch error: 12.5%
Validation error: 3.7%
Epoch 0.35
Minibatch loss: 3.191, learning rate: 0.010000
Minibatch error: 7.8%
Validation error: 3.4%
Epoch 0.47
Minibatch loss: 3.201, learning rate: 0.010000
Minibatch error: 4.7%
Validation error: 2.7%
…
I borrowed instructions from a few sources, so thanks very much to them. If you want more information about the various options, check out TensorFlow’s installation instructions.


 1625
1625

 被折叠的 条评论
为什么被折叠?
被折叠的 条评论
为什么被折叠?
 到【灌水乐园】发言


