


1.概述(www.nb-ai.com)
2.环境配置
-
支持的操作系统: Windows10/11 X64
-
支持的.NET框架:.NET Framework 4.6.1(推荐使用) 和 .NET Framework 4.0 (文件默认4.6.1,如需4.0版本,留意下方指引的加粗部分)
此SDK只支持在Nvidia显卡上运行。不支持 AMD 等其他品牌!
-
支持的显卡类型:英伟达GPU(支持算力为“6.1”、“7.5”、“8.6”的GPU),2G以上显存。。具体型号见工作台的模型下载界面中的“选择硬件”。
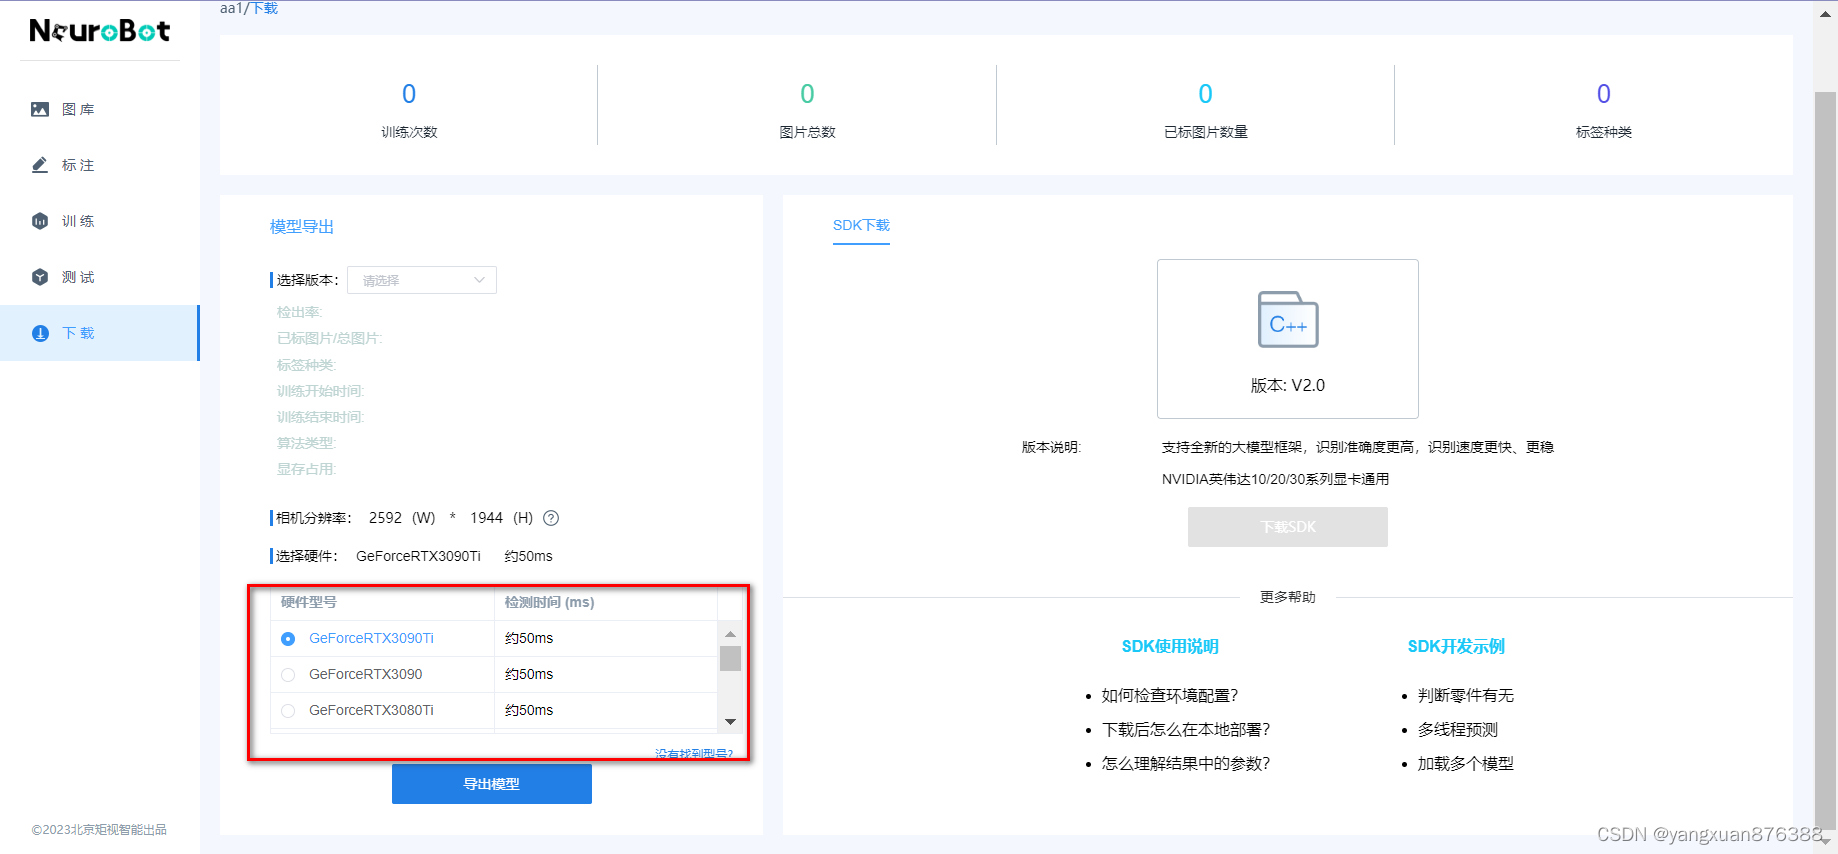
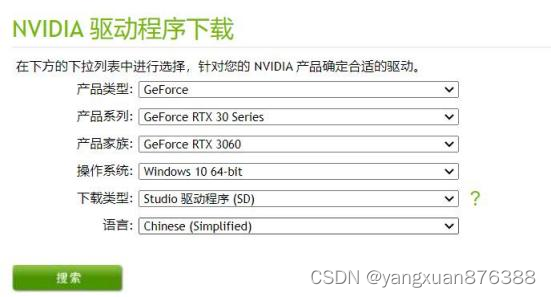
在英伟达官网可以查到显卡算力
-
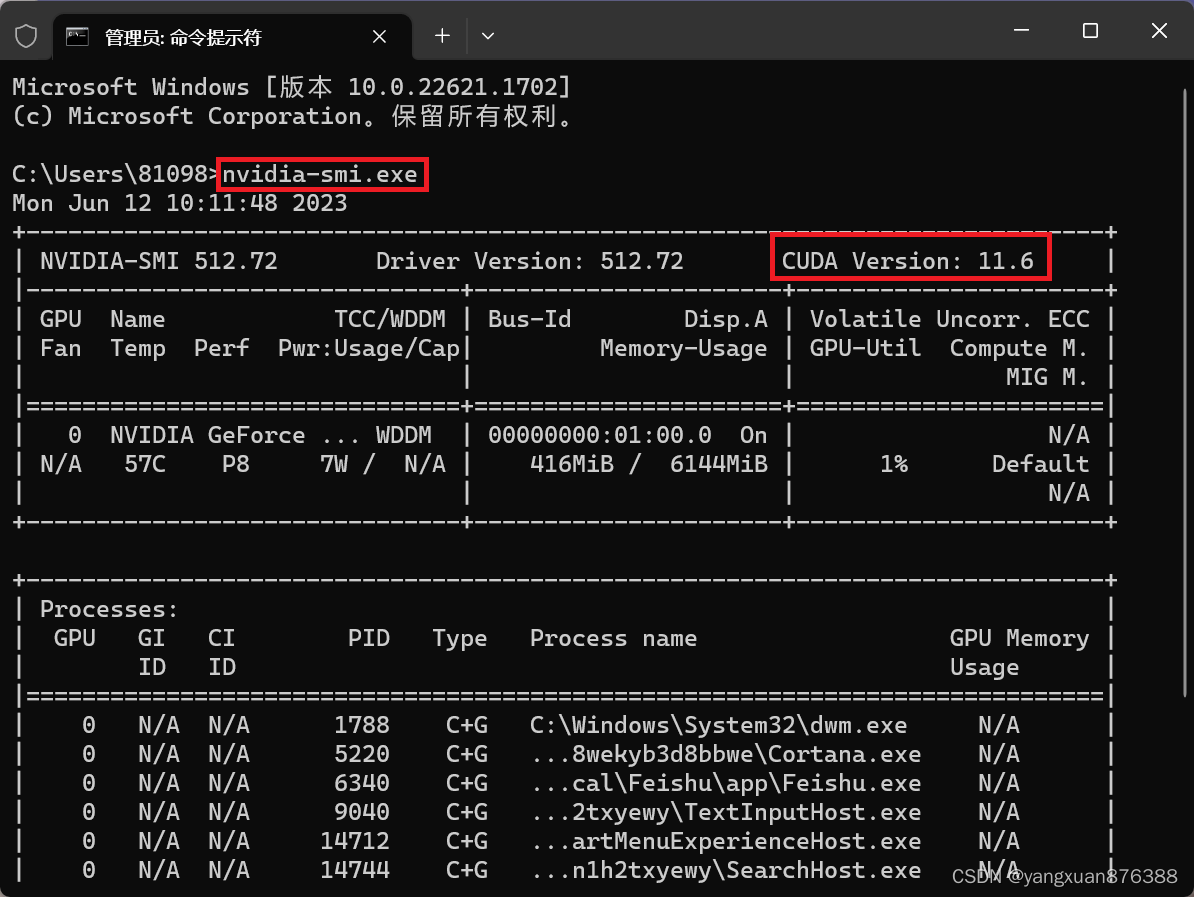
支持的显卡驱动版本:不低于cuda version 11.6 (在终端命令窗口中输入“nvidia-smi.exe”即可查询cuda version)
-
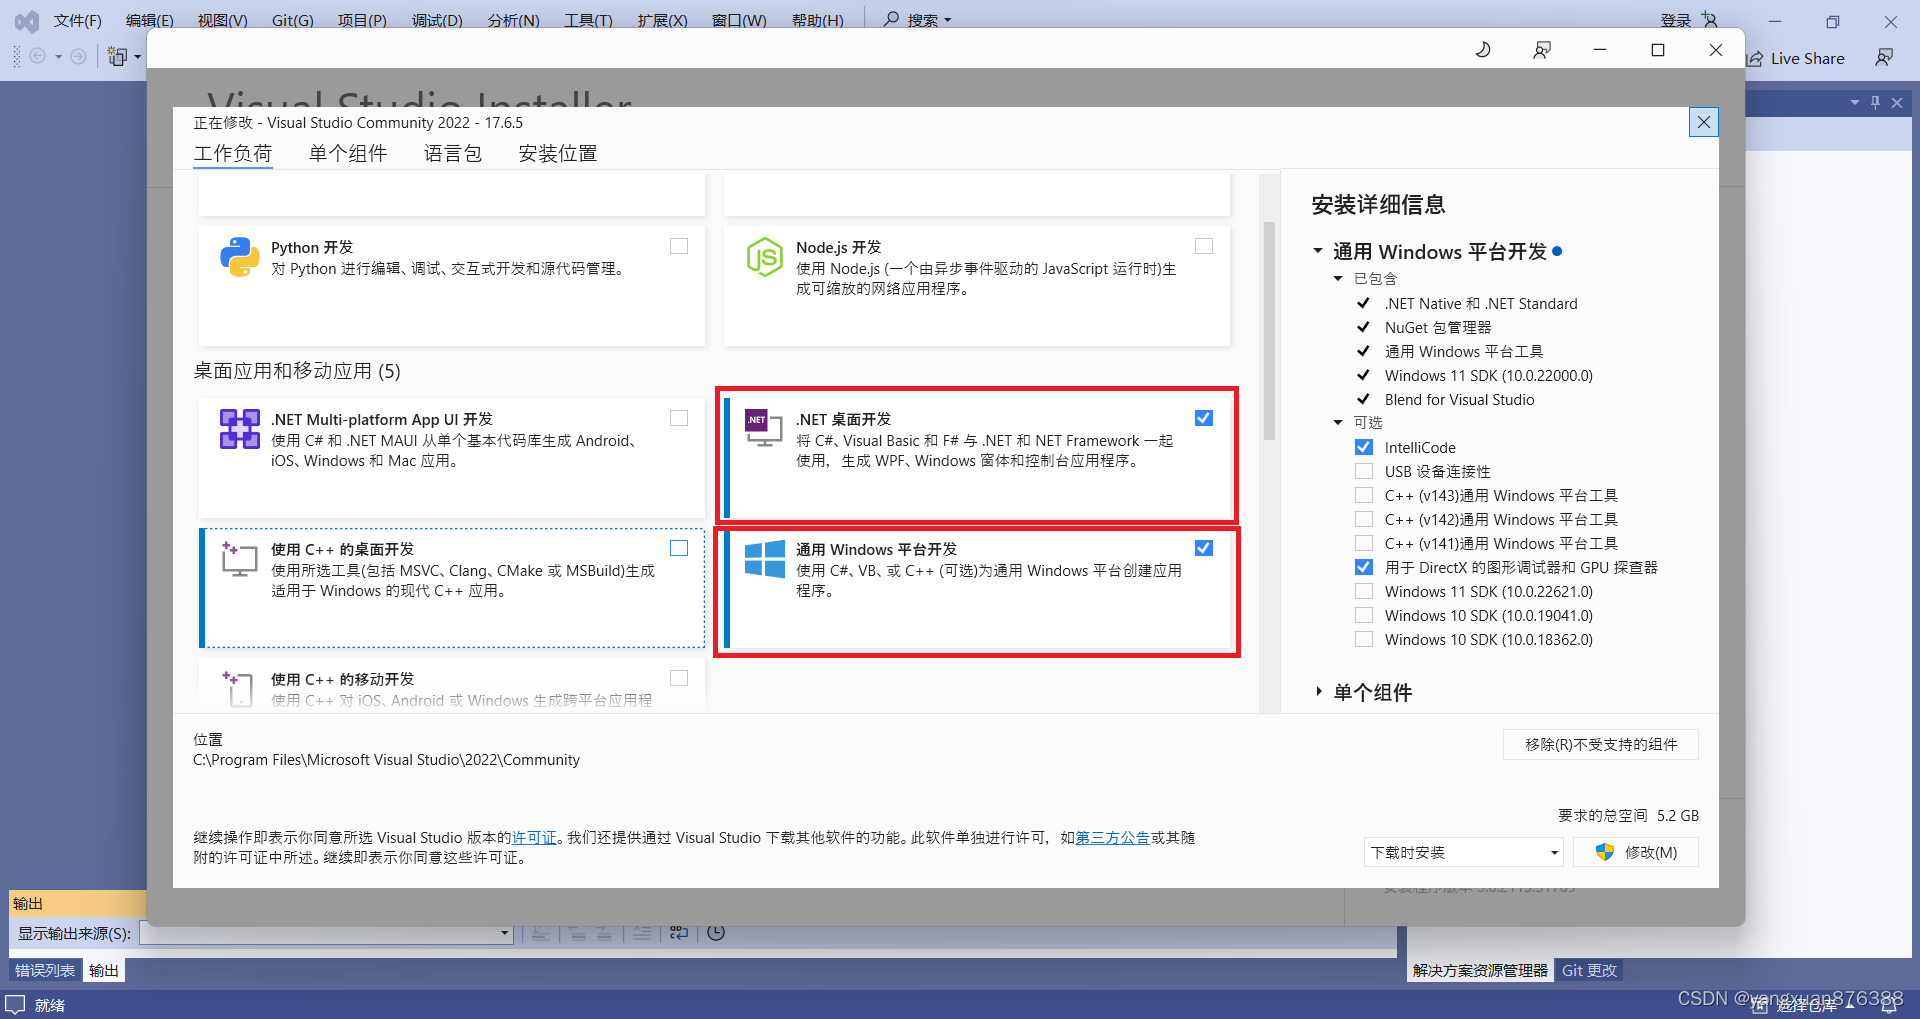
环境依赖:Visual Studio 2017版本及以上。 Visual Studio下载链接。在官网下载好 Visual Studio 后进行安装,注意勾选“.NET 桌面开发”和“通用Windows平台开发”。
-
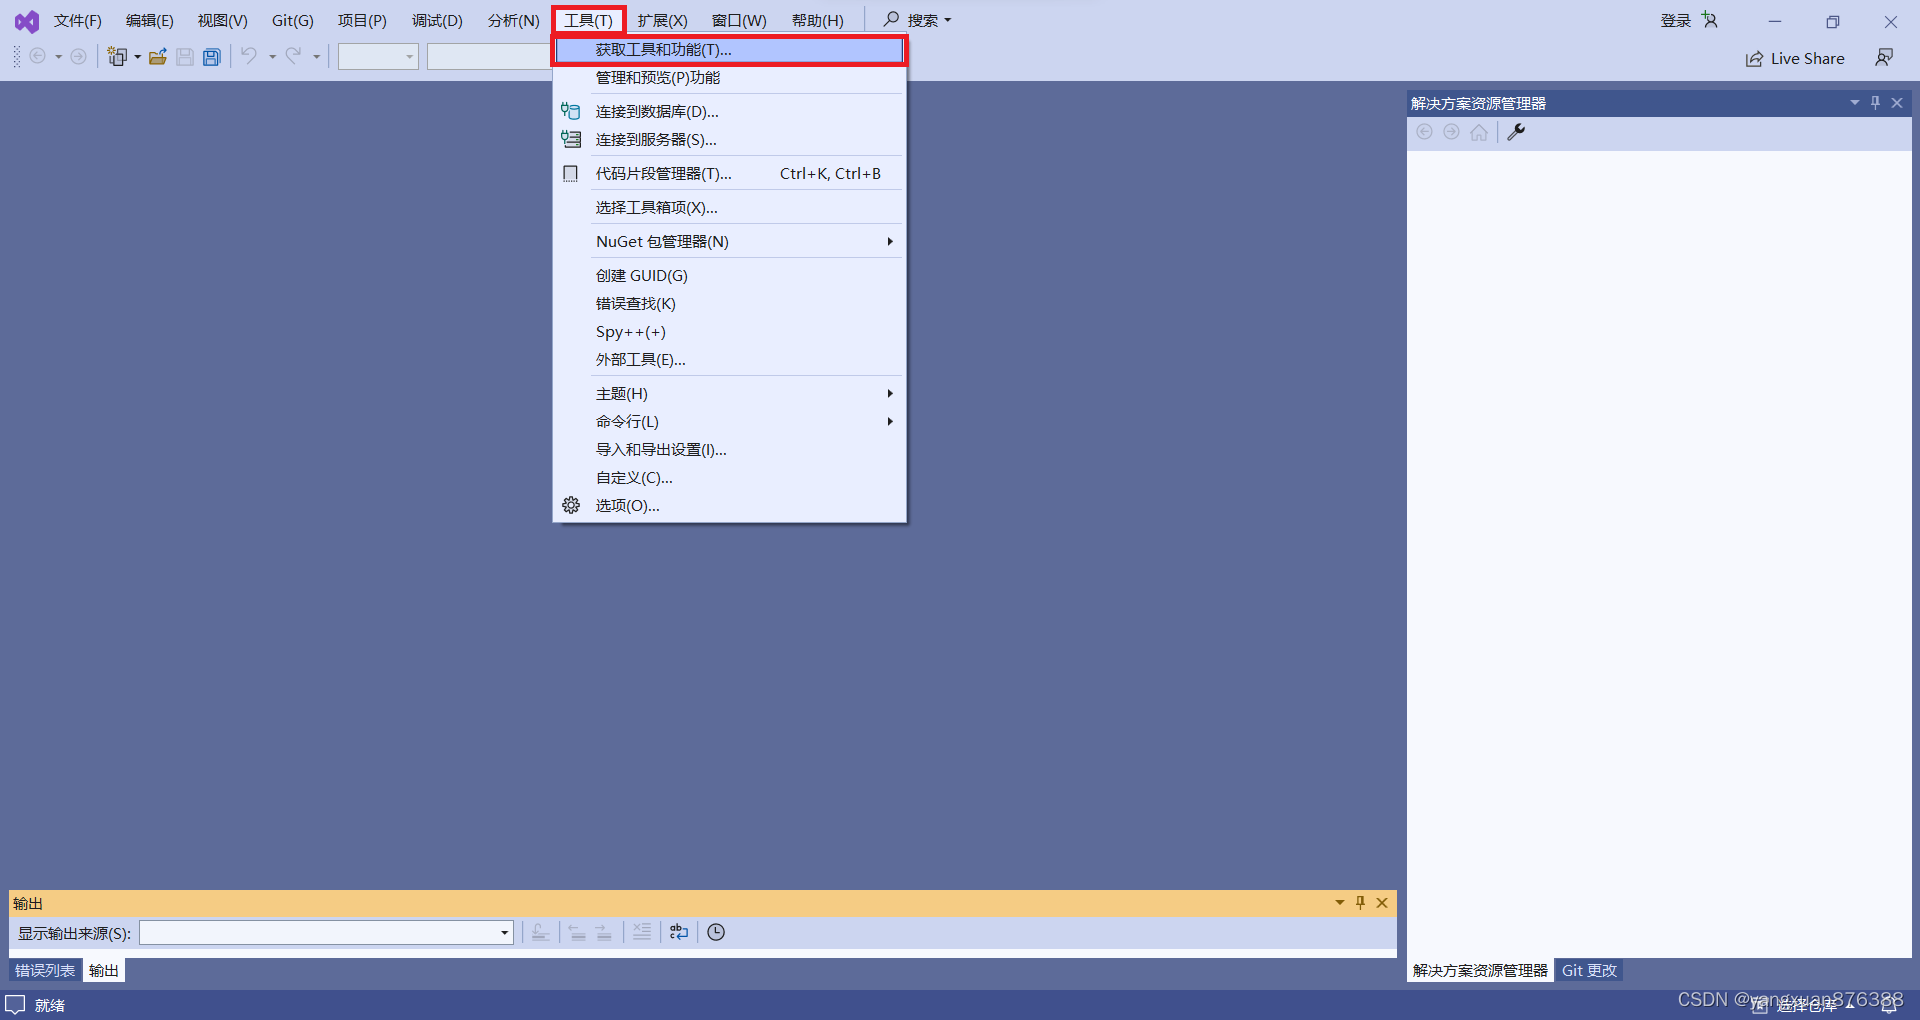
如果您已经下载VS软件:
-
请在“工具”-“获取工具和功能”中下载安装包。
-
在“工作负荷”中,勾选“.NET 桌面开发”和“通用Windows平台开发”。
-
在“单个组件”中,勾选“.NET Framework 4.6.1 SDK”和“.NET Framework 4.6.1 目标包” (如需4.0版本,勾选对应4.0选项)。然后点击“修改”。

-
3.快速入门
- 下面给出一个示例,帮助您快速了解如何使用SDK完成 C# 软件开发。本示例使用VS2022版本,.NET Framework 4.6.1框架给出示例(使用VS2017及以上任一版本均可)
3.1 新建项目
-
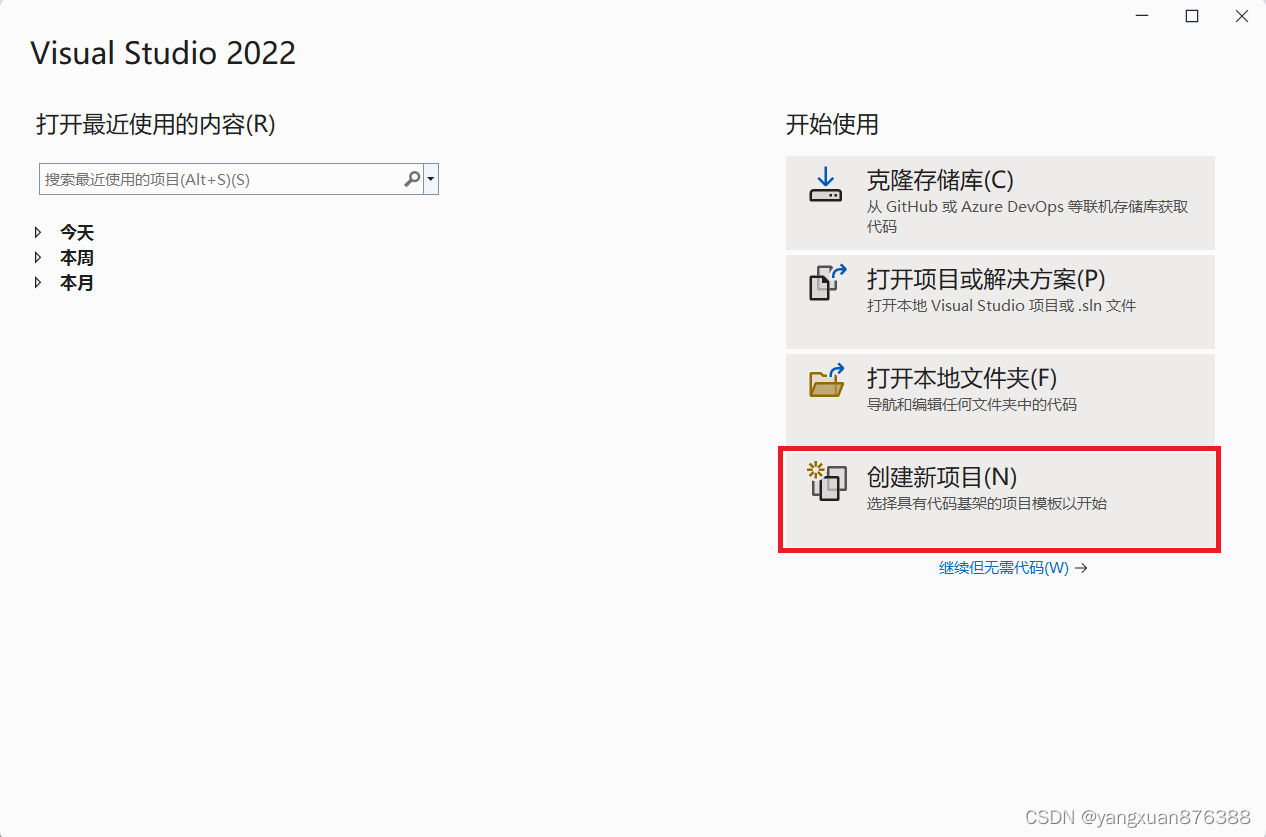
打开Visual Studio, 点击“创建新项目”
-
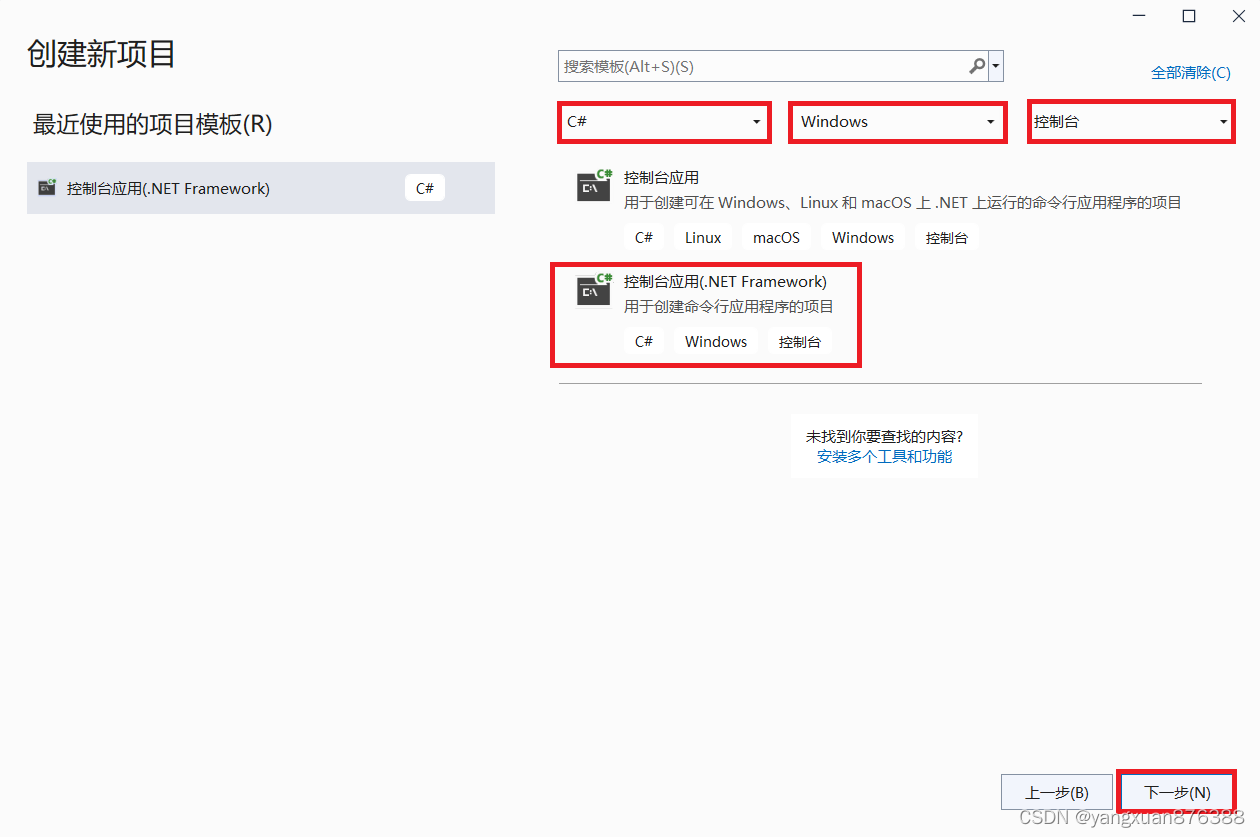
选择“C#” 、 “Windows” 、 “控制台” ,然后点击“下一步”
-
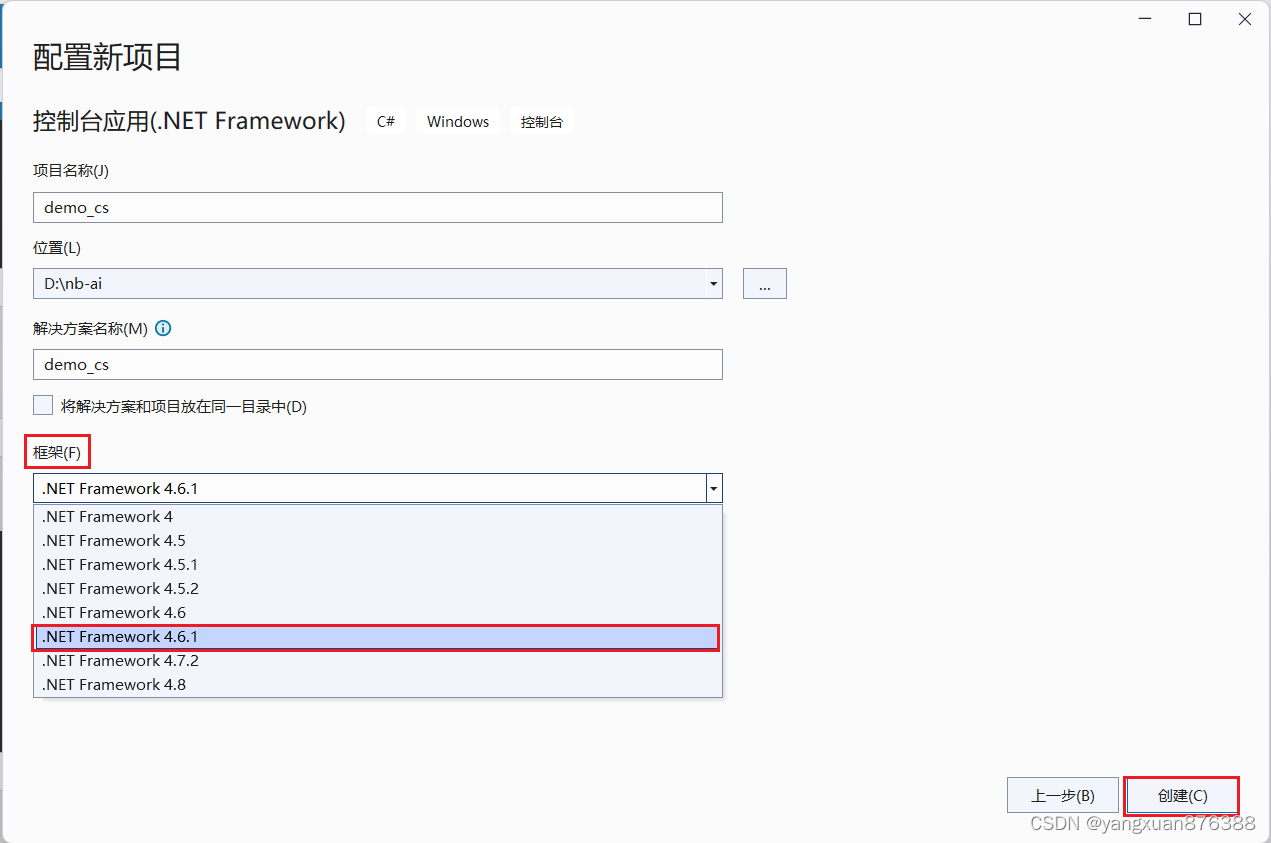
在“框架”中,选择“.NET Framework 4.6.1”(如使用“.NET Framework 4.0”,请选择对应的选项),点击“创建”
3.2 修改运行配置
-
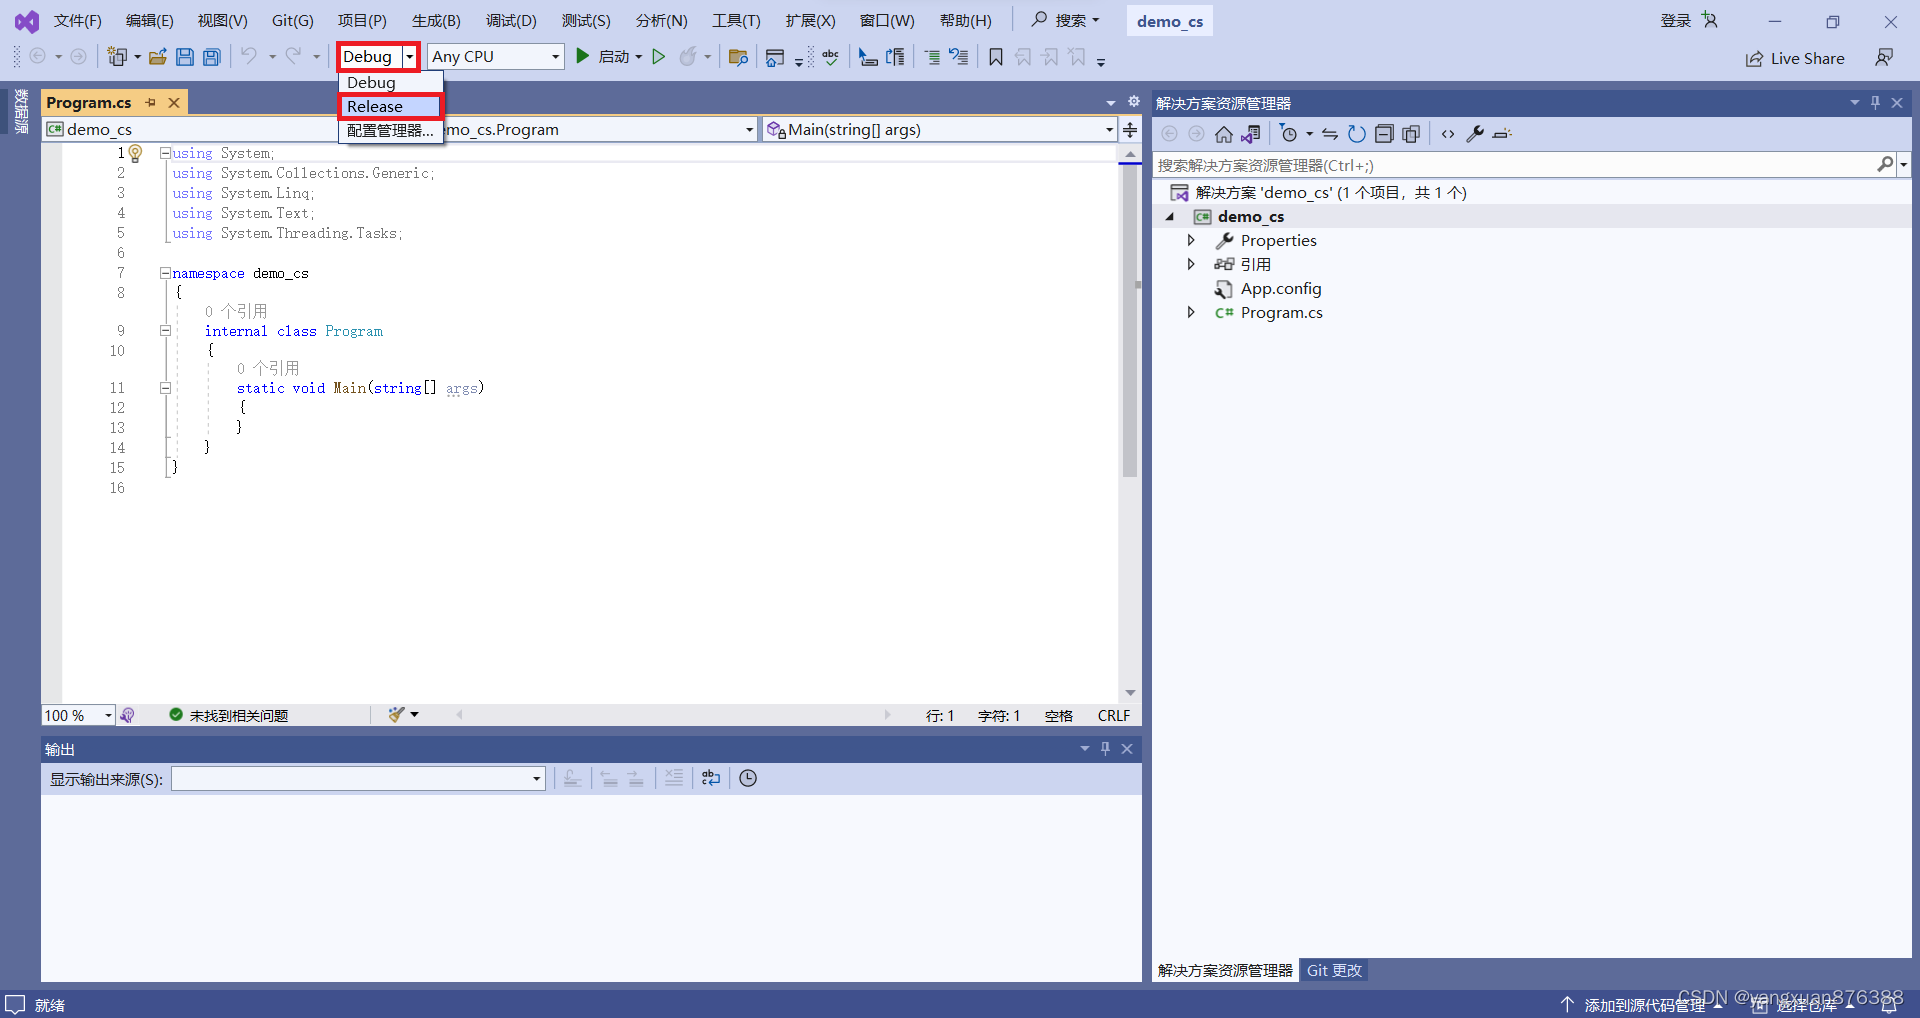
在红框中勾选“Release”
-
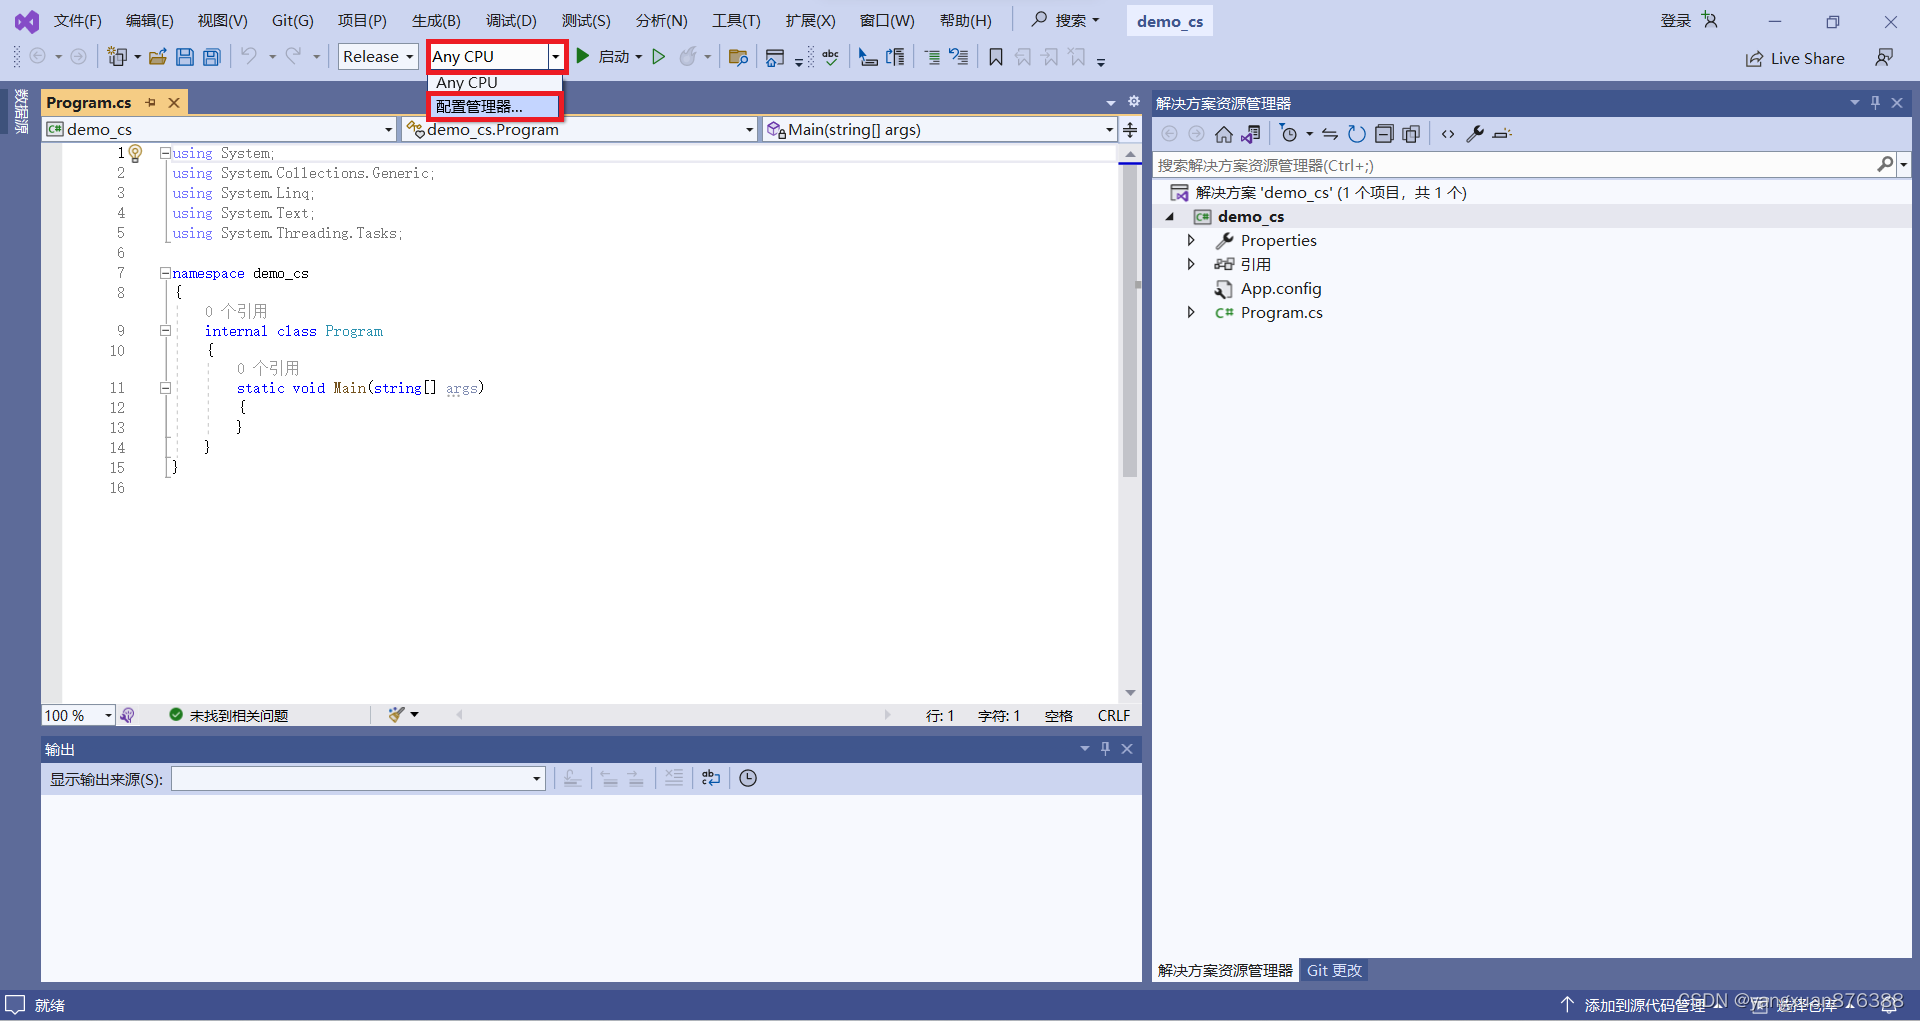
在“Any CPU”处,点击“配置管理器”
-
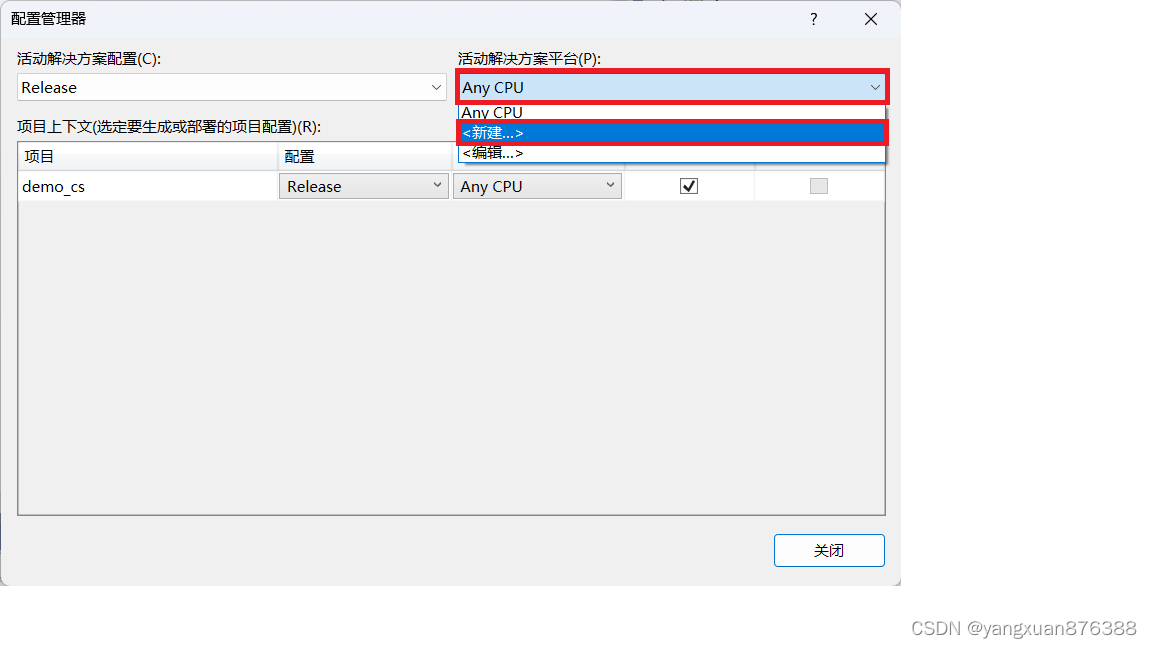
点击图中红框内下拉菜单,选择“新建”:
-
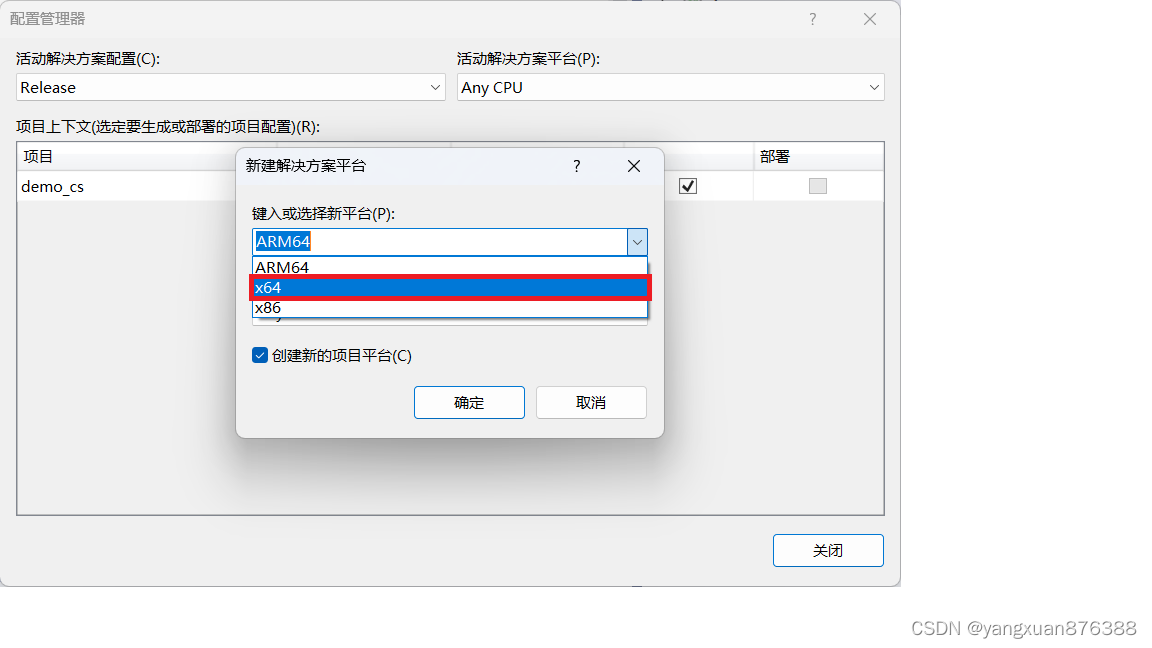
选择"x64"
-
最终效果为:

3.3 解压SDK
-
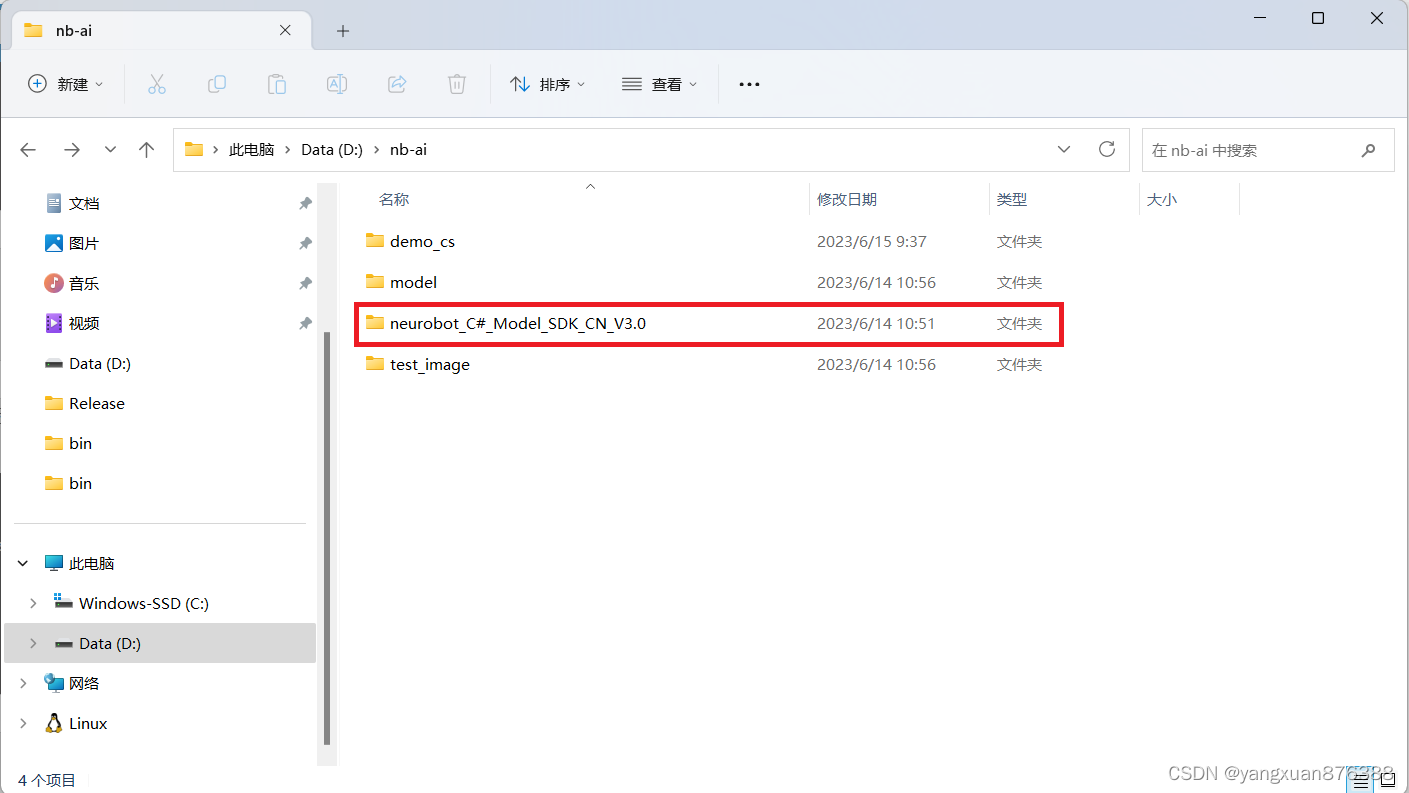
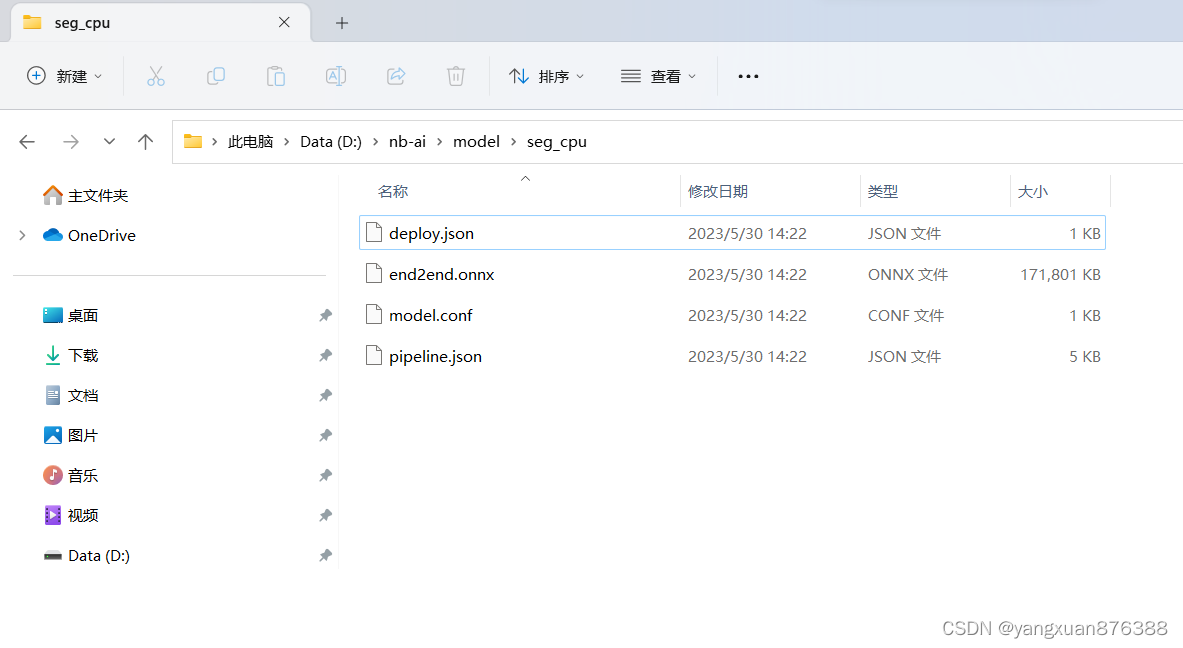
将下载好的SDK文件解压到安全的路径下(因为要引用SDK,所以请不要删除),如下所示:
-
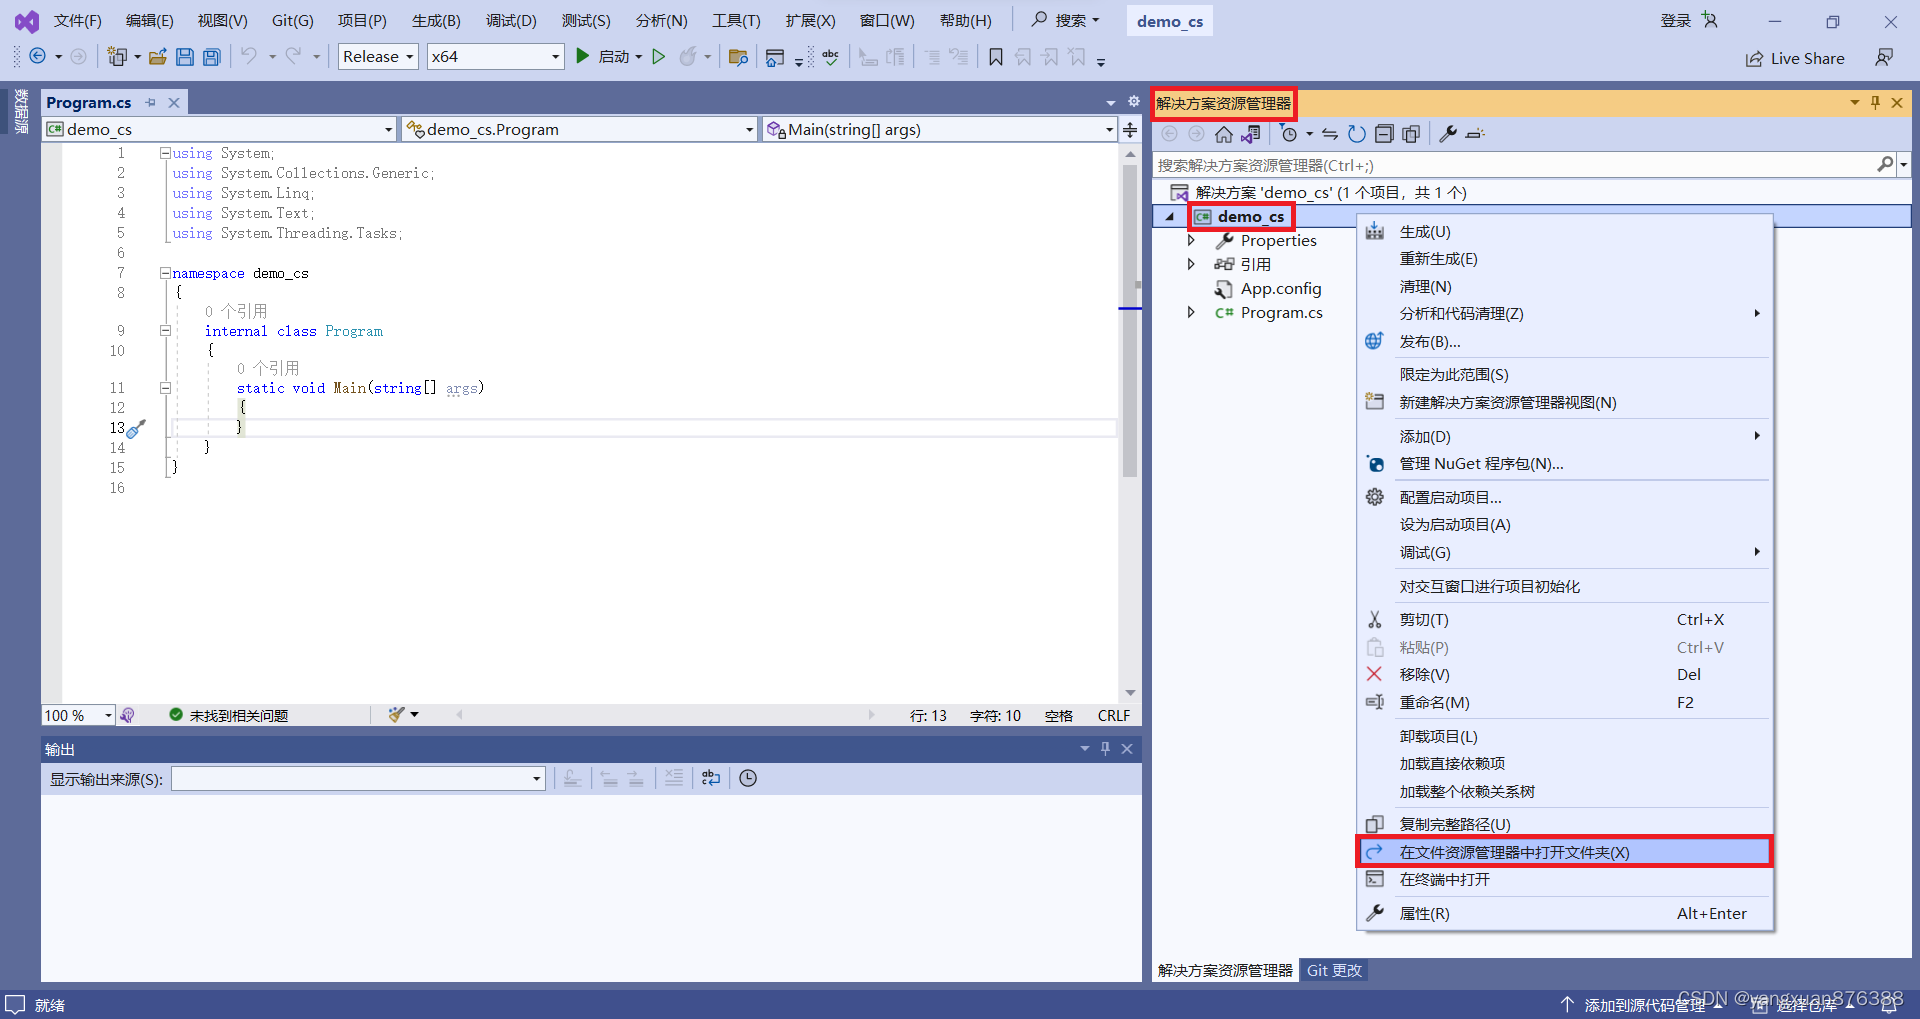
返回Visual Studio,在“解决资源管理器”中,右键,点击“在文件资源管理器中打开文件夹”
-
打开后,如下所示(我们代称这个当前路径为
proj_root/,之后要用):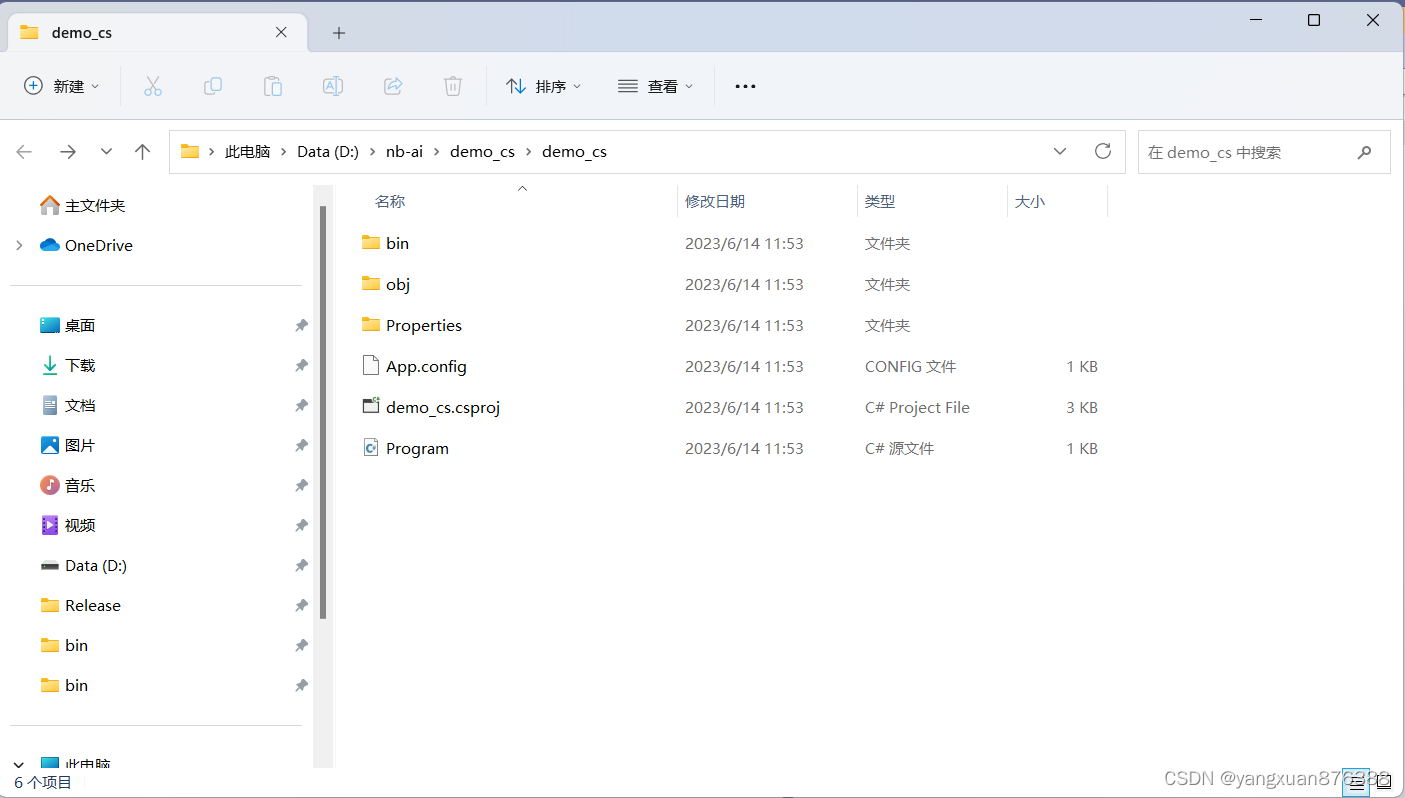
-
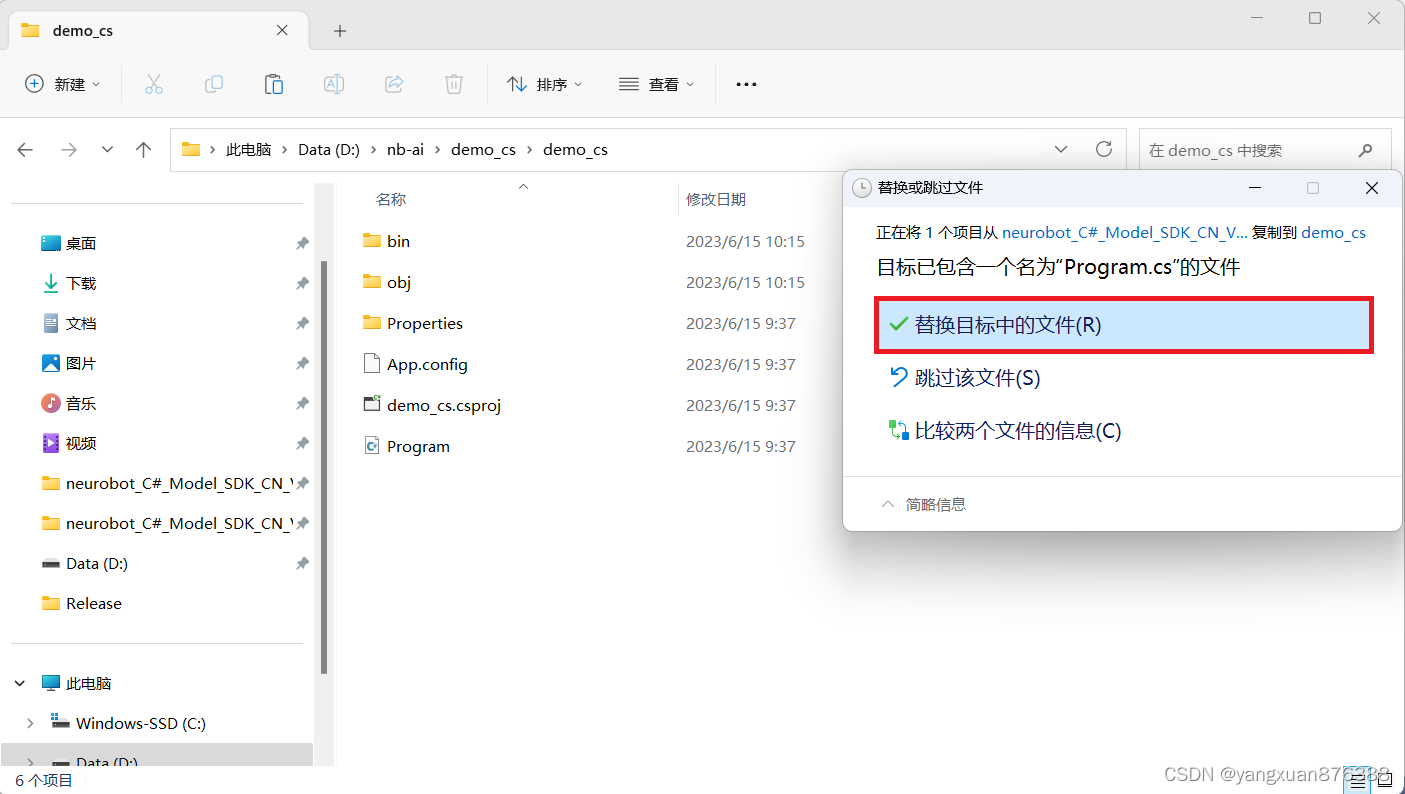
在SDK文件夹中,将
Program.cs文件复制,粘贴到proj_root/下,并替换原有文件: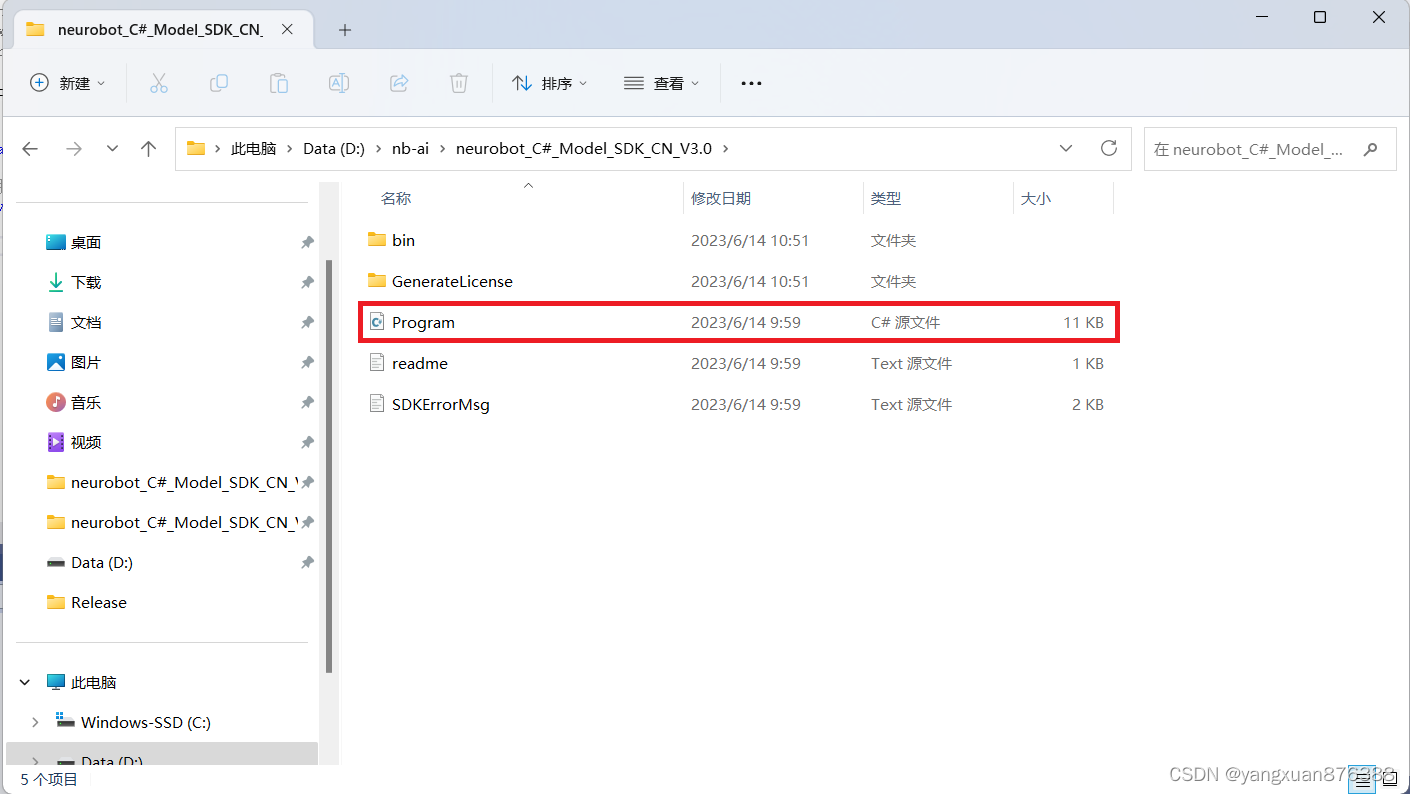
-
如果使用的是“.NET Framework 4.0”框架,还需要如下操作:
- 请在SDK文件夹中
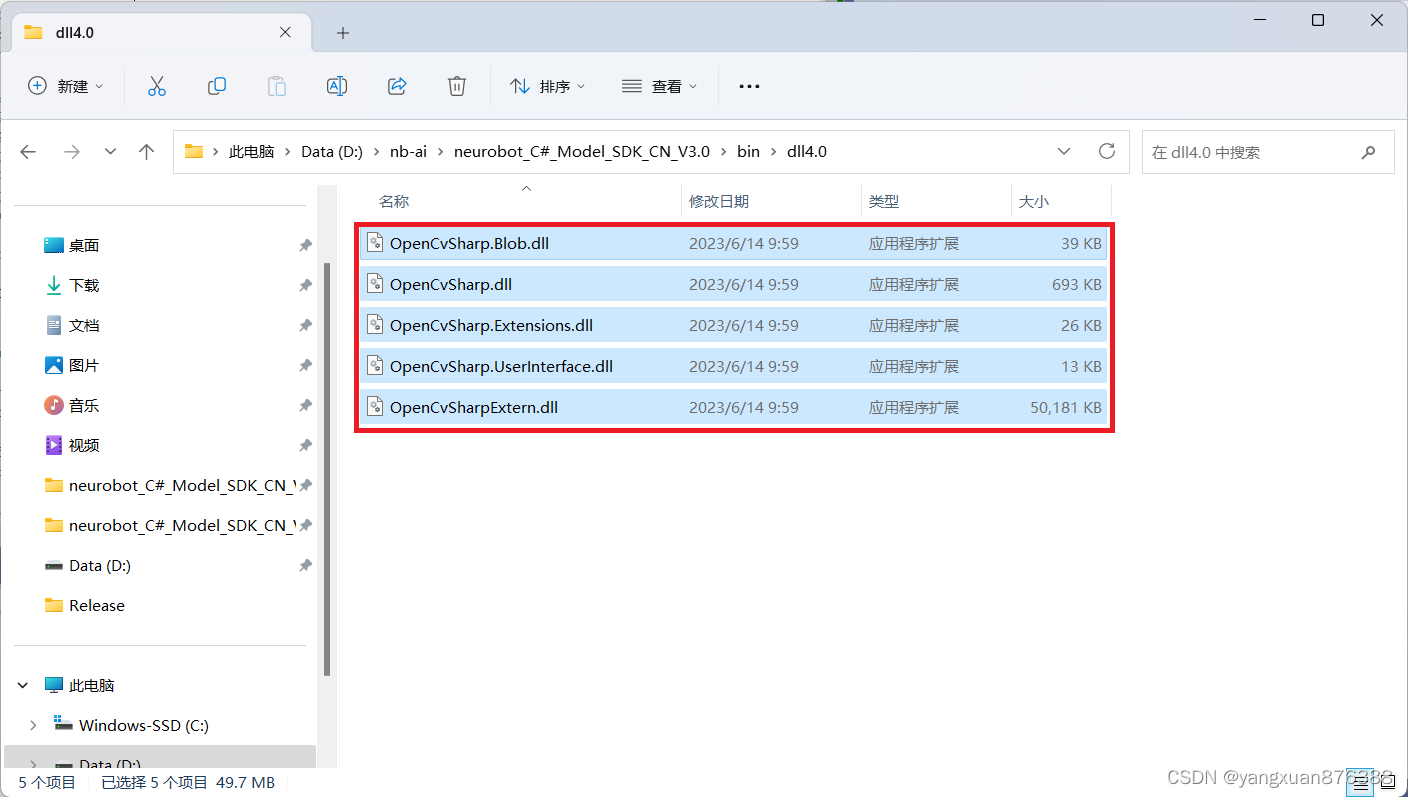
bin/目录下,进入dll4.0/文件夹。 - 将该界面的所有文件复制,粘贴到SDK文件夹中
bin/目录下,并替换原有文件: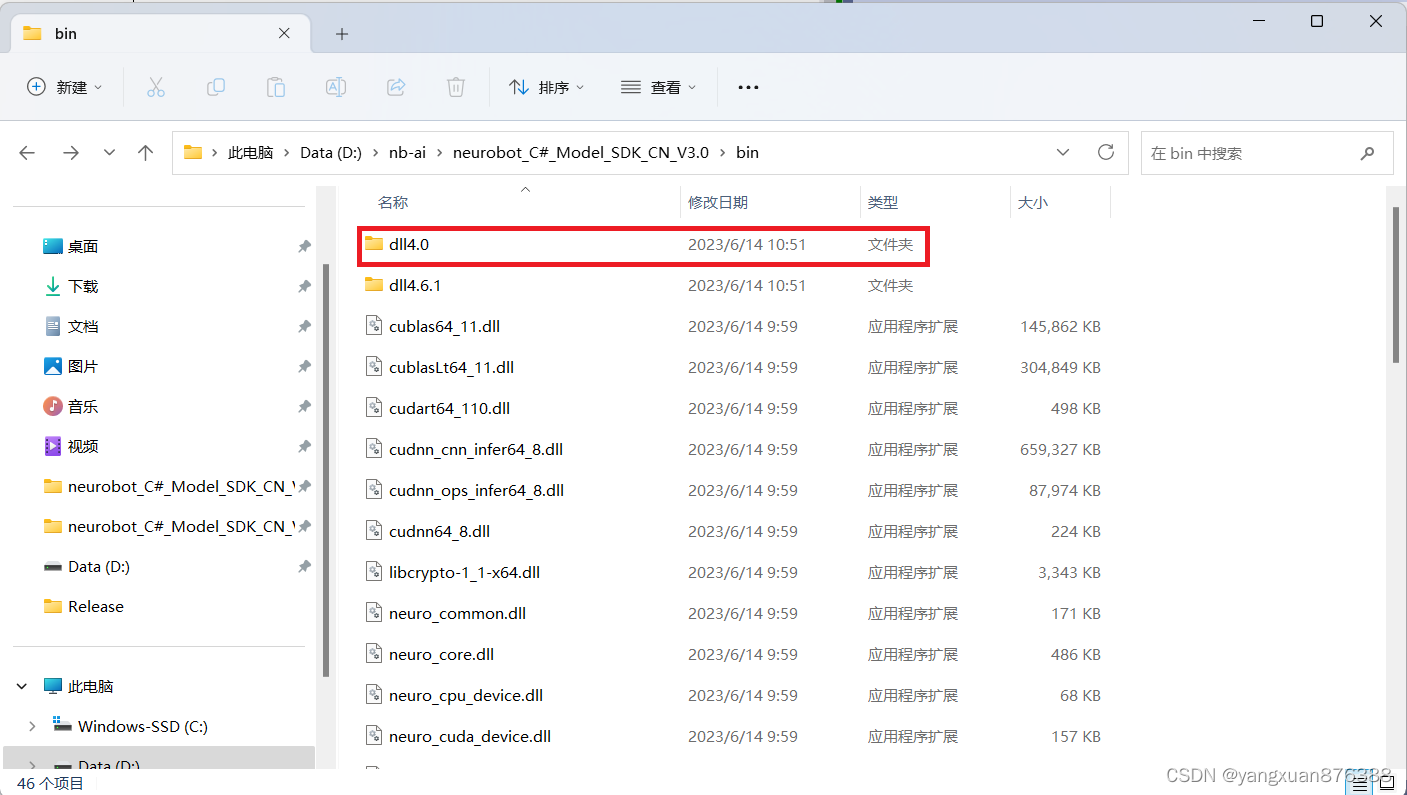

- 请在SDK文件夹中
3.4 添加引用
-
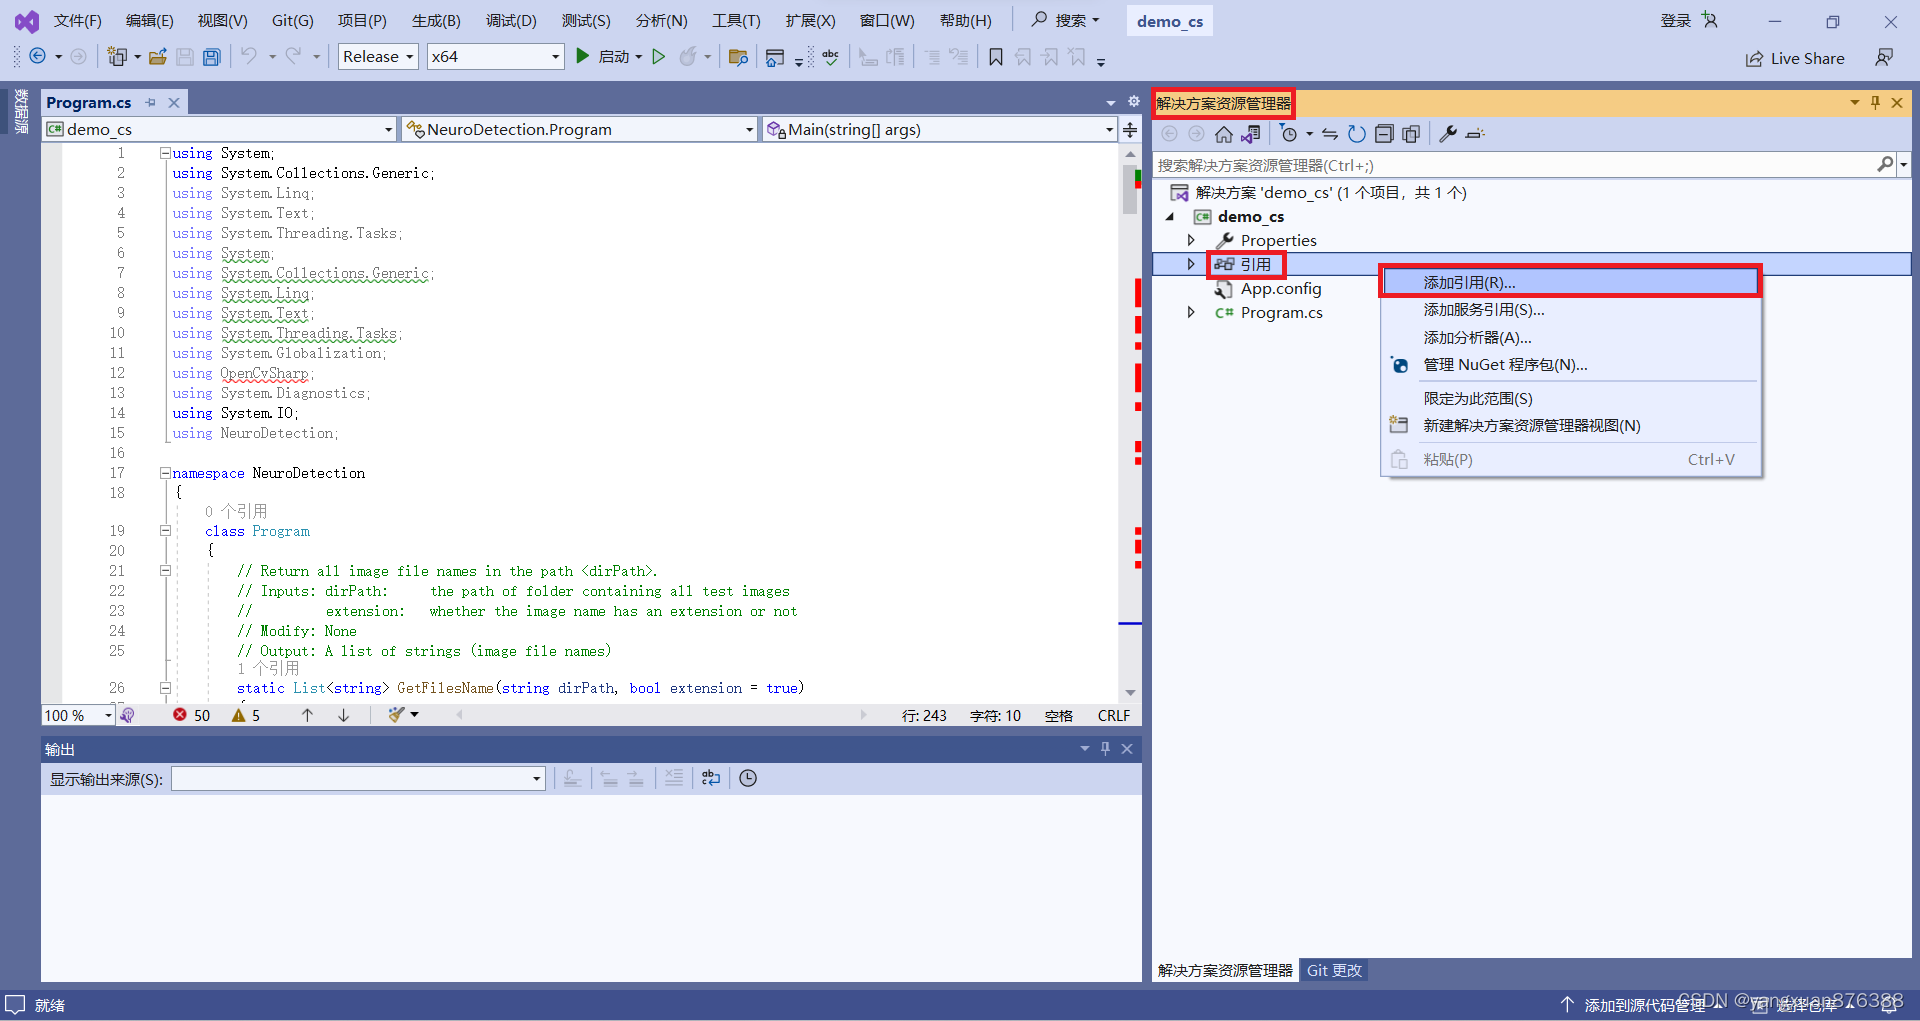
返回Visual Studio,在“解决方案资源管理器”中,右键“引用”,点击“添加引用”
-
选择“浏览”
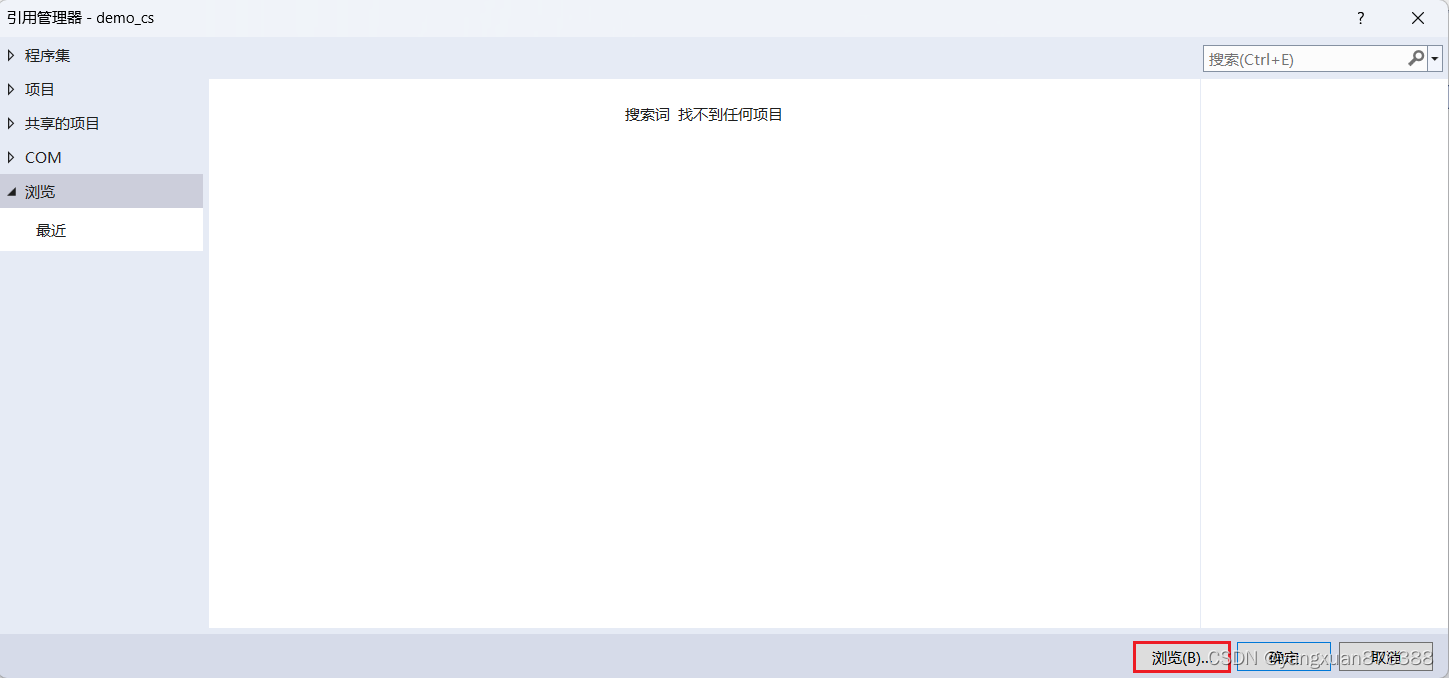
-
在SDK中的
bin/文件夹中,选中下列三个文件,点击“确定”neuro_det_sdk_cs.dllOpenCvSharp.dllOpenCvSharp.Extension.dll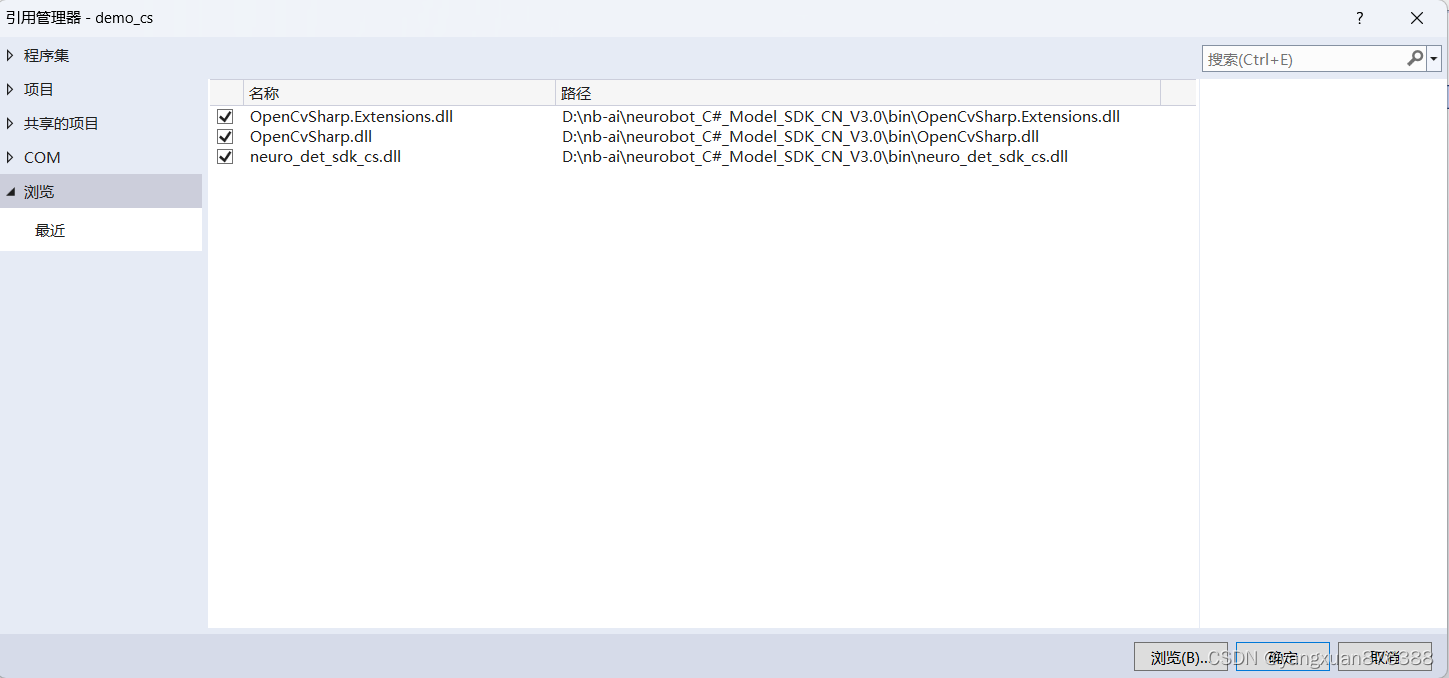
-
如果您使用.NET Framework 4.0 框架,请选中
neuro_det_sdk_cs4.0.dllOpenCvSharp.dllOpenCvSharp.Extension.dll
3.5 添加系统环境变量
-
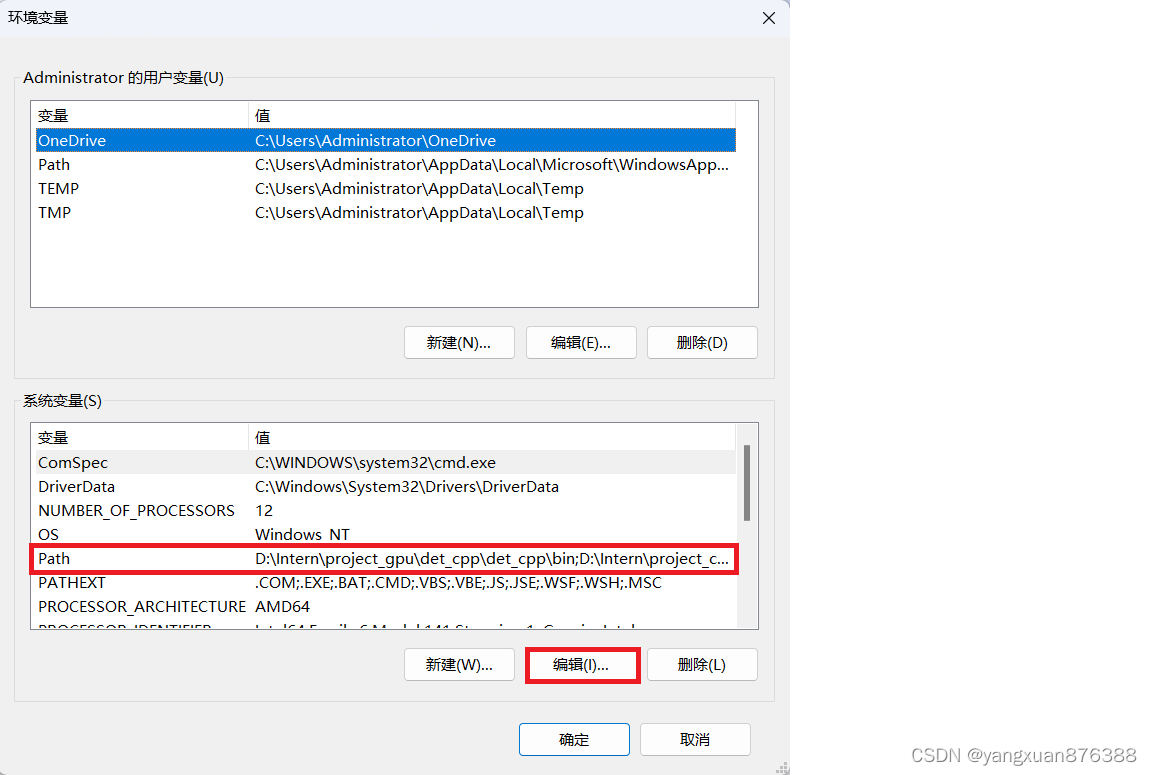
下面开始添加系统环境变量,打开“此电脑”,空白位置右键,然后选择“属性”,点击“高级系统设置”,点击“环境变量”,出现如下界面。然后选中“Path”,点击“编辑”
-
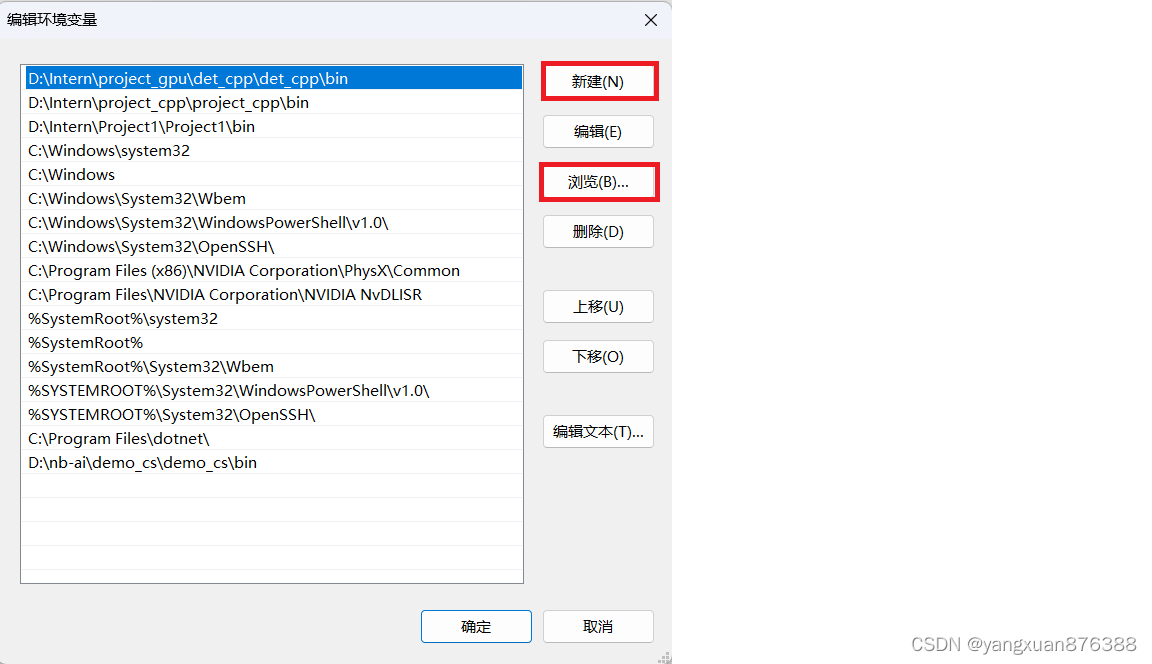
点击“新建”,再点击“浏览”
-
选择SDK文件夹下的
bin文件夹:
-
将此环境变量上移到第一个
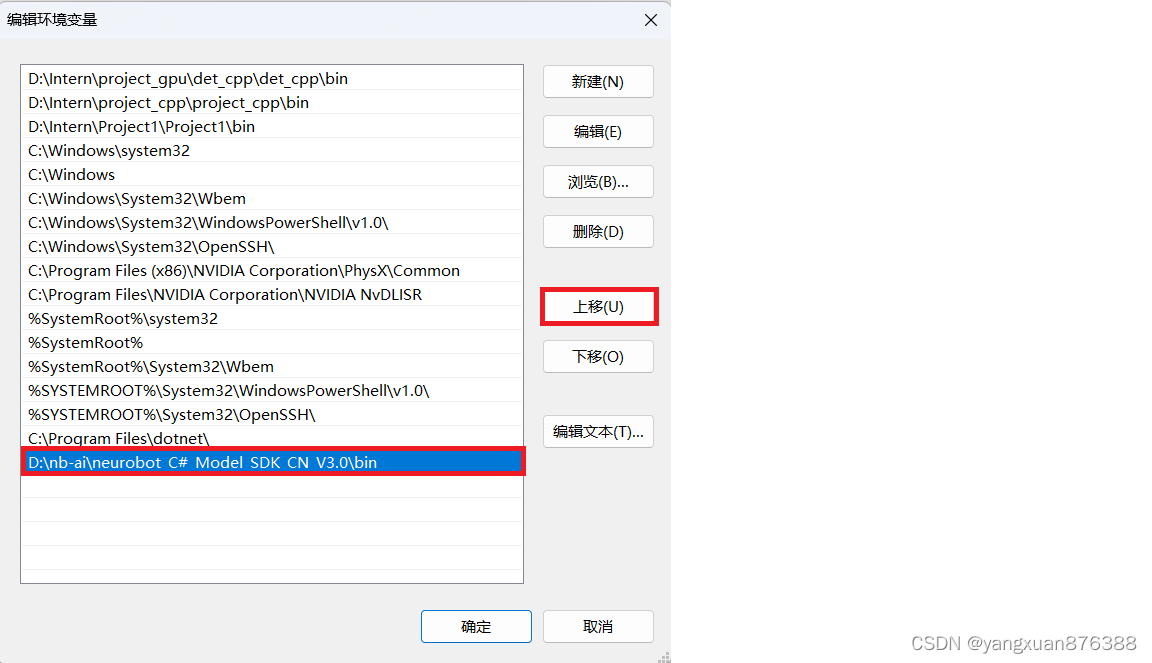
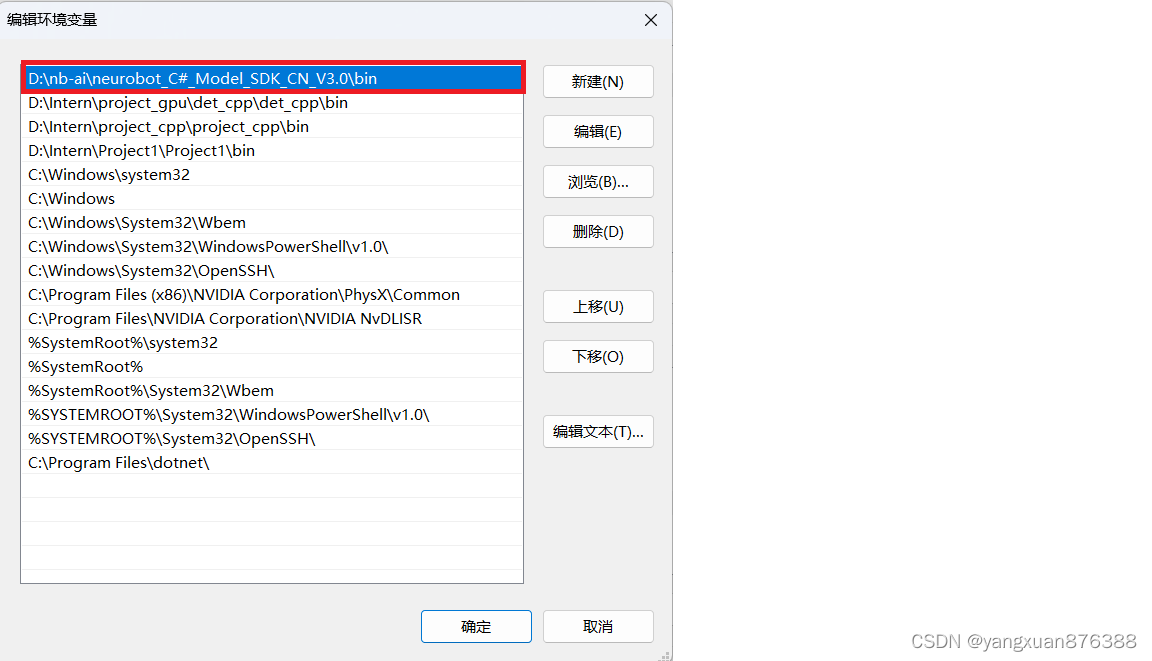
操作完成点击“确定”。
3.6 重启Visual Studio
3.7 配置License文件 如何获取License - Neurobot
- 请将
License.txt文件放到proj_root/bin/x64/Release/文件夹下(放置License.txt文件的位置请以当前文档为准)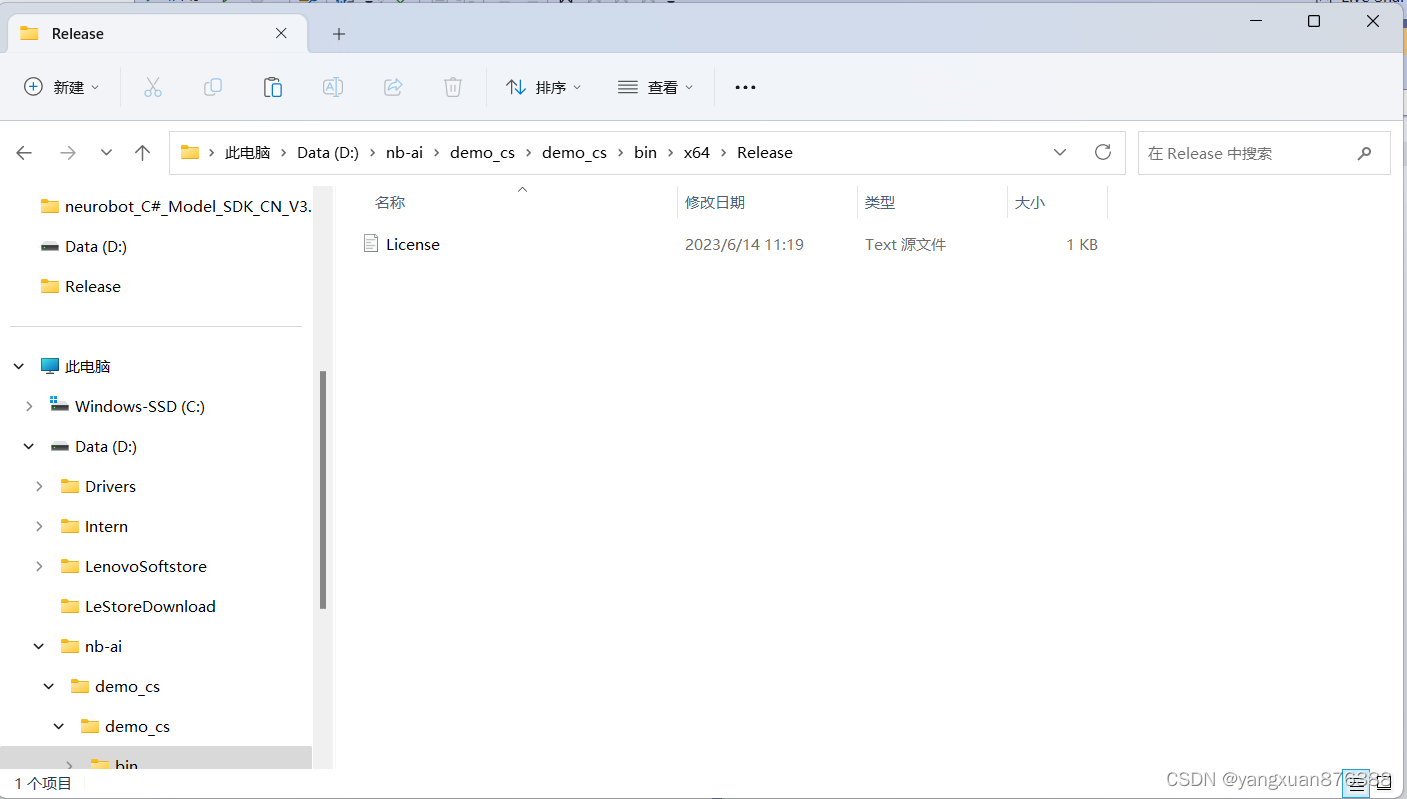 关于如何生成
License.txt文件,参见: 如何获取License - Neurobot
3.8 修改示例代码
-
在
proj_root/目录下的Program.cs文件给出了如何对图片进行预测的一个示例,用户仅需对Program.cs文件进行简单的修改,即可完成线下图片测试。 -
在
namespace NeuroDetection下class Program的Main函数中,有4行TODO:注释,分别对应测试图片文件夹的路径(imageFolderPath),模型文件夹的路径(modelPath),模型名称(modelName),和设备名称(deviceName),设备索引(deviceIndex),和检测阈值(detectThres)。。请修改这六个变量的值。 -
注意:
modelName可以随意起名但是不要重复;deviceName只能是"cpu"或者"cuda";deviceIndex一般情况下默认是0,当你有多张显卡的时候,用此索引选择你要使用的显卡;detectThres是用来筛选检测目标的,如果检测目标的置信度低于此阈值,将被抛弃。阈值的取值范围是[0,1],默认值是-1,也就是0.7。 -
例如:

测试图片文件夹的路径
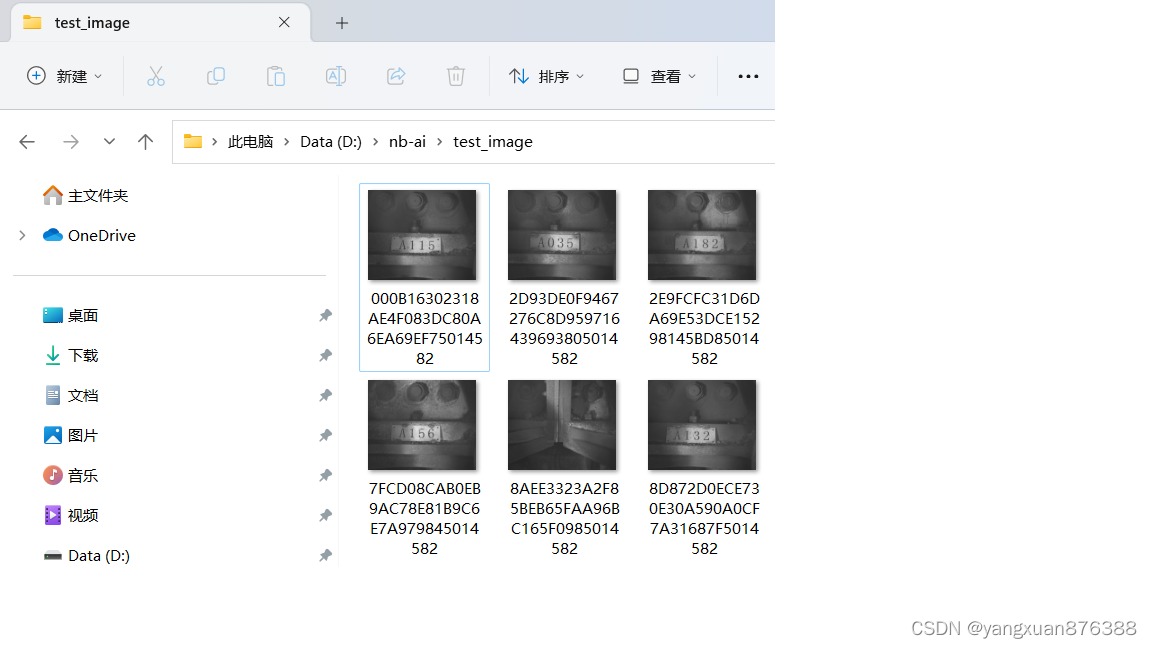
模型文件夹的路径
-
除了在
Main函数中有六处含有TODO:的注释,其他函数也有含有TODO:的注释,例如:DrawBox、DrawInfo和DisplayResults。请仔细阅读这些注释并根据需求自行修改数值或者代码。
3.9 运行程序
-
上述已经完成了必要的配置过程,下面开始运行程序。打开项目文件。打开
Program.cs文件,点击“启动”,开始运行程序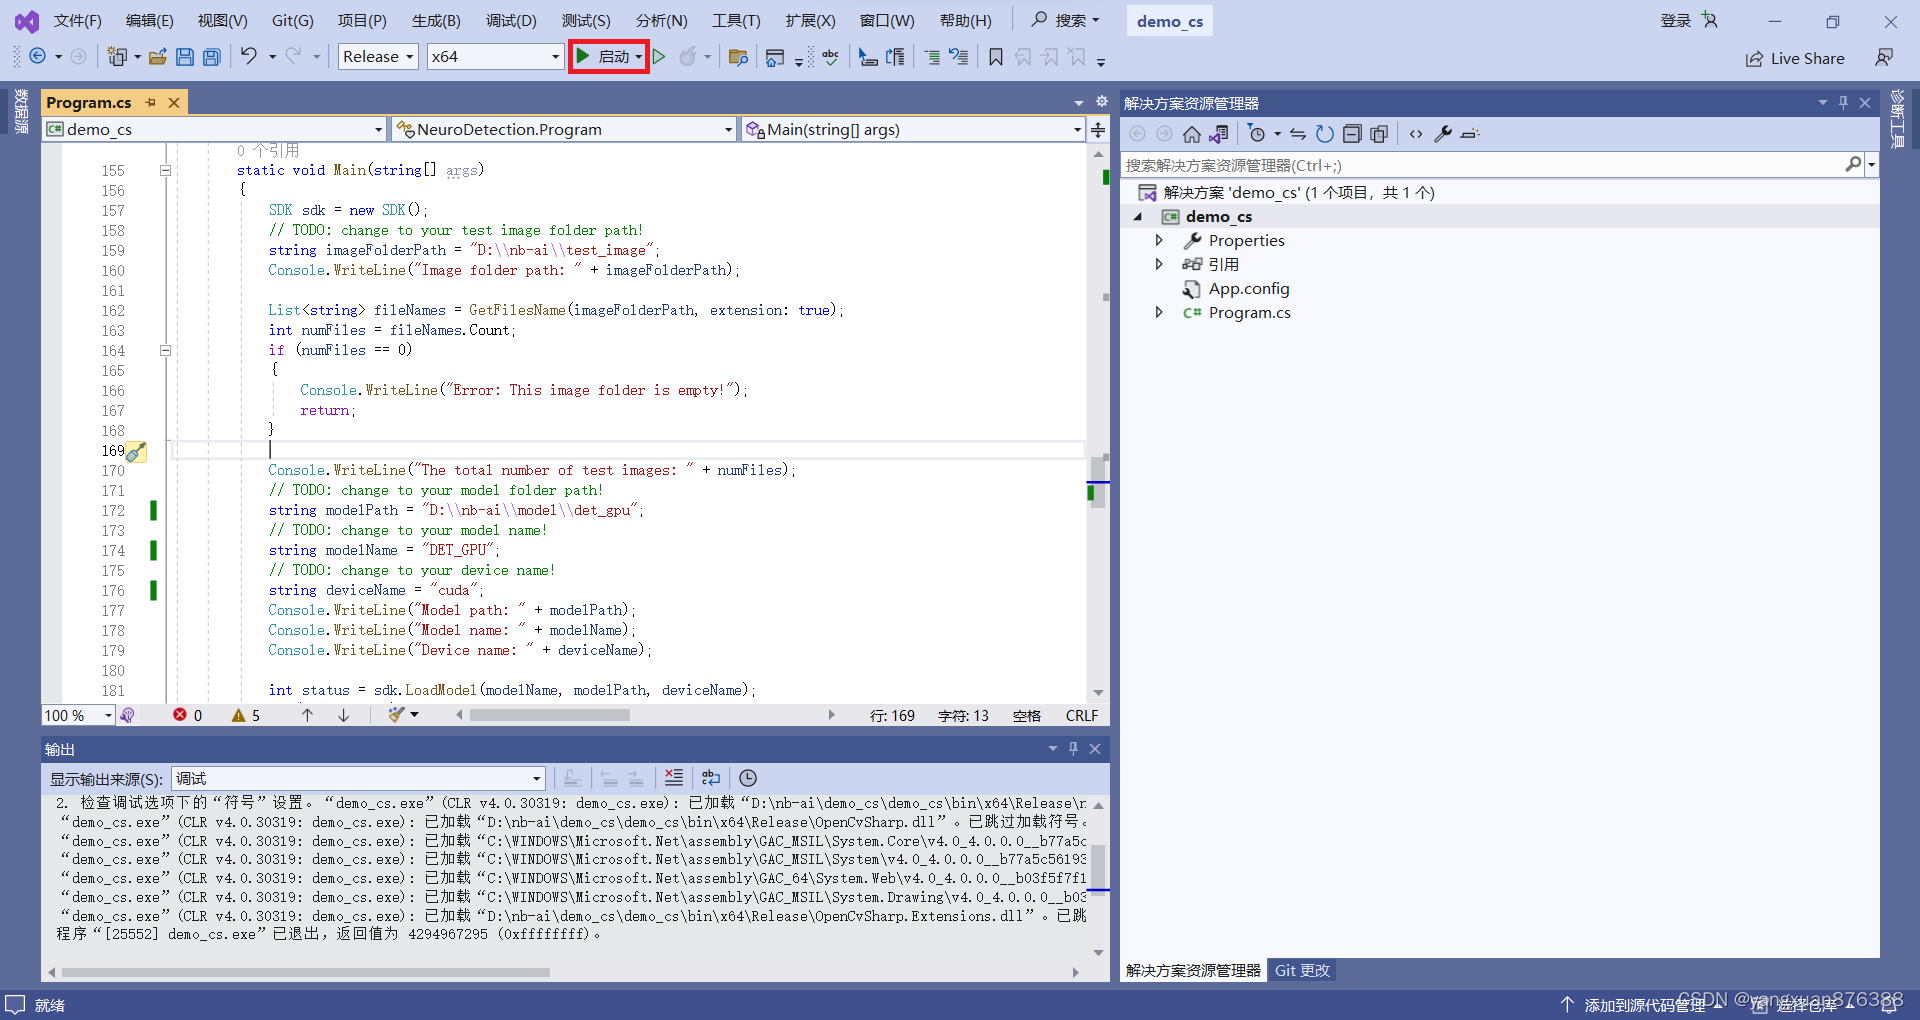
-
如运行成功,命令行界面会展示类似的以下信息:
Image folder path: D:\nb-ai\test_image
The total number of test images: 63
Model path: D:\nb-ai\model\det_gpu
Model name: DET_GPU
Device name: cuda
input device: cuda
infer device: cuda
[2023-06-14 15:27:11.899] [logging] [info] [model.cpp:35] [DirectoryModel] Load model: "D:\nb-ai\model\det_gpu"
[2023-06-14 15:27:12.021] [logging] [info] [inference.cpp:44] {
  ...
}
[2023-06-14 15:27:12.773] [logging] [warning] [trt_net.cpp:24] TRTNet: Using an engine plan file across different models of devices is not recommended and is likely to affect performance or even cause errors.
[2023-06-14 15:27:13.844] [logging] [info] [inference.cpp:56] ["img"] <- ["image"]
[2023-06-14 15:27:13.844] [logging] [info] [inference.cpp:67] ["post_output"] -> ["dets"]
Batch size: 1

Reading the image: D:\nb-ai\test_image\000B16302318AE4F083DC80A6EA69EF75014582.bmp
Image size (height, width): 2048 2448
results in the 0-th image:
  bbox_count=100
[CPP][get_result_mask_cs]Error: the returned mask is empty.

label:                              screw
label_index:                        0
confidential score:                 0.9995336
position of result(x0,y0,x1,y1):    (145.2008, 44.06215, 599.7194, 494.3687)
row_index:                          0
col_index:                          0
mask_width:                         0
mask_height:                        0
mat_mask_width:                     0
mat_mask_height:                    0
...
-
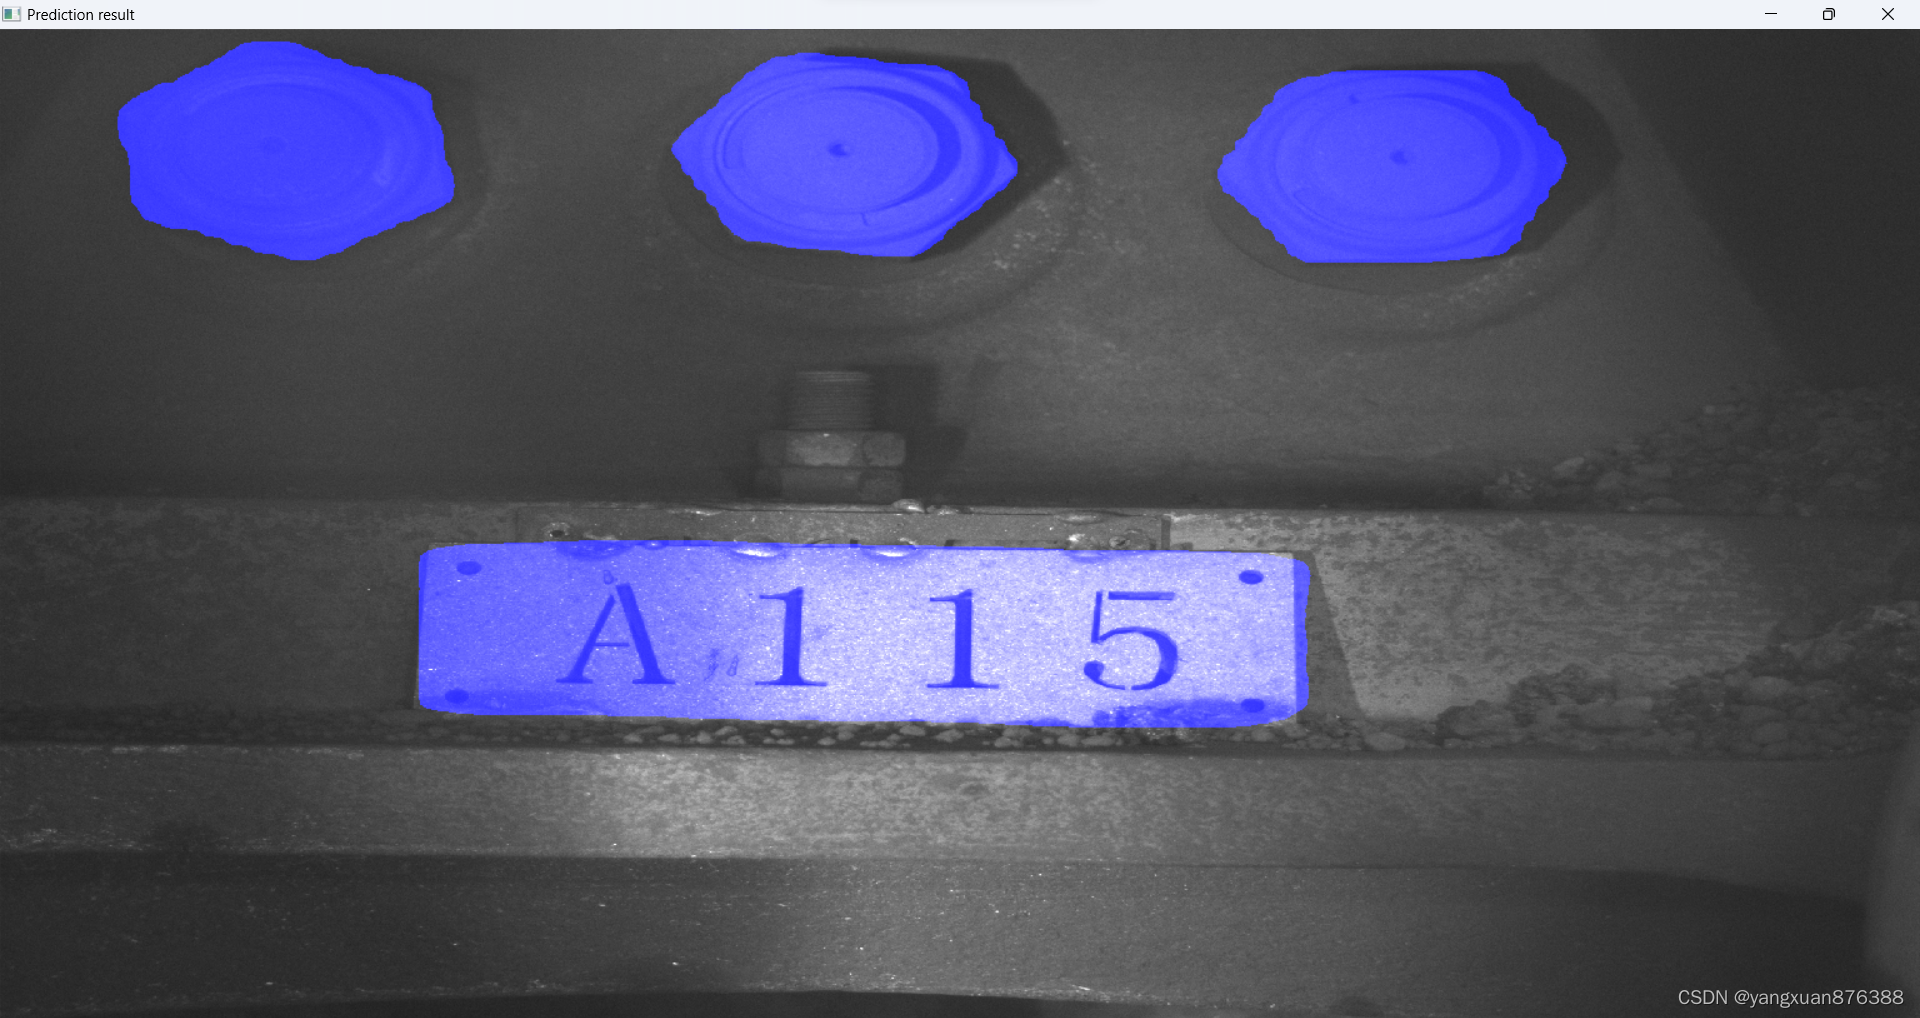
测试照片的预测结果会以弹窗形式展示出来,例如:
-
这样就使用SDK完成了C#软件开发。
4. 调用函数说明
4.1 LoadModel()
-
定义:
- 该函数用于加载模型
-
参数说明:
| 参数 | 解释 |
|---|---|
| modelName | 模型名称 |
| modelPath | 模型所在路径 |
| deviceName | 选择CPU处理:device_name="cpu"; 选择GPU处理:device_name="cuda" |
| deviceIndex | 加载模型的显卡设备号。默认值为0(默认设备号),您也可以修改为其他设备号。 |
- 返回值:
- 返回一个int型变量。0代表执行成功,其他数字为错误码,具体如下:
| 返回值 | 定义 |
|---|---|
| 0 | 执行成功 |
| 1 | 配置文件找不到 |
| 2 | 未找到batch参数 |
| 3 | 未找到dete_thres参数 |
| 4 | 未找到class参数 |
| 5 | 缺少运行所需dll文件 |
| 6 | ARG-英伟达显卡报错 |
| 7 | 不支持 |
| 8 | 越界 |
| 9 | 内存不足 |
| 10 | 加载模型相关文件不存在 |
| 11 | 加载失败 |
| 12 | 状态计数 |
| 50 | 模型类型错误或无法读取model.conf文件 |
4.2 GetBatch()
-
定义:
- 得到单次处理的样本个数
-
参数说明:
| 参数 | 说明 |
|---|---|
| modelName | 模型名称(名称为英文名称) |
- 返回值:
- 返回一个int型变量(batch)
4.3 PredictModel()
-
定义:
- 该函数用于预测待测试图片
-
参数说明:
| 参数 | 说明 |
|---|---|
| modelName | 模型名称(名称为英文名称) |
| mats | 图片的OpenCvSharp.Mat格式数据 |
| detectThreshold | 检测阈值,超过检测阈值即视为目标物体。detectThreshold=-1代表默认值,默认检测阈值为0.7。 |
- 返回值:
- 返回一个类叫
PredictionResult, 如下代码所示:
- 返回一个类叫
    // Bounding box
    // (x0, y0) coordinates represent the upper left corner of the bounding box
    // (x1, y1) coordinates represent the lower right corner of the bounding box
    public class Boxes
    {
        public float x0;
        public float y0;
        public float x1;
        public float y1;
    };


    // Detection results
    // For OCR and Object Detection tasks, results are bounding box (box), confidence level (score),
    //                                                 and category (label, label_index)
    // For Pixel Segmentation task, results are bounding box (box), confidence level (score), category (label, label_index),
    //                                          and pixel segmentation image (mask, mat_mask_width, mat_mask_height)
    public class DetectionResult
    {
        public Boxes box;                   // Bounding box containing the detected object
        public float score;                 // Score after predicting, ranging from 0 to 1
                                            // The closer the score is to 1, the better the result is
        public string label;                // Target's label name after predicting
        public int label_index;             // Index of the label
        public Mat mask;                    // Mask of the the detected object
        public int row_index;               // No specific use right now. It's for the future development
        public int col_index;               // No specific use right now. It's for the future development
        public int mask_width;              // No specific use right now. It's for the future development
        public int mask_height;             // No specific use right now. It's for the future development
        public int mat_mask_width;          // Width (#cols) of the mask
        public int mat_mask_height;         // Height (#rows) of the mask
    };


    // Prediction results returned by PredictModel() in C#
    public class PredictionResult
    {
        public DetectionResult[][] outResults;   // final results
        public int status;                       // status after prediction
    };
状态码(status)具体如下:
| 状态码 | 定义 |
|---|---|
| 0 | 执行成功 |
| 1 | 英伟达显卡报错 |
| 2 | 不支持 |
| 3 | 越界 |
| 4 | 内存不足 |
| 5 | 用于预测的相关文件不存在 |
| 6 | 预测失败 |
| 7 | 状态计数 |
| 8 | 无法获取预测的标签 |
| 9 | 预测的标签和结果数量不符 |
| 50 | 授权文件不存在或无权限读取 |
| 51 | 授权文件格式不正确 |
| 52 | 授权文件指纹不匹配 |
| 53 | 未到授权开始时间 |
| 54 | 授权过期 |
4.4 DestroyModel()
-
定义:
- 该函数用于将模型从显卡中清除
-
参数说明:
| 参数 | 说明 |
|---|---|
| modelName | 模型名称(名称为英文名称) |
- 返回值:
- 无


 3916
3916

 被折叠的 条评论
为什么被折叠?
被折叠的 条评论
为什么被折叠?
 到【灌水乐园】发言


