


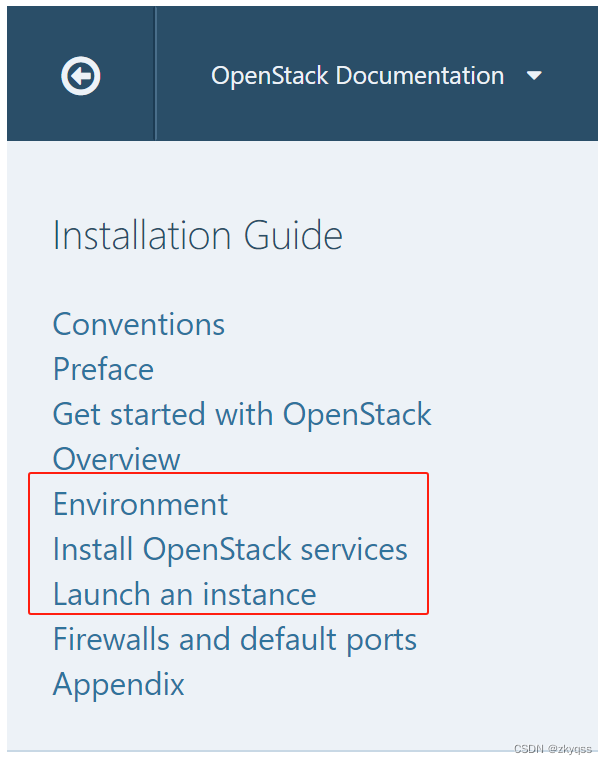
一、官方文档
OpenStack Installation Guide — Installation Guide documentation![]() https://docs.openstack.org/install-guide/index.html本次安装是在Ubuntu 22.04上进行,基本按照OpenStack Installation Guide顺序执行,主要内容包括:
https://docs.openstack.org/install-guide/index.html本次安装是在Ubuntu 22.04上进行,基本按照OpenStack Installation Guide顺序执行,主要内容包括:
- 环境安装
- OpenStack服务安装
- 启动一个实例
二、实验环境
1、win11
2、VMware® Workstation 16 Pro(16.2.5 build-20904516)
3、ubuntu-22.04.4-live-server-amd64.iso
三、虚机准备
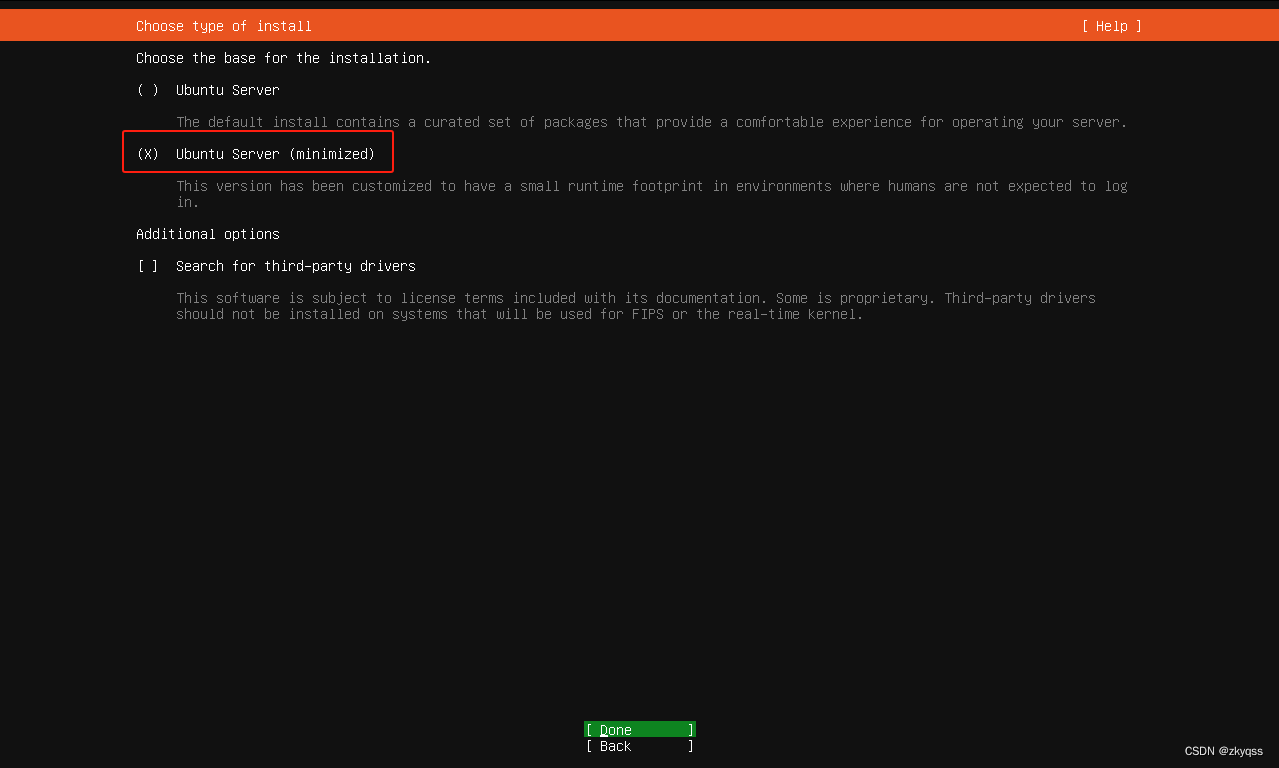
可以参考VMware Workstation安装Ubuntu 22.04笔记进行虚机准备,在安装过程中,建议采用最小化安装:
本次安装过程中,将先安装1个controller node(控制节点),1个compute node(计算节点),到后面再加入1个block storage node(存储节点)。
虚机需求如下图所示:
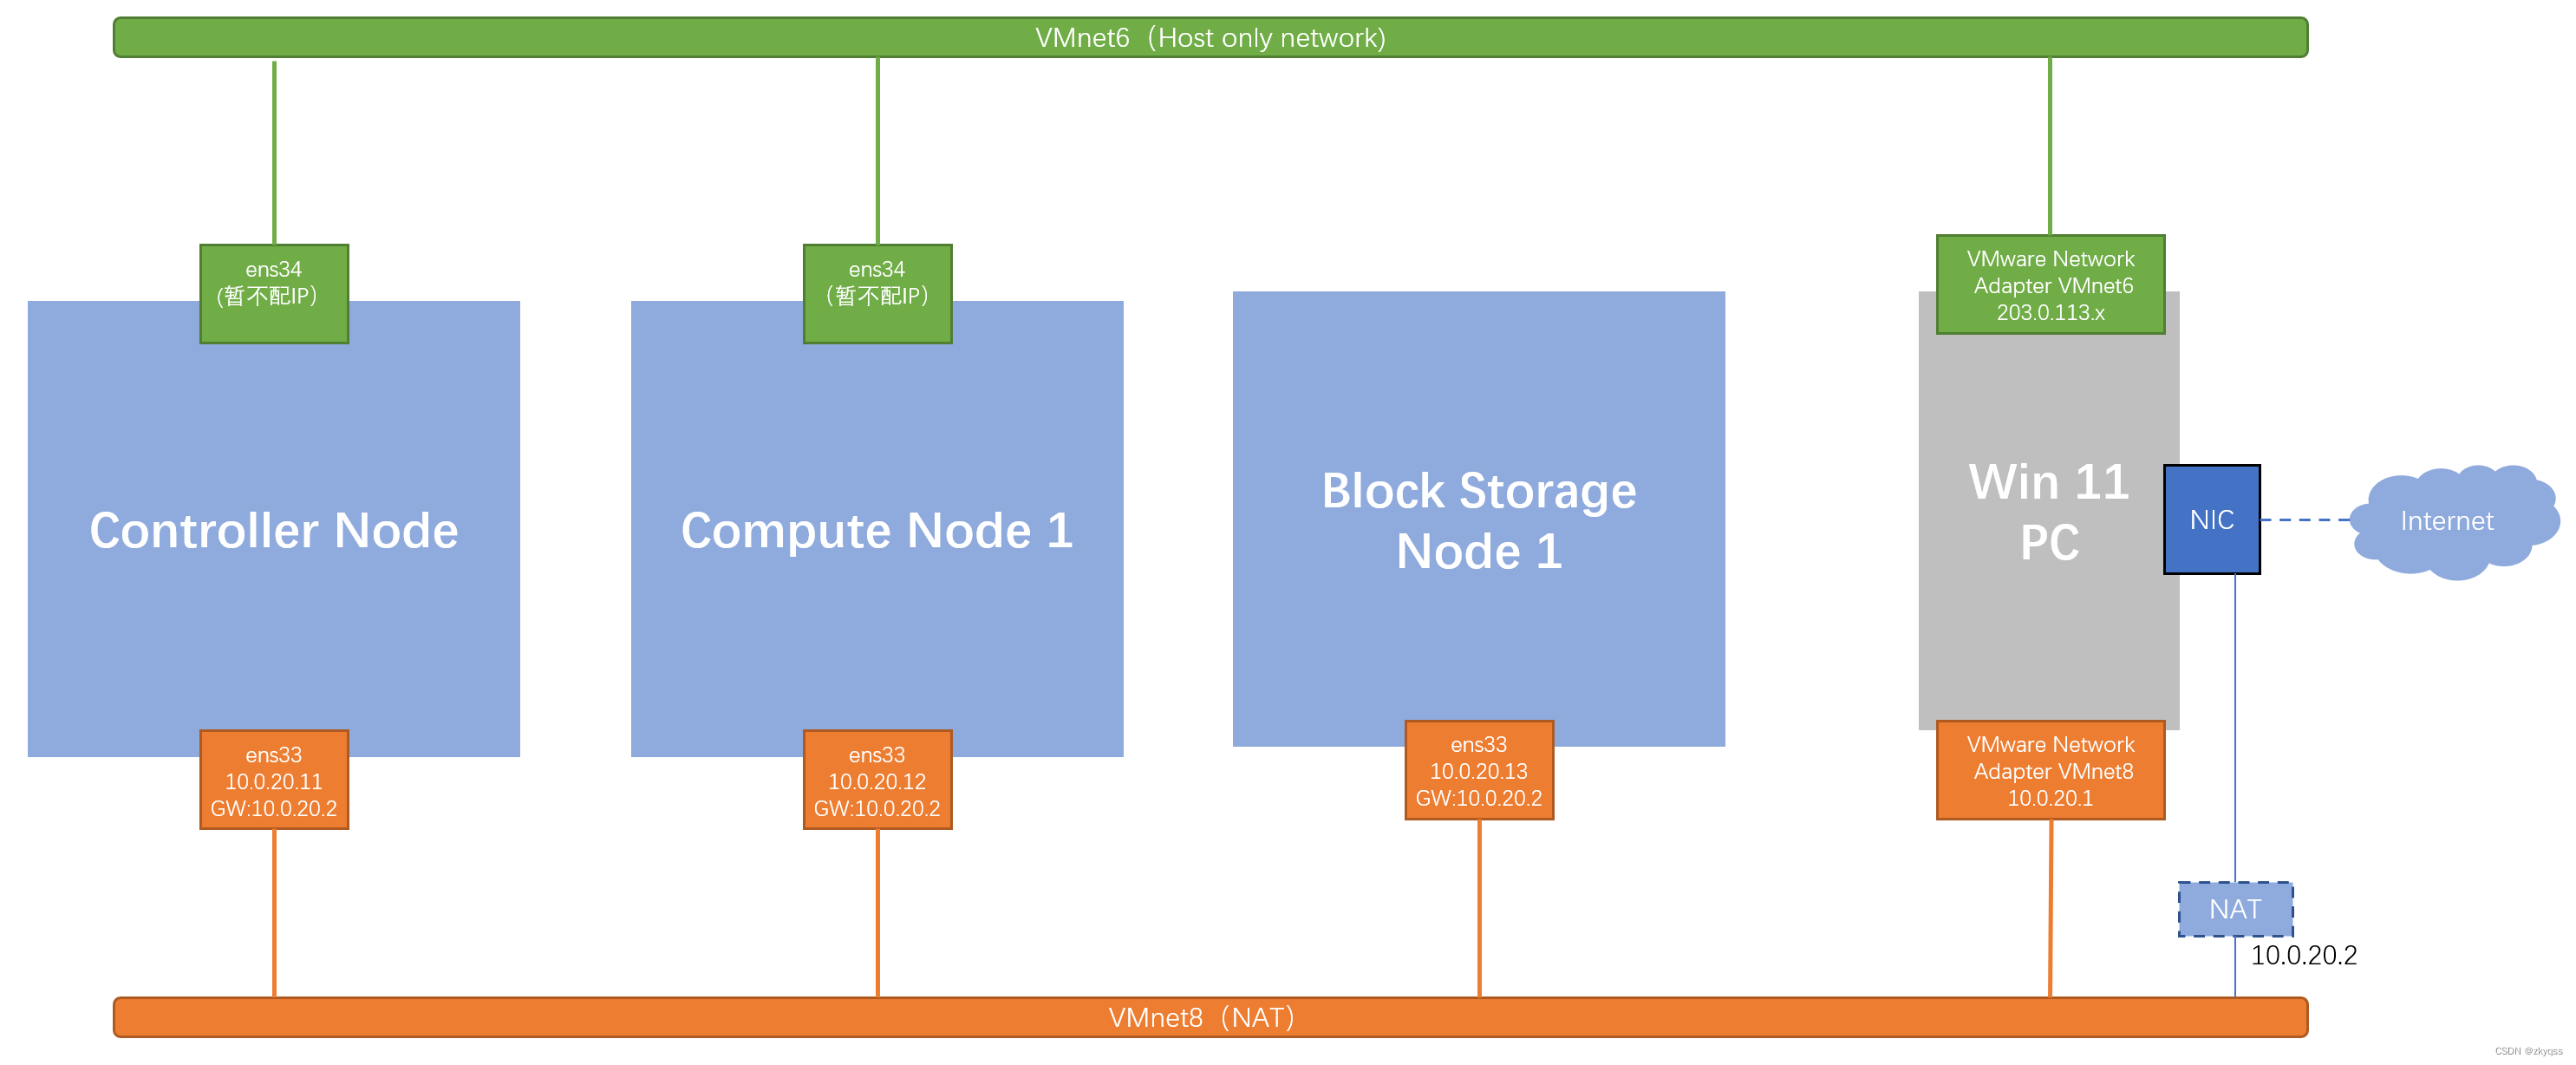
本实验中各虚机规格如下:
-
Controller Node: 4 processor, 8 GB memory, and 20 GB storage,2块网卡
-
Compute Node: 4processor, 8GB memory, and 20 GB storage,2块网卡
-
Block Storage Node:4processor, 4GB memory, and 20 GB storage,1块网卡
-
Controller Node: 1 processor, 4 GB memory, and 5 GB storage
-
Compute Node: 1 processor, 2 GB memory, and 10 GB storage
实际安装,可以根据自己电脑的CPU/内存条件进行配置。
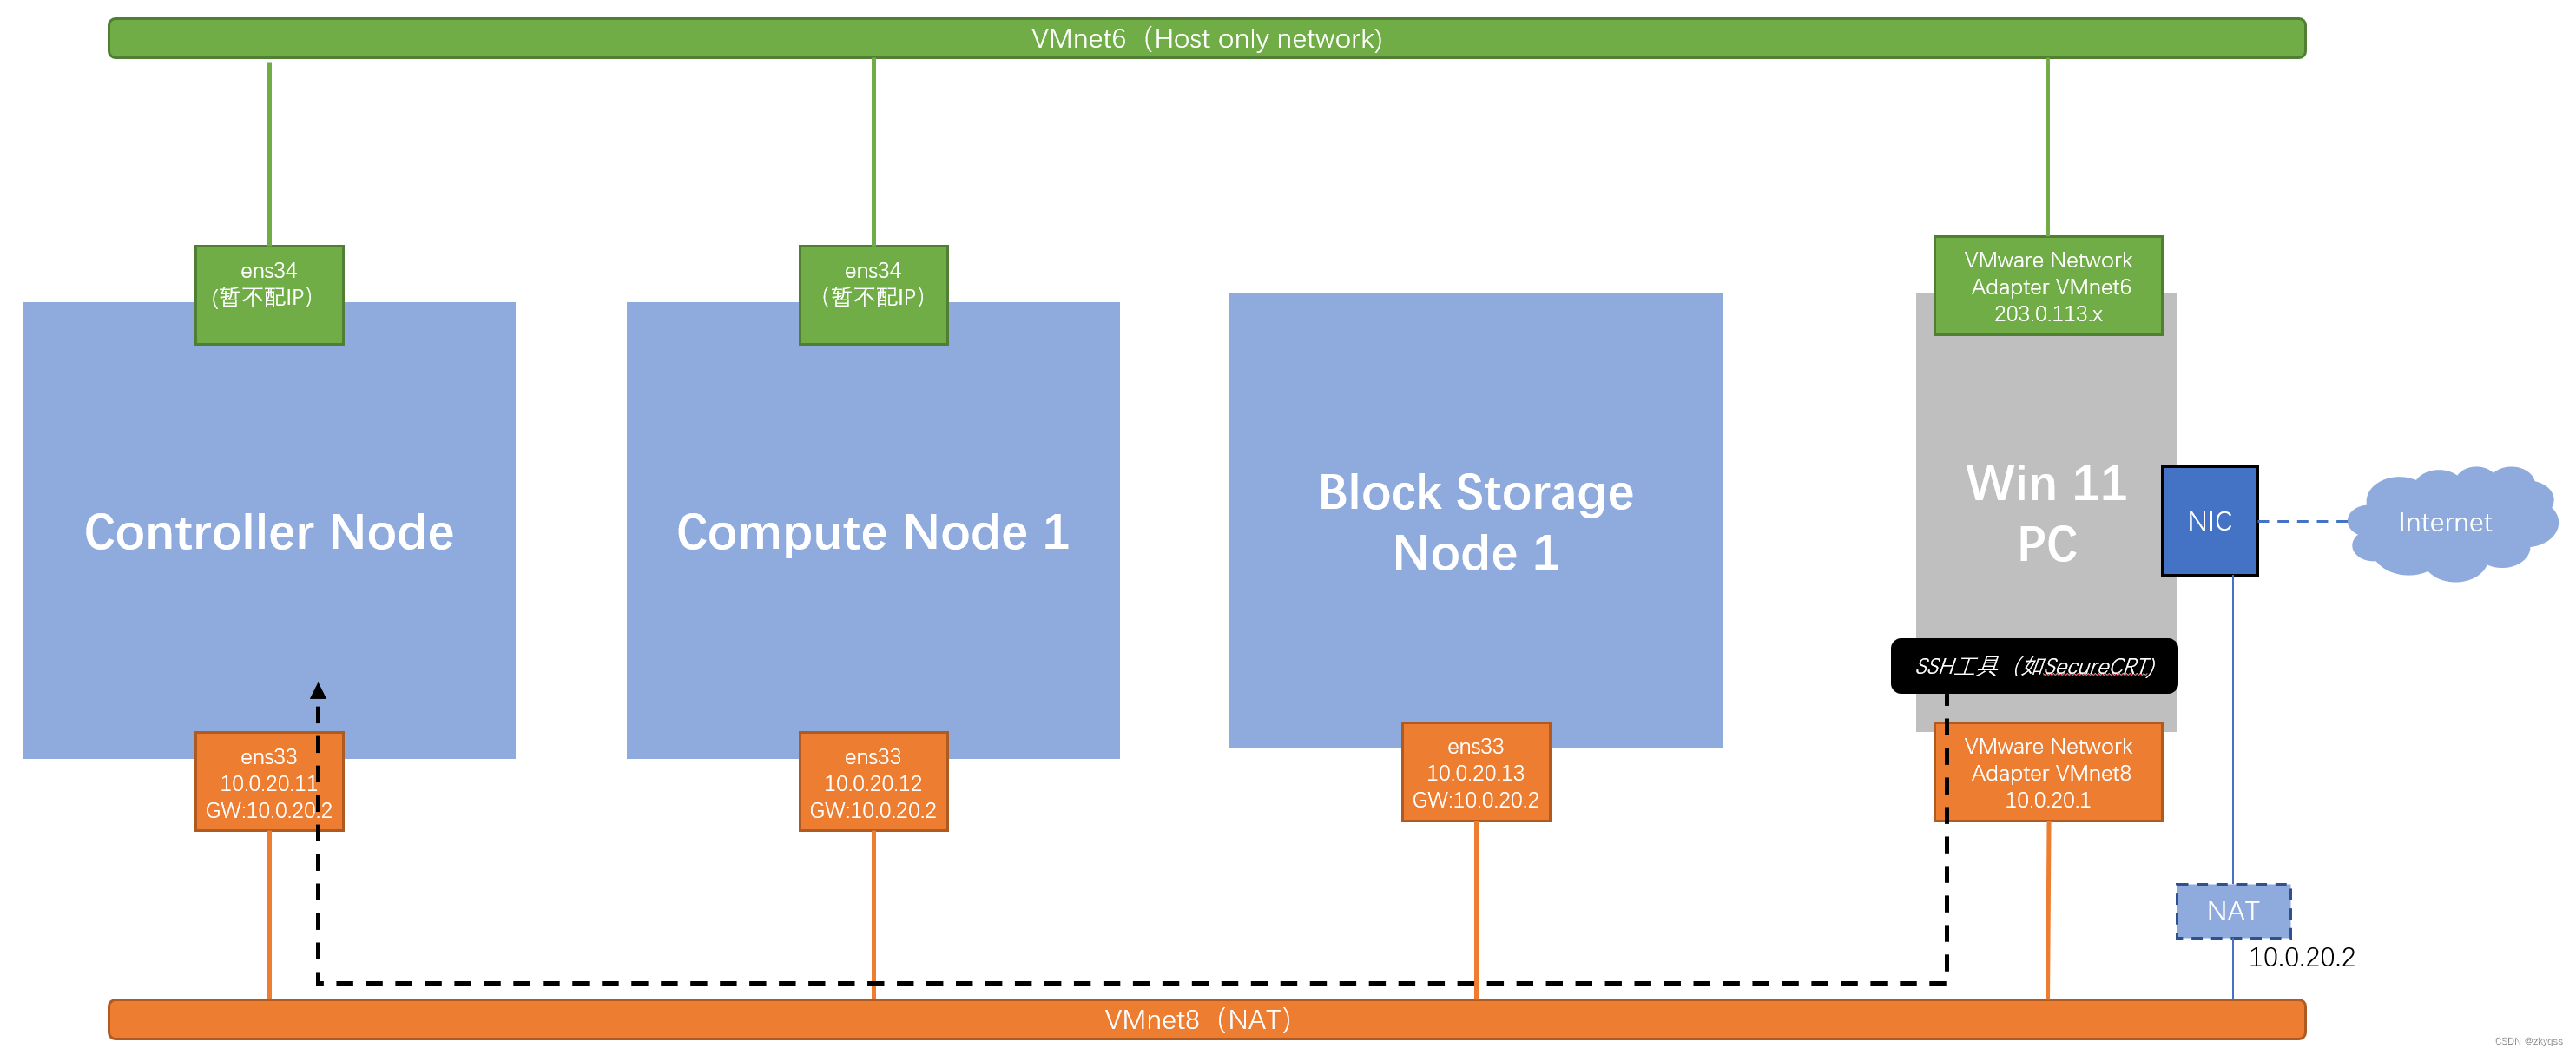
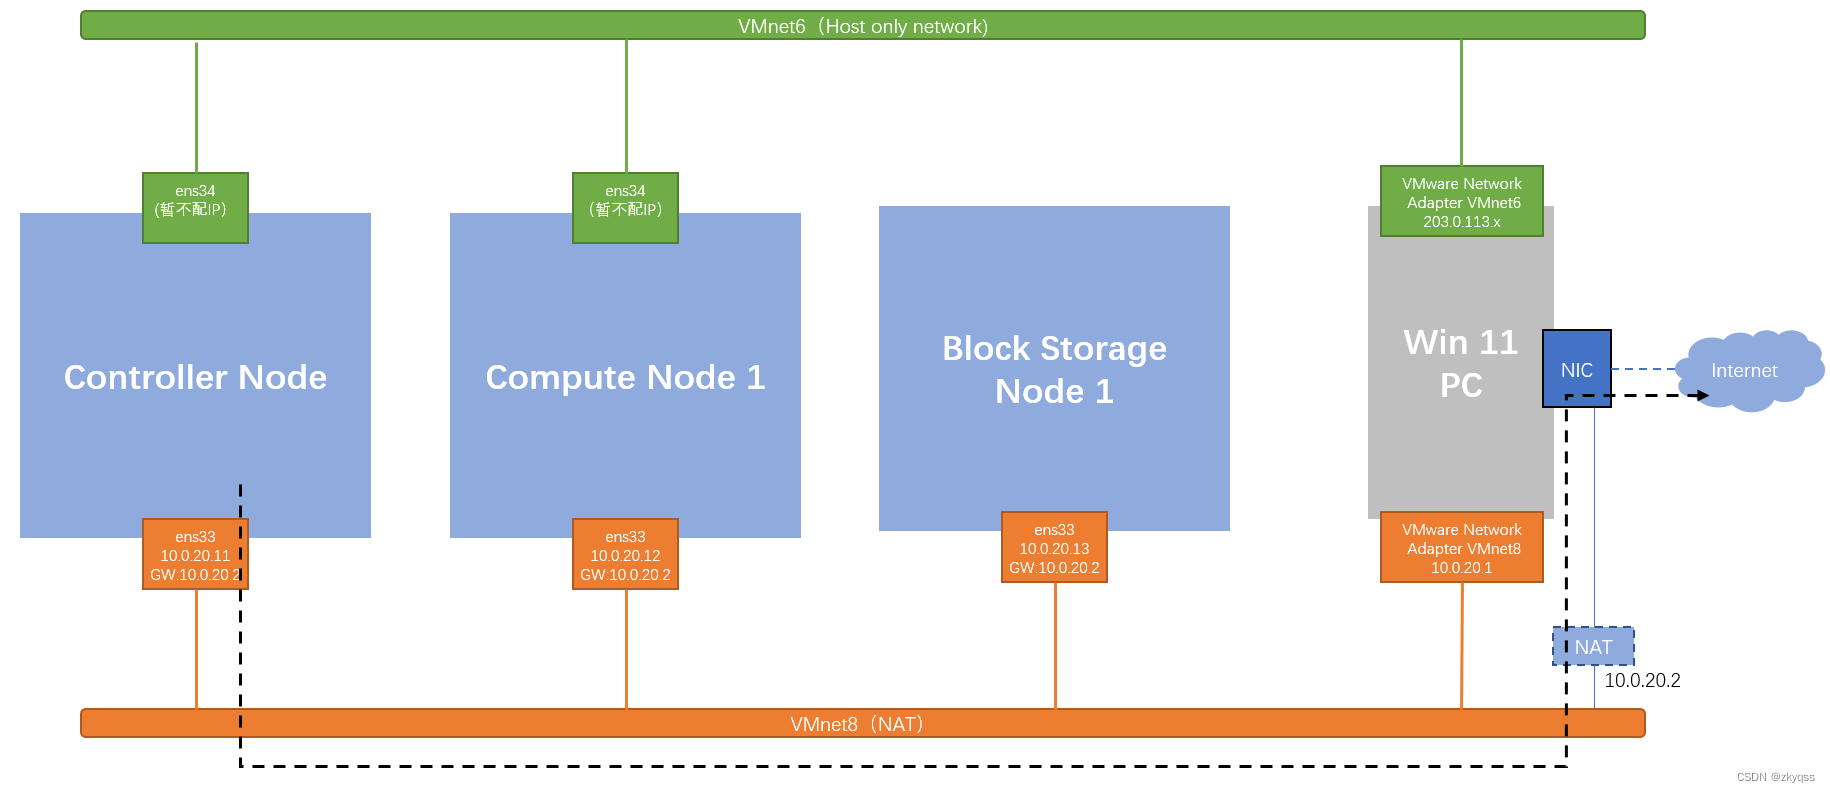
虚机安装完成后,应该可以从win11 PC上通过ssh登录,SSH数据流如下图所示(以SSH登录Controller Node为例):
由于Ubuntu最小化安装,可以首先安装必要的软件:
sudo apt update
sudo apt install vim -y
sudo apt install iputils-ping -y
虚机能正常访问互联网,访问互联网数据流如下图所示(以Controller Node为例):
此时,虚机能正常ping通互联网地址,如下图所示(hostname在后面安装过程中会修改为controller):
ubcode@os-1:~$ ping www.ubuntu.com
PING www.ubuntu.com (185.125.190.20) 56(84) bytes of data.
64 bytes from website-content-cache-1.ps5.canonical.com (185.125.190.20): icmp_seq=1 ttl=128 time=217 ms
64 bytes from website-content-cache-1.ps5.canonical.com (185.125.190.20): icmp_seq=2 ttl=128 time=226 ms
64 bytes from website-content-cache-1.ps5.canonical.com (185.125.190.20): icmp_seq=3 ttl=128 time=244 ms
64 bytes from website-content-cache-1.ps5.canonical.com (185.125.190.20): icmp_seq=4 ttl=128 time=220 ms
64 bytes from website-content-cache-1.ps5.canonical.com (185.125.190.20): icmp_seq=5 ttl=128 time=230 ms
^C
--- www.ubuntu.com ping statistics ---
5 packets transmitted, 5 received, 0% packet loss, time 4006ms
rtt min/avg/max/mdev = 217.109/227.384/244.025/9.532 ms
ubcode@os-1:~$


 2216
2216

 被折叠的 条评论
为什么被折叠?
被折叠的 条评论
为什么被折叠?
 到【灌水乐园】发言


