


1、官方文档
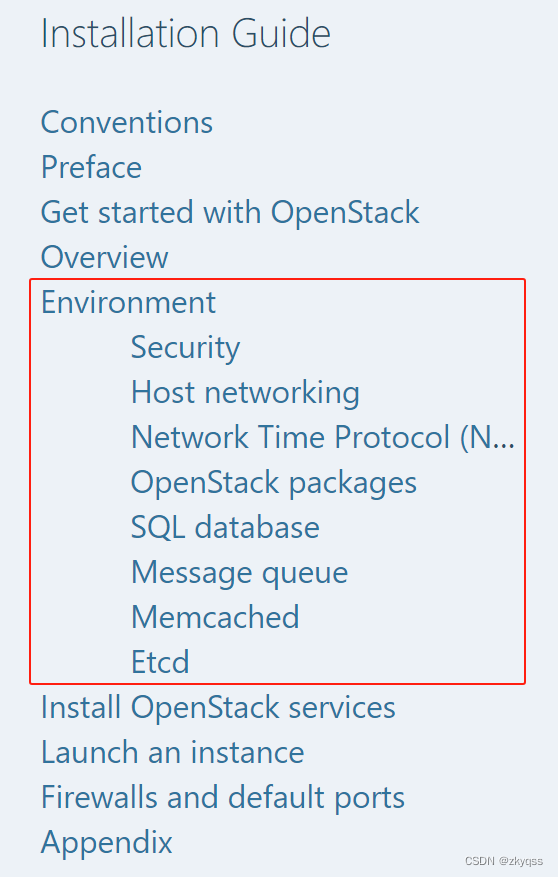
OpenStack Installation Guid![]() https://docs.openstack.org/install-guide/本次安装是在Ubuntu 22.04上进行,基本按照OpenStack Installation Guide顺序执行,主要内容包括:
https://docs.openstack.org/install-guide/本次安装是在Ubuntu 22.04上进行,基本按照OpenStack Installation Guide顺序执行,主要内容包括:
- 环境安装
- OpenStack服务安装
- 启动一个实例
本篇文档主要说明环境安装(Environment)的内容。
2、概述
2.1 环境安装说明
根据官方文档Enviroment内容,说明如下:

2.2 设置root权限登录
虚机设置为root权限登录:
第一台虚机(controller node)设置root ssh登录:

ubcode@os-1:~$ sudo passwd root
[sudo] password for ubcode:
New password:
Retype new password:
passwd: password updated successfully

ubcode@os-1:~$ sudo vi /etc/ssh/sshd_config
#PermitRootLogin prohibit-password
PermitRootLogin yes <--新增配置

ubcode@os-1:~$ sudo /etc/init.d/ssh stop <--修改配置后,对服务重启
Stopping ssh (via systemctl): ssh.service.
ubcode@os-1:~$ sudo /etc/init.d/ssh start
Starting ssh (via systemctl): ssh.service.
ubcode@os-1:~$ sudo service ssh restart
ubcode@os-1:~$

第二台虚机(compute node)设置root ssh登录:

ubcode@os-2:~$ sudo passwd root
[sudo] password for ubcode:
New password:
Retype new password:
passwd: password updated successfully

ubcode@os-2:~$ sudo vi /etc/ssh/sshd_config
#PermitRootLogin prohibit-password
PermitRootLogin yes

ubcode@os-2:~$ sudo /etc/init.d/ssh stop
[sudo] password for ubcode:
Stopping ssh (via systemctl): ssh.service.
ubcode@os-2:~$
ubcode@os-2:~$ sudo /etc/init.d/ssh start
Starting ssh (via systemctl): ssh.service.
ubcode@os-2:~$ sudo service ssh restart
ubcode@os-2:~$
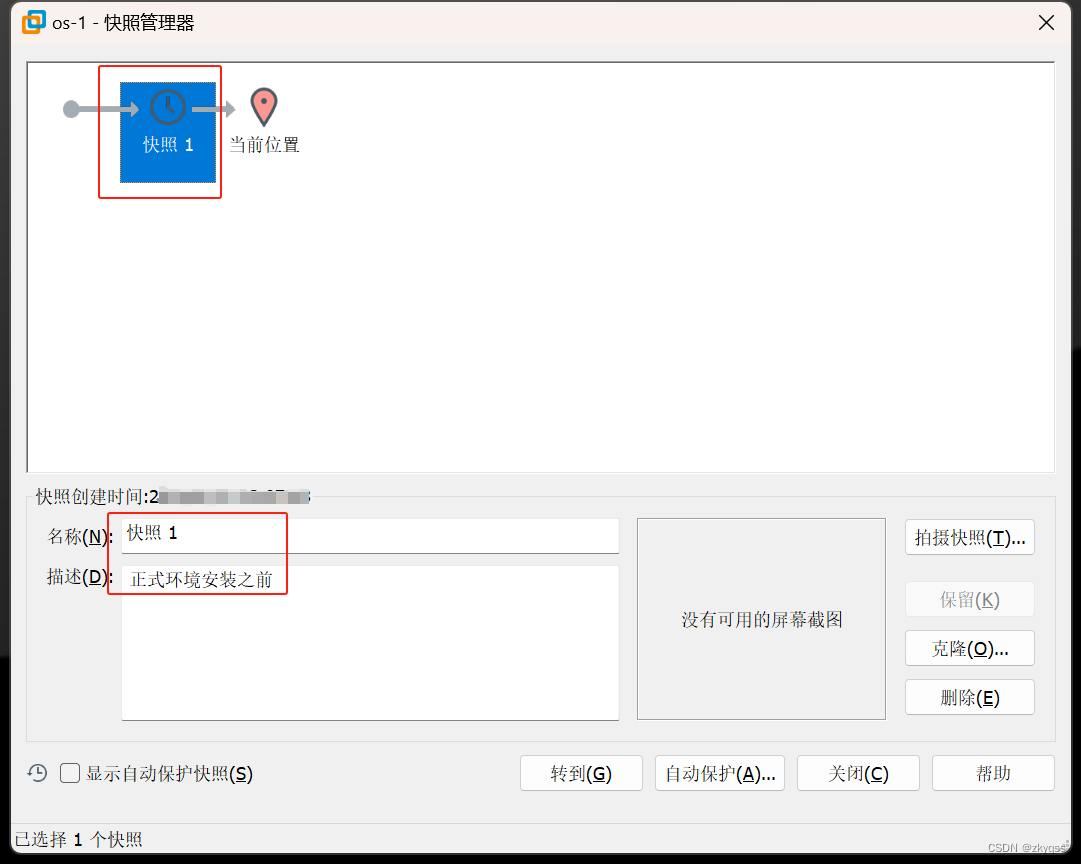
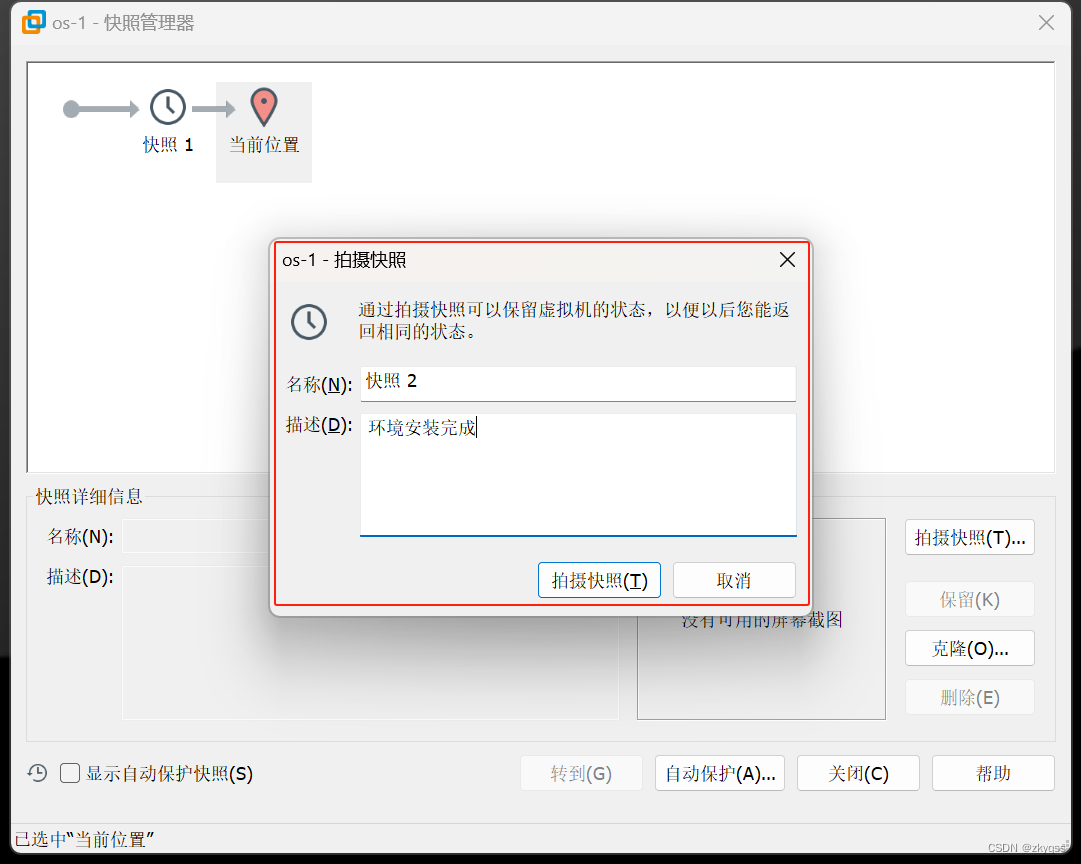
2.3 安装的每个阶段记得拍摄快照
对这两台虚机在正式进行环境安装之前,进行快照保存(建议虚机关机情况下进行快照):

3、Security
OpenStack 服务支持多种安全方法,包括密码认证、策略控制和数据加密。
此外,支撑服务(即OpenStack服务正常运行所依赖的一些服务,也叫基础服务、公共服务,这些服务是OpenStack的内部服务,通常不允许外部直接访问,安全访问控制非常重要),例如数据库、消息队列、缓存服务等,也支持通过密码进行安全保护。
本次安装都采用密码认证,密码统一设置为:openstack。
4、Host Networking
4.1 网络配置
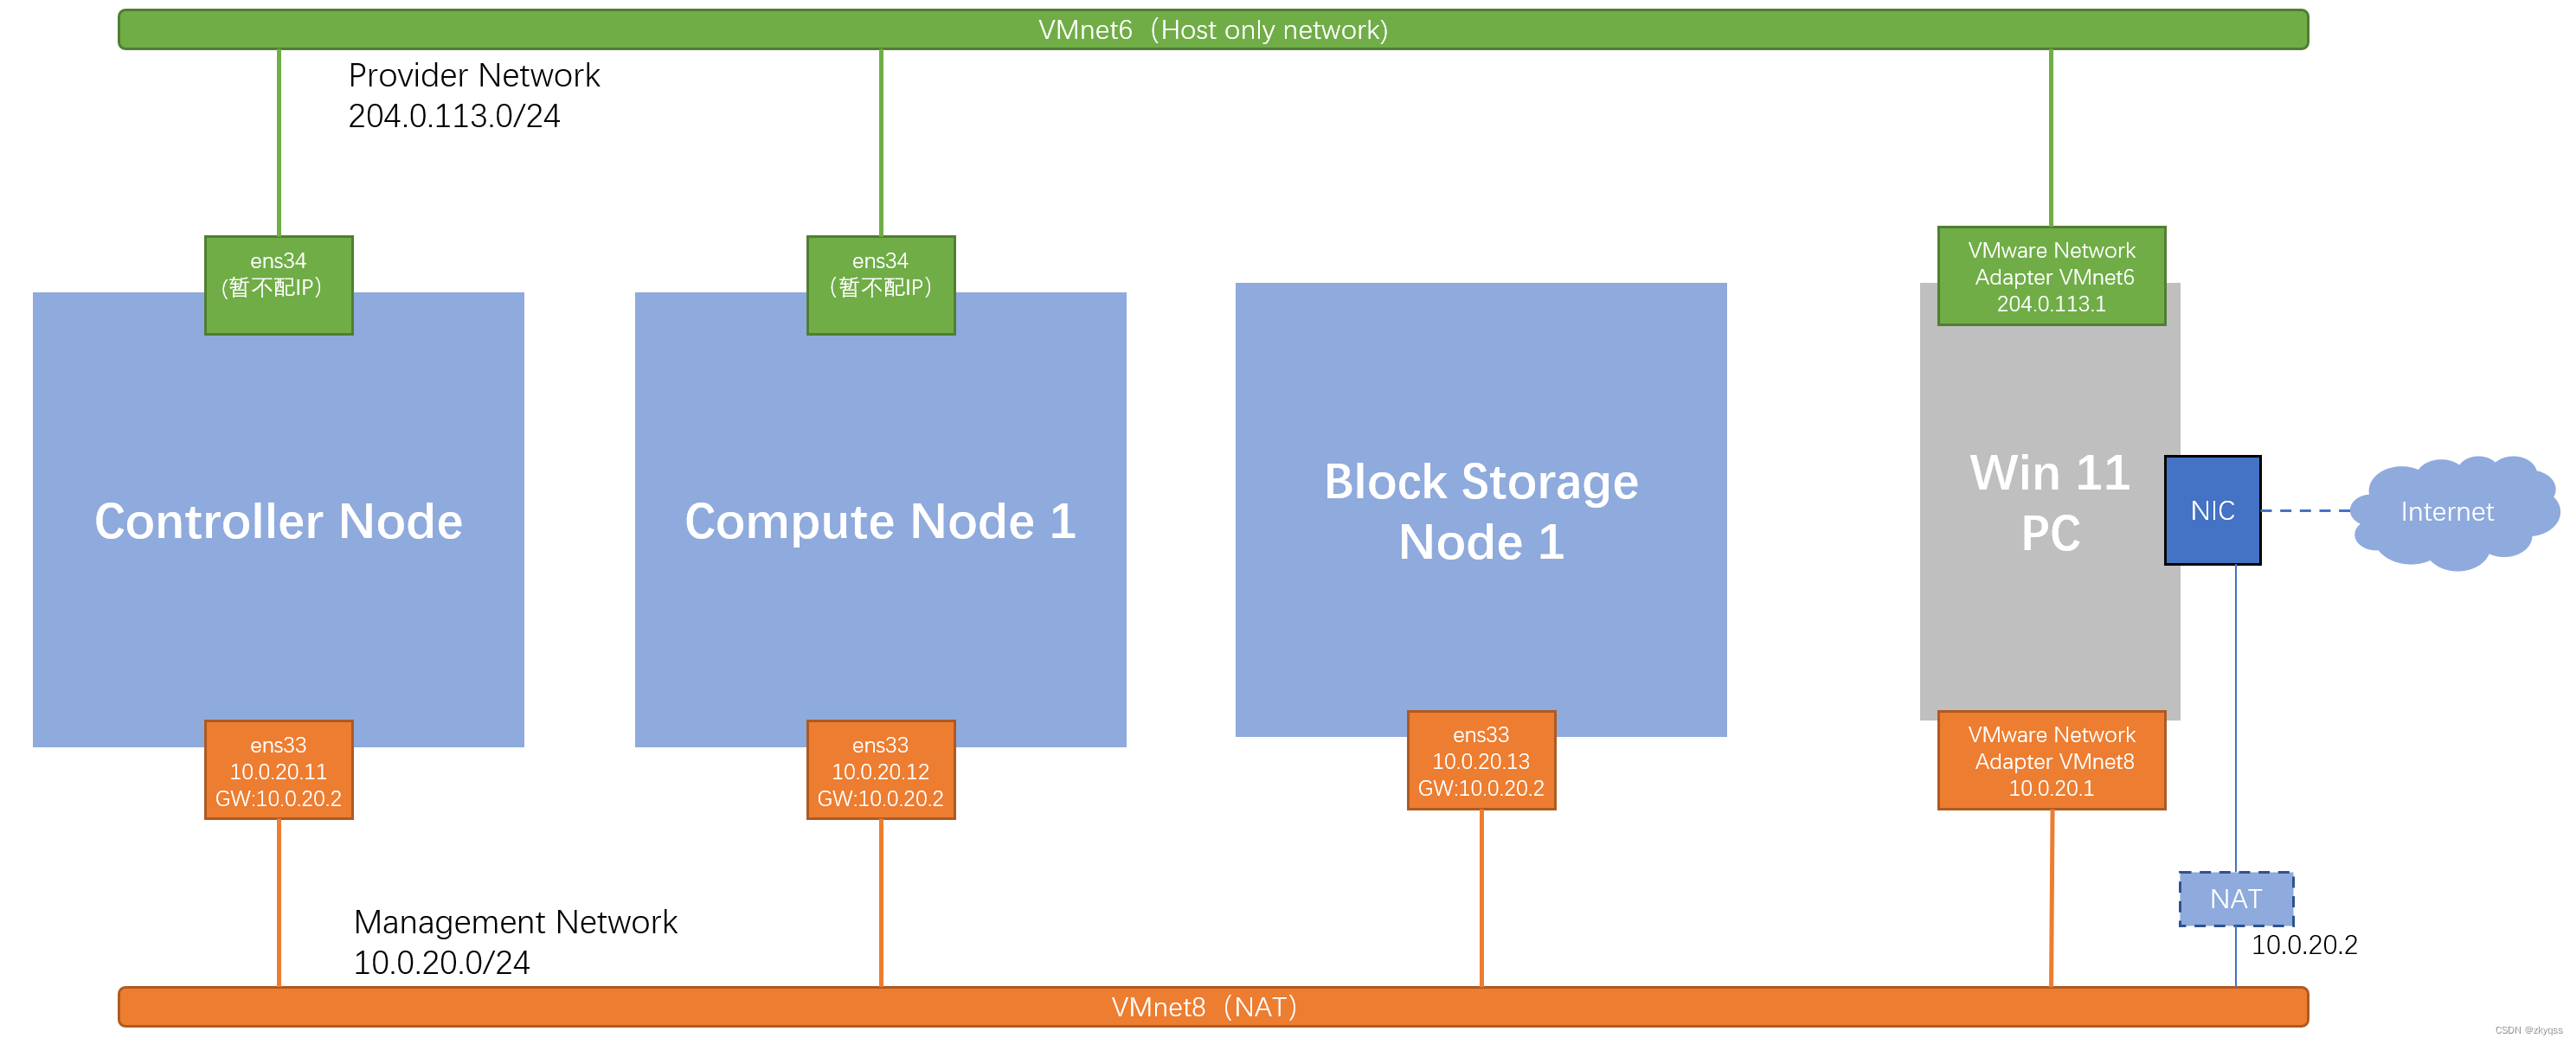
本次安装的网络环境划分为:
- 管理网络(Management Network):各节点通过管理网络访问互联网,获取软件更新、NTP服务、DNS服务等等。Win11 PC也是通过管理网络SSH登录到各节点设备进行配置。
- 业务网络(Provider Network):可以理解为租户虚机(Openstack里面称为instance)通过业务网络和外部进行通讯(也包括互联网)。由于实验环境的限制,在后续实验中,只要租户的实例(instance)能ping通业务网络的网关204.0.113.1即认为可以对外访问。
4.2 Controller node
4.2.1 Configure network interfaces
Controller Node的ens33配置为管理端口,已经在安装过程中进行了配置,ens34配置为业务端口(provider interface),不配置IP地址。
配置如下:
root@os-1:~# vi /etc/netplan/00-installer-config.yaml
# This is the network config written by 'subiquity'
network:
  ethernets:
    ens33:
      addresses:
      - 10.0.20.11/24
      nameservers:
        addresses:
        - 10.0.20.2
        search: []
      routes:
      - to: default
        via: 10.0.20.2
    ens34:
      dhcp4: false
  version: 2

root@controller:~# netplan apply
WARNING:root:Cannot call Open vSwitch: ovsdb-server.service is not running.
root@controller:~#
4.2.2 Configure name resolution
1、将主机名设置为controller
root@os-1:~# hostnamectl set-hostname controller
root@os-1:~# reboot
2、 编辑/etc/hosts文件:
root@controller:~# vi /etc/hosts
root@controller:~# cat /etc/hosts
127.0.0.1 localhost
# 127.0.1.1 os-1  <---注释掉

# The following lines are desirable for IPv6 capable hosts
::1     ip6-localhost ip6-loopback
fe00::0 ip6-localnet
ff00::0 ip6-mcastprefix
ff02::1 ip6-allnodes
ff02::2 ip6-allrouters

10.0.20.11 controller  <-- add
10.0.20.12 compute1    <-- add

root@controller:~#
4.3 Compute node
4.3.1 Configure network interfaces
Compute Node 1的ens33配置为管理端口,已经在安装过程中进行了配置,ens34配置为业务端口(provider interface),不配置IP地址。
配置如下:
root@os-2:~# vi /etc/netplan/00-installer-config.yaml
# This is the network config written by 'subiquity'
network:
  ethernets:
    ens32:
      addresses:
      - 10.0.20.12/24
      nameservers:
        addresses:
        - 10.0.20.2
        search: []
      routes:
      - to: default
        via: 10.0.20.2
    ens33:
      dhcp4: false
  version: 2

root@os-2:~# netplan apply
WARNING:root:Cannot call Open vSwitch: ovsdb-server.service is not running.
root@os-2:~#
4.3.2 Configure name resolution
1、将主机名设置为compute1
root@os-2:~# hostnamectl set-hostname compute1
root@os-2:~# reboot
2、 编辑/etc/hosts文件:
root@compute1:~# vi /etc/hosts
root@compute1:~# cat /etc/hosts
127.0.0.1 localhost
# 127.0.1.1 os-2

# The following lines are desirable for IPv6 capable hosts
::1     ip6-localhost ip6-loopback
fe00::0 ip6-localnet
ff00::0 ip6-mcastprefix
ff02::1 ip6-allnodes
ff02::2 ip6-allrouters

10.0.20.11 controller
10.0.20.12 compute1
root@compute1:~# 5、Network Time Protocol (NTP)
在分布式系统中同步节点之间的服务是非常重要的,尤其是在类似OpenStack这样的环境中。Chrony是一种实现网络时间协议(NTP)的工具,因其稳定性和高效性而广受推荐。安装和配置Chrony以同步各节点时间,其中控制节点参考更准确的(低层级)服务器,其他节点参考控制节点。
5.1 Controller node
安装和配置Chrony:
root@controller:~# apt install chrony
root@controller:~# chronyc --version
chronyc (chrony) version 4.2 (+READLINE +SECHASH +IPV6 -DEBUG)
root@controller:~#

root@controller:~# vi /etc/chrony/chrony.conf
...
# pool ntp.ubuntu.com        iburst maxsources 4
# pool 0.ubuntu.pool.ntp.org iburst maxsources 1
# pool 1.ubuntu.pool.ntp.org iburst maxsources 1
# pool 2.ubuntu.pool.ntp.org iburst maxsources 2

server ntp1.aliyun.com iburst

allow 10.0.20.0/24
...

root@controller:~# service chrony restart
root@controller:~#

root@controller:~# chronyc sources
MS Name/IP address         Stratum Poll Reach LastRx Last sample
===============================================================================
^* 120.25.115.20                 2   6   150    16  +1257ns[ +863us] +/-   16ms
root@controller:~#
5.2 Other nodes
其他节点上安装和配置Chrony(包括Compute node):
root@compute1:~# apt install chrony

root@compute1:~# vi /etc/chrony/chrony.conf
...
# pool ntp.ubuntu.com        iburst maxsources 4
# pool 0.ubuntu.pool.ntp.org iburst maxsources 1
# pool 1.ubuntu.pool.ntp.org iburst maxsources 1
# pool 2.ubuntu.pool.ntp.org iburst maxsources 2

server controller iburst
...

root@compute1:~# service chrony restart

root@compute1:~# chronyc sources
MS Name/IP address         Stratum Poll Reach LastRx Last sample
===============================================================================
^* controller                    3   6    17    25  +6348ns[+3156ns] +/-   18ms
root@compute1:~#
5.3 Verify operation
确保控制节点与外部NTP服务器同步,其他节点与控制节点同步,从而在分布式环境中实现高效的时间同步。
1、控制节点:

root@controller:~# chronyc sources
MS Name/IP address         Stratum Poll Reach LastRx Last sample
===============================================================================
^* 120.25.115.20                 2   7   111     1   +620us[+1173us] +/-   17ms
root@controller:~#

2、计算节点:

root@compute1:~# chronyc sources
MS Name/IP address         Stratum Poll Reach LastRx Last sample
===============================================================================
^* controller                    3   6   377     3   +338us[+1242us] +/-   18ms
root@compute1:~# 6、OpenStack packages
OpenStack是一个开源的云计算平台,它提供了一系列的软件包来构建云基础设施。不同的操作系统发行版(如Ubuntu、Red Hat等)会以不同的方式分发OpenStack的软件包。
有些操作系统发行版会将OpenStack软件包作为其标准软件库的一部分进行分发。这意味着用户可以直接使用发行版的包管理器(如apt、yum等)来安装OpenStack。
无论使用哪种方法分发OpenStack软件包,都需要确保所有节点都使用相同版本的OpenStack,从而保证系统的一致性和兼容性。
6.1 OpenStack packages for Ubuntu
6.1.1 Archive Enablement
"Archive Enablement"是指启用Ubuntu Cloud Archive的过程,这是Ubuntu提供OpenStack软件包的一种机制,用于让Ubuntu用户能够安装和使用OpenStack的不同版本。Ubuntu Cloud Archive允许用户通过Ubuntu的软件包管理器(apt)访问OpenStack的软件包。

"OpenStack Yoga is available by default using Ubuntu 22.04 LTS" 意味着在Ubuntu 22.04 LTS(长期支持版本)中,OpenStack Yoga版本是默认可用的。换句话说,不需要通过Ubuntu Cloud Archive来安装OpenStack Yoga,因为它已经被包含在Ubuntu 22.04 LTS的默认软件源中,可以直接使用Ubuntu的包管理器(apt)来安装OpenStack Yoga版本。
6.1.2 Client Installation
OpenStackClient 是一个用于管理OpenStack云服务的命令行工具,它提供了与OpenStack服务交互的命令。
1、可以选择在Controller node安装OpenStackClient:
root@controller:~# apt install python3-openstackclient2、也可以新增加一台虚机(OpenStack Client),专门用于执行OpenStack命令行。增加该虚机后的网络环境如下:
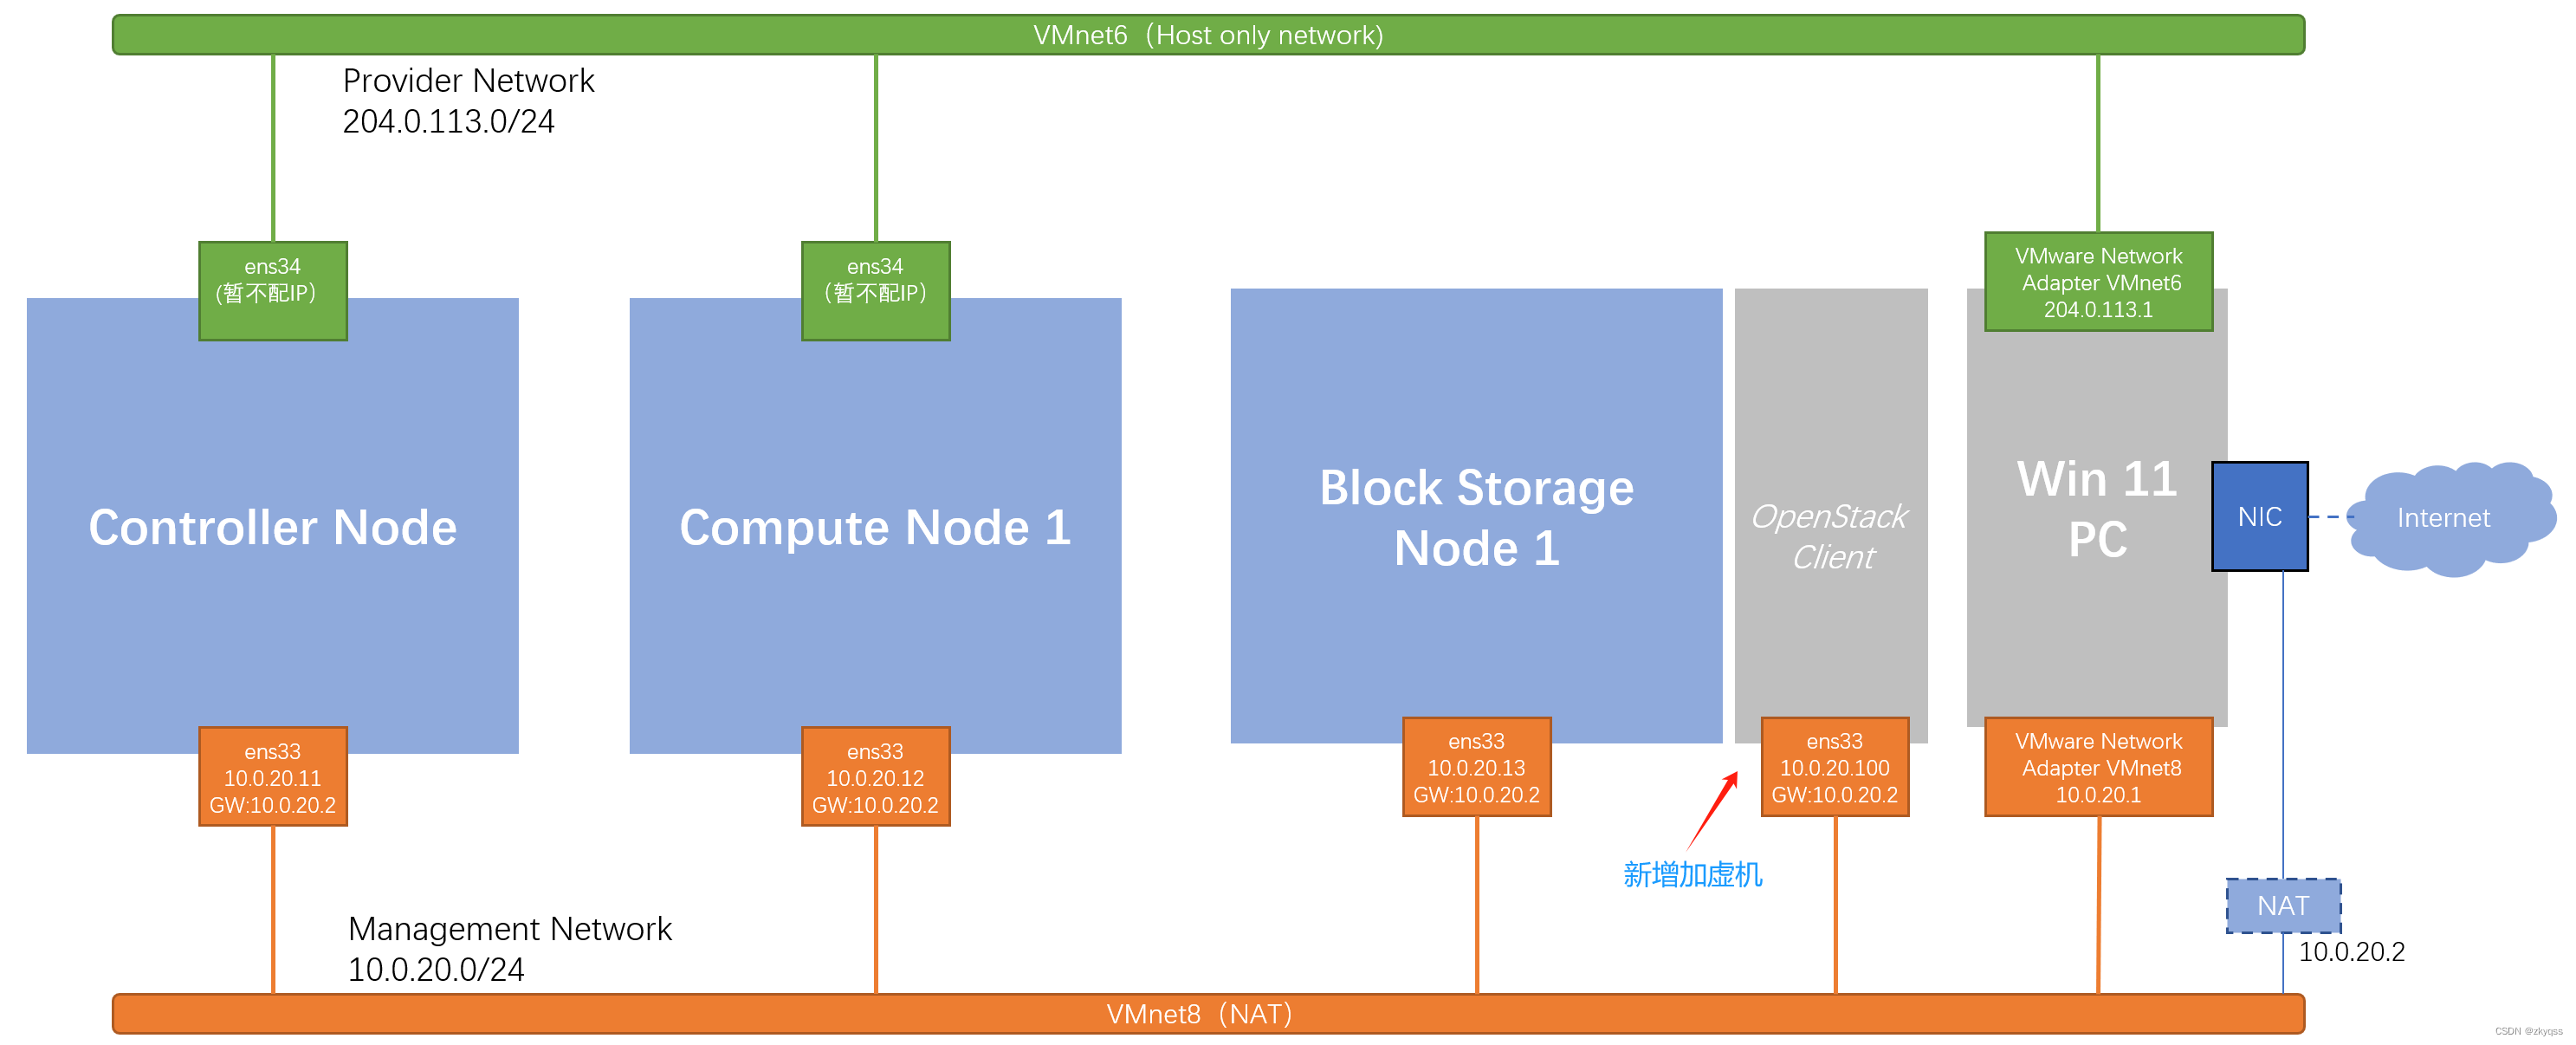
同前面一样准备这一台虚机,最小化安装Ubuntu 22.04,然后安装必要软件,进行相关配置即可:
1、安装ping、vim:

sudo apt update
sudo apt install vim -y
sudo apt install iputils-ping -y

2、修改hostname:

ubcode@os-4:~$ sudo hostnamectl set-hostname osclient
[sudo] password for ubcode:
ubcode@os-4:~$ sudo reboot

3、编辑/etc/hosts文件:

ubcode@osclient~(admin>admin)$ sudo vi /etc/hosts
ubcode@osclient~(admin>admin)$
ubcode@osclient~(admin>admin)$ cat /etc/hosts
127.0.0.1 localhost
# 127.0.1.1 os-4

# The following lines are desirable for IPv6 capable hosts
::1     ip6-localhost ip6-loopback
fe00::0 ip6-localnet
ff00::0 ip6-mcastprefix
ff02::1 ip6-allnodes
ff02::2 ip6-allrouters

10.0.20.31 controller
10.0.20.32 compute1

4、安装和配置NTP:

ubcode@osclient:~$ sudo apt install chrony
...
ubcode@osclient:~$ sudo vi /etc/chrony/chrony.conf
# pool ntp.ubuntu.com        iburst maxsources 4
# pool 0.ubuntu.pool.ntp.org iburst maxsources 1
# pool 1.ubuntu.pool.ntp.org iburst maxsources 1
# pool 2.ubuntu.pool.ntp.org iburst maxsources 2

server controller iburst
...

ubcode@osclient:~$ sudo service chrony restart

ubcode@osclient:~$ chronyc sources
MS Name/IP address         Stratum Poll Reach LastRx Last sample
===============================================================================
^* controller                    3   6    17     8  +2379ns[  -76us] +/-   19ms

5、安装OpenStackClient:

ubcode@osclient:~$ sudo apt install python3-openstackclient7、SQL database
大多数OpenStack服务使用SQL数据库来存储信息,数据库通常运行在控制节点上。
7.1 SQL database for Ubuntu
7.1.1 Install and configure components
1、安装mariadb软件包
root@controller:~# apt install mariadb-server python3-pymysql2、配置99-openstack.cnf
root@controller:~# vi /etc/mysql/mariadb.conf.d/99-openstack.cnf
root@controller:~# cat /etc/mysql/mariadb.conf.d/99-openstack.cnf
[mysqld]
bind-address = 10.0.20.11  <-- controller ip address

default-storage-engine = innodb
innodb_file_per_table = on
max_connections = 4096
collation-server = utf8_general_ci
character-set-server = utf8
root@controller:~#
7.1.2 Finalize installation
1、重启mysql服务
root@controller:~# service mysql restart
root@controller:~#
2、安全加固数据库
root@controller:~# mysql_secure_installation

NOTE: RUNNING ALL PARTS OF THIS SCRIPT IS RECOMMENDED FOR ALL MariaDB
      SERVERS IN PRODUCTION USE!  PLEASE READ EACH STEP CAREFULLY!

In order to log into MariaDB to secure it, we'll need the current
password for the root user. If you've just installed MariaDB, and
haven't set the root password yet, you should just press enter here.

Enter current password for root (enter for none):
OK, successfully used password, moving on...

Setting the root password or using the unix_socket ensures that nobody
can log into the MariaDB root user without the proper authorisation.

You already have your root account protected, so you can safely answer 'n'.

Switch to unix_socket authentication [Y/n] n
 ... skipping.

You already have your root account protected, so you can safely answer 'n'.

Change the root password? [Y/n] n
 ... skipping.

By default, a MariaDB installation has an anonymous user, allowing anyone
to log into MariaDB without having to have a user account created for
them.  This is intended only for testing, and to make the installation
go a bit smoother.  You should remove them before moving into a
production environment.

Remove anonymous users? [Y/n] y
 ... Success!

Normally, root should only be allowed to connect from 'localhost'.  This
ensures that someone cannot guess at the root password from the network.

Disallow root login remotely? [Y/n] y
 ... Success!

By default, MariaDB comes with a database named 'test' that anyone can
access.  This is also intended only for testing, and should be removed
before moving into a production environment.

Remove test database and access to it? [Y/n] y
 - Dropping test database...
 ... Success!
 - Removing privileges on test database...
 ... Success!

Reloading the privilege tables will ensure that all changes made so far
will take effect immediately.

Reload privilege tables now? [Y/n] y
 ... Success!

Cleaning up...

All done!  If you've completed all of the above steps, your MariaDB
installation should now be secure.

Thanks for using MariaDB!
root@controller:~#
3、数据库简单操作(optional)
root@controller:~# mysql
Welcome to the MariaDB monitor.  Commands end with ; or \g.
Your MariaDB connection id is 37
Server version: 10.6.18-MariaDB-0ubuntu0.22.04.1 Ubuntu 22.04

Copyright (c) 2000, 2018, Oracle, MariaDB Corporation Ab and others.

Type 'help;' or '\h' for help. Type '\c' to clear the current input statement.

MariaDB [(none)]> show grants for root@localhost;
+-----------------------------------------------------------------------------------------------------------------------------------------+
| Grants for root@localhost                                                                                                               |
+-----------------------------------------------------------------------------------------------------------------------------------------+
| GRANT ALL PRIVILEGES ON *.* TO `root`@`localhost` IDENTIFIED VIA mysql_native_password USING 'invalid' OR unix_socket WITH GRANT OPTION |
| GRANT PROXY ON ''@'%' TO 'root'@'localhost' WITH GRANT OPTION                                                                           |
+-----------------------------------------------------------------------------------------------------------------------------------------+
2 rows in set (0.000 sec)

MariaDB [(none)]> select user,host,password from mysql.user;
+-------------+-----------+----------+
| User        | Host      | Password |
+-------------+-----------+----------+
| mariadb.sys | localhost |          |
| root        | localhost | invalid  |
| mysql       | localhost | invalid  |
+-------------+-----------+----------+
3 rows in set (0.001 sec)

MariaDB [(none)]> show databases;
+--------------------+
| Database           |
+--------------------+
| information_schema |
| mysql              |
| performance_schema |
| sys                |
+--------------------+
4 rows in set (0.000 sec)

MariaDB [(none)]> quit
Bye
root@controller:~# 8、Message queue
OpenStack使用消息队列来协调各服务之间的操作和状态信息。消息队列服务通常运行在控制节点上。这里采用RabbitMQ消息队列服务。
8.1 Message queue for Ubuntu
8.1.1 Install and configure components
1、安装rabbitmq软件包
root@controller:~# apt install rabbitmq-server2、新增openstack user
root@controller:~# rabbitmqctl add_user openstack openstack
Adding user "openstack" ...
Done. Don't forget to grant the user permissions to some virtual hosts! See 'rabbitmqctl help set_permissions' to learn more.
root@controller:~#
密码设置为:openstack
3、给openstack user添加权限
root@controller:~# rabbitmqctl set_permissions openstack ".*" ".*" ".*"
Setting permissions for user "openstack" in vhost "/" ...
root@controller:~# 这个命令的作用是给予openstack user在RabbitMQ服务器上所有虚拟主机的所有资源(队列)发布和订阅消息的权限。这通常是为了确保OpenStack服务能够通过RabbitMQ正常通信。
9、Memcached
OpenStack身份认证服务(Identity service)在对其他服务进行认证时,会使用Memcached来存储令牌。
Memcached是一个高性能的分布式内存缓存系统,常用于提高Web应用程序的性能,通过缓存数据减少数据库的访问次数。
这里的“令牌”(token)通常是指在计算机系统中用于身份验证的一段数据。它可以是一串字符或者一个加密的代码,用来代表用户的登录凭证。当用户登录系统后,系统会生成一个令牌,并将其发送给用户。用户在随后的请求中携带这个令牌,系统通过验证令牌来确认用户的身份,从而允许用户访问相应的资源或服务。使用令牌的好处是可以减少对用户名和密码的重复验证,提高系统的响应速度和安全性。
Memcached服务通常运行在控制器节点上。
9.1 Memcached for Ubuntu
9.1.1 Install and configure components
1、安装memcached软件包
root@controller:~# apt install memcached python3-memcache2、编辑/etc/memcached.conf
root@controller:~# vi /etc/memcached.conf
...
# Specify which IP address to listen on. The default is to listen on all IP addresses
# This parameter is one of the only security measures that memcached has, so make sure
# it's listening on a firewalled interface.
-l 10.0.20.11
...
9.1.2 Finalize installation
重启memcached服务:
root@controller:~# service memcached restart10、Etcd
Etcd是一个可选的组件,OpenStack服务可能会用到它,用于分布式键锁(distributed key locking)、存储配置信息、跟踪服务的状态等场景。
Etcd服务通常运行在控制器节点上。
10.1.1 Install and configure components
1、安装etcd软件包
root@controller:~# apt install etcd2、编辑/etc/default/etcd
root@controller:~# vi /etc/default/etcd
(可以在结尾处添加:)

ETCD_NAME="controller"
ETCD_DATA_DIR="/var/lib/etcd"
ETCD_INITIAL_CLUSTER_STATE="new"
ETCD_INITIAL_CLUSTER_TOKEN="etcd-cluster-01"
ETCD_INITIAL_CLUSTER="controller=http://10.0.20.11:2380"
ETCD_INITIAL_ADVERTISE_PEER_URLS="http://10.0.20.11:2380"
ETCD_ADVERTISE_CLIENT_URLS="http://10.0.20.11:2379"
ETCD_LISTEN_PEER_URLS="http://0.0.0.0:2380"
ETCD_LISTEN_CLIENT_URLS="http://10.0.20.11:2379"
10.1.2 Finalize installation
重启etcd服务:
root@controller:~# systemctl enable etcd
Synchronizing state of etcd.service with SysV service script with /lib/systemd/systemd-sysv-install.
Executing: /lib/systemd/systemd-sysv-install enable etcd
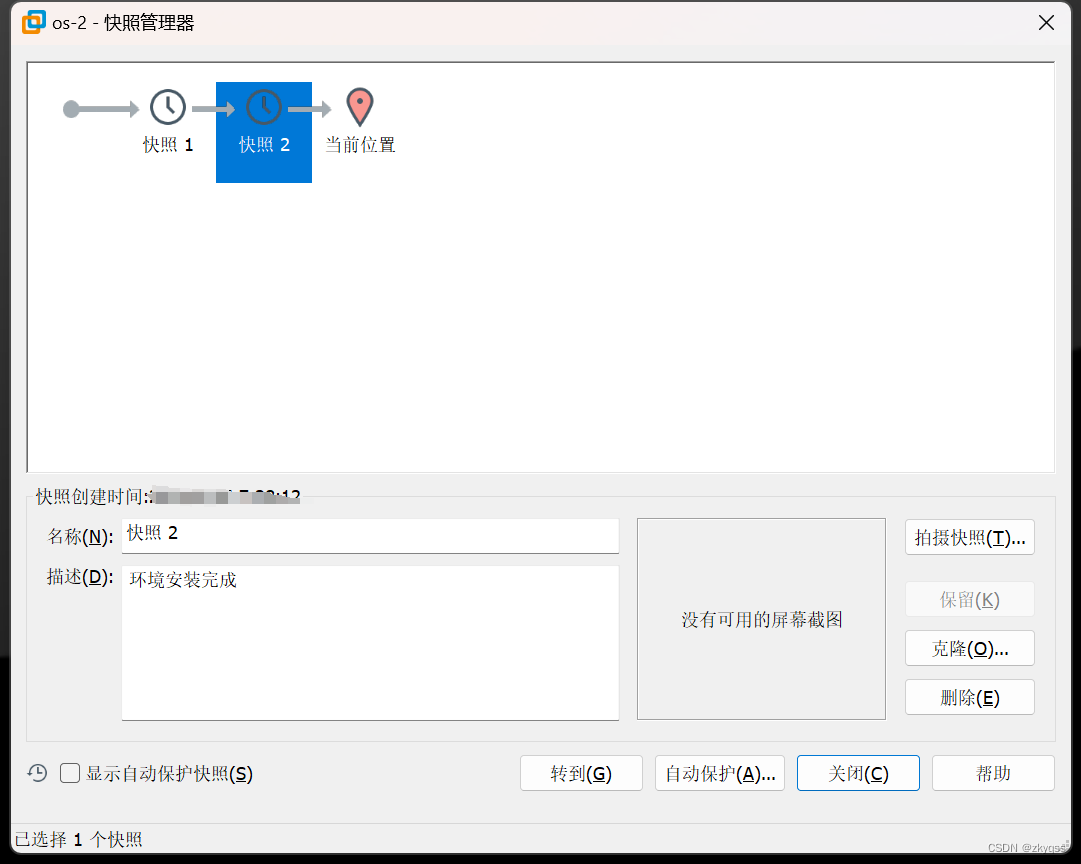
root@controller:~# systemctl restart etcd11、拍摄快照
环境安装完成,关闭虚机,拍摄快照。
11.1 Controller node拍摄快照

11.2 Compute node拍摄快照


 870
870


 被折叠的 条评论
为什么被折叠?
被折叠的 条评论
为什么被折叠?
 到【灌水乐园】发言


