总览
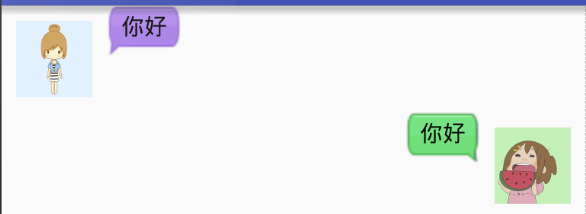
- 基于图灵机器人接口的聊天机器人的实现
- 效果如图所示,由于是在模拟器上,我无法输入中文,其实这个是可以实现中文对话的
Step1 界面布局的实现
- 在每条聊天条目中都包括如下内容,这样在根据消息的类型(收/发)来确定让左边的控件显示还是右边的控件显示
<?xml version="1.0" encoding="utf-8"?>
<LinearLayout xmlns:android="http://schemas.android.com/apk/res/android"
    android:orientation="vertical" android:layout_width="match_parent"
    android:layout_height="wrap_content"
    >

    <LinearLayout
        android:id="@+id/linearlyaout_left"
        android:layout_width="wrap_content"
        android:layout_height="wrap_content"
        android:layout_gravity="left">
        <ImageView
            android:id="@+id/left_girl"
            android:layout_width="50dp"
            android:layout_height="50dp"
            android:layout_margin="10dp"
            android:src="@drawable/girl2"/>
        <TextView
            android:id="@+id/textView_receive"
            android:layout_width="wrap_content"
            android:layout_height="wrap_content"
            android:background="@drawable/left"
            android:textColor="#000000"
            android:textSize="15dp"
            android:text="你好"/>
    </LinearLayout>

    <LinearLayout
        android:id="@+id/linearlyaout_right"
        android:layout_width="wrap_content"
        android:layout_height="wrap_content"
        android:layout_gravity="right">
        <TextView
            android:id="@+id/textView_send"
            android:layout_width="wrap_content"
            android:layout_height="wrap_content"
            android:background="@drawable/right"
            android:textColor="#000000"
            android:textSize="15dp"
            android:text="你好"/>
        <ImageView
            android:id="@+id/right_girl"
            android:layout_width="50dp"
            android:layout_height="50dp"
            android:layout_margin="10dp"
            android:src="@drawable/girl1"/>
    </LinearLayout>

</LinearLayout>
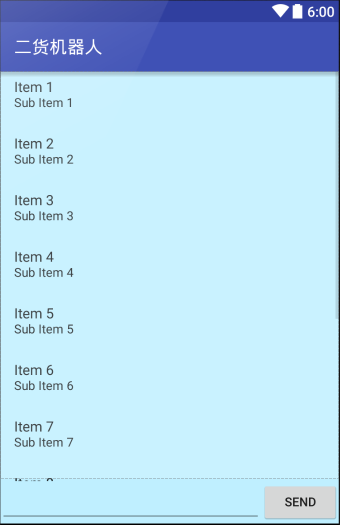
- 主界面的布局就通过添加一个listView,一个EditText和一个Button来实现,通过Button的点击事件,来发送消息,更新listView中数据。
<?xml version="1.0" encoding="utf-8"?>
<LinearLayout
    xmlns:android="http://schemas.android.com/apk/res/android"
    xmlns:tools="http://schemas.android.com/tools"
    android:layout_width="match_parent"
    android:layout_height="match_parent"
    android:orientation="vertical"
    android:background="#BFEFFF"
    tools:context="com.lingzhuo.onlyrobot.MainActivity">

    <ListView
        android:layout_width="match_parent"
        android:layout_height="0dip"
        android:id="@+id/listView"
        android:divider="@null"
        android:focusable="false"
        android:focusableInTouchMode="false"
        android:listSelector="#00000000"
        android:cacheColorHint="#00000000"
        android:layout_weight="1" />

    <LinearLayout
        android:layout_width="match_parent"
        android:layout_height="wrap_content">
        <EditText
            android:id="@+id/editText"
            android:layout_width="0dip"
            android:layout_height="match_parent"
            android:layout_weight="1"
            />
        <Button
            android:id="@+id/btn_send"
            android:layout_width="wrap_content"
            android:layout_height="match_parent"
            android:text="Send"/>
    </LinearLayout>
</LinearLayout>
Step2 图灵机器人接口及代码实现逻辑
- 聊天功能调用了图灵机器人的接口(http://www.tuling123.com/)
- 关于接口的使用图灵机器人的官网上面已经讲得很详细了,APIKEY只需要注册一下在个人中心就可以获取到(接口的实现很简单,请自行查阅官网,需要自己登录注册)
- 图灵机器人官网个人信息中查看自己的API_KEY
- 我们先新建一个MyMsg消息类,listView中接收的数据类型
- 此类用来存放消息的内容,id等等;
package com.lingzhuo.onlyrobot;

/**
 * Created by Wang on 2016/3/19.
 */
public class MyMsg {
    public static final int TYPR_SENT=0;
    public static final int TYPR_RECEIVRD=1;
    private String msg;
    private int type;

    public MyMsg(String msg, int type) {
        this.msg = msg;
        this.type = type;
    }

    public String getMsg() {
        return msg;
    }

    public void setMsg(String msg) {
        this.msg = msg;
    }

    public int getType() {
        return type;
    }

    public void setType(int type) {
        this.type = type;
    }
}
- 由于要用到ListView并且向其中添加自己自定义的条目布局,所以需要自己写一个Adapter适配器,将listView和数据进行适配
- 复用convertView解决布局文件重复加载的问题
- 建立ViewHolder类,解决布局文件中重复findViewById方法的调用
- 通过上面两个的复用,提高ListView的效率
public class MyAdapter extends ArrayAdapter<MyMsg> {
private int item_layout
public MyAdapter(Context context,int textViewResourceId, List<MyMsg> objects) {
super(context,textViewResourceId, objects)
item_layout=textViewResourceId
}
@Override
public View getView(int position, View convertView, ViewGroup parent) {
MyMsg myMsg=getItem(position)
View view
ViewHolder viewHolder
if (convertView==null){
view= LayoutInflater.from(getContext()).inflate(item_layout,null)
viewHolder=new ViewHolder()
viewHolder.textView_receive= (TextView) view.findViewById(R.id.textView_receive)
viewHolder.textView_send= (TextView) view.findViewById(R.id.textView_send)
viewHolder.leftImageView= (ImageView) view.findViewById(R.id.left_girl)
viewHolder.rightImageView= (ImageView) view.findViewById(R.id.right_girl)
viewHolder.leftLinearLayout= (LinearLayout) view.findViewById(R.id.linearlyaout_left)
viewHolder.rightLinearLayout= (LinearLayout) view.findViewById(R.id.linearlyaout_right)
view.setTag(viewHolder)
}else{
view=convertView
viewHolder= (ViewHolder) view.getTag()
}
if (MyMsg.TYPR_SENT==myMsg.getType()){
viewHolder.textView_receive.setVisibility(View.GONE)
viewHolder.leftImageView.setVisibility(View.GONE)
viewHolder.textView_send.setVisibility(View.VISIBLE)
viewHolder.rightImageView.setVisibility(View.VISIBLE)
viewHolder.textView_send.setText(myMsg.getMsg())
}else if (MyMsg.TYPR_RECEIVRD==myMsg.getType()){
viewHolder.textView_send.setVisibility(View.GONE)
viewHolder.rightImageView.setVisibility(View.GONE)
viewHolder.textView_receive.setVisibility(View.VISIBLE)
viewHolder.leftImageView.setVisibility(View.VISIBLE)
viewHolder.textView_receive.setText(myMsg.getMsg())
}
return view
}
class ViewHolder{
TextView textView_receive
TextView textView_send
ImageView leftImageView
ImageView rightImageView
LinearLayout leftLinearLayout
LinearLayout rightLinearLayout
}
}
- 由于主线程中不能进行过于耗时的操作,所以我们在点击SEND按钮的时候,就开启一个新的线程,而在自己开启的线程里面不能更新UI,所以使用了handler将获取到的消息传递 给UI线程,在新线程中将消息发送到图灵机器人的接口上,同时更新listView中的信息,并且解析返回的数据,将返回的数据通过handler将获取到的消息传递 给UI线程。
public class MainActivity extends AppCompatActivity {
private ListView listView;
private EditText editText;
private Button button;
private List<MyMsg> data = new ArrayList<>();
private MyAdapter adapter;
protected void onCreate(Bundle savedInstanceState) {
super.onCreate(savedInstanceState);
setContentView(R.layout.activity_main);
button = (Button) findViewById(R.id.btn_send);
listView = (ListView) findViewById(R.id.listView);
editText = (EditText) findViewById(R.id.editText);
adapter = new MyAdapter(getApplicationContext(), R.layout.item_layout, data);
listView.setAdapter(adapter);
button.setOnClickListener(new View.OnClickListener() {
@Override
public void onClick(View v) {
new Thread(new Runnable() {
@Override
public void run() {
String str = editText.getText().toString();
MyMsg mysendMsg = new MyMsg(str, MyMsg.TYPR_SENT);
Message sendMessage = new Message();
sendMessage.obj = mysendMsg;
sendMessage.what=0;
handler.sendMessage(sendMessage);
String responString=getBackMsg(str);
MyMsg myReceiveMsg = new MyMsg(responString, MyMsg.TYPR_RECEIVRD);
Message receiveMessage = new Message();
receiveMessage.obj = myReceiveMsg;
handler.sendMessage(receiveMessage);
}
}).start();
}
});
}
private Handler handler = new Handler() {
@Override
public void handleMessage(Message msg) {
MyMsg myMsg= (MyMsg) msg.obj;
if (msg.what==0){
editText.setText("");
}
data.add(myMsg);
scrollMyListViewToBottom();
adapter.notifyDataSetChanged();
}
};
private void scrollMyListViewToBottom() {
listView.post(new Runnable() {
@Override
public void run() {
listView.setSelection(adapter.getCount() - 1);
}
});
}
public static String getBackMsg(String str){
URL url;
String backString = null;
try {
url = new URL("http://www.tuling123.com/openapi/api");
HttpURLConnection conn = (HttpURLConnection) url.openConnection();
conn.setRequestMethod("POST");
conn.setConnectTimeout(1000);
conn.setDoOutput(true);
conn.setDoInput(true);
sendMessage(conn,str);
backString=receiveMessage(conn);
} catch (MalformedURLException e1) {
e1.printStackTrace();
} catch (IOException e) {
e.printStackTrace();
}
return backString;
}
private static void sendMessage(HttpURLConnection conn,String str) {
String API_KEY = "**************************";
String requestString = "key=" + API_KEY + "&info=" + str;
OutputStream outputStream;
try {
outputStream = conn.getOutputStream();
outputStream.write(requestString.getBytes("UTF-8"));
outputStream.flush();
} catch (IOException e) {
e.printStackTrace();
}
}
private static String receiveMessage(HttpURLConnection conn){
BufferedReader reader;
String responseString = "";
String line="";
JSONObject jsonObject=null;
try {
reader = new BufferedReader(new InputStreamReader(conn.getInputStream()));
String temp="";
while ((temp = reader.readLine()) != null) {
responseString += temp;
}
jsonObject=new JSONObject(responseString);
line=jsonObject.getString("text");
} catch (IOException e) {
e.printStackTrace();
} catch (JSONException e) {
e.printStackTrace();
}
return line;
}
}


 671
671

 被折叠的 条评论
为什么被折叠?
被折叠的 条评论
为什么被折叠?
 到【灌水乐园】发言


