


前面两章内容我们学习了如何设计音乐播放器页面、组件简化、进度条功能,这期我们最终完善此项目。
ArkTs鸿蒙开发入门学习——自定义音乐播放器(一)含源码-CSDN博客
ArkTs鸿蒙开发入门学习——自定义音乐播放器(二)含源码-CSDN博客
目录
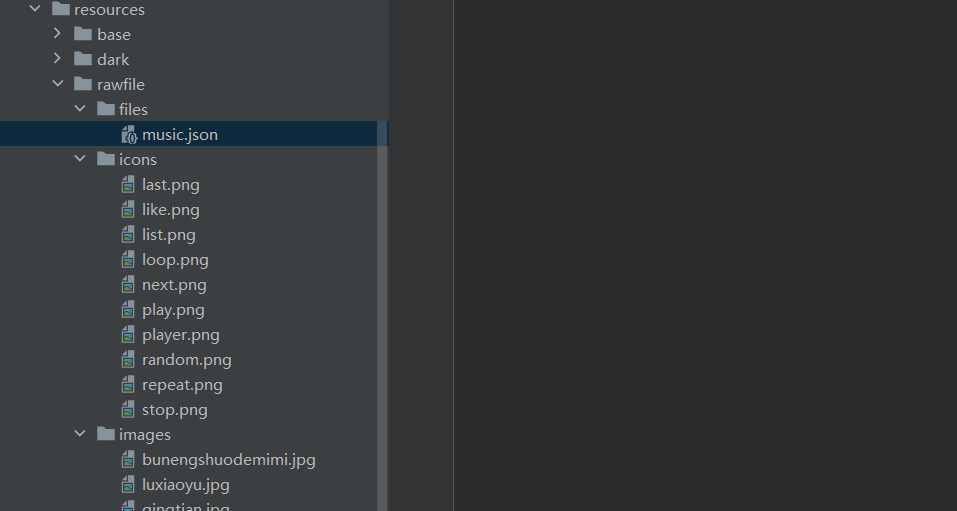
1、在rawfile下创建files文件夹,并创建misic.json文件。
2.同样创建my.json定义一个播放列表文件,主要是帮助简化播放器调用复杂程度。
一、文件保存
1、在rawfile下创建files文件夹,并创建misic.json文件。
对于开发中的文本,一般用于存储数据/传输的文件,一般都是用json类型的字符串
在music.json文件中 编辑:
[
  {
    "id": "1",
    "name": "路小雨",
    "src": "music/luxiaoyu.mp3",
    "imageSrc": "images/luxiaoyu.jpg",
    "player": "周杰伦",
    "writer": "周杰伦"
  },
  {
  "id": "2",
  "name": "不能说的秘密",
  "src": "music/bunengshuodemimi.mp3",
  "imageSrc": "images/bunengshuodemimi.jpg",
  "player": "周杰伦",
  "writer": "周杰伦"
  },
  {
  "id": "3",
  "name": "晴天",
  "src": "music/qingtian.mp3",
  "imageSrc": "images/qingtian.jpg",
  "player": "周杰伦",
  "writer": "周杰伦"
  },
  {
    "id": "4",
    "name": "一路向北",
    "src": "music/yiluxiangbei.flac",
    "imageSrc": "images/yiluxiangbei.jpg",
    "player": "周杰伦",
    "writer": "周杰伦"
  }
]
2.同样创建my.json定义一个播放列表文件,主要是帮助简化播放器调用复杂程度。
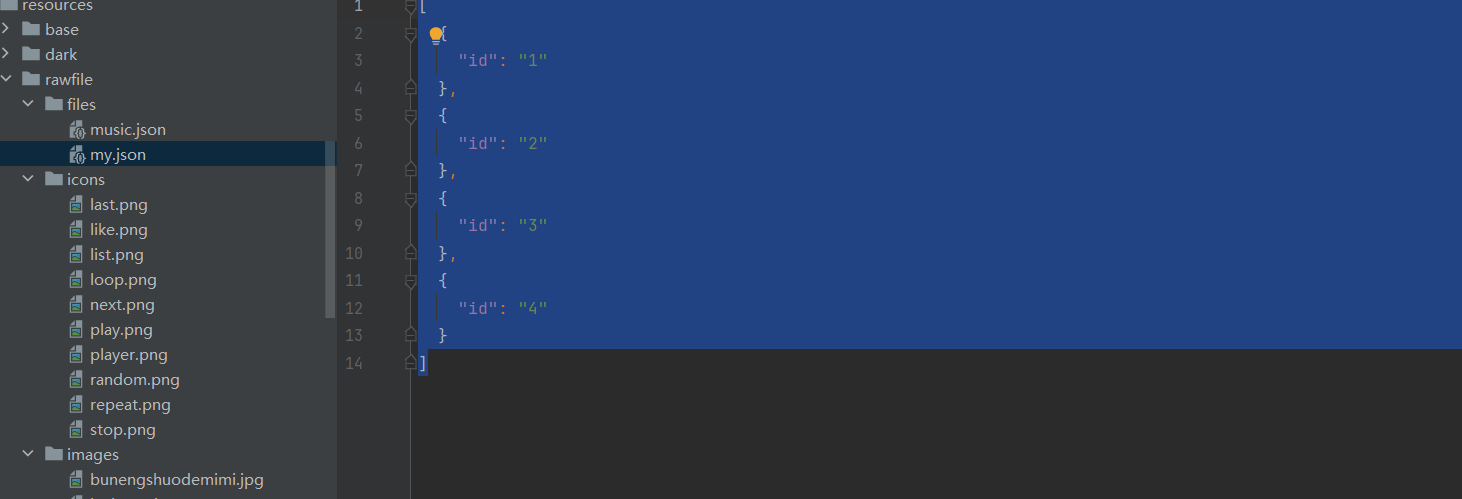
[
  {
    "id": "1"
  },
  {
    "id": "2"
  },
  {
    "id": "3"
  },
  {
    "id": "4"
  }
]
二、读取本地文件
1.导入包
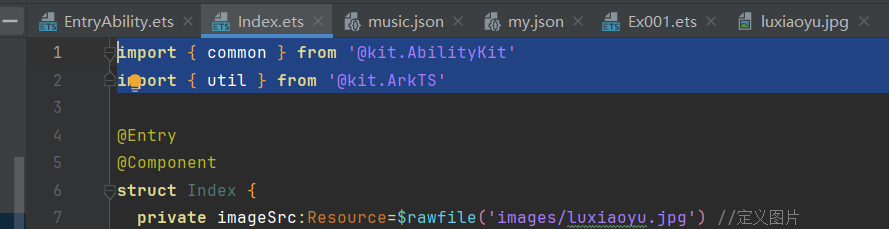
import { common } from '@kit.AbilityKit'
import { util } from '@kit.ArkTS'
2.测试用例
创建测试方法
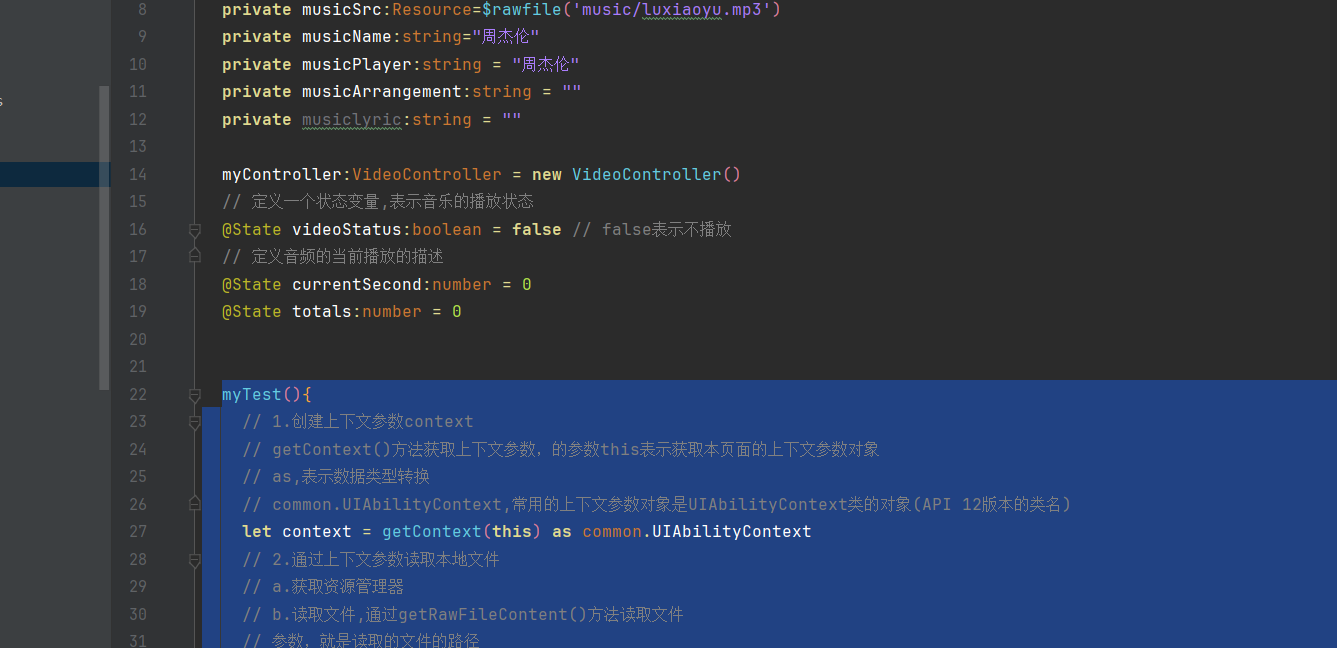
a.代码如下:
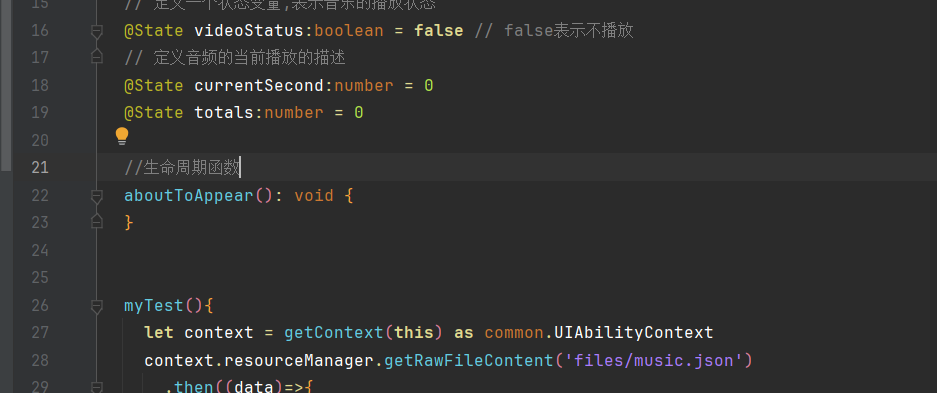
myTest(){

    let context = getContext(this) as common.UIAbilityContext
    context.resourceManager.getRawFileContent('files/music.json')
      .then((data)=>{
        let textdecoder = util.TextDecoder.create("UTF-8")
        let decodedData = textdecoder.decodeToString(data)
        let musicArr:Array<Music> = JSON.parse(decodedData)
        for(let music of musicArr){
          console.log("==============> " + music.name)
        }
      })
  }
b.结尾定义接口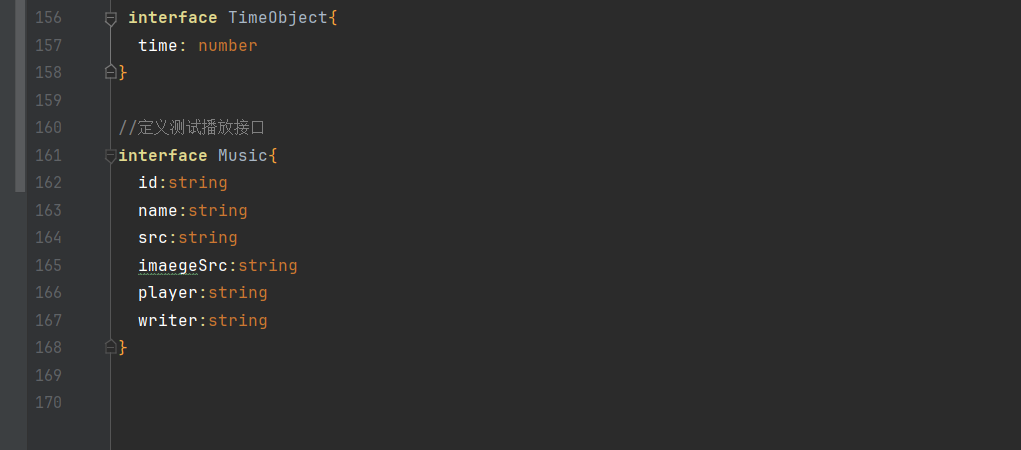
代码如下:
interface Music{
  id:string
  name:string
  src:string
  imaegeSrc:string
  player:string
  writer:string
}
c.测试调用(以循环按钮为例)

Row(){
Image($rawfile('icons/loop.png'))
.width('12%')
.onClick(()=>{
this.myTest()
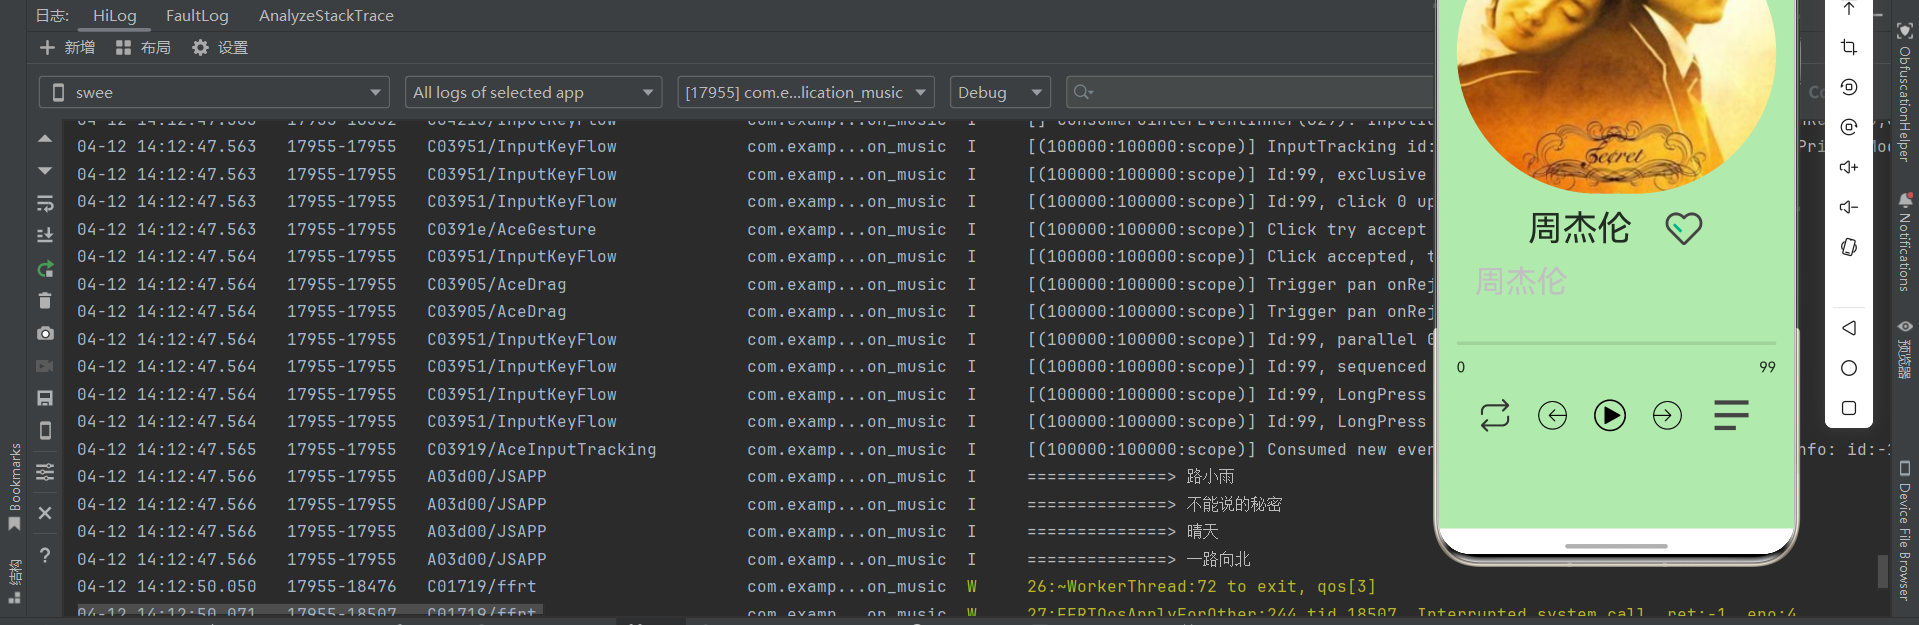
})测试结构如下,当点击循环按钮时,日志中显示四首曲目
 三、生命周期函数
实际开发的过程中,应该是加载页面的时候,就会读取本地文件,形成播放列表信息 ,在ArkTS中,有两种生命周期,一个叫Ability的生命周期,一个叫页面的生命周期,在加载页面的时候调用的生命周期函数。
aboutToAppear(): void {
}
1.将代码中的播放以及细腻展示全部转化为数组的形式:
以图片为例,后续完整代码会在最后列出
四、上一曲下一曲切换实现
上一曲:
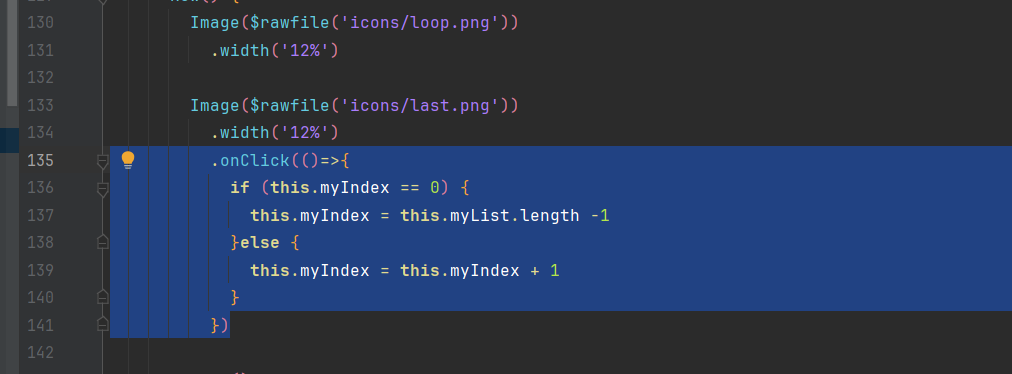
下一曲: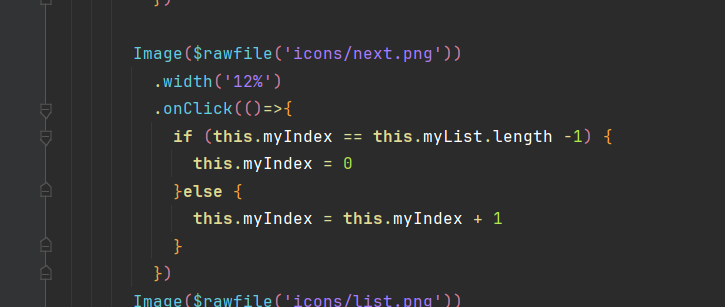
这样我们就学会了如何切换四首曲子。
写了这么久播放jay的歌真是如听仙乐耳暂明吖。
五、完善列表弹出功能
在ets下创建customDialog文件夹和CustomDialog.ets代码文件
代码如下
import { Music } from "..//pages/Index"
@CustomDialog // 表示这个组件是一个自定义的弹出层组件
// export default表示需要导出该组件
export default struct ListDialog{
// 自定义弹出层必须要有的一个变量,控制器变量
myController:CustomDialogController = new CustomDialogController({
builder:ListDialog()
})
// 自定义弹出的作用是弹出播放列表,需要一个变量保存播放列表
myList:Array<Music> = []
build() {
// 展示弹出层的样式
Column({space:5}){
ForEach(this.myList,(music:Music)=>{
Text(music.name)
})
}
}
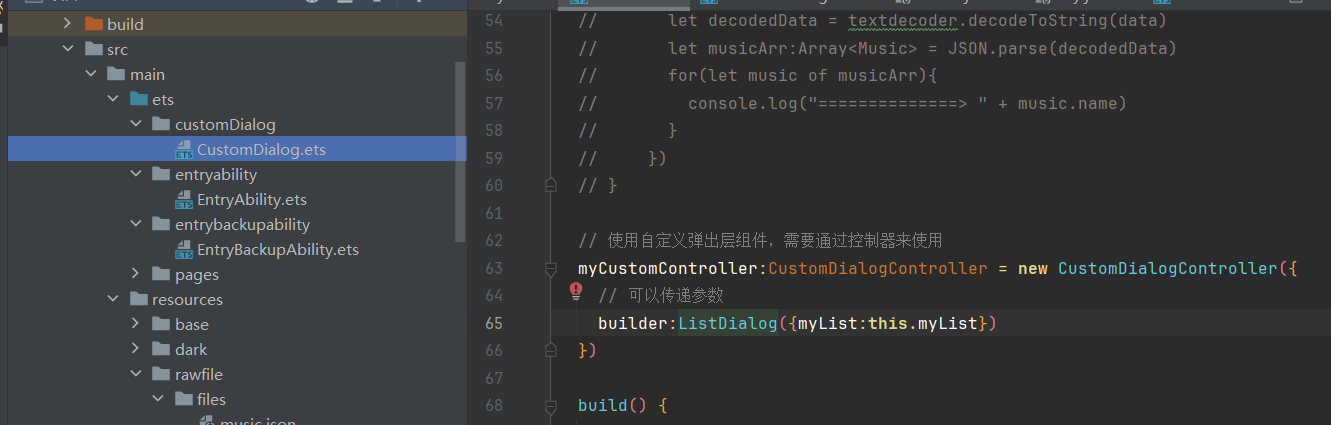
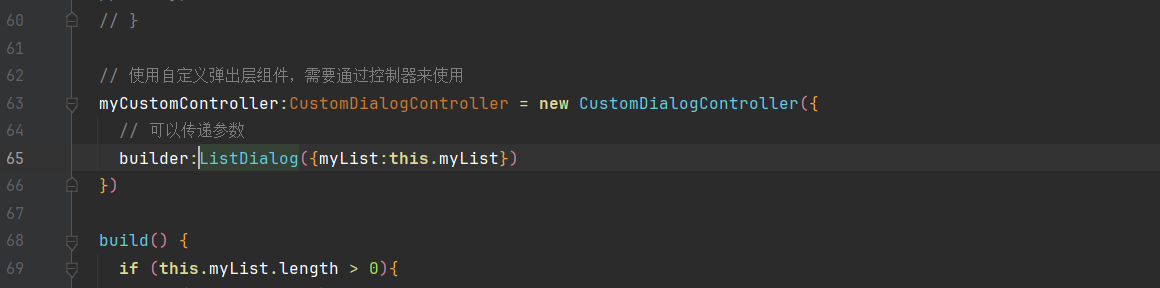
}在Index.ets中调用
// 使用自定义弹出层组件,需要通过控制器来使用
myCustomController:CustomDialogController = new CustomDialogController({
  // 可以传递参数
  builder:ListDialog({myList:this.myList})
})
效果如图所示:
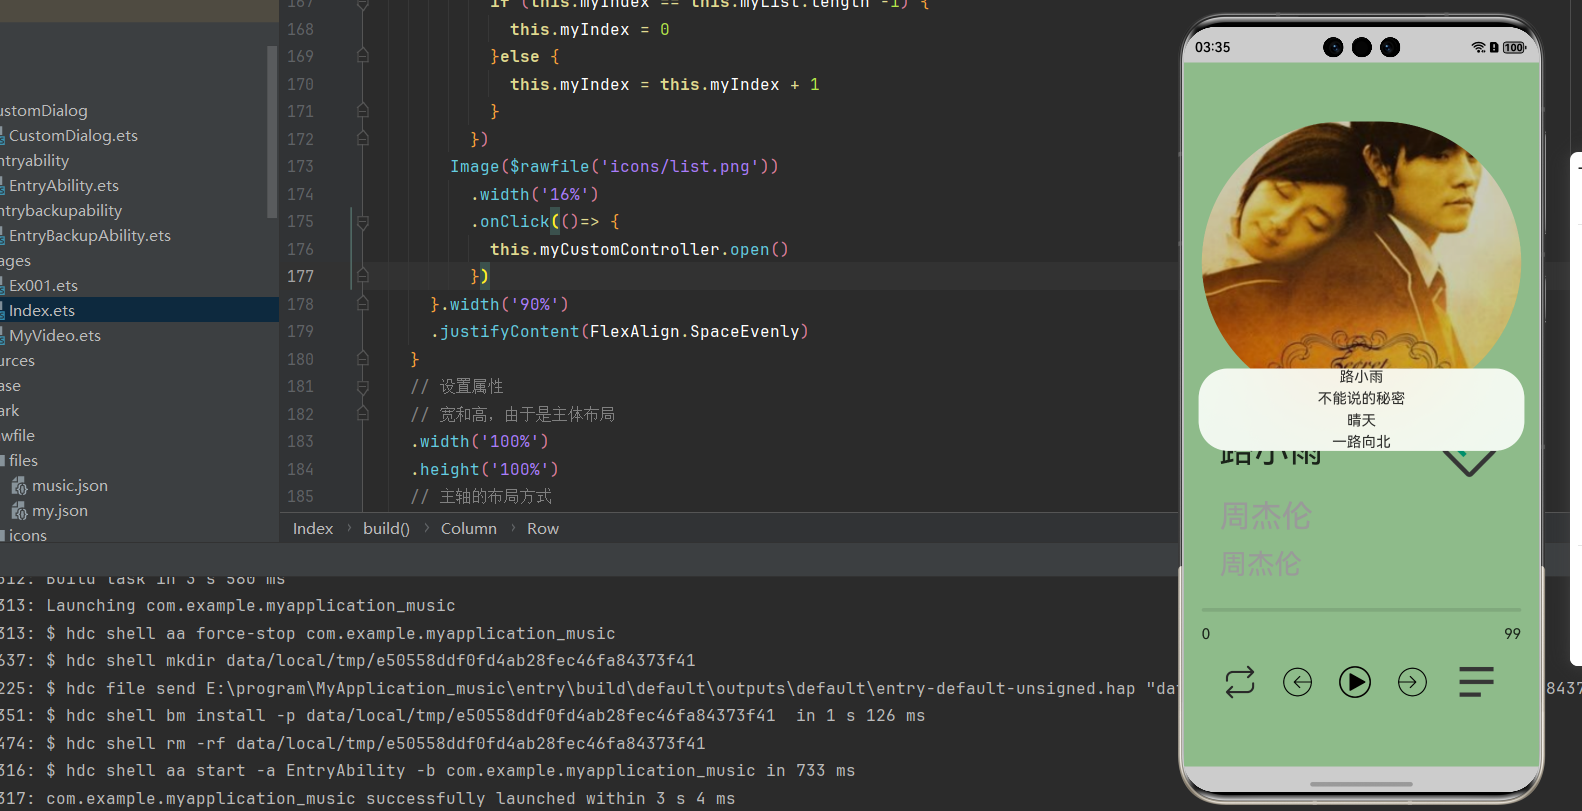
六、项目完整代码:
1.index.ets
import { common } from '@kit.AbilityKit'
import { util } from '@kit.ArkTS'
import ListDialog from '../customDialog/CustomDialog'
@Entry
@Component
struct Index {
myController:VideoController = new VideoController()
// 定义一个状态变量,表示音乐的播放状态
@State videoStatus:boolean = false // false表示不播放
// 定义音频的当前播放的描述
@State currentSecond:number = 0
@State totals:number = 0
@State myList:Array<Music> = []
@State myIndex:number = 0
//生命周期函数
aboutToAppear(): void {
let context=getContext(this) as common.UIAbilityContext
//获取播放列表数组
context.resourceManager.getRawFileContent('files/my.json')
.then((data)=>{
let textdecoder = util.TextDecoder.create("UTF-8")
let decodedData = textdecoder.decodeToString(data)
let myArr:Array<My> = JSON.parse(decodedData)
//获取歌曲数据
context.resourceManager.getRawFileContent('files/music.json')
.then((data)=>{
let textdecoder = util.TextDecoder.create("UTF-8")
let decodedData = textdecoder.decodeToString(data)
let musicArr:Array<Music> = JSON.parse(decodedData)
// 对播放列表进行组装
for(let my of myArr){
for (let music of musicArr){
if(my.id === music.id){
this.myList.push(music)
}
}
}
})
})
}
// myTest(){
// let context = getContext(this) as common.UIAbilityContext
// context.resourceManager.getRawFileContent('files/music.json')
// .then((data)=>{
// let textdecoder = util.TextDecoder.create("UTF-8")
// let decodedData = textdecoder.decodeToString(data)
// let musicArr:Array<Music> = JSON.parse(decodedData)
// for(let music of musicArr){
// console.log("==============> " + music.name)
// }
// })
// }
// 使用自定义弹出层组件,需要通过控制器来使用
myCustomController:CustomDialogController = new CustomDialogController({
// 可以传递参数
builder:ListDialog({myList:this.myList})
})
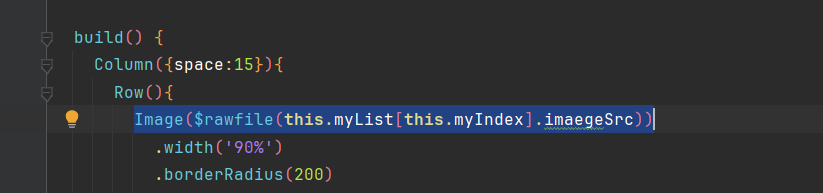
build() {
if (this.myList.length > 0){
Column({ space: 15 }) {
Row() {
Image($rawfile(this.myList[this.myIndex].imageSrc))
.width('90%')
.borderRadius(200)
// 使用锐角,可以将方形的组件变成圆形
}.width('100%')
.height('40%')
.justifyContent(FlexAlign.Center)
// 第二行
Row() {
Text(this.myList[this.myIndex].name)
.fontSize(38)
Image($rawfile('icons/like.png'))
.width('24%')
}.width('80%')
.justifyContent(FlexAlign.SpaceBetween)
// 第三行
Row() {
Text(this.myList[this.myIndex].player)
.fontSize(34)
.fontColor('#C0C0C0')
}.width('80%')
.justifyContent(FlexAlign.Start)
// 第四行
Row() {
Text(this.myList[this.myIndex].writer)
.fontSize(30)
.fontColor('#C0C0C0')
}.width('80%')
.justifyContent(FlexAlign.Start)
Video({ src: $rawfile(this.myList[this.myIndex].src), controller: this.myController })
.controls(false)// 隐藏video组件默认的控制栏
.height('0%')// 隐藏Video组件不显示
// 通过prepared事件方法获取音频的总时长,使用方式通过官网的示例查询
// 有个一个参数 e:DurationObject
.onPrepared((e?: DurationObject) => {
if (e != undefined) {
this.totals = e.duration
console.log("=========> 2 " + this.totals)
}
})
.onUpdate((e?: TimeObject) => {
if (e != undefined) {
this.currentSecond = e.time
console.log("=========> 1 " + this.currentSecond)
}
})
// value:表示当前播放的进度
// total:表示总体的进度
// type:表示进度条的样式,ProgressType.Linear,表示线性进度条
Progress({ value: this.currentSecond, total: this.totals, type: ProgressType.Linear })
.width('90%')
Row() {
Text(this.currentSecond + "")
Text(this.totals + "")
}.width("90%")
.justifyContent(FlexAlign.SpaceBetween)
Row() {
Image($rawfile('icons/loop.png'))
.width('12%')
Image($rawfile('icons/last.png'))
.width('12%')
.onClick(()=>{
if (this.myIndex == 0) {
this.myIndex = this.myList.length -1
}else {
this.myIndex = this.myIndex + 1
}
})
Button()
.type(ButtonType.Circle)
.myButtonStyle()// 调用自定义的属性方法集合
.onClick(() => {
// 通过this.videoStatus播放变量更改播放/暂停状态
if (this.videoStatus) {
this.videoStatus = false
this.myController.pause()
} else {
this.videoStatus = true
this.myController.start()
}
})
Image($rawfile('icons/next.png'))
.width('12%')
.onClick(()=>{
if (this.myIndex == this.myList.length -1) {
this.myIndex = 0
}else {
this.myIndex = this.myIndex + 1
}
})
Image($rawfile('icons/list.png'))
.width('16%')
.onClick(()=> {
this.myCustomController.open()
})
}.width('90%')
.justifyContent(FlexAlign.SpaceEvenly)
}
// 设置属性
// 宽和高,由于是主体布局
.width('100%')
.height('100%')
// 主轴的布局方式
.justifyContent(FlexAlign.Center)
// 交叉轴的居中布局方式
.alignItems(HorizontalAlign.Center)
// 主体的背景颜色和背景图片
.backgroundColor('#ffb1eaad')
}
}
//自定义属性方法
@Styles myButtonStyle(){
.backgroundColor('#ffb1eaad')
.width('12%')
.opacity(1)
.backgroundImage(this.videoStatus ? $rawfile('icons/stop.png') : $rawfile('icons/play.png'))
.backgroundImageSize({width:'100%',height:'100%'})
}
}
//自定义接口
interface DurationObject{
duration: number
}
interface TimeObject{
time: number
}
//定义测试播放接口
export interface Music{
id:string
name:string
src:string
imageSrc:string
player:string
writer:string
}
interface My{
id:string
}
2.CustomDialog.ets
import { Music } from "..//pages/Index"
@CustomDialog // 表示这个组件是一个自定义的弹出层组件
  // export default表示需要导出该组件
export default struct ListDialog{
  // 自定义弹出层必须要有的一个变量,控制器变量
  myController:CustomDialogController = new CustomDialogController({
    builder:ListDialog()
  })
  // 自定义弹出的作用是弹出播放列表,需要一个变量保存播放列表
  myList:Array<Music> = []
  build() {
    // 展示弹出层的样式
    Column({space:5}){
      ForEach(this.myList,(music:Music)=>{
        Text(music.name)
      })

    }
  }
}
本期所有内容就此结束啦,本人是为在校学生,所编辑内容均来自课堂和老师,制作不易欢迎点赞收藏!!!


 1315
1315

 被折叠的 条评论
为什么被折叠?
被折叠的 条评论
为什么被折叠?
 到【灌水乐园】发言


