


一、卷积操作
以conv2d为例
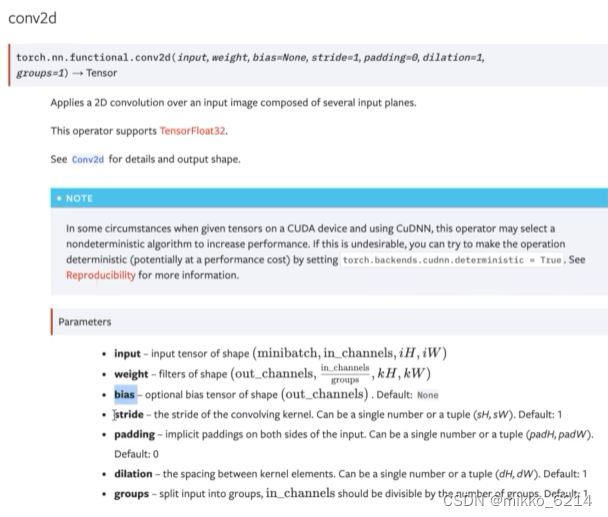
常用参数:
input: 输入图像
weight: 卷积核
stride: 步长
padding: 填充大小
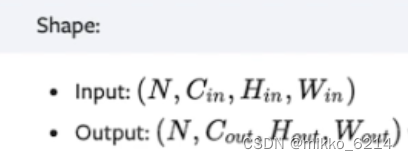
input和weight的尺寸要求均为4个参数
相关参数的一些理解:
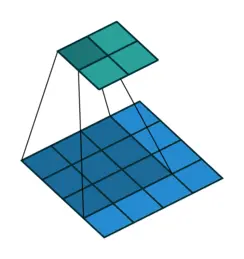
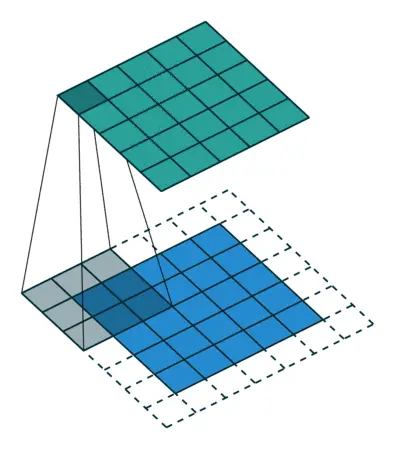
1.步长(stride)
滑动卷积核时,我们会先从输入的左上角开始,每次往左滑动一列或者往下滑动一行逐一计算输出,我们将每次滑动的行数和列数称为stride。
当stride=1时
当stride=2时
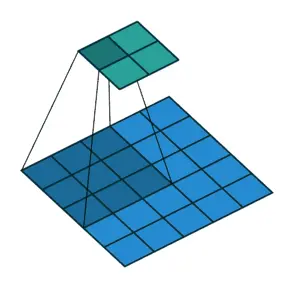
stride就是缩小的具体倍数,比如步幅为2,输出就是输入的1/2;步幅为3,输出就是输入的1/3。
2.填充(padding)
在矩阵的边界上填充一些值,以增加矩阵的大小(通常填充0),填充的圈数就是padding的值。
为什么要进行填充?
在卷积核移动的时候中间位置都被计算了,而输入图像二维矩阵的边缘却只计算了一次,可能会导致计算的结果不准确,所以为了让每个方块都能作为卷积窗口的中心,从而提高准确度就进行了padding。
二、实例
import torch
import torch.nn.functional as F
input = torch.tensor([[1, 2, 0, 3, 1],
[0, 1, 2, 3, 1],
[1, 2, 1, 0, 0],
[5, 2, 3, 1, 1],
[2, 1, 0, 1, 1]])
kernel = torch.tensor([[1, 2, 1],
[0, 1, 0],
[2, 1, 0]])
input = torch.reshape(input, (1, 1, 5, 5)) # 转换为符合要求的尺寸
kernel = torch.reshape(kernel, (1, 1, 3, 3))
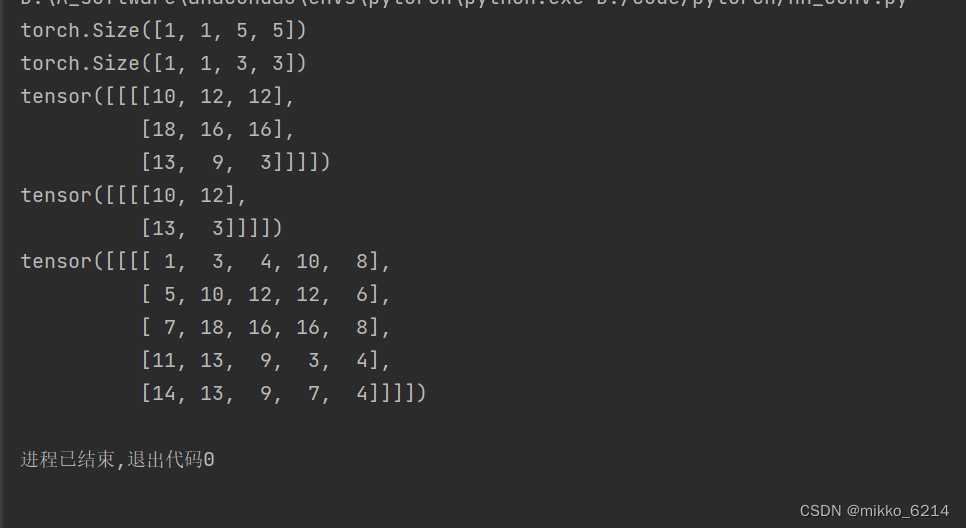
print(input.shape)
print(kernel.shape)
output = F.conv2d(input, kernel, stride=1) # 步长为1
print(output)
output2 = F.conv2d(input, kernel, stride=2) # 步长为2
print(output2)
output3 = F.conv2d(input, kernel, stride=1, padding=1) # 步长为1 填充1圈
print(output3)
运行结果:
实际应用
import torch
import torchvision
from torch import nn
from torch.utils.data import DataLoader
from torch.nn import Conv2d
from torch.utils.tensorboard import SummaryWriter
dataset = torchvision.datasets.CIFAR10("../data", train=False, transform=torchvision.transforms.ToTensor(), download=True)
dataloader = DataLoader(dataset, batch_size=64)
class Mikko(nn.Module):
def __init__(self):
super(Mikko, self).__init__()
self.conv1 = Conv2d(in_channels=3, out_channels=6, kernel_size=3, stride=1, padding=0)
def forward(self, x):
x = self.conv1(x)
return x
mikko = Mikko()
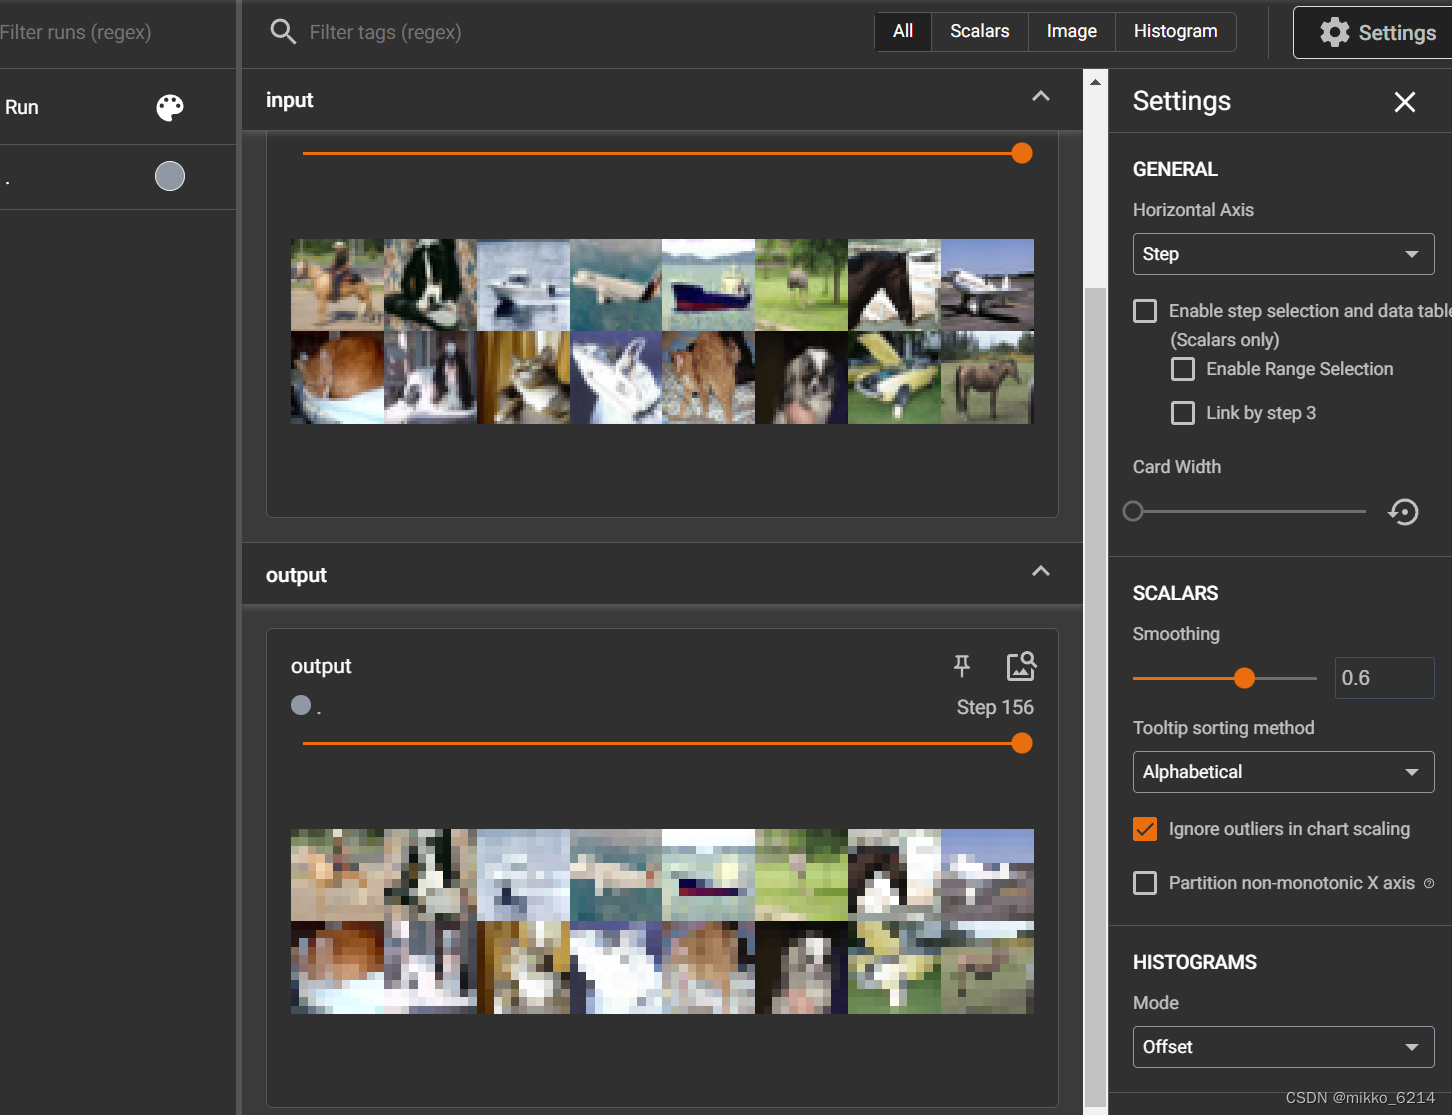
writer = SummaryWriter("../log3")
step = 0
for data in dataloader:
imgs, target = data
output = mikko(imgs)
# print(imgs.shape)
# print(output.shape)
writer.add_images("input", imgs, step)
output = torch.reshape(output, (-1, 3, 30, 30))
writer.add_images("output", output, step)
step = step + 1
writer.close()
参考:
CNN基础知识——卷积(Convolution)、填充(Padding)、步长(Stride) - 知乎 (zhihu.com)


 4638
4638


 被折叠的 条评论
为什么被折叠?
被折叠的 条评论
为什么被折叠?
 到【灌水乐园】发言


