


深知大多数程序员,想要提升技能,往往是自己摸索成长,但自己不成体系的自学效果低效又漫长,而且极易碰到天花板技术停滞不前!
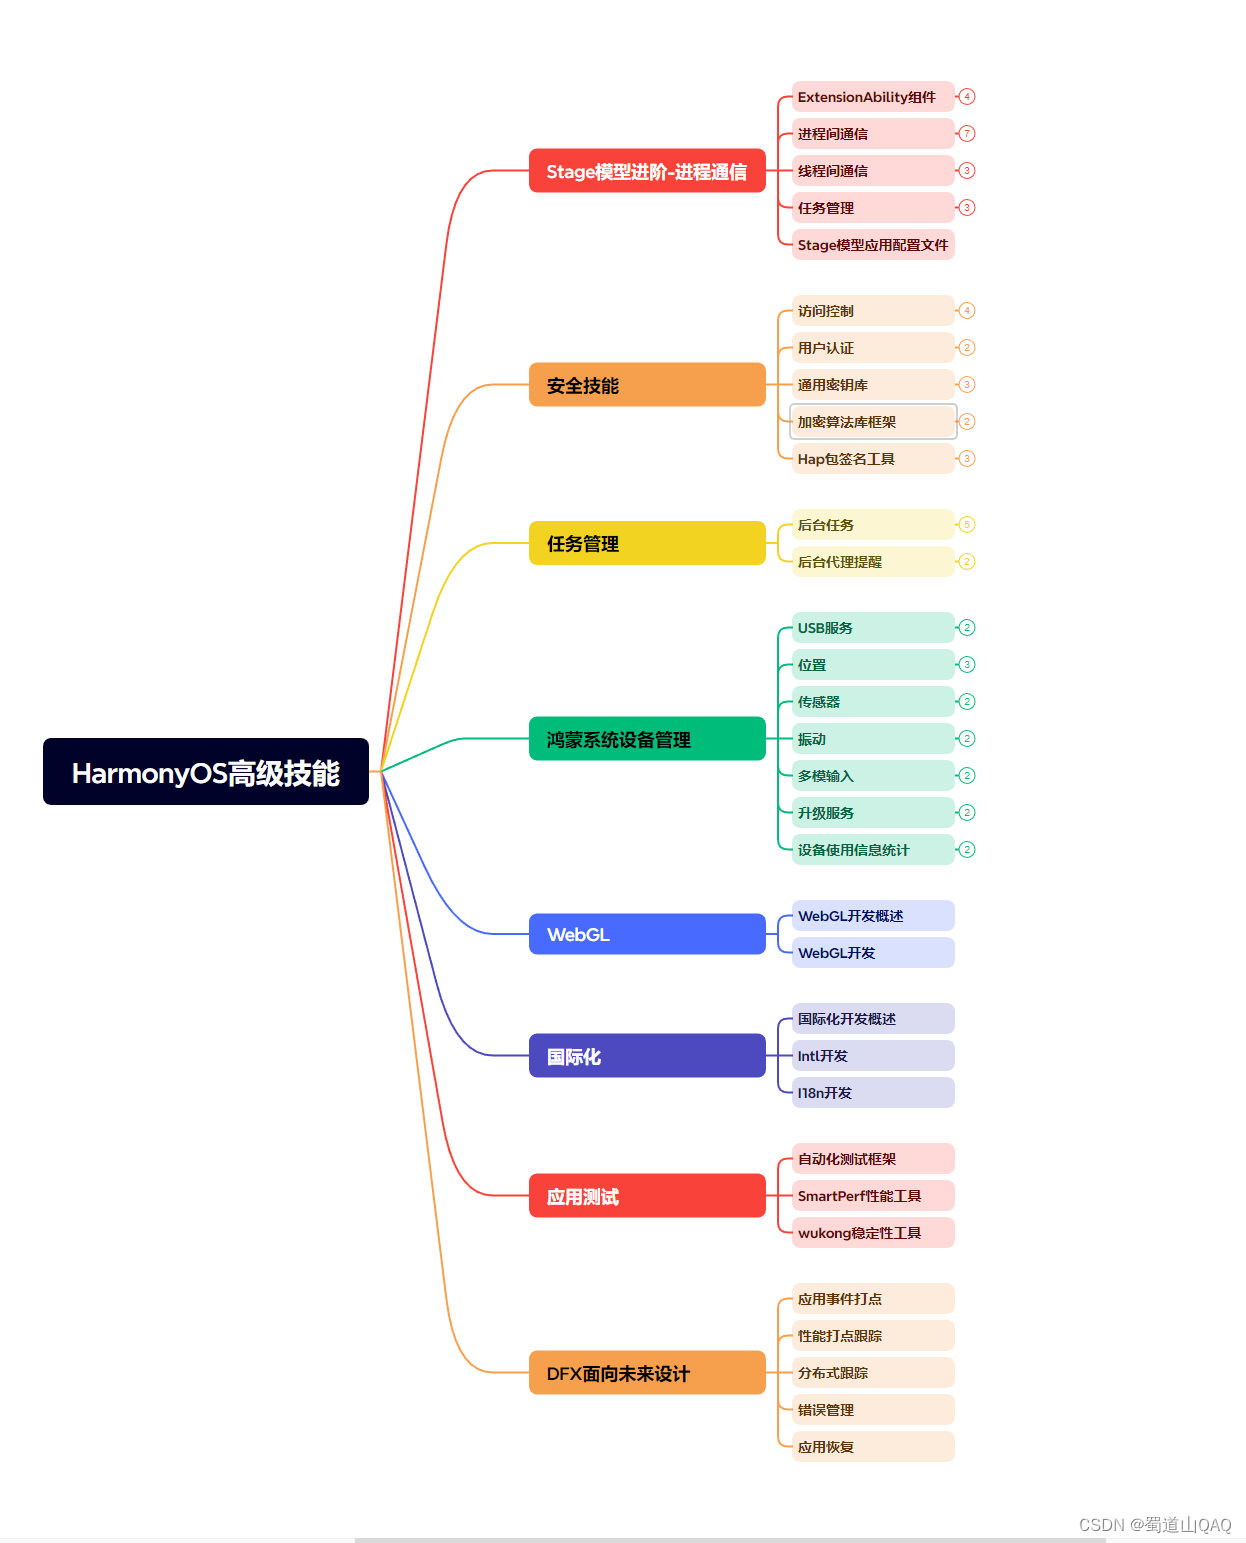
既有适合小白学习的零基础资料,也有适合3年以上经验的小伙伴深入学习提升的进阶课程,涵盖了95%以上鸿蒙开发知识点,真正体系化!
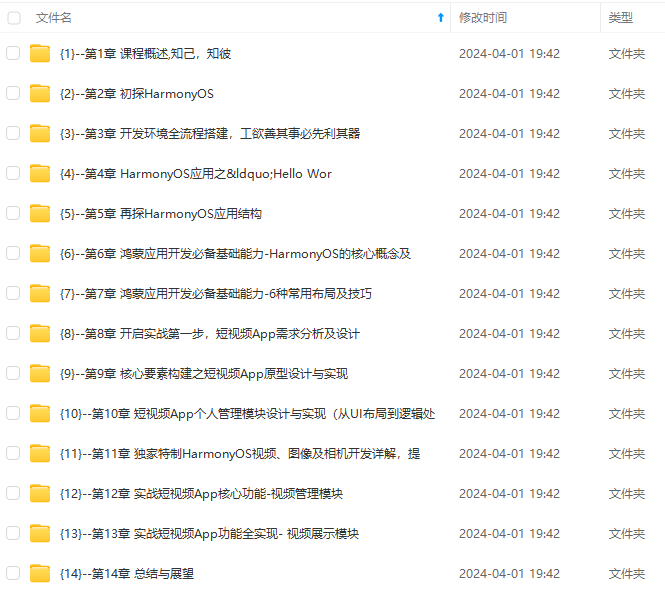
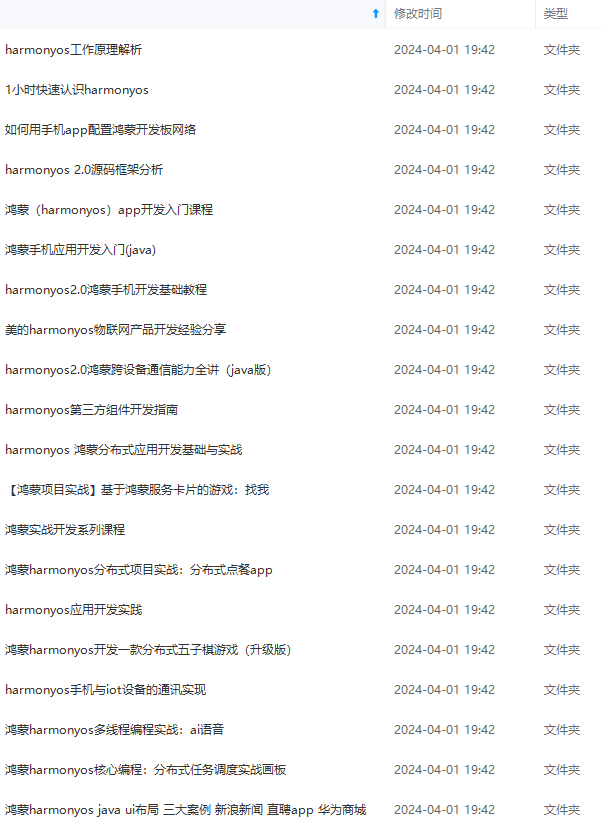
由于文件比较多,这里只是将部分目录截图出来,全套包含大厂面经、学习笔记、源码讲义、实战项目、大纲路线、讲解视频,并且后续会持续更新
<solid
ohos:color=“#00FFFD”/>
3.2 水平排列
效果图

代码
布局文件
<?xml version="1.0" encoding="utf-8"?><DirectionalLayout
xmlns:ohos=“http://schemas.huawei.com/res/ohos”
ohos:width=“match_parent”
ohos:height=“match_content”
ohos:orientation=“horizontal”>
<Button
ohos:width=“33vp”
ohos:height=“20vp”
ohos:left_margin=“13vp”
ohos:background_element=“$graphic:color_cyan_element”
ohos:text=“Button 1”/>
<Button
ohos:width=“33vp”
ohos:height=“20vp”
ohos:left_margin=“13vp”
ohos:background_element=“$graphic:color_cyan_element”
ohos:text=“Button 2”/>
<Button
ohos:width=“33vp”
ohos:height=“20vp”
ohos:left_margin=“13vp”
ohos:background_element=“$graphic:color_cyan_element”
ohos:text=“Button 3”/>
color_cyan_element.xml:
<?xml version="1.0" encoding="utf-8"?><shape xmlns:ohos=“http://schemas.huawei.com/res/ohos”
ohos:shape=“rectangle”>
<solid
ohos:color=“#00FFFD”/>
4.1 对齐方式属性表
| 参数 | 作用 | 可搭配排列方式 |
| :-: | :-: | :-: |
| left | 左对齐 | 垂直排列 |
| top | 顶部对齐 | 水平排列 |
| right | 右对齐 | 垂直排列 |
| bottom | 底部对齐 | 水平排列 |
| horizontal_center | 水平方向居中 | 垂直排列 |
| vertical_center | 垂直方向居中 | 水平排列 |
| center | 垂直与水平方向都居中 | 水平/垂直排列 |
4.2 实例
效果图

布局文件示例代码
<?xml version="1.0" encoding="utf-8"?><DirectionalLayout
xmlns:ohos=“http://schemas.huawei.com/res/ohos”
ohos:width=“match_parent”
ohos:height=“60vp”>
<Button
ohos:width=“50vp”
ohos:height=“20vp”
ohos:background_element=“$graphic:color_cyan_element”
ohos:layout_alignment=“left”
ohos:text=“Button 1”/>
<Button
ohos:width=“50vp”
ohos:height=“20vp”
ohos:background_element=“$graphic:color_cyan_element”
ohos:layout_alignment=“horizontal_center”
ohos:text=“Button 2”/>
<Button
ohos:width=“50vp”
ohos:height=“20vp”
ohos:background_element=“$graphic:color_cyan_element”
ohos:layout_alignment=“right”
ohos:text=“Button 3”/>
color_cyan_element.xml:
<?xml version="1.0" encoding="utf-8"?><shape xmlns:ohos=“http://schemas.huawei.com/res/ohos”
ohos:shape=“rectangle”>
<solid
ohos:color=“#00FFFD”/>
5.1 说明
-
权重(weight)就是按比例来分配组件占用父组件的大小
-
父布局可分配宽度=父布局宽度-所有子组件width之和;
-
组件宽度=组件weight/所有组件weight之和*父布局可分配宽度;
5.2 实例
效果图
布局文件
<?xml version="1.0" encoding="utf-8"?><DirectionalLayout
xmlns:ohos=“http://schemas.huawei.com/res/ohos”
ohos:width=“match_parent”
ohos:height=“match_content”
ohos:orientation=“horizontal”>
<Button
ohos:width=“0vp”
ohos:height=“20vp”
ohos:weight=“1”
ohos:background_element=“$graphic:color_cyan_element”
ohos:text=“Button 1”/>
<Button
ohos:width=“0vp”
ohos:height=“20vp”
ohos:weight=“1”
ohos:background_element=“$graphic:color_gray_element”
ohos:text=“Button 2”/>
<Button
ohos:width=“0vp”
ohos:height=“20vp”
ohos:weight=“1”
ohos:background_element=“$graphic:color_cyan_element”
ohos:text=“Button 3”/>
color_cyan_element.xml:
<?xml version="1.0" encoding="utf-8"?><shape xmlns:ohos=“http://schemas.huawei.com/res/ohos”
ohos:shape=“rectangle”>
<solid
ohos:color=“#00FFFD”/>
color_gray_element.xml:
<?xml version="1.0" encoding="utf-8"?><shape xmlns:ohos=“http://schemas.huawei.com/res/ohos”
ohos:shape=“rectangle”>
深知大多数程序员,想要提升技能,往往是自己摸索成长,但自己不成体系的自学效果低效又漫长,而且极易碰到天花板技术停滞不前!

既有适合小白学习的零基础资料,也有适合3年以上经验的小伙伴深入学习提升的进阶课程,涵盖了95%以上鸿蒙开发知识点,真正体系化!
由于文件比较多,这里只是将部分目录截图出来,全套包含大厂面经、学习笔记、源码讲义、实战项目、大纲路线、讲解视频,并且后续会持续更新
ttps://img-blog.csdnimg.cn/direct/743b668910224b259a5ffe804fa6d0db.png)
[外链图片转存中…(img-vtqmWxje-1715302396448)]
[外链图片转存中…(img-v7lr8Vlo-1715302396448)]
既有适合小白学习的零基础资料,也有适合3年以上经验的小伙伴深入学习提升的进阶课程,涵盖了95%以上鸿蒙开发知识点,真正体系化!
由于文件比较多,这里只是将部分目录截图出来,全套包含大厂面经、学习笔记、源码讲义、实战项目、大纲路线、讲解视频,并且后续会持续更新


 3621
3621

 被折叠的 条评论
为什么被折叠?
被折叠的 条评论
为什么被折叠?
 到【灌水乐园】发言


