


        val name = getString(R.string.channel_name)

        val descriptionText = getString(R.string.channel_description)

        val importance = NotificationManager.IMPORTANCE_DEFAULT

        val channel = NotificationChannel(CHANNEL_ID, name, importance).apply {

            description = descriptionText

        }

        // Register the channel with the system

        val notificationManager: NotificationManager =

            getSystemService(Context.NOTIFICATION_SERVICE) as NotificationManager

        notificationManager.createNotificationChannel(channel)

    }

}
#### []( )设置通知的点按操作
// Create an explicit intent for an Activity in your app
val intent = Intent(this, AlertDetails::class.java).apply {

    flags = Intent.FLAG_ACTIVITY_NEW_TASK or Intent.FLAG_ACTIVITY_CLEAR_TASK

}

val pendingIntent: PendingIntent = PendingIntent.getActivity(this, 0, intent, 0)


val builder = NotificationCompat.Builder(this, CHANNEL_ID)

        .setSmallIcon(R.drawable.notification_icon)

        .setContentTitle("My notification")

        .setContentText("Hello World!")

        .setPriority(NotificationCompat.PRIORITY_DEFAULT)

        // Set the intent that will fire when the user taps the notification

        .setContentIntent(pendingIntent)

        .setAutoCancel(true)
请注意,该代码会调用 [setAutoCancel()]( ),它会在用户点按通知后自动[移除通知]( )。


#### []( )显示通知


要显示通知,请调用 [NotificationManagerCompat.notify()]( ),并将通知的唯一 ID 和 [NotificationCompat.Builder.build()]( )的结果传递给它。例如:
with(NotificationManagerCompat.from(this)) {

    // notificationId is a unique int for each notification that you must define

    notify(notificationId, builder.build())

}
### []( )添加操作按钮


要添加操作按钮,请将 [PendingIntent]( ) 传递给 [addAction()]( ) 方法。这就像是设置通知的默认点按操作,不同的是不会启动 Activity,而是可以完成各种其他任务

例如启动在后台执行作业的 [BroadcastReceiver]( ),这样该操作就不会干扰已经打开的应用。
val snoozeIntent = Intent(this, MyBroadcastReceiver::class.java).apply {
    action = ACTION_SNOOZE

    putExtra(EXTRA_NOTIFICATION_ID, 0)

}

val snoozePendingIntent: PendingIntent =

    PendingIntent.getBroadcast(this, 0, snoozeIntent, 0)

val builder = NotificationCompat.Builder(this, CHANNEL_ID)

        .setSmallIcon(R.drawable.notification_icon)

        .setContentTitle("My notification")

        .setContentText("Hello World!")

        .setPriority(NotificationCompat.PRIORITY_DEFAULT)

        .setContentIntent(pendingIntent)

        .addAction(R.drawable.ic_snooze, getString(R.string.snooze),

                snoozePendingIntent)
#### []( )添加直接回复操作


Android 7.0(API 级别 24)中引入的直接回复操作允许用户直接在通知中输入文本,然后会直接提交给应用

1、创建 RemoteInput.Builder 的实例以便您添加到通知操作
// Key for the string that’s delivered in the action’s intent.
private val KEY_TEXT_REPLY = "key_text_reply"

var replyLabel: String = resources.getString(R.string.reply_label)

var remoteInput: RemoteInput = RemoteInput.Builder(KEY_TEXT_REPLY).run {

    setLabel(replyLabel)

    build()

}
2、为回复操作创建 PendingIntent
// Build a PendingIntent for the reply action to trigger.
var replyPendingIntent: PendingIntent =

    PendingIntent.getBroadcast(applicationContext,

        conversation.getConversationId(),

        getMessageReplyIntent(conversation.getConversationId()),

        PendingIntent.FLAG_UPDATE_CURRENT)
3、使用 addRemoteInput() 将 RemoteInput 对象附加到操作。
// Create the reply action and add the remote input.
var action: NotificationCompat.Action =

    NotificationCompat.Action.Builder(R.drawable.ic_reply_icon,

        getString(R.string.label), replyPendingIntent)

        .addRemoteInput(remoteInput)

        .build()
4、对通知应用操作并发出通知。
// Build the notification and add the action.

val newMessageNotification = Notification.Builder(context, CHANNEL_ID)

        .setSmallIcon(R.drawable.ic_message)

        .setContentTitle(getString(R.string.title))

        .setContentText(getString(R.string.content))

        .addAction(action)

        .build()


// Issue the notification.

with(NotificationManagerCompat.from(this)) {

    notificationManager.notify(notificationId, newMessageNotification)

}
要从通知回复界面接收用户输入,请调用 RemoteInput.getResultsFromIntent() 并将 BroadcastReceiver 收到的 Intent 传递给它:
private fun getMessageText(intent: Intent): CharSequence? {
    return RemoteInput.getResultsFromIntent(intent)?.getCharSequence(KEY_TEXT_REPLY)

}
处理完文本后,必须使用相同的 ID 和标记(如果使用)调用 NotificationManagerCompat.notify() 来更新通知。若要隐藏直接回复界面并向用户确认他们的回复已收到并得到正确处理,则必须完成该操作。
// Build a new notification, which informs the user that the system
// handled their interaction with the previous notification.

val repliedNotification = Notification.Builder(context, CHANNEL_ID)

        .setSmallIcon(R.drawable.ic_message)

        .setContentText(getString(R.string.replied))

        .build()


// Issue the new notification.

NotificationManagerCompat.from(this).apply {

    notificationManager.notify(notificationId, repliedNotification)

}
在处理这个新通知时,请使用传递给接收者的 [onReceive()]( ) 方法的上下文。
您还应通过调用 [setRemoteInputHistory()]( ) 将回复附加到通知底部。但如果要构建消息应用,应创建[消息式通知]( ),并在会话中附加新消息。
有关来自消息应用的通知的更多建议,请参阅[消息应用的最佳做法]( )。
### []( )添加进度条
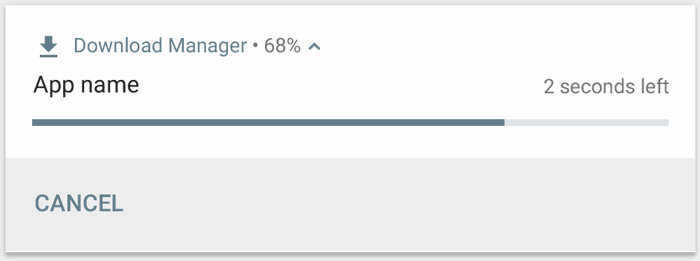
通过调用 [setProgress(max, progress, false)]( ) 使用指示器。
第一个参数是“完成”值(如 100);第二个参数是当前完成的进度,最后一个参数表明这是一个确定性进度条。
val builder = NotificationCompat.Builder(this, CHANNEL_ID).apply {
    setContentTitle("Picture Download")

    setContentText("Download in progress")

    setSmallIcon(R.drawable.ic_notification)

    setPriority(NotificationCompat.PRIORITY_LOW

}

val PROGRESS_MAX = 100

val PROGRESS_CURRENT = 0

NotificationManagerCompat.from(this).apply {

    // Issue the initial notification with zero progress

    builder.setProgress(PROGRESS_MAX, PROGRESS_CURRENT, false)

    notify(notificationId, builder.build())


    // Do the job here that tracks the progress.

    // Usually, this should be in a

    // worker thread

    // To show progress, update PROGRESS_CURRENT and update the notification with:

    // builder.setProgress(PROGRESS_MAX, PROGRESS_CURRENT, false);

    // notificationManager.notify(notificationId, builder.build());


    // When done, update the notification one more time to remove the progress bar

    builder.setContentText("Download complete")

            .setProgress(0, 0, false)

    notify(notificationId, builder.build())

}
操作结束时,`progress` 应等于 `max`。您可以在操作完成后仍保留显示进度条,也可以将其移除。要移除进度条,请调用 [setProgress(0, 0, false)]( )。


要显示不确定性进度条(不指示完成百分比的进度条),请调用 [setProgress(0, 0, true)]( )。

结果会产生一个与上述进度条样式相同的指示器,区别是这个进度条是一个持续动画,不指示完成情况。

在您调用 [setProgress(0, 0, false)]( ) 之前,进度动画会一直运行,调用后系统会更新通知以移除 Activity 指示器。


### []( )设置系统范围的类别


如果您的通知属于 NotificationCompat 中定义的预定义通知类别之一

(例如 CATEGORY\_ALARM、CATEGORY\_REMINDER、CATEGORY\_EVENT 或 CATEGORY\_CALL),

您应通过将相应类别传递到 setCategory() 来进行声明。
var builder = NotificationCompat.Builder(this, CHANNEL_ID)
        .setSmallIcon(R.drawable.notification_icon)

        .setContentTitle("My notification")

        .setContentText("Hello World!")

        .setPriority(NotificationCompat.PRIORITY_DEFAULT)

        .setCategory(NotificationCompat.CATEGORY_MESSAGE)
### []( )显示紧急消息


**注意**:如果应用的目标平台是 Android 10(API 级别 29)或更高版本,必须在应用清单文件中请求 [`USE_FULL_SCREEN_INTENT`]( ) 权限,以便系统启动与时效性通知关联的全屏 Activity。

以下代码段展示了如何将通知与全屏 Intent 关联:
val fullScreenIntent = Intent(this, ImportantActivity::class.java)

val fullScreenPendingIntent = PendingIntent.getActivity(this, 0,

    fullScreenIntent, PendingIntent.FLAG_UPDATE_CURRENT)


var builder = NotificationCompat.Builder(this, CHANNEL_ID)

        .setSmallIcon(R.drawable.notification_icon)

        .setContentTitle("My notification")

        .setContentText("Hello World!")

        .setPriority(NotificationCompat.PRIORITY_DEFAULT)

        .setFullScreenIntent(fullScreenPendingIntent, true)
### []( )设置锁定屏幕公开范围


要控制锁定屏幕中通知的可见详情级别,请调用 [setVisibility()]( ) 并指定以下值之一:


*   [VISIBILITY\_PUBLIC]( ) 显示通知的完整内容。

*   [VISIBILITY\_SECRET]( ) 不在锁定屏幕上显示该通知的任何部分。

*   [VISIBILITY\_PRIVATE]( ) 显示基本信息,例如通知图标和内容标题,但隐藏通知的完整内容。


### []( )更新通知


要在发出此通知后对其进行更新,请再次调用 NotificationManagerCompat.notify(),并将之前使用的具有同一 ID 的通知传递给该方法。如果之前的通知已被关闭,则系统会创建一个新通知。


您可以选择性调用 setOnlyAlertOnce(),这样通知只会在通知首次出现时打断用户(通过声音、振动或视觉提示),而之后更新则不会再打断用户。


### []( )有关消息应用的最佳做法


从 Android 7.0(API 级别 24)起,Android 提供了专用于消息内容的通知样式模板。使用 NotificationCompat.MessagingStyle 类,您可以更改在通知中显示的多个标签,包括会话标题、其他消息和通知的内容视图。

以下代码段展示了如何使用 MessagingStyle 类自定义通知的样式。
var notification = NotificationCompat.Builder(this, CHANNEL_ID)

        .setStyle(NotificationCompat.MessagingStyle("Me")

                .setConversationTitle("Team lunch")

                .addMessage("Hi", timestamp1, null) // Pass in null for user.

                .addMessage("What's up?", timestamp2, "Coworker")

                .addMessage("Not much", timestamp3, null)

                .addMessage("How about lunch?", timestamp4, "Coworker"))

        .build()
从 Android 8.0(API 级别 26)起,使用 NotificationCompat.MessagingStyle 类的通知会在采用折叠形式时显示更多内容


[]( )[5、权限 - 用于检查和请求应用权限的兼容性 API]( )

-----------------------------------------------------------------------------------------------------------------------------------------------------------------


略


[]( )[6、偏好设置 - 创建交互式设置屏幕]( )

------------------------------------------------------------------------------------------------------------------------------------------------


\*\*注意:\*\*本指南介绍如何使用 [AndroidX Preference Library]( )。自 Android 10 开始,系统已弃用 `android.preference` 库平台。


#### []( )创建层次结构
<PreferenceScreen
xmlns:app="http://schemas.android.com/apk/res-auto">


<SwitchPreferenceCompat

    app:key="notifications"

    app:title="Enable message notifications"/>


<Preference

    app:key="feedback"

    app:title="Send feedback"

    app:summary="Report technical issues or suggest new features"/>
#### []( )扩充层次结构
class MySettingsFragment : PreferenceFragmentCompat() {
override fun onCreatePreferences(savedInstanceState: Bundle?, rootKey: String?) {

    setPreferencesFromResource(R.xml.preferences, rootKey)

}
}
然后,与您对其他 Fragment 进行的操作一样,您可以将此 Fragment 添加到您的 Activity:
class MySettingsActivity : AppCompatActivity() {
override fun onCreate(savedInstanceState: Bundle?) {

    super.onCreate(savedInstanceState)

    supportFragmentManager

            .beginTransaction()

            .replace(R.id.settings_container, MySettingsFragment())

            .commit()

}
}
[]( )[7、共享 - 提供适合应用操作栏的共享操作]( )

-------------------------------------------------------------------------------------------------------------------------------------------


Android 应用的一大优点是它们能够互相通信和集成。如果某一功能并非应用的核心,而且已存在于另一个应用中,为何要重新开发它?


本节说明如何借助 [Intent]( )对象使用 Android Sharesheet 和 Intent Resolver 在不同应用之间发送和接收简单数据(如文本、图像和文件)的一些常用方法。


### []( )1、将简单的数据发送给其他应用


Android 为用户提供了两种在应用之间分享数据的方式:


*   Android Sharesheet 主要用于将内容发送到应用外部和/或直接发送给其他用户。例如,将网址分享给朋友。

*   Android intent 解析器最适合将数据传递到明确定义的任务的下一个阶段。例如,从应用中打开 PDF,并让用户挑选他们首选的查看器。


#### []( )发送文本内容
val sendIntent: Intent = Intent().apply {

    action = Intent.ACTION_SEND

    putExtra(Intent.EXTRA_TEXT, "This is my text to send.")

    type = "text/plain"

}


val shareIntent = Intent.createChooser(sendIntent, null)

startActivity(shareIntent)
#### []( )发送二进制内容
val shareIntent: Intent = Intent().apply {
    action = Intent.ACTION_SEND

    putExtra(Intent.EXTRA_STREAM, uriToImage)

    type = "image/jpeg"

}

startActivity(Intent.createChooser(shareIntent, resources.getText(R.string.send_to)))
#### []( )使用正确的 MIME 类型


您应该为要发送的数据提供最具体的 MIME 类型。例如,分享纯文本时,应使用 text/plain。以下是在 Android 中发送简单数据时一些常用的 MIME 类型。


*   text/plain、text/rtf、text/html 和 text/json,接收方应注册 text/\*

*   image/jpg、image/png 和 image/gif,接收方应注册 image/\*

*   video/mp4 和 video/3gp,接收方应注册 video/\*

*   application/pdf,接收方应注册支持的文件扩展名

*   您可以使用 MIME 类型 _/_,但强烈建议您不要这样做,因为它仅与能够处理通用数据流的 Activity 匹配。

    Android Sharesheet 可能会根据提供的 MIME 类型显示内容预览。某些预览功能仅适用于特定类型。


#### []( )分享多份内容


要分享多份内容,请将 [ACTION\_SEND\_MULTIPLE]( ) 操作与指向该内容的一系列 URI 一起使用
val imageUris: ArrayList<Uri> = arrayListOf(

        // Add your image URIs here

        imageUri1,

        imageUri2

)


val shareIntent = Intent().apply {

    action = Intent.ACTION_SEND_MULTIPLE

    putParcelableArrayListExtra(Intent.EXTRA_STREAM, imageUris)

    type = "image/*"

}

startActivity(Intent.createChooser(shareIntent, "Share images to.."))
#### []( )向文本预览添加丰富的内容


从 Android 10(API 级别 29)开始,Android Sharesheet 可以显示分享的文本的预览。

如果要预览文本,您可以设置标题和/或缩略图。在调用 Intent.createChooser() 之前,先添加 Intent.EXTRA\_TITLE 的说明。通过 ClipData 添加相关的缩略图。
 val share = Intent.createChooser(Intent().apply {

      action = Intent.ACTION_SEND

      putExtra(Intent.EXTRA_TEXT, "https://developer.android.com/training/sharing/")


      // (Optional) Here we're setting the title of the content

      putExtra(Intent.EXTRA_TITLE, "Introducing content previews")


      // (Optional) Here we're passing a content URI to an image to be displayed

      setClipData(contentUri);

      setFlags(Intent.FLAG_GRANT_READ_URI_PERMISSION);

  }, null)

  startActivity(share)
#### []( )添加自定义目标


在调用 [Intent.createChooser()]( ) **之后**,向您的分享 intent 添加 `Intent.EXTRA_CHOOSER_TARGETS` 和 `Intent.EXTRA_INITIAL_INTENTS`。
val share = Intent.createChooser(myShareIntent, null).apply {
    putExtra(Intent.EXTRA_CHOOSER_TARGETS, myChooserTargetArray)

    putExtra(Intent.EXTRA_INITIAL_INTENTS, myInitialIntentArray)

}
#### []( )按组件排除特定目标


在调用 Intent.createChooser() 之后,向您的 intent 添加 Intent.EXTRA\_EXCLUDE\_COMPONENTS
val share = Intent.createChooser(myShareIntent, null).apply {
  // Only use components you have control over

  share.putExtra(Intent.EXTRA_EXCLUDE_COMPONENTS, myComponentArray)

}
#### []( )获取有关分享的信息
var share = new Intent(Intent.ACTION_SEND);
...

val pi = PendingIntent.getBroadcast(myContext, requestCode, Intent(myContext, MyBroadcastReceiver.class),

Intent.FLAG_UPDATE_CURRENT)

share = Intent.createChooser(share, null, pi.intentSender);
然后,在 MyBroadcastReceiver 中接收回调,并查看 Intent.EXTRA\_CHOSEN\_COMPONENT
override fun onReceive(context: Context, intent: Intent) {

  ...

  val clickedComponent : ComponentName = intent.getParcelableExtra(EXTRA_CHOSEN_COMPONENT);

}
#### []( )使用 Android intent 解析器
val sendIntent: Intent = Intent().apply {

    action = Intent.ACTION_SEND

    putExtra(Intent.EXTRA_TEXT, "This is my text to send.")

    type = "text/plain"

}

startActivity(sendIntent)
### []( )2、从其他应用接收简单的数据
您的应用可以通过三种方式接收其他应用发送的数据:
* 在清单中有匹配的 intent-filter 标记的 Activity
* 由您的 ChooserTargetService 返回的一个或多个 ChooserTarget 对象
* 您的应用发布的共享快捷方式。它们将取代 ChooserTarget 对象。只有当您的应用在 Android 10(API 级别 29)平台上运行时,才可以使用共享快捷方式。
#### []( )支持 MIME 类型
您的应用应支持接收尽可能广泛的 MIME 类型。例如,用于发送文本、图像和视频的短信应用应支持接收 text/_、image/_ 和 video/\*。以下是在 Android 中发送简单数据时常见的一些 MIME 类型。
text/_,发送方通常会发送 text/plain、text/rtf、text/html、text/json
image/_,发送方通常会发送 image/jpg、image/png、image/gif
video/\*,发送方通常会发送 video/mp4、video/3gp
# **总结**
可以看出,笔者的工作学习模式便是由以下 **「六个要点」** 组成:
> ❝ 多层次的工作/学习计划 + 番茄工作法 + 定额工作法 + 批处理 + 多任务并行 + 图层工作法❞
希望大家能将这些要点融入自己的工作学习当中,我相信一定会工作与学习地更富有成效。
下面是我学习用到的一些书籍学习导图,以及系统的学习资料。每一个知识点,都有对应的导图,学习的资料,视频,面试题目。
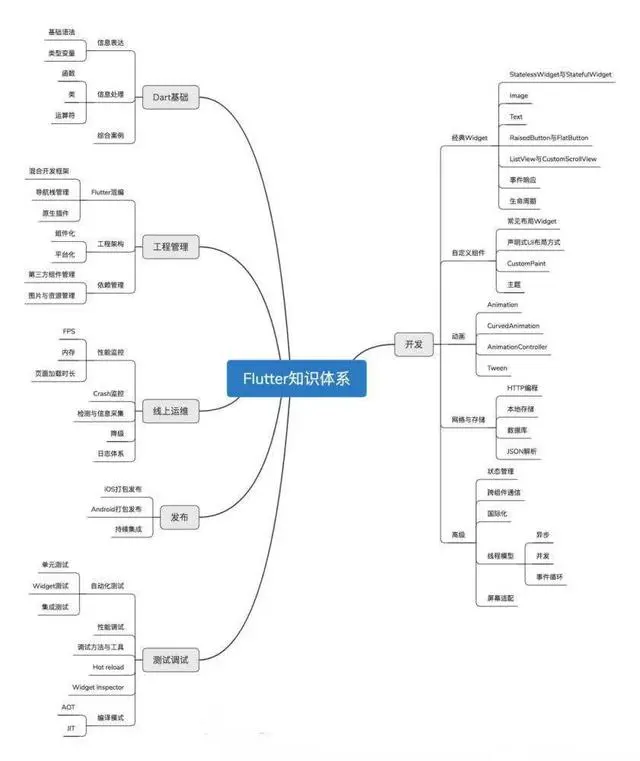
**如:我需要学习 **Flutter的知识。(大家可以参考我的学习方法)
* **Flutter 的思维导图(无论学习什么,有学习路线都会事半功倍)**
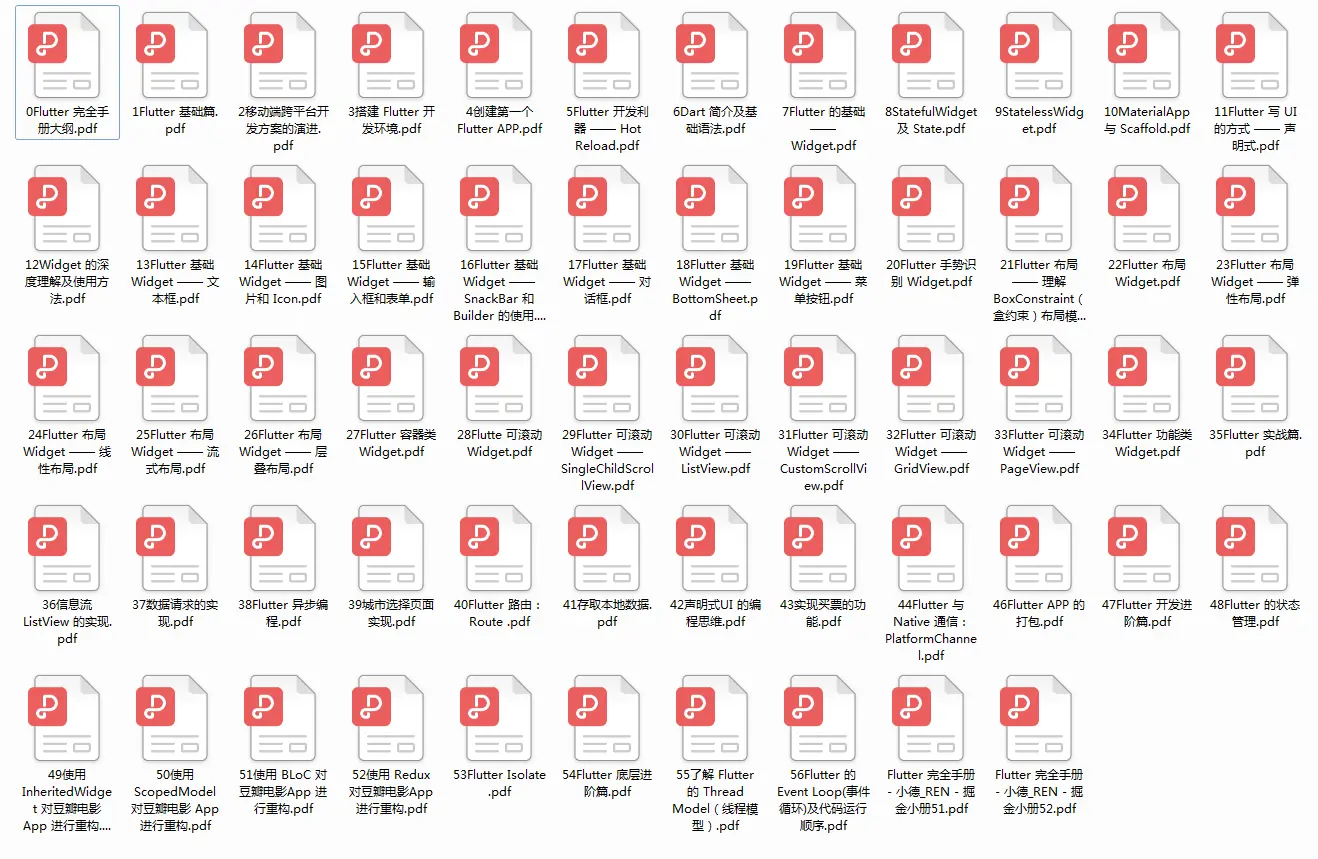
* **Flutter进阶学习全套手册**
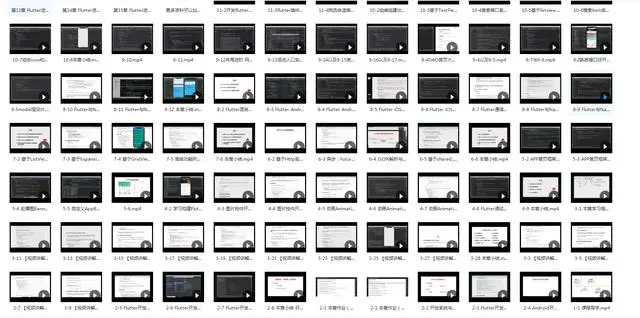
* **Flutter进阶学习全套视频**
大概就上面这几个步骤,这样学习不仅高效,而且能系统的学习新的知识。
intent-filter 标记的 Activity
* 由您的 ChooserTargetService 返回的一个或多个 ChooserTarget 对象
* 您的应用发布的共享快捷方式。它们将取代 ChooserTarget 对象。只有当您的应用在 Android 10(API 级别 29)平台上运行时,才可以使用共享快捷方式。
#### []( )支持 MIME 类型
您的应用应支持接收尽可能广泛的 MIME 类型。例如,用于发送文本、图像和视频的短信应用应支持接收 text/_、image/_ 和 video/\*。以下是在 Android 中发送简单数据时常见的一些 MIME 类型。
text/_,发送方通常会发送 text/plain、text/rtf、text/html、text/json
image/_,发送方通常会发送 image/jpg、image/png、image/gif
video/\*,发送方通常会发送 video/mp4、video/3gp
# **总结**
可以看出,笔者的工作学习模式便是由以下 **「六个要点」** 组成:
> ❝ 多层次的工作/学习计划 + 番茄工作法 + 定额工作法 + 批处理 + 多任务并行 + 图层工作法❞
希望大家能将这些要点融入自己的工作学习当中,我相信一定会工作与学习地更富有成效。
下面是我学习用到的一些书籍学习导图,以及系统的学习资料。每一个知识点,都有对应的导图,学习的资料,视频,面试题目。
**如:我需要学习 **Flutter的知识。(大家可以参考我的学习方法)
* **Flutter 的思维导图(无论学习什么,有学习路线都会事半功倍)**
[外链图片转存中...(img-d48YaLOF-1719484289288)]
* **Flutter进阶学习全套手册**
[外链图片转存中...(img-LK1NWXcx-1719484289288)]
* **Flutter进阶学习全套视频**
[外链图片转存中...(img-qS9zP2ZL-1719484289289)]
大概就上面这几个步骤,这样学习不仅高效,而且能系统的学习新的知识。


 2240
2240

 被折叠的 条评论
为什么被折叠?
被折叠的 条评论
为什么被折叠?
 到【灌水乐园】发言


