


QT中使用QNetworkAccessManager类进行POST数据
QNetworkAccessManager类简介:
QNetworkAccessManager类允许应用程序发送网络请求和接收网络应答。
Network Access API都是围绕着一个QNetworkAccessManager对象构造的,这个对象包含着发送请求的一些通用配置和设置。它包含着代理和缓存的配置,以及和这些事物相关的一些信号,并且应答信号可以作为我们检测一个网络操作的进度。
一个QNetworkAccessManager对于一整个Qt应用程序来说已经足够了!
一旦一个QNetworkAccessManager对象被创建了,那么应用程序就可以使用它在网络上发送请求。它提供了一组标准的函数,可以承载网络请求和一些可选的数据,并且每一个请求返回一个QNetworkReply对象。该返回的对象包含着返回的请求应带的所有数据。
  本例使用POST向网站页面传递数据,HTTP传输数据主要有两种形式,分别是Get和POST,两者的详细的介绍请参见[这里](http://blog.csdn.net/yipiankongbai/article/details/24025633)。
  本例运行的最终效果图如下
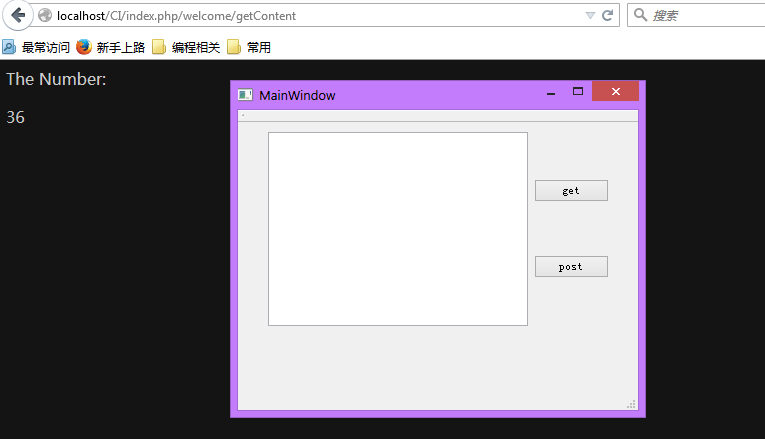
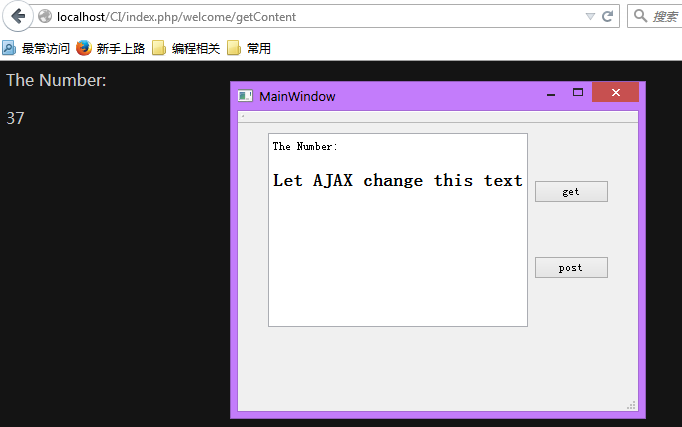
实现的功能是:
点击POST按钮,发送一个数据,并把这个数据写入数据库,网页上显示的是当前数据库中的数据条数。显示数据采用AJAX,可以在固定的时间间隔内自动刷新获得数据(通过不断的向服务器发送GET请求实现。这样写对服务器的压力比较大,我这里主要是为了演示POST的使用方法,实际中不采用这种不断GET的方法)。
QT的代码如下:
//QT的工程文件
#-------------------------------------------------
#
# Project created by QtCreator 2015-08-04T14:40:58
#
#-------------------------------------------------

QT       += core gui

greaterThan(QT_MAJOR_VERSION, 4): QT += widgets

TARGET = networkTest
TEMPLATE = app


SOURCES += main.cpp\
        mainwindow.cpp

HEADERS  += mainwindow.h

FORMS    += mainwindow.ui
QT+=network
//mainwindow.h
#ifndef MAINWINDOW_H
#define MAINWINDOW_H

#include <QMainWindow>
#include <QNetworkReply>
#include <QNetworkRequest>
#include<windows.h>
namespace Ui {
class MainWindow;
}

class MainWindow : public QMainWindow
{
    Q_OBJECT

public:
    explicit MainWindow(QWidget *parent = 0);
    ~MainWindow();
public slots:
    void finishedSlot(QNetworkReply *reply);
    void onClicked();
    void onClickedPost();
private:
    Ui::MainWindow *ui;
    QNetworkAccessManager *nam;//定义变量
};

#endif // MAINWINDOW_H
//main.c
#include "mainwindow.h"
#include <QApplication>

int main(int argc, char *argv[])
{
    QApplication a(argc, argv);
    MainWindow w;
    w.show();

    return a.exec();
}
//mainwindow.cpp
#include "mainwindow.h"
#include "ui_mainwindow.h"
#include<QHttp>
MainWindow::MainWindow(QWidget *parent) :
    QMainWindow(parent),
    ui(new Ui::MainWindow)
{
    ui->setupUi(this);
    nam=new QNetworkAccessManager(this);
    connect(ui->pushButton_get,SIGNAL(clicked()),this,SLOT(onClicked()));
    connect(nam, SIGNAL(finished(QNetworkReply*)),
                 this, SLOT(finishedSlot(QNetworkReply*)));
    connect(ui->pushButton_post,SIGNAL(clicked()),this,SLOT(onClickedPost()));
}

MainWindow::~MainWindow()
{
    delete ui;
}

void MainWindow::finishedSlot(QNetworkReply *reply)
{
#if 1
     // Reading attributes of the reply
     // e.g. the HTTP status code
     QVariant statusCodeV =
     reply->attribute(QNetworkRequest::HttpStatusCodeAttribute);
     // Or the target URL if it was a redirect:
     QVariant redirectionTargetUrl =
     reply->attribute(QNetworkRequest::RedirectionTargetAttribute);
     // see CS001432 on how to handle this

     // no error received?
     if (reply->error() == QNetworkReply::NoError)
     {
         QByteArray bytes = reply->readAll();  // bytes
         //QString string(bytes); // string
         QString string = QString::fromUtf8(bytes);

         ui->textBrowser->setText(string);
     }
     else
     {
         // handle errors here
     }

     // We receive ownership of the reply object
     // and therefore need to handle deletion.
     reply->deleteLater();
#endif
}

void MainWindow::onClicked()
{
    QUrl url("http://www.hust.edu.cn/");
            nam->get(QNetworkRequest(url));
}

void MainWindow::onClickedPost()
{
    //QUrl url("http://www.hust.edu.cn/");
    //QUrl url("http://www.google.com/ig/api?weather=wuhan");
//    QHttp re;
//    QHttpRequestHeader  request_header;
    QNetworkRequest request;
    QUrl url("http://localhost/CI/index.php/welcome/getdata");

    QByteArray data;
    data.append("name=admin&");
    data.append("email=weihao");

//    request.setHeader(QNetworkRequest::ContentLengthHeader, data.length());

   request.setUrl(url);
   request.setRawHeader("Content-Type","application/x-www-form-urlencoded");
//    QByteArray append("name=admin&email=123456");
    //QNetworkReply* reply = nam->get(QNetworkRequest(url));
    QNetworkReply* reply = nam->post(request, data);


    // NOTE: Store QNetworkReply pointer (maybe into caller).
    // When this HTTP request is finished you will receive this same
    // QNetworkReply as response parameter.
    // By the QNetworkReply pointer you can identify request and response.

}
//mainwindow.ui
<?xml version="1.0" encoding="UTF-8"?>
<ui version="4.0">
 <class>MainWindow</class>
 <widget class="QMainWindow" name="MainWindow">
  <property name="geometry">
   <rect>
    <x>0</x>
    <y>0</y>
    <width>400</width>
    <height>300</height>
   </rect>
  </property>
  <property name="windowTitle">
   <string>MainWindow</string>
  </property>
  <widget class="QWidget" name="centralWidget">
   <widget class="QWidget" name="layoutWidget">
    <property name="geometry">
     <rect>
      <x>30</x>
      <y>10</y>
      <width>341</width>
      <height>194</height>
     </rect>
    </property>
    <layout class="QHBoxLayout" name="horizontalLayout">
     <item>
      <widget class="QTextBrowser" name="textBrowser"/>
     </item>
     <item>
      <layout class="QVBoxLayout" name="verticalLayout">
       <item>
        <widget class="QPushButton" name="pushButton_get">
         <property name="text">
          <string>get</string>
         </property>
        </widget>
       </item>
       <item>
        <widget class="QPushButton" name="pushButton_post">
         <property name="text">
          <string>post</string>
         </property>
        </widget>
       </item>
      </layout>
     </item>
    </layout>
   </widget>
  </widget>
  <widget class="QMenuBar" name="menuBar">
   <property name="geometry">
    <rect>
     <x>0</x>
     <y>0</y>
     <width>400</width>
     <height>20</height>
    </rect>
   </property>
  </widget>
  <widget class="QToolBar" name="mainToolBar">
   <attribute name="toolBarArea">
    <enum>TopToolBarArea</enum>
   </attribute>
   <attribute name="toolBarBreak">
    <bool>false</bool>
   </attribute>
  </widget>
  <widget class="QStatusBar" name="statusBar"/>
 </widget>
 <layoutdefault spacing="6" margin="11"/>
 <resources/>
 <connections/>
</ui>
以上是QT客户端代码。服务器端我使用的CI的框架,如果不清楚这个的话直接百度,上面有详细的讲解。不过本例的实现与这个CI框架无关,只是个人使用习惯。(代码是按照CI框架的结构来写的)
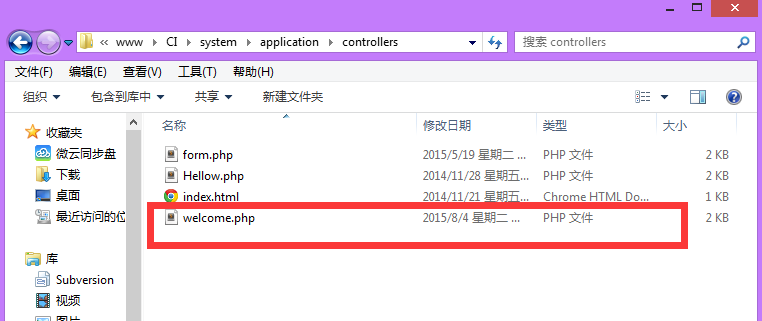
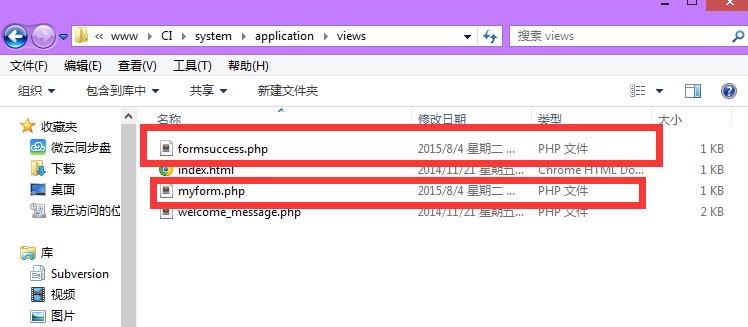
其他的文件与本例无关,可以直接忽略。主要是画红线的文件。
//welconme.php
<?php if ( ! defined('BASEPATH')) exit('No direct script access allowed');

class Welcome extends CI_Controller {
    public function index()
    {
        $this->load->view('myform');
    }
    public function getdata()
    {
        $temp=new common_m('content','data');
        $data['content'] =$_POST['name'];
    //  $this->load->view('formsuccess');
        $this->getContent();
        $temp->insert($data);

    }
    public function getnum()
    {//这里是使用数据库的语句,具体的用法可以CI的modles文件夹中找 //到这个common_m.php的文件,里面有详细的用法。
        $temp=new common_m('content','data');
        echo $temp->_all_num();
    }
    public function getContent()
    {
        $this->load->view('formsuccess');
    }
}

/* End of file welcome.php */
/* Location: ./application/controllers/welcome.php */
视图中的文件
//myform.php
<html>
<head>
<title>My Form</title>
</head>
<body>
<form action="welcome/getdata" method="post">
Name: <input type="text" name="name"><br>
E-mail: <input type="text" name="email"><br>
<input type="submit">
</form>
</body>
</html>
//formsuccess.php
<html>
<head>
<title>My Form</title>
<script type="text/javascript">
function loadXMLDoc()
{
var xmlhttp;
if (window.XMLHttpRequest)
{// code for IE7+, Firefox, Chrome, Opera, Safari
xmlhttp=new XMLHttpRequest();
}
else
{// code for IE6, IE5
xmlhttp=new ActiveXObject("Microsoft.XMLHTTP");
}
xmlhttp.onreadystatechange=function()
{
if (xmlhttp.readyState==4 && xmlhttp.status==200)
{
document.getElementById("myDiv").innerHTML=xmlhttp.responseText;
}
}
//写出完整路径,获取要显示的数据
xmlhttp.open("GET","http://localhost/CI/index.php/welcome/getnum",true);
xmlhttp.send();
//每隔1秒中更新一下数据
setTimeout("loadXMLDoc()", 1000);
}
</script>
</head>
<body>
<p>The Number:</p>
<div id="myDiv"><h2>Let AJAX change this text</h2></div>
<!-- <button type="button" onclick="loadXMLDoc()">通过 AJAX 改变内容</button> -->
<script type="text/javascript">loadXMLDoc();</script>
</body>
</html>
以上就是这个例子的介绍。有不足的地方,欢迎大家进行指正(∩_∩)。附上代码包下载链接http://download.csdn.net/detail/a_a_ron/8960635


 2407
2407

 被折叠的 条评论
为什么被折叠?
被折叠的 条评论
为什么被折叠?
 到【灌水乐园】发言


