


mock使用背景
实际开发采用前后端分离形式,意味着后端API正在开发中,前端只需知道需要的数据格式即可进行开发,与后端开发同步进行。mock模拟后端提供api的调用,并返回数据。
mock使用步骤
1. 安装依赖
npm install mockjs
2. 建立文件夹
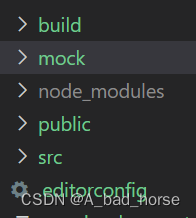
新建文件夹,并命名为mock。
3. mock文件中创建文件
const Mock = require('mockjs');
const utils = require('./utils');

Mock.mock('/login', {'name': '@name'}) // 方式1

module.exports = function(app) { // 方式2
  app.get('/user/userinfo', function(rep, res) {
    var json = utils.getJsonFile('./userInfo.json');
    res.json(Mock.mock(json))
  })
}
index.js代码如上,需要注意的是mock的2种调用方式(这里有坑!!!)
{
  "error": 0,
  "data": {
    "userid": "m900981",
    "username": "bill",
    "password": "...."
  }
}
测试数据userinfo.json内容如上。
const fs = require('fs');
const path = require('path');

module.exports = {
  getJsonFile:function(filePath) {
    var json = fs.readFileSync(path.resolve(__dirname, filePath), 'utf-8');
    return JSON.parse(json);
  }
}
工具类utils.js
4. main.js引入
import Vue from 'vue'
import App from './App'

import VueRouter from 'vue-router'
import router from './router'
import axios from 'axios'
import VueAxios from './vue-axios'
import store from './store'

//关闭Vue的生产提示
Vue.config.productionTip = false
//应用插件
Vue.use(VueRouter)
Vue.use(VueAxios, axios)

/* eslint-disable no-new */
new Vue({
  el: '#app',
  components: { App },
  template: '<App/>',
  router,
  store
})
main.js引入axios(实际下载了axios依赖)。
main.js引入VueAxios,是因为新建了文件夹vue-axios。
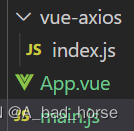
vue-axios目录下的index.js内容如下。
import Vue from 'vue'
import axios from 'axios'

const http = {
  install() {
    Vue.prototype.axios = axios;
  }
}

export default http
5. 运行前引入mock
修改webpack.dev.conf.js
...
  // these devServer options should be customized in /config/index.js
  devServer: {
    clientLogLevel: 'warning',
    historyApiFallback: {
      rewrites: [
        { from: /.*/, to: path.posix.join(config.dev.assetsPublicPath, 'index.html') },
      ],
    },
    hot: true,
    contentBase: false, // since we use CopyWebpackPlugin.
    compress: true,
    host: HOST || config.dev.host,
    port: PORT || config.dev.port,
    open: config.dev.autoOpenBrowser,
    overlay: config.dev.errorOverlay
      ? { warnings: false, errors: true }
      : false,
    publicPath: config.dev.assetsPublicPath,
    proxy: config.dev.proxyTable,
    quiet: true, // necessary for FriendlyErrorsPlugin
    before: require('../mock'), // 划重点!!!
    watchOptions: {
      poll: config.dev.poll,
    }
  },
...
添加配置before: require('../mock')。
运行项目,在项目启动前会引入mock。
6. 发起请求
实际使用是在组件中调用。
<template>
  <div>
    <button @click="getUserInfo">get user info</button>
    <button @click="login">login</button>
  </div>
</template>
<script>
import mock from '../../mock' // 方式1

export default {
  name: 'Mocker',
  data() {
    return {
      userInfo: {}
    }
  },
  methods: {
    getUserInfo() {
      this.axios.get('/user/userinfo')
      .then(res =>{
        console.log(res);
      })
      .catch(err => {
        console.log(err);
      });
    },
    login() {
      this.axios.post("/login").then(res => {
        console.log(res.data);
        if (res.data) {

        }
      })
    }
  }
}
</script>
Mocker.vue内容如上。
需要注意的是:2种调用方式决定是否需要直接引入mock。
7. 运行结果

打开浏览器后,F12打开调试窗口。
点击按钮“get user info”,“login”分别出现数据表明mock成功。


 5340
5340


 被折叠的 条评论
为什么被折叠?
被折叠的 条评论
为什么被折叠?
 到【灌水乐园】发言


