


前言: 在学习AGL官网文档并实操的过程中,当做完Creating a New Service和Creating a New Application后,官网提示将编译成功的hellocount.wgt文件拷贝到AGL System中安装:
AGL官网文档入口: https://docs.automotivelinux.org/en/lamprey/#3_Developer_Guides/2_Creating_a_New_Service/
1.远程 AGL 系统
(两种方式1.正常有界面的方式 2.无界面方式)
1.1 有界面方式:
1.1.1 AGL工程中打开终端执行:
$ runqemu qemux86-64
1.1.2 待qemu将工程打开成功后,新打开一个终端:
$ ssh root@<ip>
sample: $ ssh root@192.168.7.4
注:IP地址为执行runqemu qemux86-64时终端提示的AGL system的IP
例如:根据终端结果,我的IP为192.168.7.4

1.2无界面方式:
1.2.1 AGL工程中打开终端执行:
qemux86-64$ runqemu qemux86-64 nographic
1.2.2 待qemu将工程打开成功后,新打开一个终端(同上1.1.1):
$ ssh root@<ip>
以上两种方式在执行ssh root@<ip>后就会进入到AGL System中了。

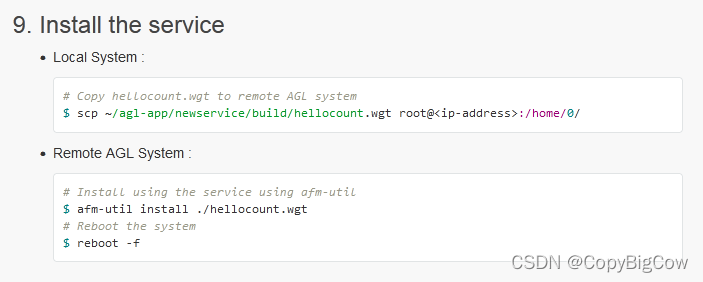
2.拷贝.wgt并安装
2.1 拷贝annex.wgt到AGL System
$ scp ./annex.wgt root@192.168.7.4:/home/0
2.2 使用afm-util命令安装.wgt:
--------------------------------------------------------------
afm-util命令介绍(afm-util --help):
afm-util runnables: 列出可以运行的widget
afm-util install wgt :安装widget文件
afm-util uninstall id:卸载指定id的widget
afm-util detail id :打印指定id的widget信息
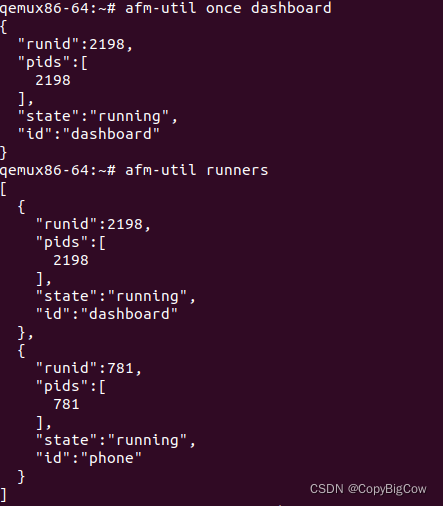
afm-util runners :列出运行实例
afm-util start id :启动指定id的widget
afm-util once id :run once指定id的widget
afm-util terminate rid :终止指定rid的应用程序
afm-util state rid :获取指定rid的运行实例的状态
----------------------------------------------------------------
2.2.1安装annex.wgt
qemux86-64:~# afm-util install annex.wgt

2.3 列出可运行的实例:
qemux86-64:~# afm-util list
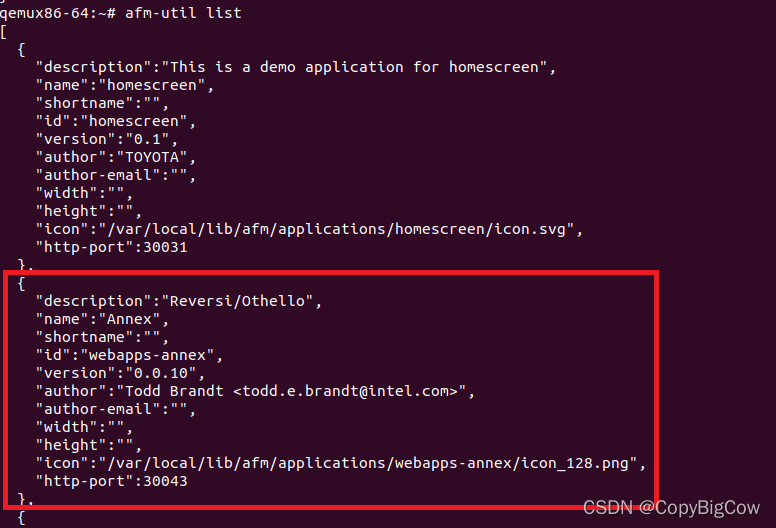
Annex已经安装成功!
接下来可以运行一个实例并查看运行状态:
到此,Install the service/application 就完成了!
●afm-util运行时,通过afm-binding.c实现 afm-system-daemon 的绑定,完成安装、卸载、运行、列出应用程序的服务。
●afm-system-daemon和afm-user-daemon介绍等参照AGL官网。


 1190
1190

 被折叠的 条评论
为什么被折叠?
被折叠的 条评论
为什么被折叠?
 到【灌水乐园】发言


