


一、系统介绍
1.1 项目简介
现代经济快节奏发展以及不断完善升级的信息化技术,让传统数据信息的管理升级为软件存储,归纳,集中处理数据信息的管理方式。本客户管理系统就是在这样的大环境下诞生,其可以帮助管理者在短时间内处理完毕庞大的数据信息,使用这种软件工具可以帮助管理人员提高事务处理效率,达到事半功倍的效果。此客户管理系统利用当下成熟完善的SSM框架,使用跨平台的可开发大型商业网站的Java语言,以及最受欢迎的RDBMS应用软件之一的Mysql数据库进行程序开发。
1.2 系统设计
客户管理系统的设计方案比如功能框架的设计,因为在系统实现阶段是需要考虑用户的所有需求,要是在设计阶段没有经过全方位考虑,那么系统实现的部分也就无从下手,所以系统设计部分也是至关重要的一个环节,只有根据用户需求进行细致全面的考虑,才有希望开发出功能健全稳定的程序软件。
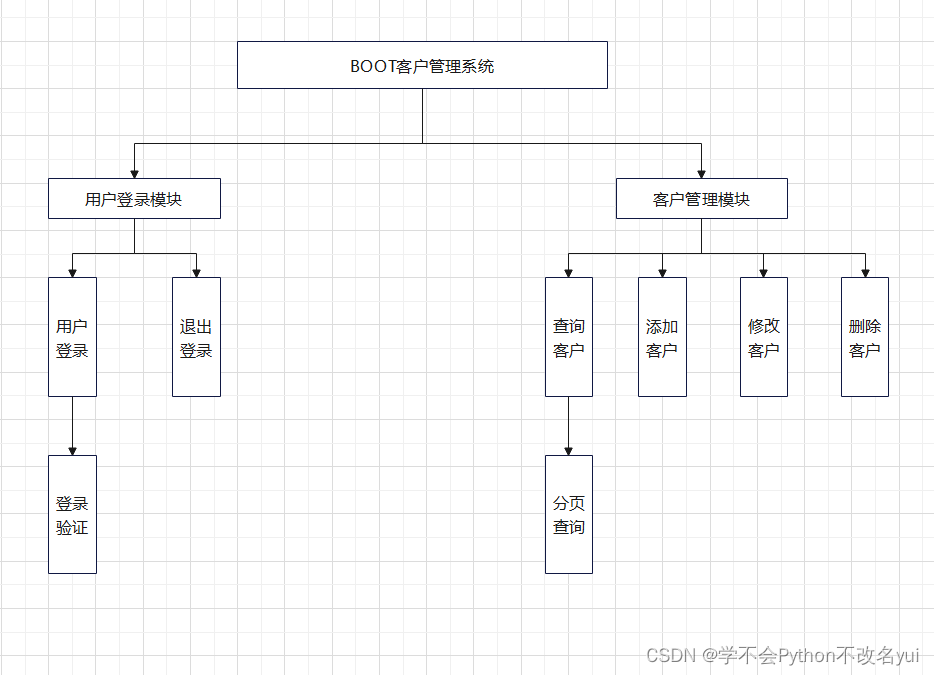
1.2.1 系统功能结构设计
在本项目中,主要实现两大功能模块:用户登录模块和客户管理模块
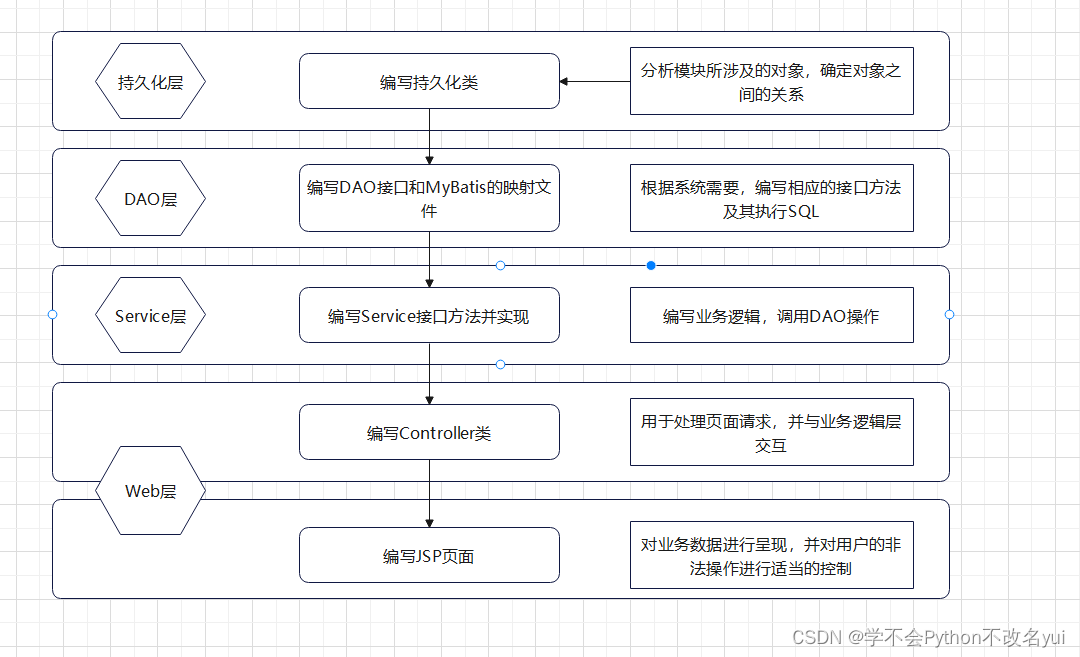
1.2.2 系统架构设计
本系统根据功能的不同,项目结构可以划分为以下几个层次:
·持久层:该层由若干实体类组成
·DAO层:该层由若干DAO接口和MyBatis映射文件组成。接口的名称统一以Dao结尾,且MyBatis的映射文件名称要与接口的名称相同
·Service层:该层由若干Service接口和实现类组成。在本系统中,业务逻辑层的接口统一使用Service结尾,其实现类名称统一在接口名后加ImpI,该层主要用于实现系统的业务逻辑
·Web层:该层主要包括Spring MVC中的Controller类和JSP页面,Controller类主要负责拦截用户请求,并调用业务逻辑层中相应组件的业务逻辑方法来处理用户请求,然后将相应的结果返回给JSP页面
1.3 系统开发及运行环境
·操作系统:Windows10
·Web服务器:Tomcat 8.5
·Java开发包:JDK8
·开发工具:IntelliJ IDEA 2023.2.2
·数据库:MySQL5.7
·浏览器:Edge
二、数据库设计
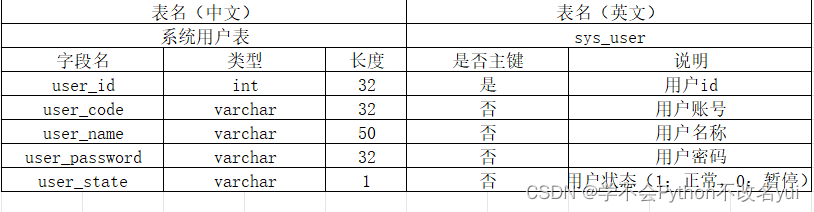
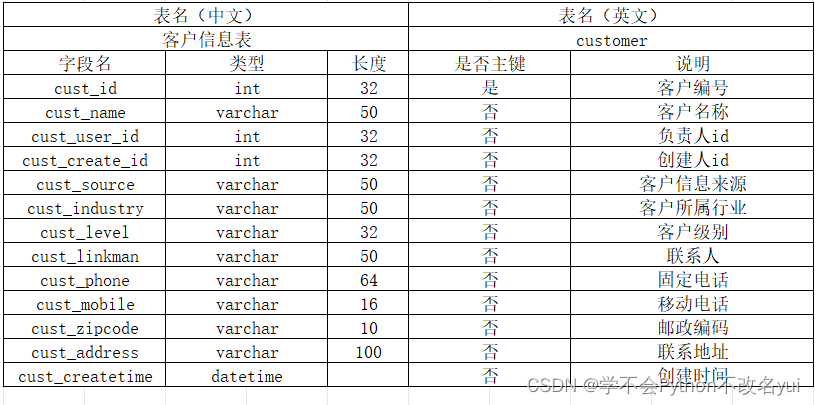
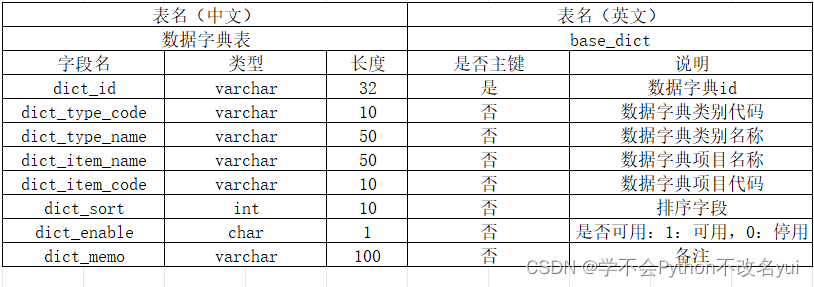
本系统中主要涉及用户登录和客户管理功能,因此在系统中会涉及系统用户表和客户信息表。除此之外,客户信息中的客户来源和所属行业等内容是根据字典表中的信息查询出的,所以涉及到一个数据字典表:
2.1 系统用户表
2.2 客户信息表
2.3 数据字典表
三、系统环境搭建
3.1 所需的JAR包


3.2 准备数据库资源
通过MySQL登录数据库后,创建一个名称为boot_crm的数据库,并选择该数据库,通过SQL命令将数据库文件导入
3.3 准备项目环境
编写配置文件
<?xml version="1.0" encoding="UTF-8"?>
<beans xmlns="http://www.springframework.org/schema/beans"
       xmlns:xsi="http://www.w3.org/2001/XMLSchema-instance"
       xmlns:mvc="http://www.springframework.org/schema/mvc"
       xmlns:context="http://www.springframework.org/schema/context"
       xmlns:aop="http://www.springframework.org/schema/aop"
       xmlns:tx="http://www.springframework.org/schema/tx"
       xsi:schemaLocation="http://www.springframework.org/schema/beans
       http://www.springframework.org/schema/beans/spring-beans-4.3.xsd
       http://www.springframework.org/schema/mvc
       http://www.springframework.org/schema/mvc/spring-mvc-4.3.xsd
       http://www.springframework.org/schema/context
       http://www.springframework.org/schema/context/spring-context-4.3.xsd
       http://www.springframework.org/schema/aop
       http://www.springframework.org/schema/aop/spring-aop-4.3.xsd
       http://www.springframework.org/schema/tx http://www.springframework.org/schema/tx/spring-tx-4.3.xsd">
    <!-- 读取db.properties  -->
    <context:property-placeholder location="classpath:db.properties"/>
    <!--  配置数据源  -->
    <bean id="dataSource" class="org.apache.commons.dbcp2.BasicDataSource">
        <!-- 数据库驱动  -->
        <property name="driverClassName" value="${jdbc.driver}"/>
        <!-- 连接数据库的url  -->
        <property name="url" value="${jdbc.url}"/>
        <!-- 连接数据库的用户名  -->
        <property name="username" value="${jdbc.username}"/>
        <!-- 连接数据库的密码  -->
        <property name="password" value="${jdbc.password}"/>
        <!-- 最大连接数  -->
        <property name="maxTotal" value="${jdbc.maxTotal}"/>
        <!-- 最大空闲连接   -->
        <property name="maxIdle" value="${jdbc.maxIdle}"/>
        <!-- 初始化连接数   -->
        <property name="initialSize" value="${jdbc.initialSize}"/>
    </bean>
    <!--  事务管理器  -->
    <bean id="transactionManager" class="org.springframework.jdbc.datasource.DataSourceTransactionManager">
        <!--  数据源  -->
        <property name="dataSource" ref="dataSource"/>
    </bean>
    <!--  通知  -->
    <tx:advice id="txAdvice" transaction-manager="transactionManager">
        <tx:attributes>
            <!--  传播行为  -->
            <tx:method name="save*" propagation="REQUIRED"/>
            <tx:method name="insert*" propagation="REQUIRED"/>
            <tx:method name="add*" propagation="REQUIRED"/>
            <tx:method name="create*" propagation="REQUIRED"/>
            <tx:method name="delete*" propagation="REQUIRED"/>
            <tx:method name="update*" propagation="REQUIRED"/>
            <tx:method name="find*" propagation="SUPPORTS" read-only="true"/>
            <tx:method name="select*" propagation="SUPPORTS" read-only="true"/>
            <tx:method name="get*" propagation="SUPPORTS" read-only="true"/>
        </tx:attributes>
    </tx:advice>
    <!--  切面  -->
    <aop:config>
        <aop:advisor advice-ref="txAdvice" pointcut="execution(* com.itheima.core.service.*.*(..))"/>
    </aop:config>
    <!--  配置 MyBatis的工厂  -->
    <bean class="org.mybatis.spring.SqlSessionFactoryBean">
        <!--  数据源  -->
        <property name="dataSource" ref="dataSource"/>
        <!--  配置MyBatis的核心配置文件所在位置  -->
        <property name="configLocation" value="classpath:mybatis-config.xml"/>
    </bean>
    <!--  接口开发,扫描 com.itheima.core.dao包 ,写在此包下的接口即可被扫描到  -->
    <bean class="org.mybatis.spring.mapper.MapperScannerConfigurer">
        <property name="basePackage" value="com.itheima.core.dao"/>
    </bean>
    <!--  配置扫描@Service注解  -->
    <context:component-scan base-package="com.itheima.core.service"/>
</beans>
customer.from.type=002
customer.industry.type=001
customer.level.type=006<?xml version="1.0" encoding="UTF-8"?>
<beans xmlns="http://www.springframework.org/schema/beans"
xmlns:xsi="http://www.w3.org/2001/XMLSchema-instance"
xmlns:mvc="http://www.springframework.org/schema/mvc"
xmlns:context="http://www.springframework.org/schema/context"
xmlns:aop="http://www.springframework.org/schema/aop"
xmlns:tx="http://www.springframework.org/schema/tx"
xsi:schemaLocation="http://www.springframework.org/schema/beans
http://www.springframework.org/schema/beans/spring-beans-4.3.xsd
http://www.springframework.org/schema/mvc
http://www.springframework.org/schema/mvc/spring-mvc-4.3.xsd
http://www.springframework.org/schema/context
http://www.springframework.org/schema/context/spring-context-4.3.xsd
http://www.springframework.org/schema/aop
http://www.springframework.org/schema/aop/spring-aop-4.3.xsd
http://www.springframework.org/schema/tx
http://www.springframework.org/schema/tx/spring-tx-4.3.xsd">
<!-- 加载属性文件 -->
<context:property-placeholder location="classpath:resource.properties"/>
<!-- 配置扫描器 -->
<context:component-scan base-package="com.itheima.core.web.controller"/>
<!-- 注解驱动:配置处理器映射器和适配器 -->
<mvc:annotation-driven/>
<!-- 配置静态资源的访问映射,此配置中的文件,将不被前端控制器拦截 -->
<mvc:resources location="/js/" mapping="/js/**"/>
<mvc:resources location="/css/" mapping="/css/**"/>
<mvc:resources location="/fonts/" mapping="/fonts/**"/>
<mvc:resources location="/images/" mapping="/images/**"/>
<!-- 配置视图解释器ViewResolver -->
<bean id="jspViewResolver" class="org.springframework.web.servlet.view.InternalResourceViewResolver">
<property name="prefix" value="/WEB-INF/jsp/"/>
<property name="suffix" value=".jsp"/>
</bean>
<!-- 配置拦截器 -->
<mvc:interceptors>
<mvc:interceptor>
<mvc:mapping path="/**"/>
<bean class="com.itheima.core.interceptor.LoginInterceptor"/>
</mvc:interceptor>
</mvc:interceptors>
</beans><?xml version="1.0" encoding="UTF-8"?>
<web-app xmlns="http://xmlns.jcp.org/xml/ns/javaee"
xmlns:xsi="http://www.w3.org/2001/XMLSchema-instance"
xsi:schemaLocation="http://xmlns.jcp.org/xml/ns/javaee
http://xmlns.jcp.org/xml/ns/javaee/web-app_4_0.xsd"
version="4.0">
<!-- 配置加载Spring文件的监听器 -->
<context-param>
<param-name>contextConfigLocation</param-name>
<param-value>classpath:applicationContext.xml</param-value>
</context-param>
<listener>
<listener-class> org.springframework.web.context.ContextLoaderListener </listener-class>
</listener>
<!-- 编码过滤器 -->
<filter>
<filter-name>encoding</filter-name>
<filter-class> org.springframework.web.filter.CharacterEncodingFilter </filter-class>
<init-param>
<param-name>encoding</param-name>
<param-value>UTF-8</param-value>
</init-param>
</filter>
<filter-mapping>
<filter-name>encoding</filter-name>
<url-pattern>*.action</url-pattern>
</filter-mapping>
<!-- 配置Spring MVC前端核心控制器 -->
<servlet>
<servlet-name>crm</servlet-name>
<servlet-class> org.springframework.web.servlet.DispatcherServlet </servlet-class>
<init-param>
<param-name>contextConfigLocation</param-name>
<param-value>classpath:springmvc-config.xml</param-value>
</init-param>
<!-- 配置服务器启动后立即加载Spring MVC配置文件 -->
<load-on-startup>1</load-on-startup>
</servlet>
<servlet-mapping>
<servlet-name>crm</servlet-name>
<url-pattern>*.action</url-pattern>
</servlet-mapping>
<!-- 系统默认页面 -->
<welcome-file-list>
<welcome-file>index.jsp</welcome-file>
</welcome-file-list>
</web-app>此时运行项目可以得到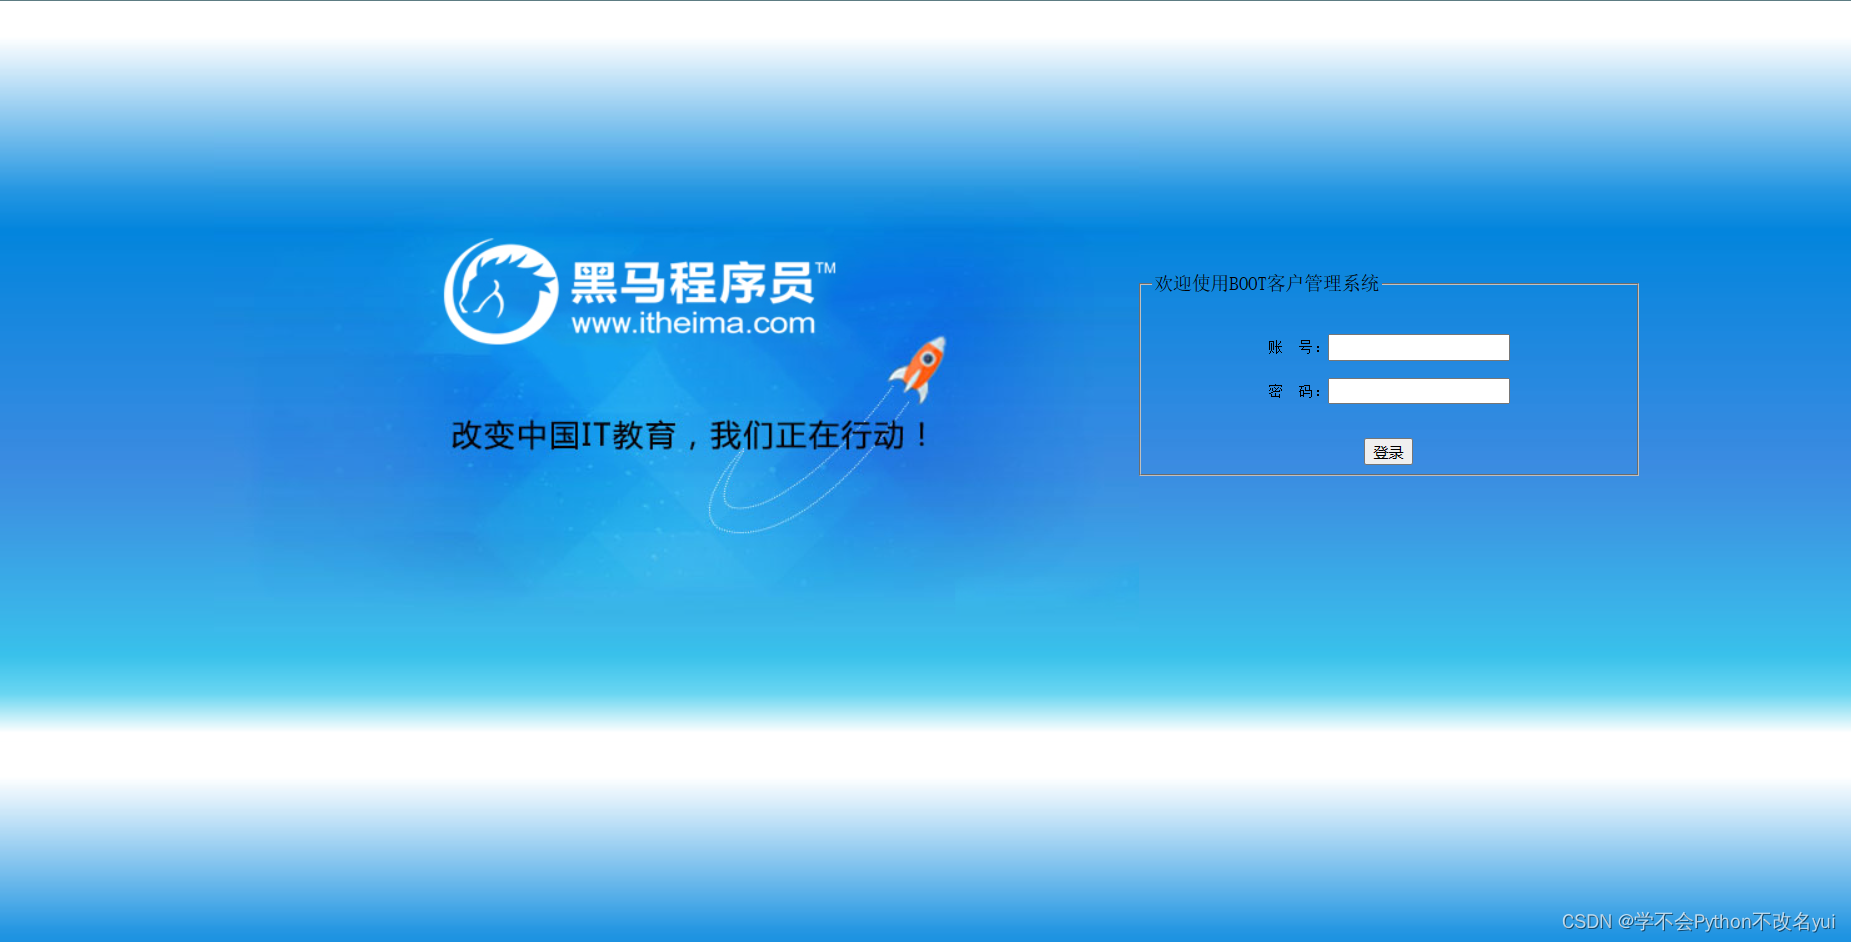
四、项目运行
4.1 用户登录退出功能
4.1.1 用户登录
实现用户登录流程: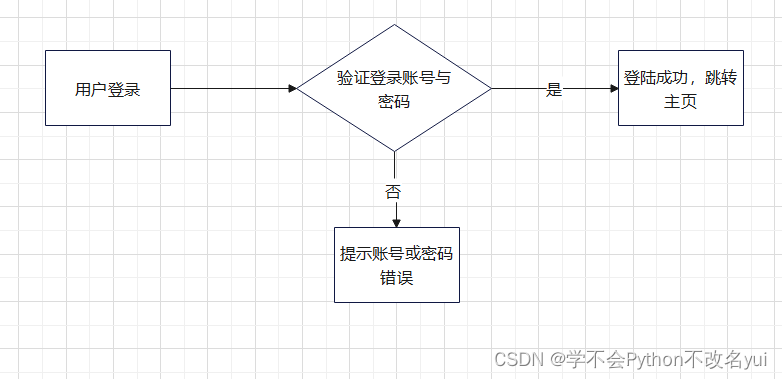
实现功能流程:用户在登录过程中首先要验证用户名和密码是否正确,如果正确则可以成功登陆系统,系统则会自动跳转到主页;如果错误则在登陆页面给出错误提示信息。
1.在User类中定义用户相关属性以及相应的getter/setter方法
2.在DAO层中实现通过账号和密码查询用户的方法,其中@Param(“a”)表示为参数a命名,命名后在映射文件的SQL中,使用#{a}就可以获取a的参数值
3.在Service层接口中,实现通过账号和密码查询用户的方法,并创建用户Service层接口的实现类,使用impl包创建UserService接口的实现类UserServiceImpl,其中,在findUser()方法中调用了UserDao对象中的findUser()方法来查询用户信息,并将查询到的信息返回
4.创建用户控制器类UserController,其中首先通过@Autowired注解将UserService对象注入到了本类中,然后创建了一个用于用户登陆的login()方法。
由于在用户登录时,表单都会以POST方式提交,所以将@RequestMapping注解的method属性设置为RequestMethod.POST。在login()方法中,首先通过页面中传递过来的账号和密码查询用户,然后通过if语句判断是否存在该用户,如果存在,就将用户信息存储到Session中,并跳转到系统主页面;如果不存在,则提示错误信息,并返回到登陆页面。
5.系统默认首页index.jsp主要实现的是转发功能,在访问时会转发到登陆页面,登陆页面中主要包含一个登陆表单。在login.jsp中,核心代码是用户登录操作的form表单,该表单在提交时会通过check()方法检查账户或密码是否为空,如果为空,则通过<span>标签提示用户“账号或密码不能为空!”;如果账号和密码都已填写,则将表单提交到以“/login.action”结尾的请求中。
6.测试登录
mysql数据库中存在已经设定的账号密码,直接登录则跳转该界面

4.1.2 登陆验证
为了验证用户登录过程,在用户控制器类UserController中实现一个跳转到客户管理页面的方法
    @RequestMapping(value = "/toCustomer.action")
    public String toCustomer() {
        return "customer";
    }
但是让未登录的用户直接访问客户管理界面是不安全的,考虑到安全性问题,应该创建一个登录拦截来拦截所有请求,只有已登录用户的请求才可以通过,而对于未登录用户的请求则跳转到登录界面并提示用户进行登录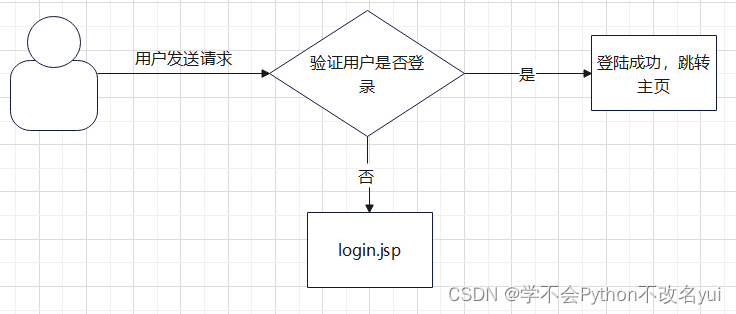
1.创建登录拦截器类,对URL进行拦截:
String url = request.getRequestURI();
        // URL:除了登录请求外,其他的URL都进行拦截控制
        if (url.indexOf("/login.action") >= 0) {
            return true;
        }
        // 获取Session
        HttpSession session = request.getSession();
        User user = (User) session.getAttribute("USER_SESSION");
        // 判断Session中是否有用户数据,如果有,则返回true,继续向下执行
        if (user != null) {
            return true;
        }
        // 不符合条件的给出提示信息,并转发到登录页面
        request.setAttribute("msg", "您还没有登录,请先登录!");
        request.getRequestDispatcher("/WEB-INF/jsp/login.jsp")
                .forward(request, response);
        return false;
在 preHandle()方法中,首先获取了用户URL请求,然后通过请求来判断是否为用户登陆操作,只有对用户的登录请求才不进行拦截操作,接下来获取Session对象,获取其中的用户信息,若其中的用户信息不为空,则表示用户已经登陆,拦截器才放行,若Session中的用户信息为空,则表示用户未登录,系统会跳转到登录界面并提醒用户登录。
2.拦截器的配置
 <!--  配置拦截器  -->
    <mvc:interceptors>
        <mvc:interceptor>
            <mvc:mapping path="/**"/>
            <bean class="com.itheima.core.interceptor.LoginInterceptor"/>
        </mvc:interceptor>
    </mvc:interceptors>
这会将所有的用户请求都交由登录拦截器来处理
3.退出登录
用户登录模块中包含退出登录功能,成功登陆的用户会跳转到客户管理页面,并在页面中显示已登录的用户名称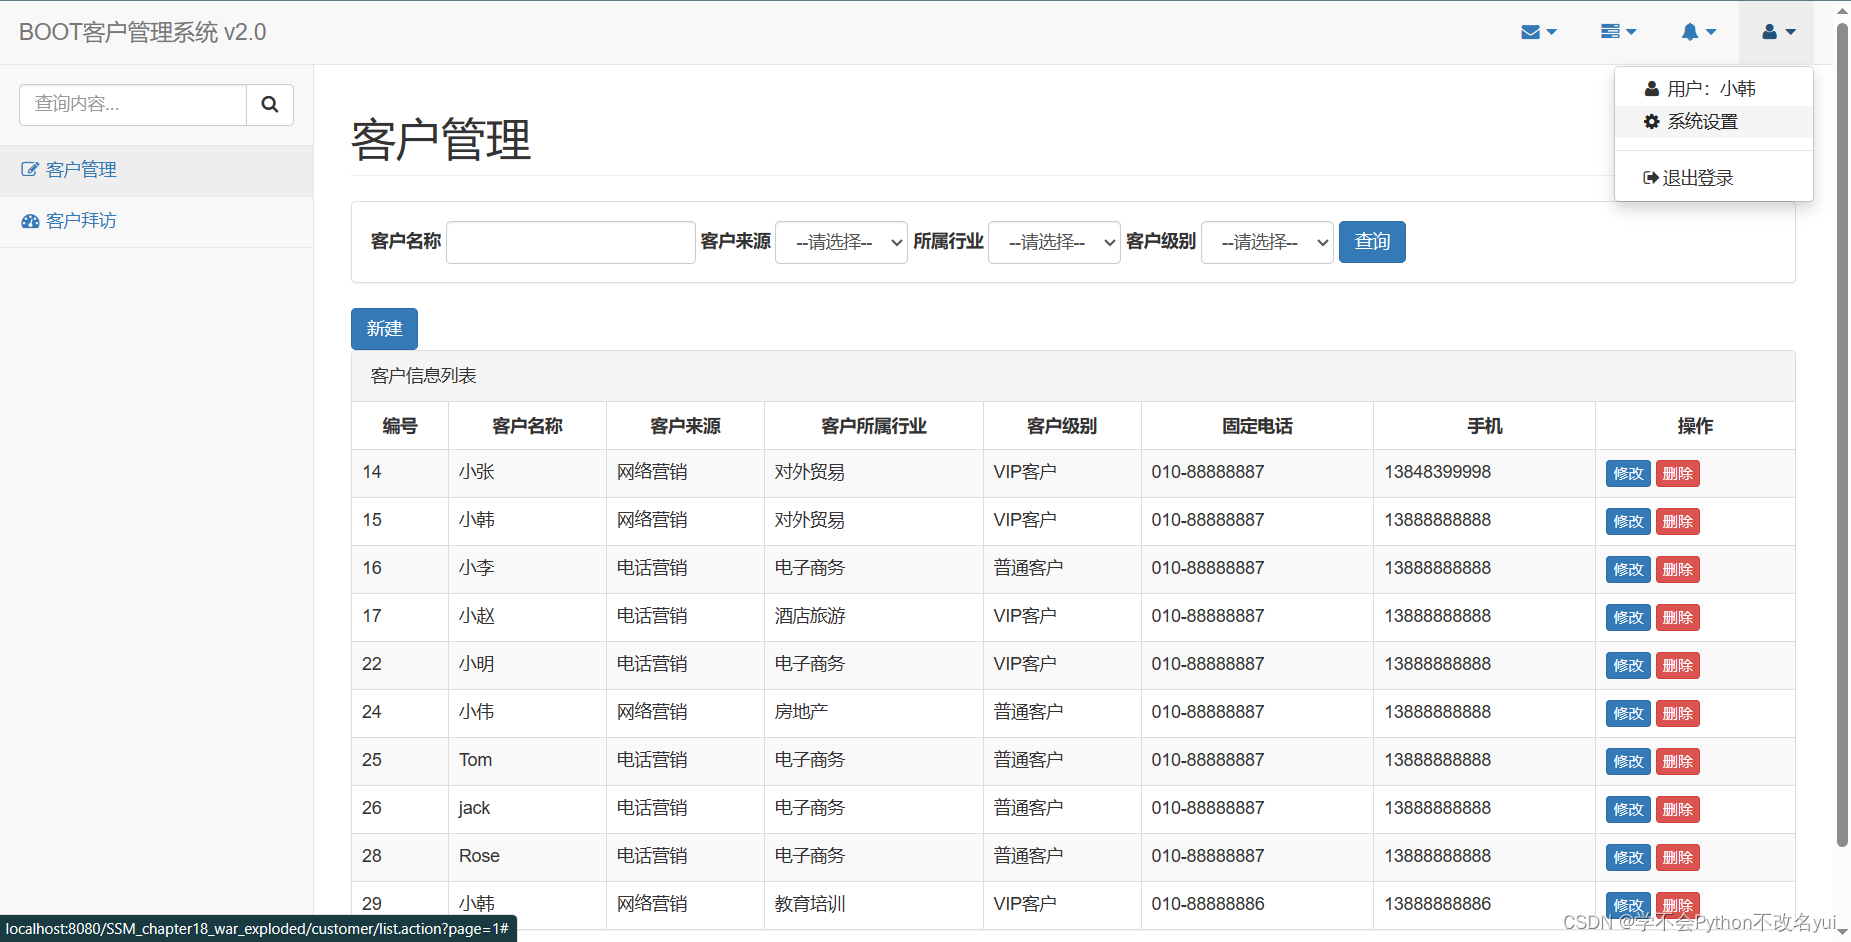
在customer.jsp中实现该功能的代码如下
<ul class="dropdown-menu dropdown-user">
				<li><a href="#"><i class="fa fa-user fa-fw"></i>
				               用户:${USER_SESSION.user_name}
				    </a>
				</li>
				<li><a href="#"><i class="fa fa-gear fa-fw"></i> 系统设置</a></li>
				<li class="divider"></li>
				<li>
					<a href="${pageContext.request.contextPath }/logout.action">
					<i class="fa fa-sign-out fa-fw"></i>退出登录
					</a>
				</li>
			</ul>
其中,现实的登陆用户名是通过EL表达式从Session中获取的,当点击"退出登录“的链接时将提交一个”logout.action“的请求。在用户控制器类中使用一个方法,在方法执行时需要清除Session中的用户信息,并且在退出登陆后系统要跳转到登录界面
 /**
     * 退出登录
     */
    @RequestMapping(value = "/logout.action")
    public String logout(HttpSession session) {
        // 清除Session
        session.invalidate();
        // 重定向到登录页面的跳转方法
        return "redirect:login.action";
    }
    /**
     * 向用户登陆页面跳转
     */
    @RequestMapping(value = "/login.action", method = RequestMethod.GET)
    public String toLogin() {
        return "login";
    }


}
4.2 客户管理功能
4.2.1 实现查询客户功能
客户管理模块中的查询分为条件查询和查询所有:为了实际使用的便捷性,可以在一个方法中使用,即当有条件时,就按条件查询,当没有条件时,就查询所有。
同时,如果实现上述效果,数据在一个页面中全部显示出来,会导致数据的可读性很差,所以考虑将数据进行分页查询显示

在客户持久化类中,声明了与客户数据表对应的属性并定义了各个属性的getter/setter方法,属性中的star和rows用于执行分页操作,其中star表示分页操作中的起始行,rows则表示分页中所选取的行数
在数据字典持久化类中,声明了与数据字典表对应的属性并定义了各个属性的getter/setter方法
4.2.1.1 实现DAO层
1.创建客户DAO层接口和映射文件CustomerDao.java/xml
在映射文件中使用SQL片段作为映射查询客户信息的条件,并在方法的SQL中分别通过左外连接的方式从数据字典表base_dict中的类别代码字段查询出了相应的类别信息,同时通过limit来实现数据的分页查询,最后使用一个查询客户总数的映射查询语句用于分页使用
2.创建数据字典DAO层接口和映射文件BaseDao.java/xml
在接口中编写根据类别代码查询字典的方法
4.2.1.2 实现Service层
1.引入分页标签类,Page.java和NavigationTag.java
2.创建数据字典及客户的Service层接口BaseDictService.java和CustomerService.java
3.创建数据字典及客户Service层接口的实现类 BaseDictServiceImpl.java和CustomerServiceImpl.java
其中,在客户Service层接口的实现类的实现方法中,首先创建了客户对象,然后判断条件查询中的客户名称、信息来源、所属行业和客户级别是否为空,只有不为空时,才添加到客户对象中。接下来获取了页面传递过来的当前页和每页数信息,并查询所有的客户信息以及客户总数,最后将查询出的所有信息封装到Page对象中并返回
 // 查询客户列表
        List<Customer> customers =
                customerDao.selectCustomerList(customer);
        // 查询客户列表总记录数
        Integer count = customerDao.selectCustomerListCount(customer);
        // 创建Page返回对象
        Page<Customer> result = new Page<>();
        result.setPage(page);
        result.setRows(customers);
        result.setSize(rows);
        result.setTotal(count);
        return result;
4.2.1.3 实现Controller
创建客户控制器类CustomerController
package com.itheima.core.web.controller;
import java.sql.Timestamp;
import java.util.Date;
import java.util.List;

import javax.servlet.http.HttpSession;

import org.springframework.beans.factory.annotation.Autowired;
import org.springframework.beans.factory.annotation.Value;
import org.springframework.stereotype.Controller;
import org.springframework.ui.Model;
import org.springframework.web.bind.annotation.RequestMapping;
import org.springframework.web.bind.annotation.RequestParam;
import org.springframework.web.bind.annotation.ResponseBody;

import com.itheima.common.utils.Page;
import com.itheima.core.po.BaseDict;
import com.itheima.core.po.Customer;
import com.itheima.core.po.User;
import com.itheima.core.service.BaseDictService;
import com.itheima.core.service.CustomerService;
/**
 * 客户管理控制器类
 */
@Controller
public class CustomerController {
    // 依赖注入
    @Autowired
    private CustomerService customerService;
    @Autowired
    private BaseDictService baseDictService;
    // 客户来源
    @Value("${customer.from.type}")
    private String FROM_TYPE;
    // 客户所属行业
    @Value("${customer.industry.type}")
    private String INDUSTRY_TYPE;
    // 客户级别
    @Value("${customer.level.type}")
    private String LEVEL_TYPE;
    /**
     *  客户列表
     */
    @RequestMapping(value = "/customer/list.action")
    public String list(@RequestParam(defaultValue="1")Integer page,
                       @RequestParam(defaultValue="10")Integer rows,
                       String custName, String custSource, String custIndustry,
                       String custLevel, Model model) {
        // 条件查询所有客户
        Page<Customer> customers = customerService
                .findCustomerList(page, rows, custName,
                        custSource, custIndustry,custLevel);
        model.addAttribute("page", customers);
        // 客户来源
        List<BaseDict> fromType = baseDictService
                .findBaseDictByTypeCode(FROM_TYPE);
        // 客户所属行业
        List<BaseDict> industryType = baseDictService
                .findBaseDictByTypeCode(INDUSTRY_TYPE);
        // 客户级别
        List<BaseDict> levelType = baseDictService
                .findBaseDictByTypeCode(LEVEL_TYPE);
        // 添加参数
        model.addAttribute("fromType", fromType);
        model.addAttribute("industryType", industryType);
        model.addAttribute("levelType", levelType);
        model.addAttribute("custName", custName);
        model.addAttribute("custSource", custSource);
        model.addAttribute("custIndustry", custIndustry);
        model.addAttribute("custLevel", custLevel);
        return "customer";
    }

    /**
     * 创建客户
     */
    @RequestMapping("/customer/create.action")
    @ResponseBody
    public String customerCreate(Customer customer,HttpSession session) {
        // 获取Session中的当前用户信息
        User user = (User) session.getAttribute("USER_SESSION");
        // 将当前用户id存储在客户对象中
        customer.setCust_create_id(user.getUser_id());
        // 创建Date对象
        Date date = new Date();
        // 得到一个Timestamp格式的时间,存入mysql中的时间格式“yyyy/MM/dd HH:mm:ss”
        Timestamp timeStamp = new Timestamp(date.getTime());
        customer.setCust_createtime(timeStamp);
        // 执行Service层中的创建方法,返回的是受影响的行数
        int rows = customerService.createCustomer(customer);
        if(rows > 0){
            return "OK";
        }else{
            return "FAIL";
        }
    }

    /**
     * 通过id获取客户信息
     */
    @RequestMapping("/customer/getCustomerById.action")
    @ResponseBody
    public Customer getCustomerById(Integer id) {
        Customer customer = customerService.getCustomerById(id);
        return customer;
    }
    /**
     * 更新客户
     */
    @RequestMapping("/customer/update.action")
    @ResponseBody
    public String customerUpdate(Customer customer) {
        int rows = customerService.updateCustomer(customer);
        if(rows > 0){
            return "OK";
        }else{
            return "FAIL";
        }
    }

    /**
     * 删除客户
     */
    @RequestMapping("/customer/delete.action")
    @ResponseBody
    public String customerDelete(Integer id) {
        int rows = customerService.deleteCustomer(id);
        if(rows > 0){
            return "OK";
        }else{
            return "FAIL";
        }
    }

}
首先声明了customerService和baseDictService属性,并通过@Autowired注解将这两个对象注入到本类中,然后分别定义了客户来源、所属行业和客户级别的属性,并通过@Value注解将resource.properties文件中的属性值赋给这三个属性,最后实现查询客户列表的方法来执行查询操作,其中第1个参数page的默认值为1,表示从第一条数据开始,第2个参数的默认值为10,表示每页显示10条数据。
4.2.1.4 实现页面显示
1.在准备项目环境时已经引入了需要的自定义标签文件,在实现页面显示功能中主要用于实现分页功能,其标签名称为commons.tld
<?xml version="1.0" encoding="UTF-8" ?>
<!DOCTYPE taglib
   PUBLIC "-//Sun Microsystems, Inc.//DTD JSP Tag Library 1.2//EN"
   "http://java.sun.com/dtd/web-jsptaglibrary_1_2.dtd">
<taglib>
    <!-- 指定标签库的版本号 -->
    <tlib-version>2.0</tlib-version>
    <!-- 指定JSP的版本号 -->
    <jsp-version>1.2</jsp-version>
    <!-- 指定标签库的名称 -->
    <short-name>common</short-name>
    <!-- 指定标签库的URI -->
    <uri>http://itheima.com/common/</uri>
    <!-- 指定标签库的显示名称 -->
    <display-name>Common Tag</display-name>
    <!-- 指定标签库的描述 -->
    <description>Common Tag library</description>
    <!-- 注册一个自定义标签 -->
    <tag>
        <!-- 指定注册的自定义标签名称 -->
        <name>page</name>
        <!-- 指定自定义标签的标签处理器类 -->
        <tag-class>com.itheima.common.utils.NavigationTag</tag-class>
        <!-- 指定标签体类型 -->
        <body-content>JSP</body-content>
        <!-- 描述 -->
        <description>create navigation for paging</description>
        <!-- 指定标签中的属性 -->
        <attribute>
            <!-- 指定属性名称 -->
            <name>url</name>
            <!-- 该属性为true时表示其指定是属性为必须属性 -->
            <required>true</required>
            <!-- 该属性用于指定能不能使用表达式来动态指定数据,为true时表示可以 -->
            <rtexprvalue>true</rtexprvalue>
        </attribute>
        <attribute>
            <name>bean</name>
            <rtexprvalue>true</rtexprvalue>
        </attribute>
        <attribute>
            <name>number</name>
            <rtexprvalue>true</rtexprvalue>
        </attribute>
	</tag>
</taglib>
其中, <uri>http://itheima.com/common/</uri>是在使用自定义标签时引入的URL,
<tag-class>com.itheima.common.utils.NavigationTag</tag-class>指定了自定义标签的处理器类
2.在customer.jsp中,编写条件查询和显示客户列表以及分页查询的功能
<%@ taglib prefix="c" uri="http://java.sun.com/jsp/jstl/core"%>
<%@ taglib prefix="itheima" uri="http://itheima.com/common/"%>
上述代码引入了JSTL标签和自定义的分页标签
				<form class="form-inline" method="get"
				      action="${pageContext.request.contextPath }/customer/list.action">
					<div class="form-group">
						<label for="customerName">客户名称</label>
						<input type="text" class="form-control" id="customerName"
						                   value="${custName }" name="custName" />
					</div>
					<div class="form-group">
						<label for="customerFrom">客户来源</label>
						<select	class="form-control" id="customerFrom" name="custSource">
							<option value="">--请选择--</option>
							<c:forEach items="${fromType}" var="item">
								<option value="${item.dict_id}"
								       <c:if test="${item.dict_id == custSource}">selected</c:if>>
								    ${item.dict_item_name }
								</option>
							</c:forEach>
						</select>
					</div>
					<div class="form-group">
						<label for="custIndustry">所属行业</label>
						<select	class="form-control" id="custIndustry"  name="custIndustry">
							<option value="">--请选择--</option>
							<c:forEach items="${industryType}" var="item">
								<option value="${item.dict_id}"
								        <c:if test="${item.dict_id == custIndustry}"> selected</c:if>>
								    ${item.dict_item_name }
								</option>
							</c:forEach>
						</select>
					</div>
					<div class="form-group">
						<label for="custLevel">客户级别</label>
						<select	class="form-control" id="custLevel" name="custLevel">
							<option value="">--请选择--</option>
							<c:forEach items="${levelType}" var="item">
								<option value="${item.dict_id}"
								        <c:if test="${item.dict_id == custLevel}"> selected</c:if>>
								    ${item.dict_item_name }
								</option>
							</c:forEach>
						</select>
					</div>
					<button type="submit" class="btn btn-primary">查询</button>
				</form>
上述代码是一个条件查询的from表单,点击”查询“后,会提交到一个”list.action“的请求中
					<table class="table table-bordered table-striped">
						<thead>
							<tr>
								<th>编号</th>
								<th>客户名称</th>
								<th>客户来源</th>
								<th>客户所属行业</th>
								<th>客户级别</th>
								<th>固定电话</th>
								<th>手机</th>
								<th>操作</th>
							</tr>
						</thead>
						<tbody>
							<c:forEach items="${page.rows}" var="row">
								<tr>
									<td>${row.cust_id}</td>
									<td>${row.cust_name}</td>
									<td>${row.cust_source}</td>
									<td>${row.cust_industry}</td>
									<td>${row.cust_level}</td>
									<td>${row.cust_phone}</td>
								    <td>${row.cust_mobile}</td>
									<td>
										<a href="#" class="btn btn-primary btn-xs" data-toggle="modal" data-target="#customerEditDialog" onclick= "editCustomer(${row.cust_id})">修改</a>
										<a href="#" class="btn btn-danger btn-xs" onclick="deleteCustomer(${row.cust_id})">删除</a>
									</td>
								</tr>
							</c:forEach>
						</tbody>
					</table>
上述代码是显示客户信息列表的表格,查询出的客户信息会在此表格中显示
<itheima:page url="${pageContext.request.contextPath }/customer/list.action" />上述代码是自定义的分页标签,该标签会根据客户数以及设定的页数数据显示内容
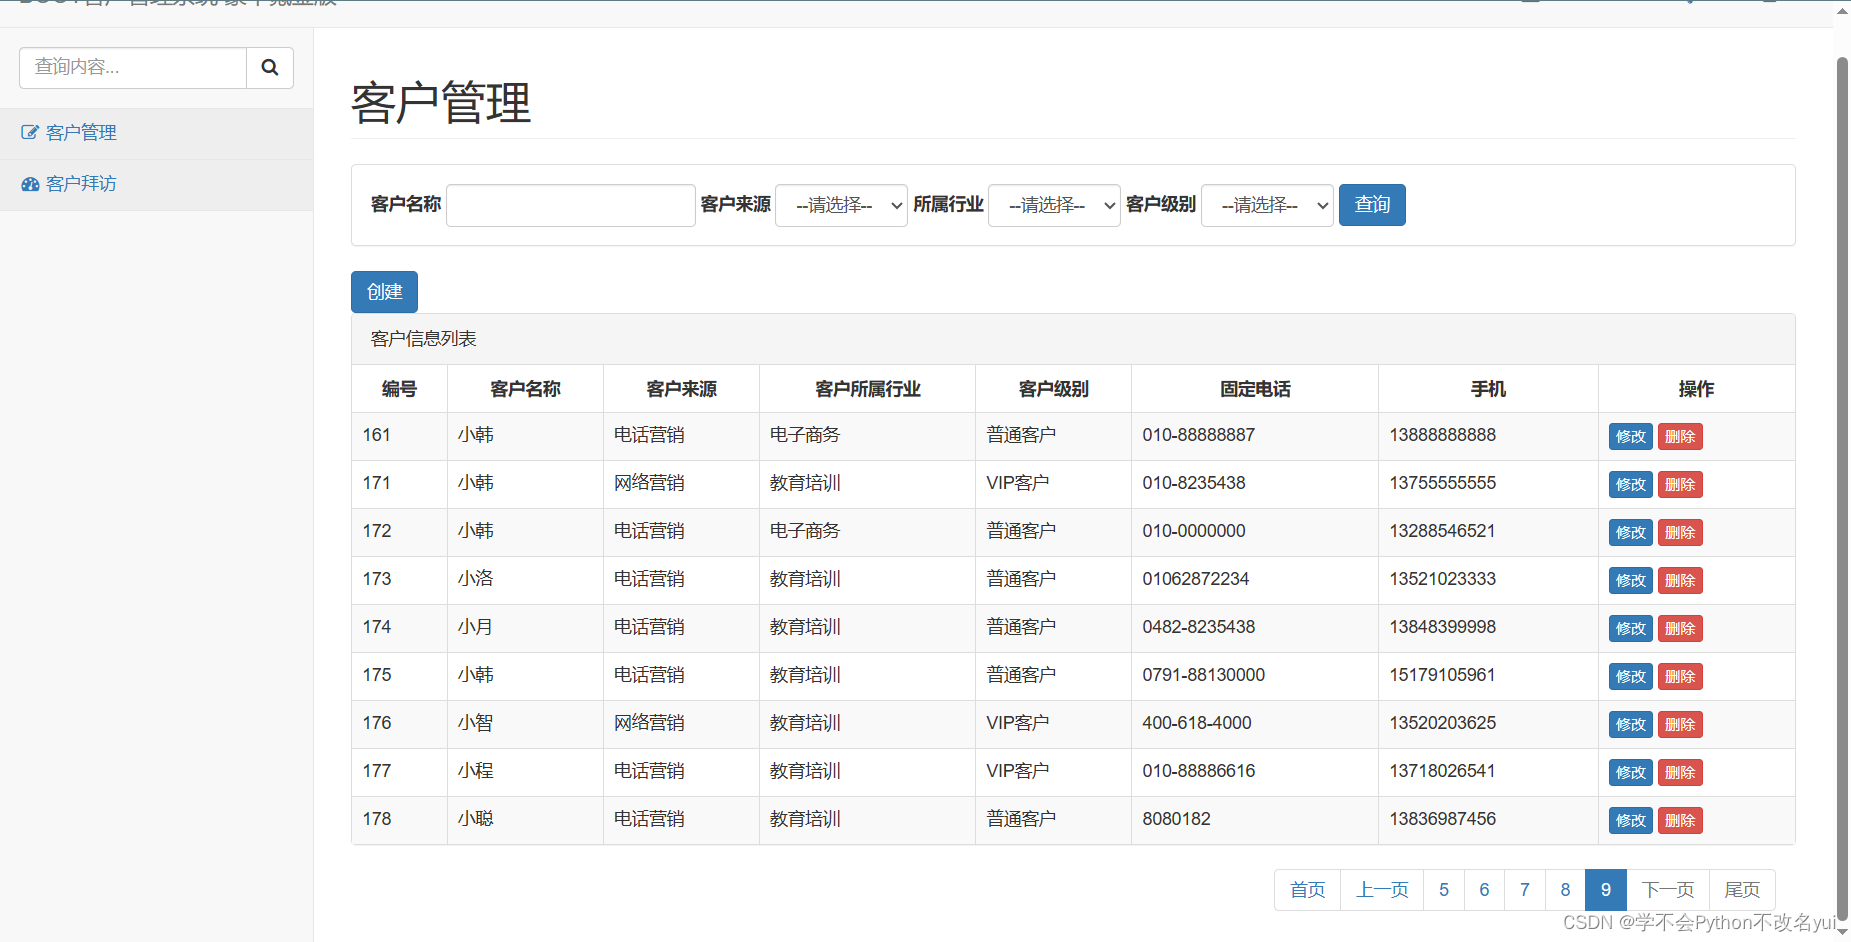
4.2.1.5 测试条件查询和分页
重启Tomcat服务器后,使用客户来源查询如图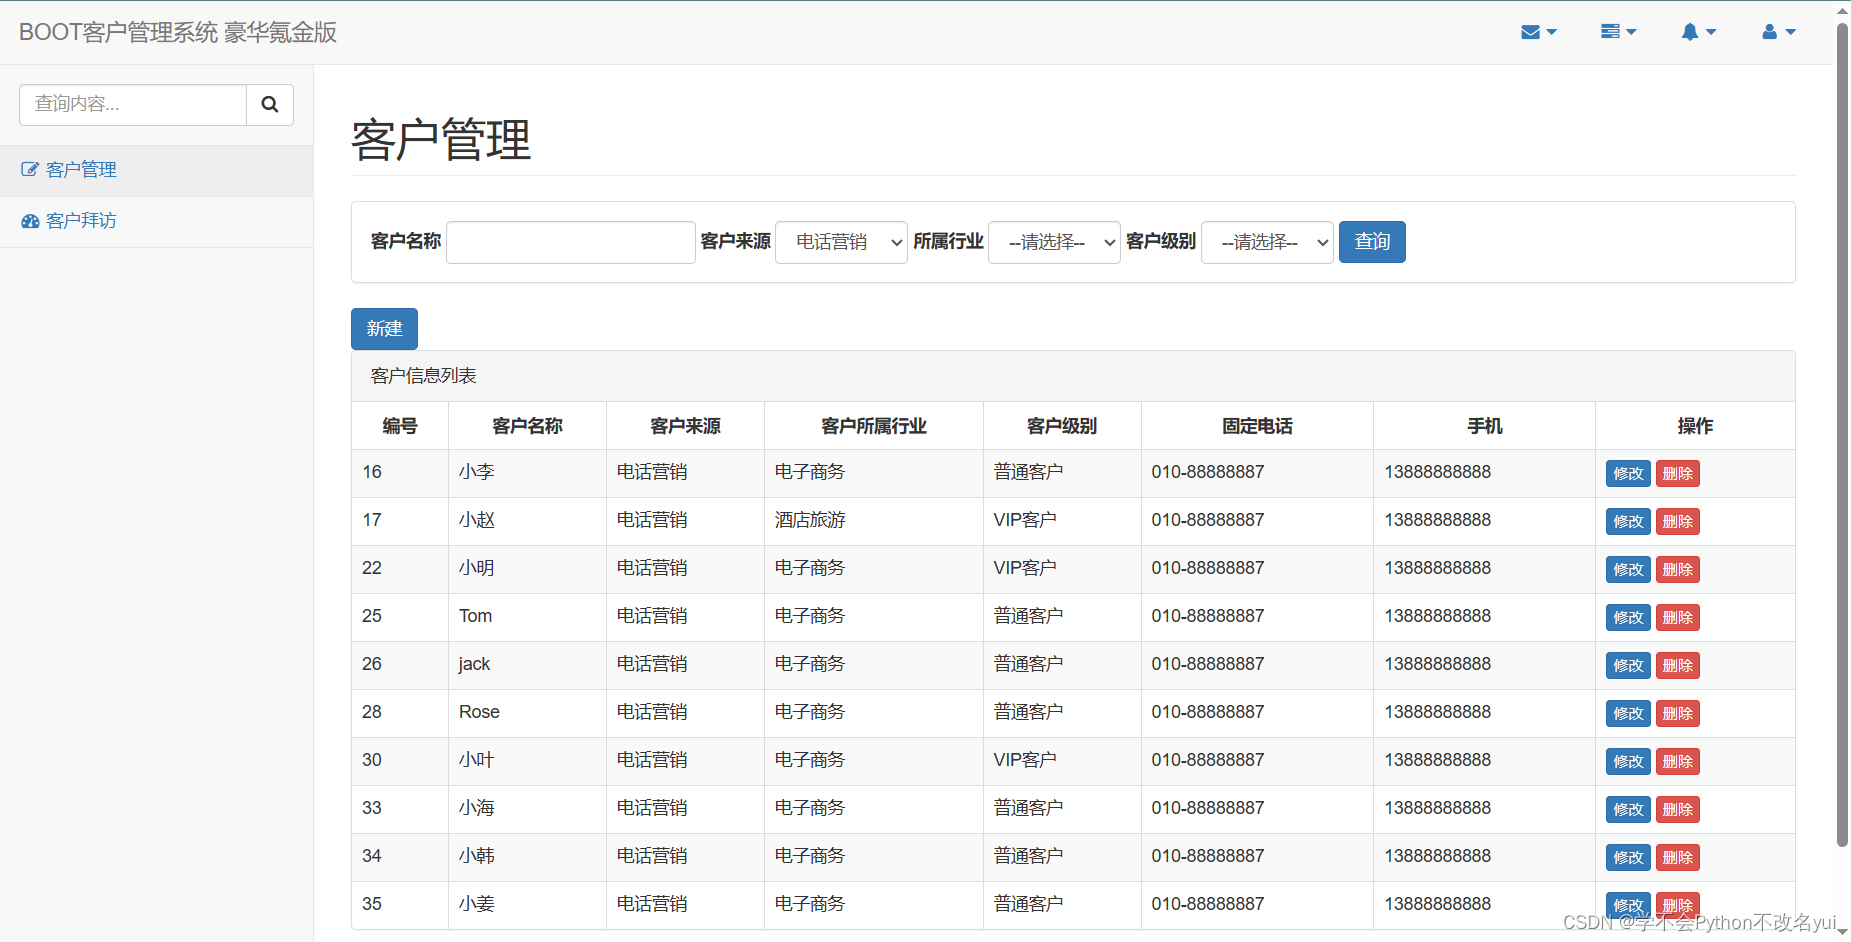
分页列表也可以使用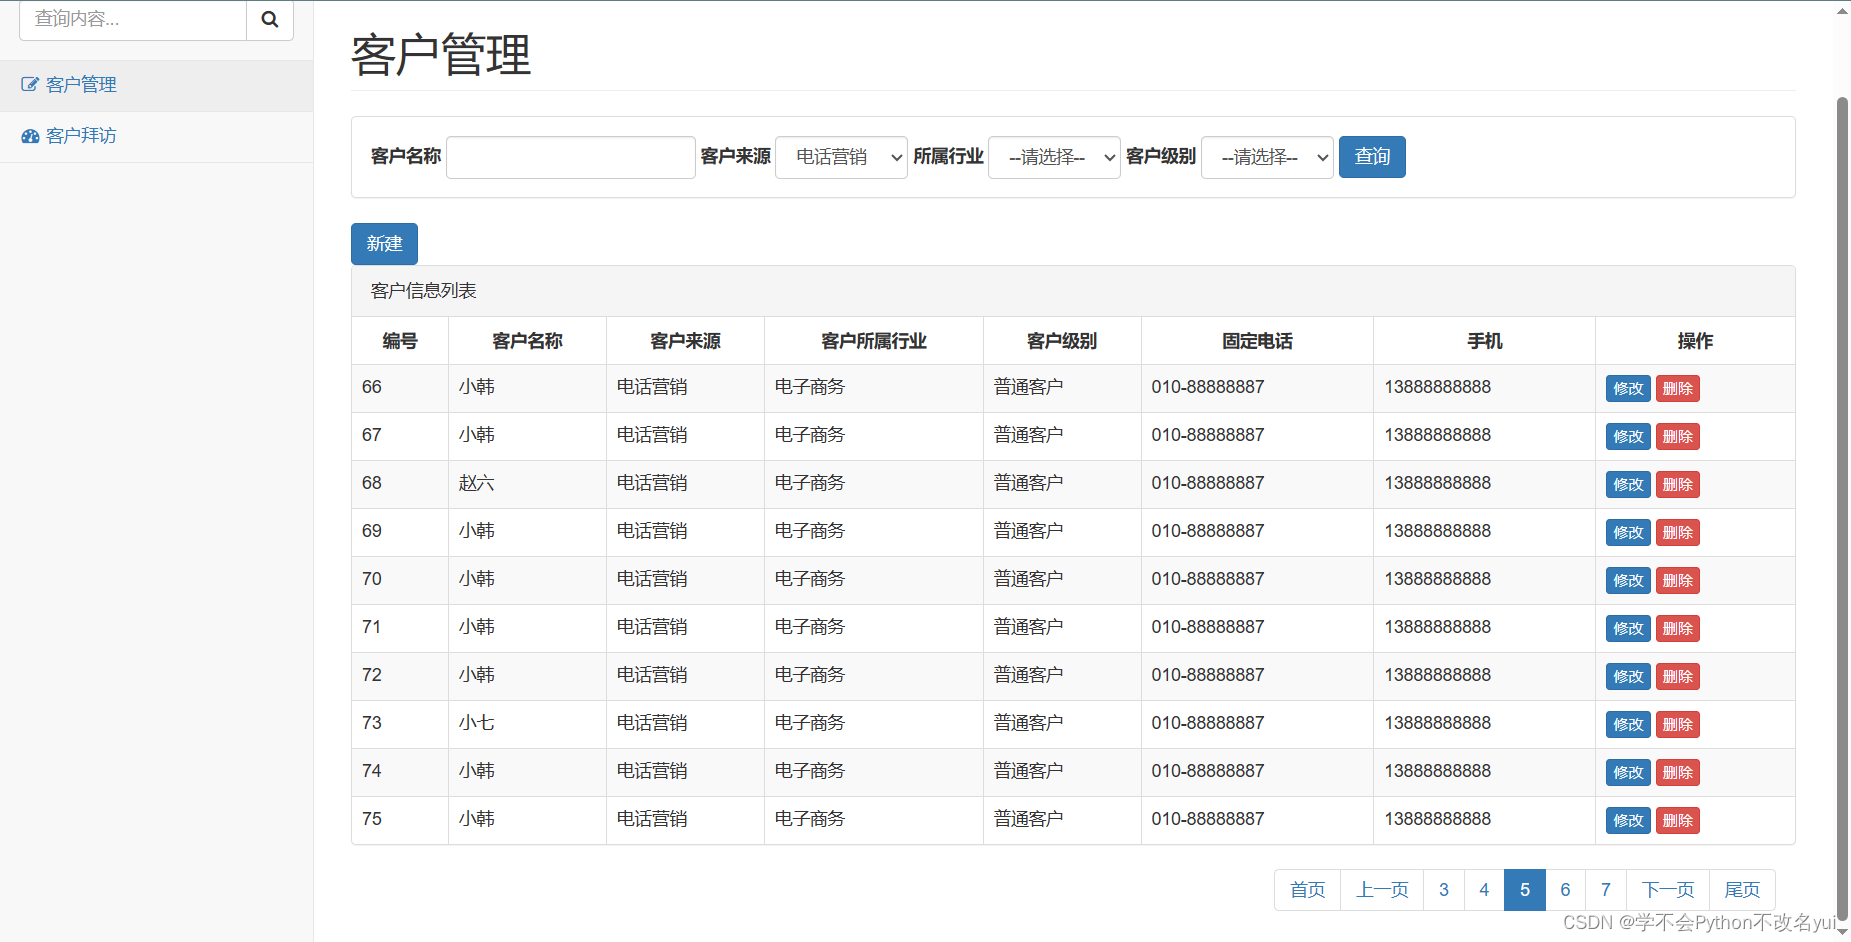
改进:当进入客户管理页面时,客户信息列表没有任何显示,只有”查询“后才会显示数据。
将用户控制器类UserController中的用户登陆方法login()内跳转到主页面的语句修改为重定向到主页的跳转方法即可
return "redirect:customer/list.action";如此,登陆成功后,客户管理页面将直接显示出分页后的客户列表信息
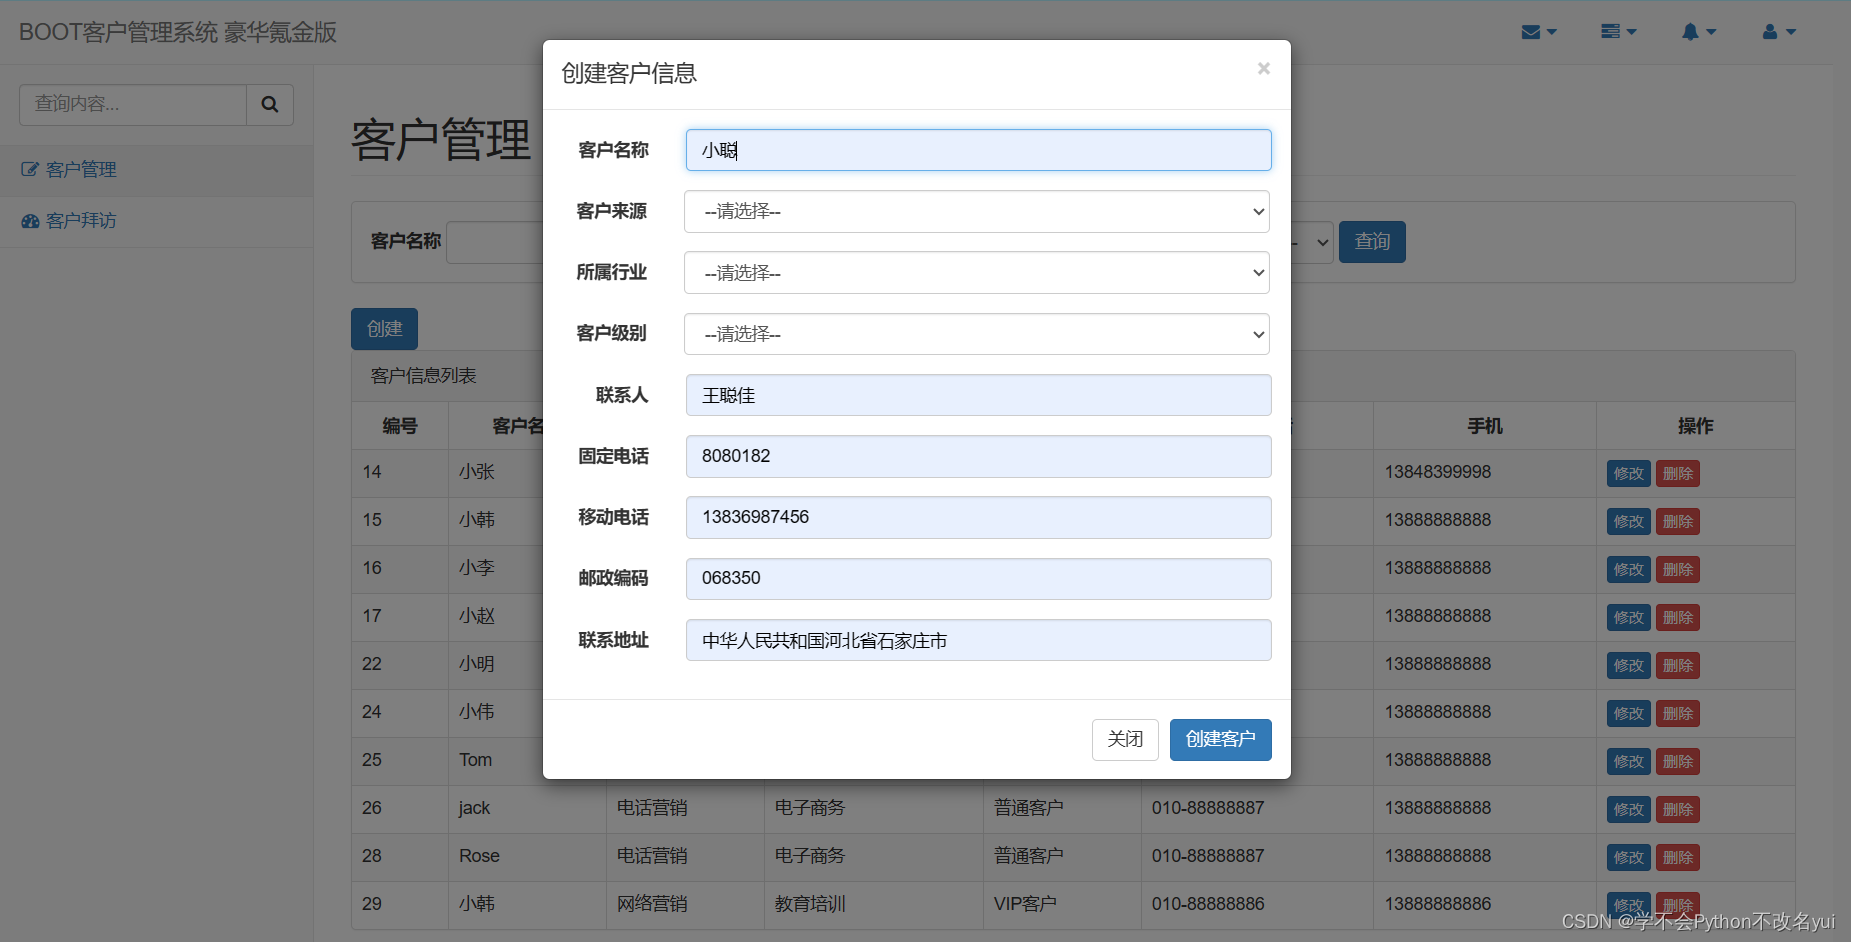
4.2.2 添加客户功能
4.2.2.1 实现页面功能
添加客户的操作是通过页面弹出窗口实现的,当点击”创建“时,将弹出”创建客户信息“窗口
lass="btn btn-primary" data-toggle="modal"
		           data-target="#newCustomerDialog" onclick="clearCustomer()">创建</a>
上述代码中,data-toggle=”modal“和data-target=”#newCustomerDialog“是Bootstrap的模态框代码,当点击”创建“后,会弹出id为newCustomerDialog的窗口,同时通过onclick属性执行clearCustomer()方法来清楚窗口中的所有数据
在custormer.jsp中,新建客户模态框的显示代码如下
<!-- 创建客户模态框 -->
<div class="modal fade" id="newCustomerDialog" tabindex="-1" role="dialog"
aria-labelledby="myModalLabel">
<div class="modal-dialog" role="document">
<div class="modal-content">
<div class="modal-header">
<button type="button" class="close" data-dismiss="modal" aria-label="Close">
<span aria-hidden="true">×</span>
</button>
<h4 class="modal-title" id="myModalLabel">创建客户信息</h4>
</div>
<div class="modal-body">
<form class="form-horizontal" id="new_customer_form">
<div class="form-group">
<label for="new_customerName" class="col-sm-2 control-label">
客户名称
</label>
<div class="col-sm-10">
<input type="text" class="form-control" id="new_customerName" placeholder="客户名称"
name="cust_name"/>
</div>
</div>
<div class="form-group">
<label for="new_customerFrom" style="float:left;padding:7px 15px 0 27px;">客户来源</label>
<div class="col-sm-10">
<select class="form-control" id="new_customerFrom" name="cust_source">
<option value="">--请选择--</option>
<c:forEach items="${fromType}" var="item">
<option value="${item.dict_id}"
<c:if test="${item.dict_id == custSource}">selected</c:if>>
${item.dict_item_name }
</option>
</c:forEach>
</select>
</div>
</div>
<div class="form-group">
<label for="new_custIndustry" style="float:left;padding:7px 15px 0 27px;">所属行业</label>
<div class="col-sm-10">
<select class="form-control" id="new_custIndustry" name="cust_industry">
<option value="">--请选择--</option>
<c:forEach items="${industryType}" var="item">
<option value="${item.dict_id}"<c:if
test="${item.dict_id == custIndustry}"> selected</c:if>>
${item.dict_item_name }
</option>
</c:forEach>
</select>
</div>
</div>
<div class="form-group">
<label for="new_custLevel" style="float:left;padding:7px 15px 0 27px;">客户级别</label>
<div class="col-sm-10">
<select class="form-control" id="new_custLevel" name="cust_level">
<option value="">--请选择--</option>
<c:forEach items="${levelType}" var="item">
<option value="${item.dict_id}"<c:if
test="${item.dict_id == custLevel}"> selected</c:if>>${item.dict_item_name }</option>
</c:forEach>
</select>
</div>
</div>
<div class="form-group">
<label for="new_linkMan" class="col-sm-2 control-label">联系人</label>
<div class="col-sm-10">
<input type="text" class="form-control" id="new_linkMan" placeholder="联系人"
name="cust_linkman"/>
</div>
</div>
<div class="form-group">
<label for="new_phone" class="col-sm-2 control-label">固定电话</label>
<div class="col-sm-10">
<input type="text" class="form-control" id="new_phone" placeholder="固定电话"
name="cust_phone"/>
</div>
</div>
<div class="form-group">
<label for="new_mobile" class="col-sm-2 control-label">移动电话</label>
<div class="col-sm-10">
<input type="text" class="form-control" id="new_mobile" placeholder="移动电话"
name="cust_mobile"/>
</div>
</div>
<div class="form-group">
<label for="new_zipcode" class="col-sm-2 control-label">邮政编码</label>
<div class="col-sm-10">
<input type="text" class="form-control" id="new_zipcode" placeholder="邮政编码"
name="cust_zipcode"/>
</div>
</div>
<div class="form-group">
<label for="new_address" class="col-sm-2 control-label">联系地址</label>
<div class="col-sm-10">
<input type="text" class="form-control" id="new_address" placeholder="联系地址"
name="cust_address"/>
</div>
</div>
</form>
</div>
<div class="modal-footer">
<button type="button" class="btn btn-default" data-dismiss="modal">关闭</button>
<button type="button" class="btn btn-primary" onclick="createCustomer()">创建客户</button>
</div>
</div>
</div>
</div>其中,第15-121行代码的form表单中的实现代码即为用户所需要填写的客户信息
为保证每次点击”创建“后所弹出的模态框内没有任何数据,需要在页面中创建一个
clearCustomer()方法来清空模态框中的内容
//清空新建客户窗口中的数据
    function clearCustomer() {
        $("#new_customerName").val("");
        $("#new_customerFrom").val("")
        $("#new_custIndustry").val("")
        $("#new_custLevel").val("")
        $("#new_linkMan").val("");
        $("#new_phone").val("");
        $("#new_mobile").val("");
        $("#new_zipcode").val("");
        $("#new_address").val("");
    }
用户填写完模态框中的信息后,点击”创建客户“会执行createCustomer()方法
// 创建客户
    function createCustomer() {
        $.post("<%=basePath%>customer/create.action",
            $("#new_customer_form").serialize(), function (data) {
                if (data == "OK") {
                    alert("客户创建成功!");
                    window.location.reload();
                } else {
                    alert("客户创建失败!");
                    window.location.reload();
                }
            });
    }
createCustomer()方法会通过jQuery Ajax的POST请求将id为 new_customer_form的表单序列化,然后提交到以”/create.action“为结尾的请求中,如果其返回值为”OK“,则表示客户创建成功,反之创建失败
4.2.2.2 实现Controller层方法
在客户控制器类CustomerController中编写创建客户的方法
   /**
     * 创建客户
     */
    @RequestMapping("/customer/create.action")
    @ResponseBody
    public String customerCreate(Customer customer,HttpSession session) {
        // 获取Session中的当前用户信息
        User user = (User) session.getAttribute("USER_SESSION");
        // 将当前用户id存储在客户对象中
        customer.setCust_create_id(user.getUser_id());
        // 创建Date对象
        Date date = new Date();
        // 得到一个Timestamp格式的时间,存入mysql中的时间格式“yyyy/MM/dd HH:mm:ss”
        Timestamp timeStamp = new Timestamp(date.getTime());
        customer.setCust_createtime(timeStamp);
        // 执行Service层中的创建方法,返回的是受影响的行数
        int rows = customerService.createCustomer(customer);
        if(rows > 0){
            return "OK";
        }else{
            return "FAIL";
        }
    }
在上述代码中,首先获取了Session中的当前用户信息,然后将当前用户id信息添加到Customer对象的创建人id属性中,接下来创建了Date对象,并将格式化的时间信息添加到Customer对象的
cust_createtime 属性中,最后执行Service层中的 createCustomer() 方法,其返回值为数据库中受影响的行数,如果其值大于0,则表示创建成功,并返回”OK“字符串信息,否则返回”FALL“
注:@Responsebody注解一般在异步获取数据时使用,在使用该注解后,方法的返回值通常会被解析为跳转路径(如某个页面或某刻方法),而加上该注解后,其返回结果将不会被解析为跳转路径,而是将通过HttpMessageConverter转换为指定格式后的结果(如json、xml)直接写入HTTP Response对象的body中,这样页面中的方法就可以直接获取其返回值
4.2.2.3 实现Service层方法
1.创建接口方法,在CustomerService接口中,创建一个createCustomer()方法
public int createCustomer(Customer customer);2.创建实现类方法,在CustomerServiceImpl中,实现createCustomer()方法
    /**
     * 创建客户
     */
    @Override
    public int createCustomer(Customer customer) {
        return customerDao.createCustomer(customer);
    }
createCustomer()方法并没有实现其他功能,而是直接放回了DAO层中的createCustomer()方法
4.2.2.4 实现DAO层方法
1.创建接口方法,在CustomerDao中,编写创建客户的方法
 // 创建客户
    public int createCustomer(Customer customer);
2.创建映射插入语句,在CustomerDao.xml中,编写执行插入操作的映射插入语句
    <!--  添加客户  -->
    <insert id="createCustomer" parameterType="customer"> insert into customer(cust_name, cust_user_id, cust_create_id,
                                                                               cust_source, cust_industry, cust_level,
                                                                               cust_linkman, cust_phone, cust_mobile,
                                                                               cust_zipcode, cust_address,
                                                                               cust_createtime)
                                                          values (#{cust_name}, #{cust_user_id}, #{cust_create_id},
                                                                  #{cust_source}, #{cust_industry}, #{cust_level},
                                                                  #{cust_linkman}, #{cust_phone}, #{cust_mobile},
                                                                  #{cust_zipcode}, #{cust_address},
                                                                  #{cust_createtime}) </insert>
4.2.2.5 添加客户测试
点击”创建“,并输入客户信息
点击”创建客户”,显示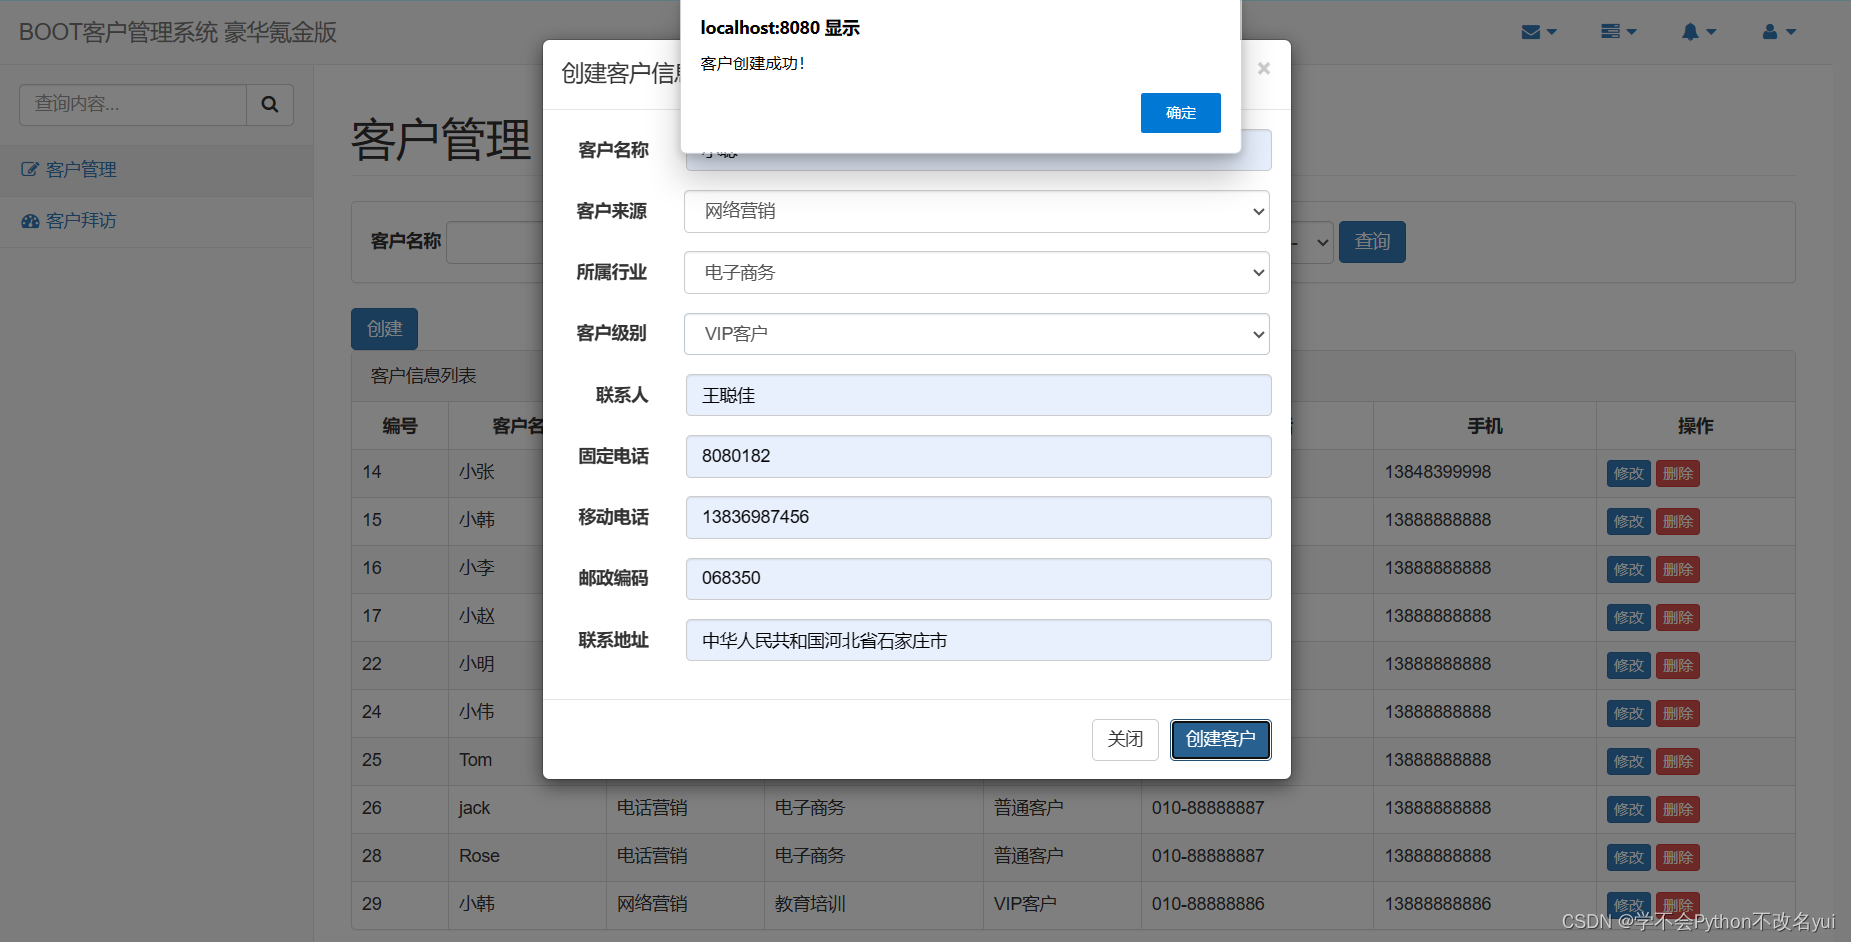 并可以在用户列表中查找到
 4.2.3 修改客户信息功能
修改客户信息功能也是通过弹出窗口实现的,当点击“修改”时,将弹出“修改客户信息”窗口
4.2.3.1 实现页面功能
在页面中,实现“修改”的代码如下
<a href="#" class="btn btn-primary btn-xs" data-toggle="modal"
                                       data-target="#customerEditDialog" onclick="editCustomer(${row.cust_id})">修改</a>
当点击“修改”后,会弹出id为customerEditDialog的模态窗口,同时通过执行onclick属性的editCustomer()方法来获取需要修改客户的所有数据
<!-- 修改客户模态框 -->
<div class="modal fade" id="customerEditDialog" tabindex="-1" role="dialog"
aria-labelledby="myModalLabel">
<div class="modal-dialog" role="document">
<div class="modal-content">
<div class="modal-header">
<button type="button" class="close" data-dismiss="modal" aria-label="Close">
<span aria-hidden="true">×</span>
</button>
<h4 class="modal-title" id="myModalLabel">修改客户信息</h4>
</div>
<div class="modal-body">
<form class="form-horizontal" id="edit_customer_form">
<input type="hidden" id="edit_cust_id" name="cust_id"/>
<div class="form-group">
<label for="edit_customerName" class="col-sm-2 control-label">客户名称</label>
<div class="col-sm-10">
<input type="text" class="form-control" id="edit_customerName" placeholder="客户名称"
name="cust_name"/>
</div>
</div>
<div class="form-group">
<label for="edit_customerFrom" style="float:left;padding:7px 15px 0 27px;">客户来源</label>
<div class="col-sm-10">
<select class="form-control" id="edit_customerFrom" name="cust_source">
<option value="">--请选择--</option>
<c:forEach items="${fromType}" var="item">
<option value="${item.dict_id}"<c:if
test="${item.dict_id == custSource}"> selected</c:if>>${item.dict_item_name }</option>
</c:forEach>
</select>
</div>
</div>
<div class="form-group">
<label for="edit_custIndustry" style="float:left;padding:7px 15px 0 27px;">所属行业</label>
<div class="col-sm-10">
<select class="form-control" id="edit_custIndustry" name="cust_industry">
<option value="">--请选择--</option>
<c:forEach items="${industryType}" var="item">
<option value="${item.dict_id}"<c:if
test="${item.dict_id == custIndustry}"> selected</c:if>>${item.dict_item_name }</option>
</c:forEach>
</select>
</div>
</div>
<div class="form-group">
<label for="edit_custLevel" style="float:left;padding:7px 15px 0 27px;">客户级别</label>
<div class="col-sm-10">
<select class="form-control" id="edit_custLevel" name="cust_level">
<option value="">--请选择--</option>
<c:forEach items="${levelType}" var="item">
<option value="${item.dict_id}"<c:if
test="${item.dict_id == custLevel}"> selected</c:if>>${item.dict_item_name }</option>
</c:forEach>
</select>
</div>
</div>
<div class="form-group">
<label for="edit_linkMan" class="col-sm-2 control-label">联系人</label>
<div class="col-sm-10">
<input type="text" class="form-control" id="edit_linkMan" placeholder="联系人"
name="cust_linkman"/>
</div>
</div>
<div class="form-group">
<label for="edit_phone" class="col-sm-2 control-label">固定电话</label>
<div class="col-sm-10">
<input type="text" class="form-control" id="edit_phone" placeholder="固定电话"
name="cust_phone"/>
</div>
</div>
<div class="form-group">
<label for="edit_mobile" class="col-sm-2 control-label">移动电话</label>
<div class="col-sm-10">
<input type="text" class="form-control" id="edit_mobile" placeholder="移动电话"
name="cust_mobile"/>
</div>
</div>
<div class="form-group">
<label for="edit_zipcode" class="col-sm-2 control-label">邮政编码</label>
<div class="col-sm-10">
<input type="text" class="form-control" id="edit_zipcode" placeholder="邮政编码"
name="cust_zipcode"/>
</div>
</div>
<div class="form-group">
<label for="edit_address" class="col-sm-2 control-label">联系地址</label>
<div class="col-sm-10">
<input type="text" class="form-control" id="edit_address" placeholder="联系地址"
name="cust_address"/>
</div>
</div>
</form>
</div>
<div class="modal-footer">
<button type="button" class="btn btn-default" data-dismiss="modal">关闭</button>
<button type="button" class="btn btn-primary" onclick="updateCustomer()">保存修改</button>
</div>
</div>
</div>
</div>在上述代码中,第15-125行代码中的表单就是修改客户信息的实现代码
由于在修改客户信息时,首先要获取到客户的所有信息,并显示到修改信息的窗口内,所以需要在页面中编写一个获取客户信息的方法editCustomer()
   // 通过id获取修改的客户信息
    function editCustomer(id) {
        $.ajax({
            type: "get",
            url: "<%=basePath%>customer/getCustomerById.action",
            data: {"id": id},
            success: function (data) {
                $("#edit_cust_id").val(data.cust_id);
                $("#edit_customerName").val(data.cust_name);
                $("#edit_customerFrom").val(data.cust_source)
                $("#edit_custIndustry").val(data.cust_industry)
                $("#edit_custLevel").val(data.cust_level)
                $("#edit_linkMan").val(data.cust_linkman);
                $("#edit_phone").val(data.cust_phone);
                $("#edit_mobile").val(data.cust_mobile);
                $("#edit_zipcode").val(data.cust_zipcode);
                $("#edit_address").val(data.cust_address);

            }
        });
    }
上述方法使用了jQuery Ajax的方式来获取所需要修改的客户信息,获取成功后,会将该客户信息添加到修改客户模态框中的相应位置
4.2.3.2 实现Controller层方法
在CustomerController类中,通过编写id获取客户信息和更新客户的方法
    /**
     * 通过id获取客户信息
     */
    @RequestMapping("/customer/getCustomerById.action")
    @ResponseBody
    public Customer getCustomerById(Integer id) {
        Customer customer = customerService.getCustomerById(id);
        return customer;
    }
    /**
     * 更新客户
     */
    @RequestMapping("/customer/update.action")
    @ResponseBody
    public String customerUpdate(Customer customer) {
        int rows = customerService.updateCustomer(customer);
        if(rows > 0){
            return "OK";
        }else{
            return "FAIL";
        }
    }
上述的两个方法都只是调用了Service层中的相应方法,并将相应的执行结果返回
4.2.3.3 实现Service层方法
1.创建接口方法,在CustomerService接口中,创建通过id获取客户信息和更新客户的方法
   // 通过id查询客户
    public Customer getCustomerById(Integer id);
    // 更新客户
    public int updateCustomer(Customer customer);
2.创建实现类方法
   /**
     * 通过id查询客户
     */
    @Override
    public Customer getCustomerById(Integer id) {
        Customer customer = customerDao.getCustomerById(id);
        return customer;
    }
    /**
     * 更新客户
     */
    @Override
    public int updateCustomer(Customer customer) {
        return customerDao.updateCustomer(customer);
    }
在上述代码中,getCustomerById()方法返回的是所需要修改的客户对象,而updateCustomer()方法执行后,返回的时数据库中受影响的行数
4.2.3.4 实现DAO层方法
1.创建接口方法,在CustomerDao接口中,创建通过id获取客户信息和更新客户的方法
   // 通过id查询客户
    public Customer getCustomerById(Integer id);
    // 更新客户信息
    public int updateCustomer(Customer customer);
2.创建映射语句,在CustomerDao.xml中,编写执行插入操作的映射插入语句
   <!--  根据id获取客户信息  -->
    <select id="getCustomerById" parameterType="Integer" resultType="customer"> select *
                                                                                from customer
                                                                                where cust_id = #{id} </select>
    <!--  更新客户  -->
    <update id="updateCustomer" parameterType="customer">
        update customer
        <set>
            <if test="cust_name!=null">cust_name=#{cust_name},</if>
            <if test="cust_user_id!=null">cust_user_id=#{cust_user_id},</if>
            <if test="cust_create_id!=null">cust_create_id=#{cust_create_id},</if>
            <if test="cust_source!=null">cust_source=#{cust_source},</if>
            <if test="cust_industry!=null">cust_industry=#{cust_industry},</if>
            <if test="cust_level!=null">cust_level=#{cust_level},</if>
            <if test="cust_linkman!=null">cust_linkman=#{cust_linkman},</if>
            <if test="cust_phone!=null">cust_phone=#{cust_phone},</if>
            <if test="cust_mobile!=null">cust_mobile=#{cust_mobile},</if>
            <if test="cust_zipcode!=null">cust_zipcode=#{cust_zipcode},</if>
            <if test="cust_address!=null">cust_address=#{cust_address},</if>
            <if test="cust_createtime!=null">cust_createtime=#{cust_createtime},</if>
        </set>
        where cust_id=#{cust_id}
    </update>
4.2.3.5 修改客户测试
将4.2.2.5节“小聪”的客户级别修改为“普通客户”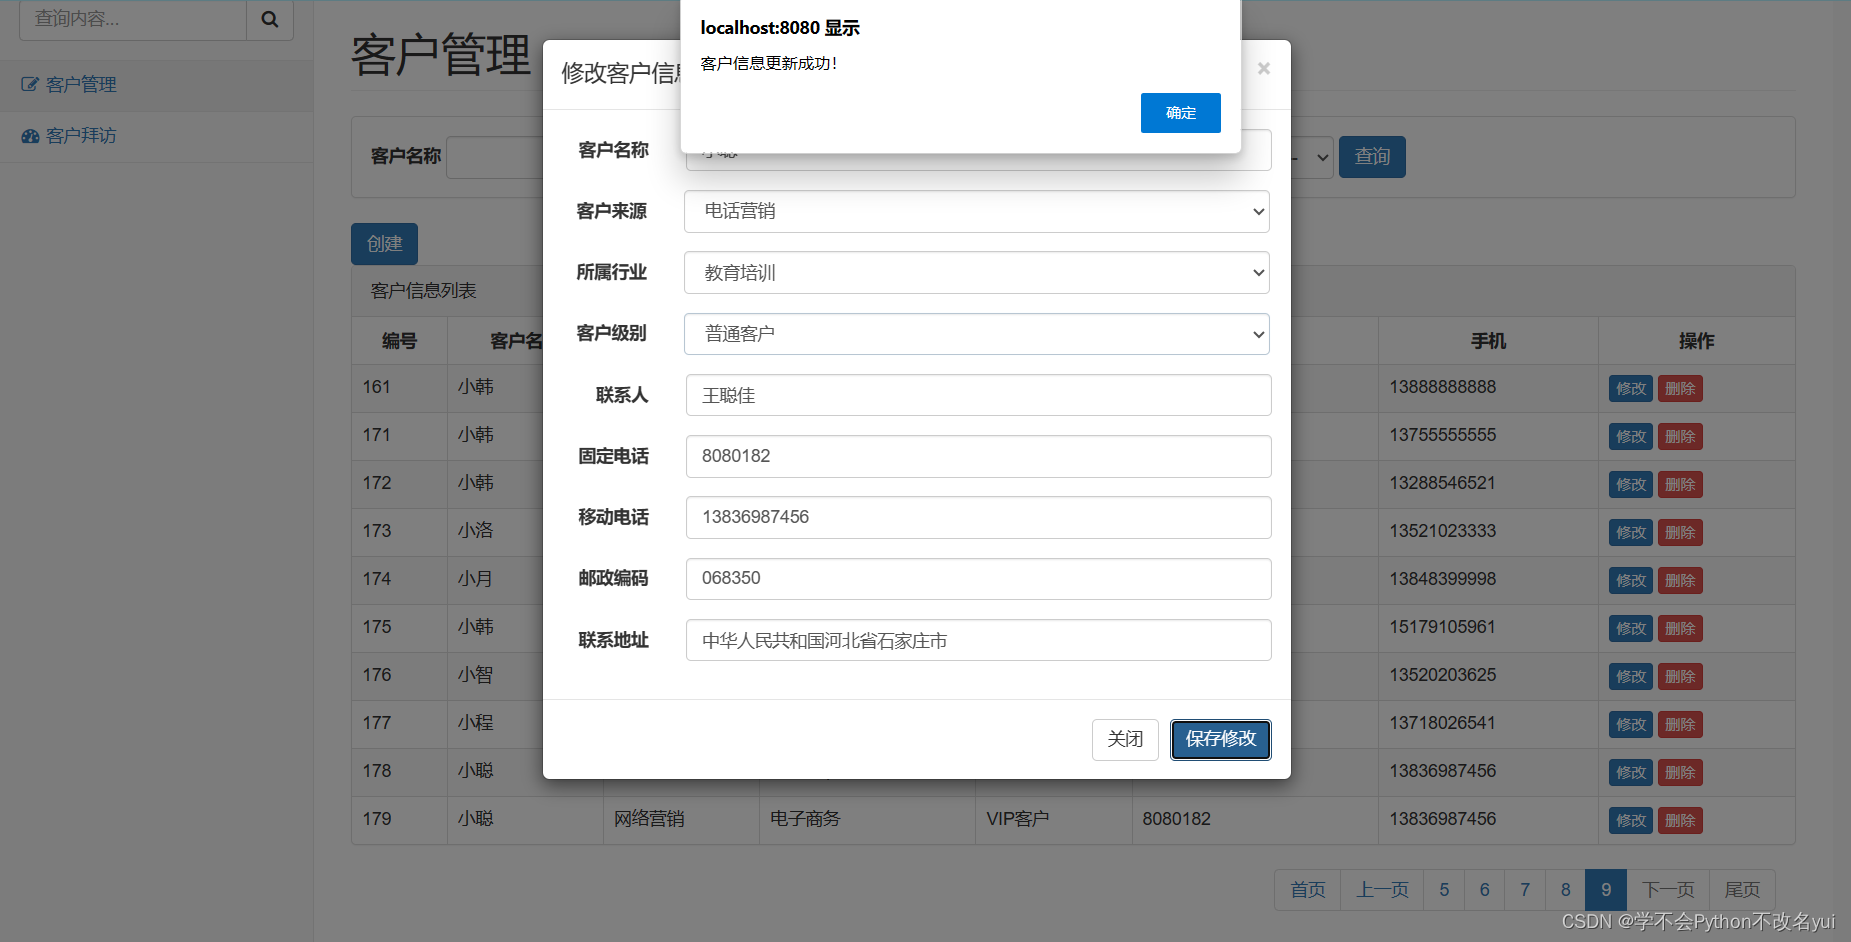
点击保存后出现提示框,并查看是否修改成功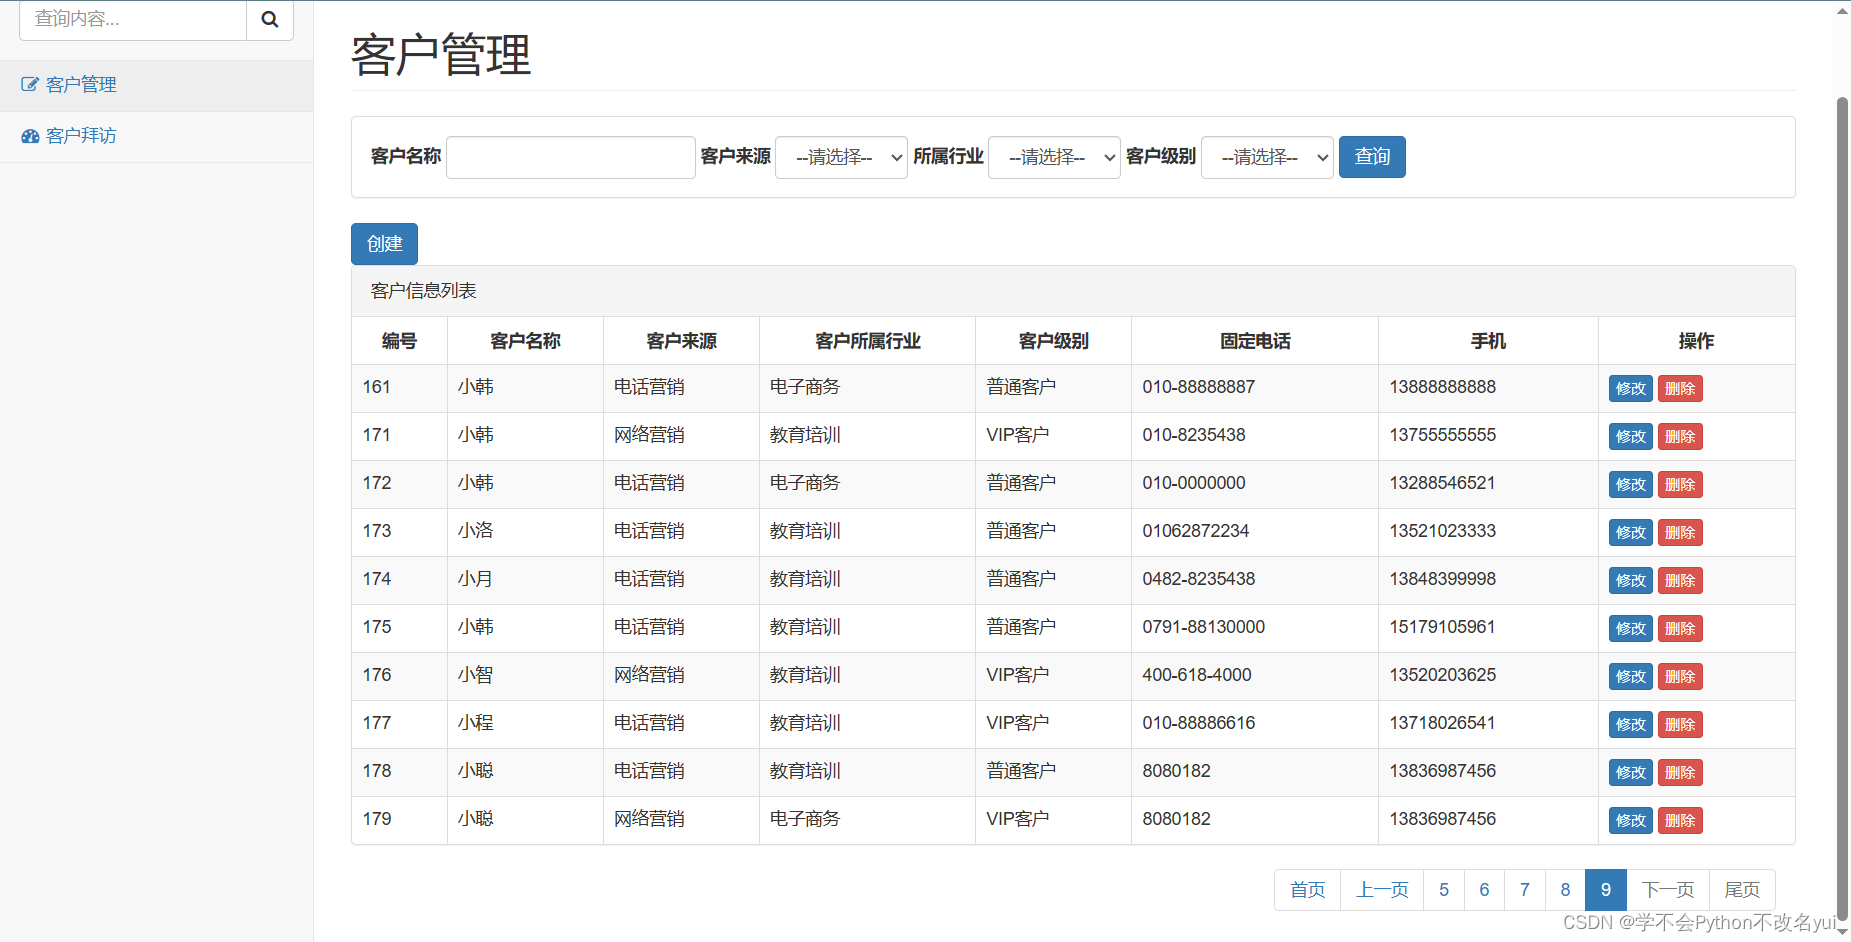
4.2.4 删除客户功能
删除客户的操作也是通过弹出窗口实现的
4.2.4.1 实现页面功能
<a href="#" class="btn btn-danger btn-xs" onclick="deleteCustomer(${row.cust_id})">删除</a>当点击“删除”后,会执行onclick属性中的deleteCustomer()方法,该方法中的参数${row.cust_id}会获取当前所在行的用户id
在页面中,编写删除客户的方法deleteCustomer()
   // 删除客户
    function deleteCustomer(id) {
        if (confirm('确定要删除该客户吗?')) {
            $.post("<%=basePath%>customer/delete.action", {"id": id},
                function (data) {
                    if (data == "OK") {
                        alert("客户删除成功!");
                        window.location.reload();
                    } else {
                        alert("删除客户失败!");
                        window.location.reload();
                    }
                });
        }
    }
在执行上述方法时,会通过jQuery Ajax的方式发送一个以“/delete.action”结尾的请求,该请求会将所要删除的客户id传入后台处理办法中
4.2.4.2 实现Controller层方法
在CustomerController类中,创建一个删除客户的方法customerDelete()
   /**
     * 删除客户
     */
    @RequestMapping("/customer/delete.action")
    @ResponseBody
    public String customerDelete(Integer id) {
        int rows = customerService.deleteCustomer(id);
        if(rows > 0){
            return "OK";
        }else{
            return "FAIL";
        }
    }

}
customerDelete()方法并未执行太多操作,而是调用了Service层中的deleteCustomer()的方法来获取数据库中受影响的行数,如果其值大于0,则表示删除成功,反之表示删除失败
4.2.4.3 实现Service层方法
1.创建接口方法,在CustomerService中编写一个删除客户的方法
   // 删除客户
    public int deleteCustomer(Integer id);
2.创建实现类方法,在CustomerServiceImpl中,实现接口中的删除方法
   /**
     * 删除客户
     */
    @Override
    public int deleteCustomer(Integer id) {
        return customerDao.deleteCustomer(id);
    }
4.2.4.4 实现DAO层方法
1.创建接口方法,在CustomerDao接口中,编写通过id删除客户的方法
    // 删除客户
    int deleteCustomer (Integer id);
2.创建映射语句,在CustomerDao.xml中编写执行删除操作的映射语句
   <!--  删除客户  -->
    <delete id="deleteCustomer" parameterType="Integer"> delete
                                                         from customer
                                                         where cust_id = #{id} </delete>
</mapper>
4.2.4.5 删除客户测试
点击删除客户,会弹出提示框
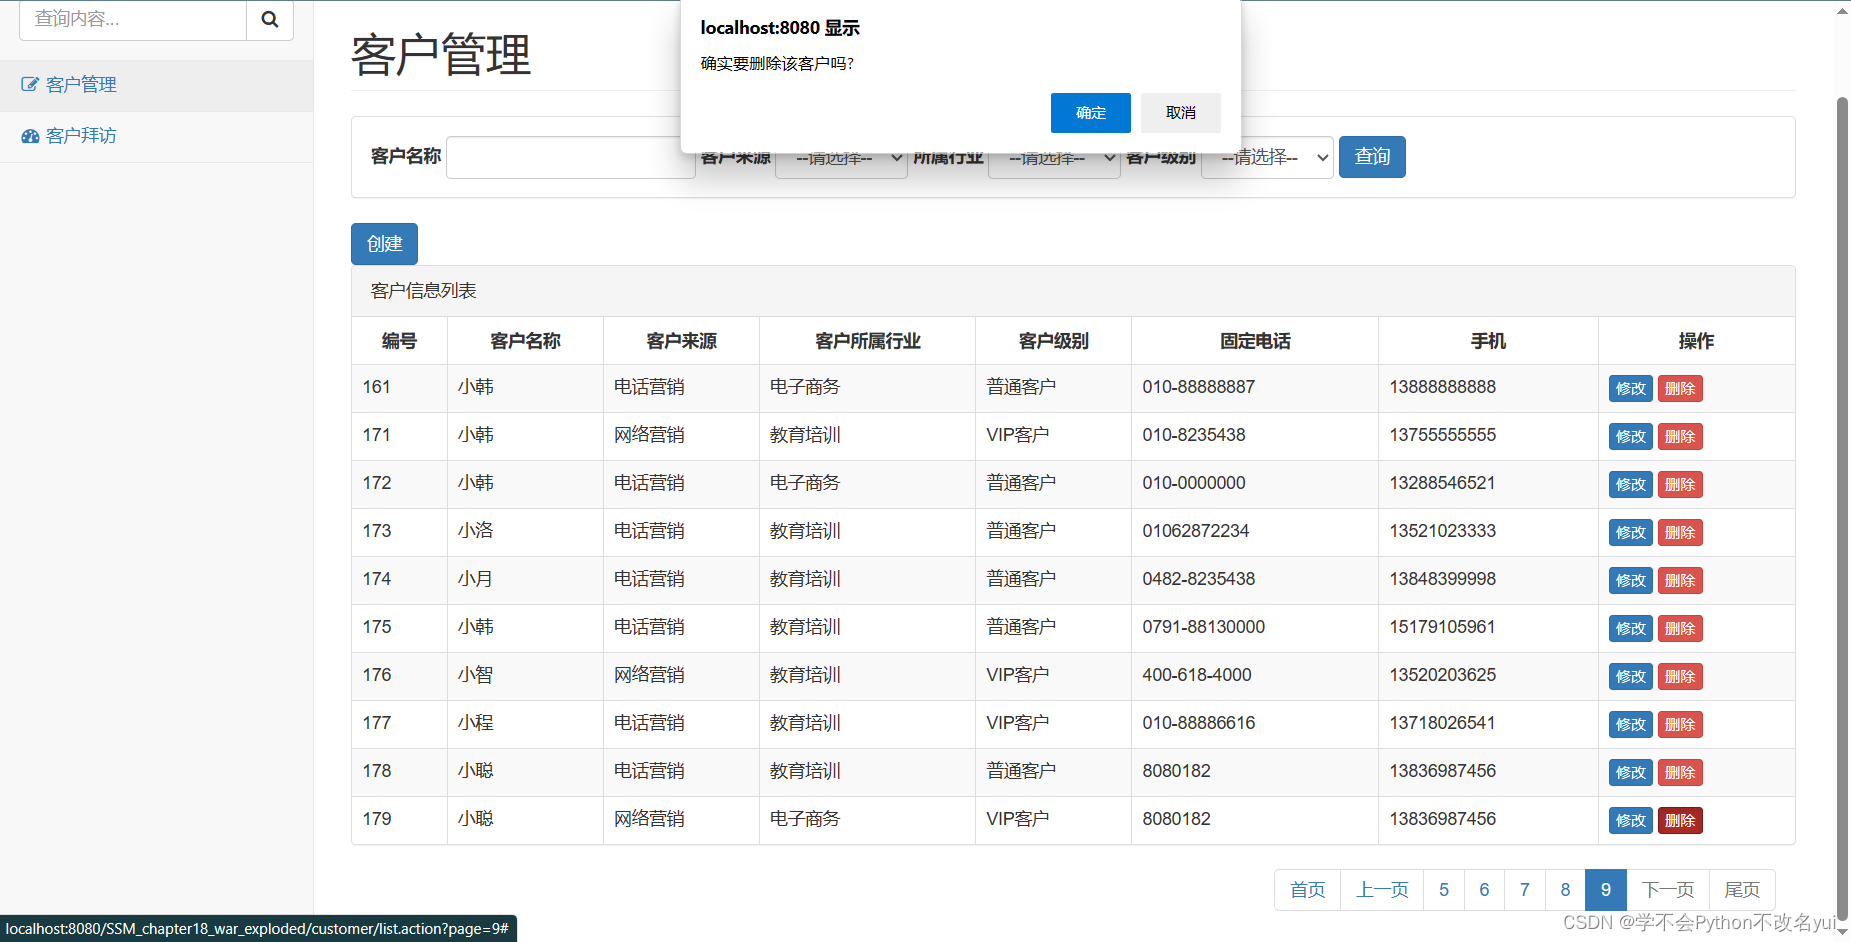 选择确定后,客户的信息将被删除
 4.3 额外功能
1.在用户栏中,添加了信息功能,但是只完成了页面显示,并没有实际功能
            <!-- 邮件通知 start -->
            <li class="dropdown">
                <a class="dropdown-toggle" data-toggle="dropdown" href="#">
                    <i class="fa fa-envelope fa-fw"></i>
                    <i class="fa fa-caret-down"></i>
                </a>
                <ul class="dropdown-menu dropdown-messages">
                    <li>
                        <a href="#">
                            <div>
                                <strong>曹少璘</strong> <span class="pull-right text-muted">
								<em>昨天</em>
							</span>
                            </div>
                            <div>我不吃牛肉!</div>
                        </a>
                    </li>
                    <li class="divider"></li>
                    <li>
                        <a class="text-center" href="#">
                            <strong>查看全部消息</strong>
                            <i class="fa fa-angle-right"></i>
                        </a>
                    </li>
                </ul>
            </li>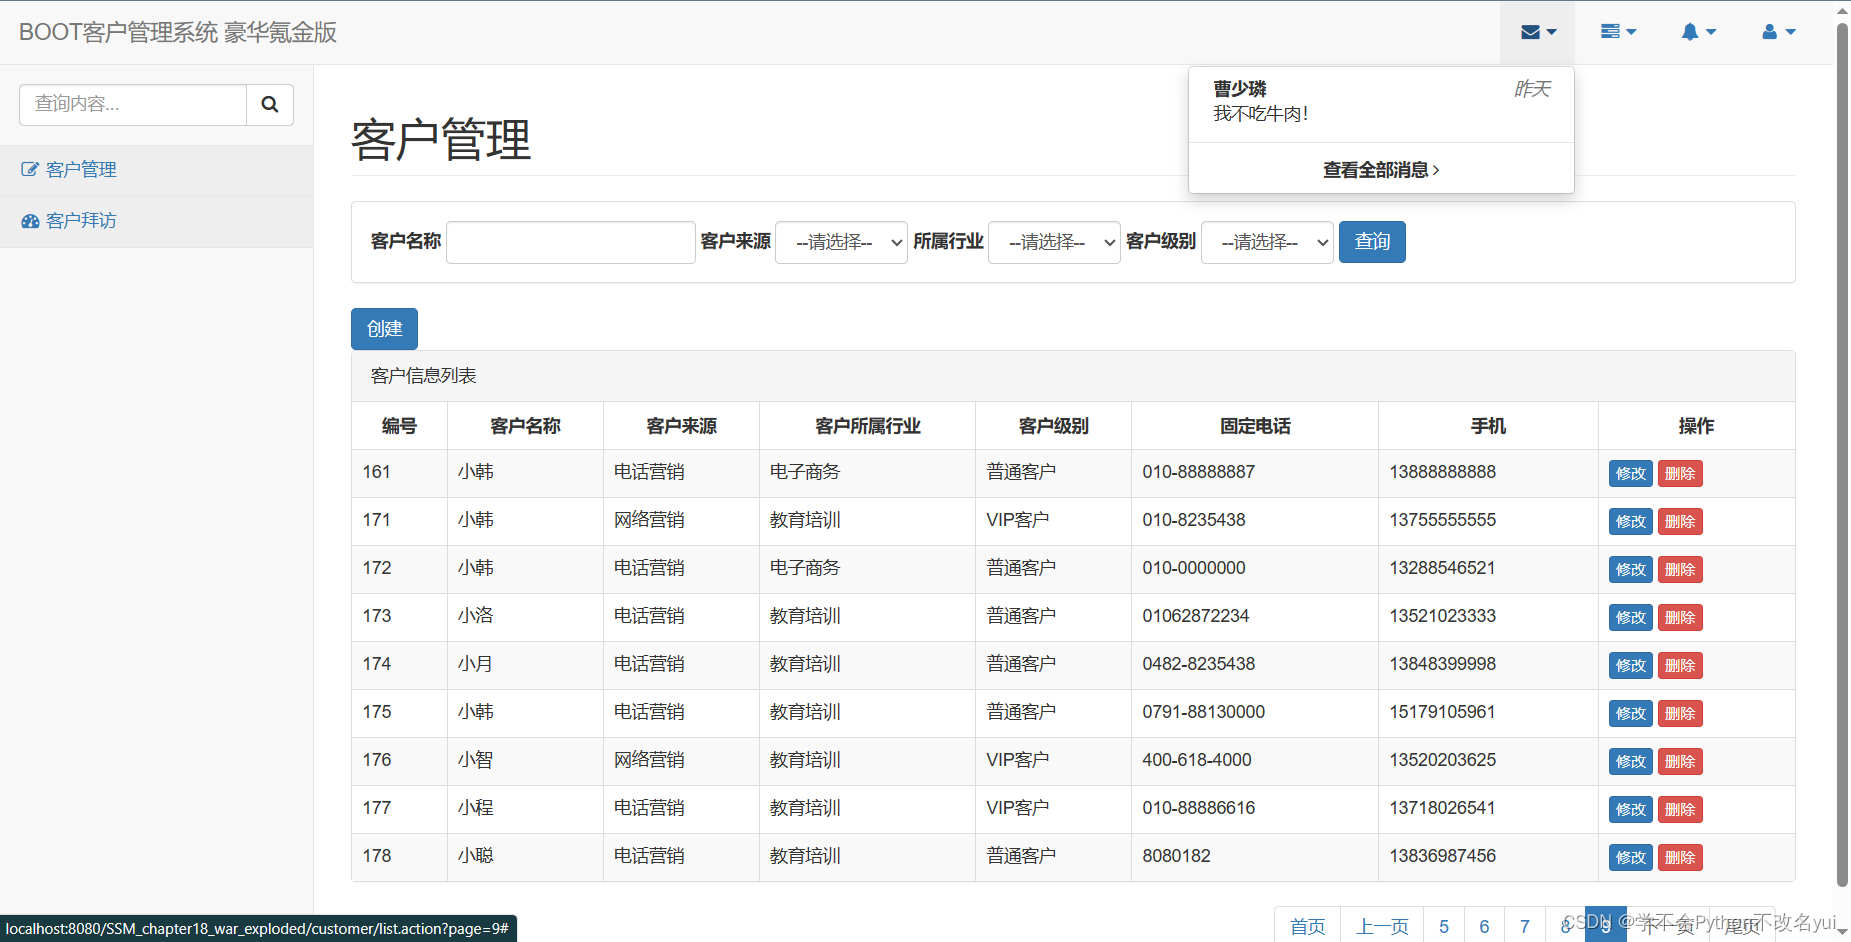
2.任务完成情况
使用了一个动态效果,只有显示功能,无法从页面改变数据
           <!-- 任务通知 start -->
            <li class="dropdown">
                <a class="dropdown-toggle" data-toggle="dropdown" href="#">
                    <i class="fa fa-tasks fa-fw"></i>
                    <i class="fa fa-caret-down"></i>
                </a>
                <ul class="dropdown-menu dropdown-tasks">
                    <li>
                        <a href="#">
                            <div>
                                <p>
                                    <strong>任务 1</strong>
                                    <span class="pull-right text-muted">完成40%</span>
                                </p>
                                <div class="progress progress-striped active">
                                    <div class="progress-bar progress-bar-success"
                                         role="progressbar" aria-valuenow="40" aria-valuemin="0"
                                         aria-valuemax="100" style="width: 40%">
                                        <span class="sr-only">完成40%</span>
                                    </div>
                                </div>
                            </div>
                        </a>
                    </li>
                    <li class="divider"></li>
                    <li>
                        <a href="#">
                            <div>
                                <p>
                                    <strong>任务 2</strong>
                                    <span class="pull-right text-muted">完成20%</span>
                                </p>
                                <div class="progress progress-striped active">
                                    <div class="progress-bar progress-bar-info" role="progressbar"
                                         aria-valuenow="20" aria-valuemin="0" aria-valuemax="100"
                                         style="width: 20%">
                                        <span class="sr-only">完成20%</span>
                                    </div>
                                </div>
                            </div>
                        </a>
                    </li>
                    <li class="divider"></li>
                    <li>
                        <a class="text-center" href="#">
                            <strong>查看所有任务</strong>
                            <i class="fa fa-angle-right"></i>
                        </a>
                    </li>
                </ul>
            </li>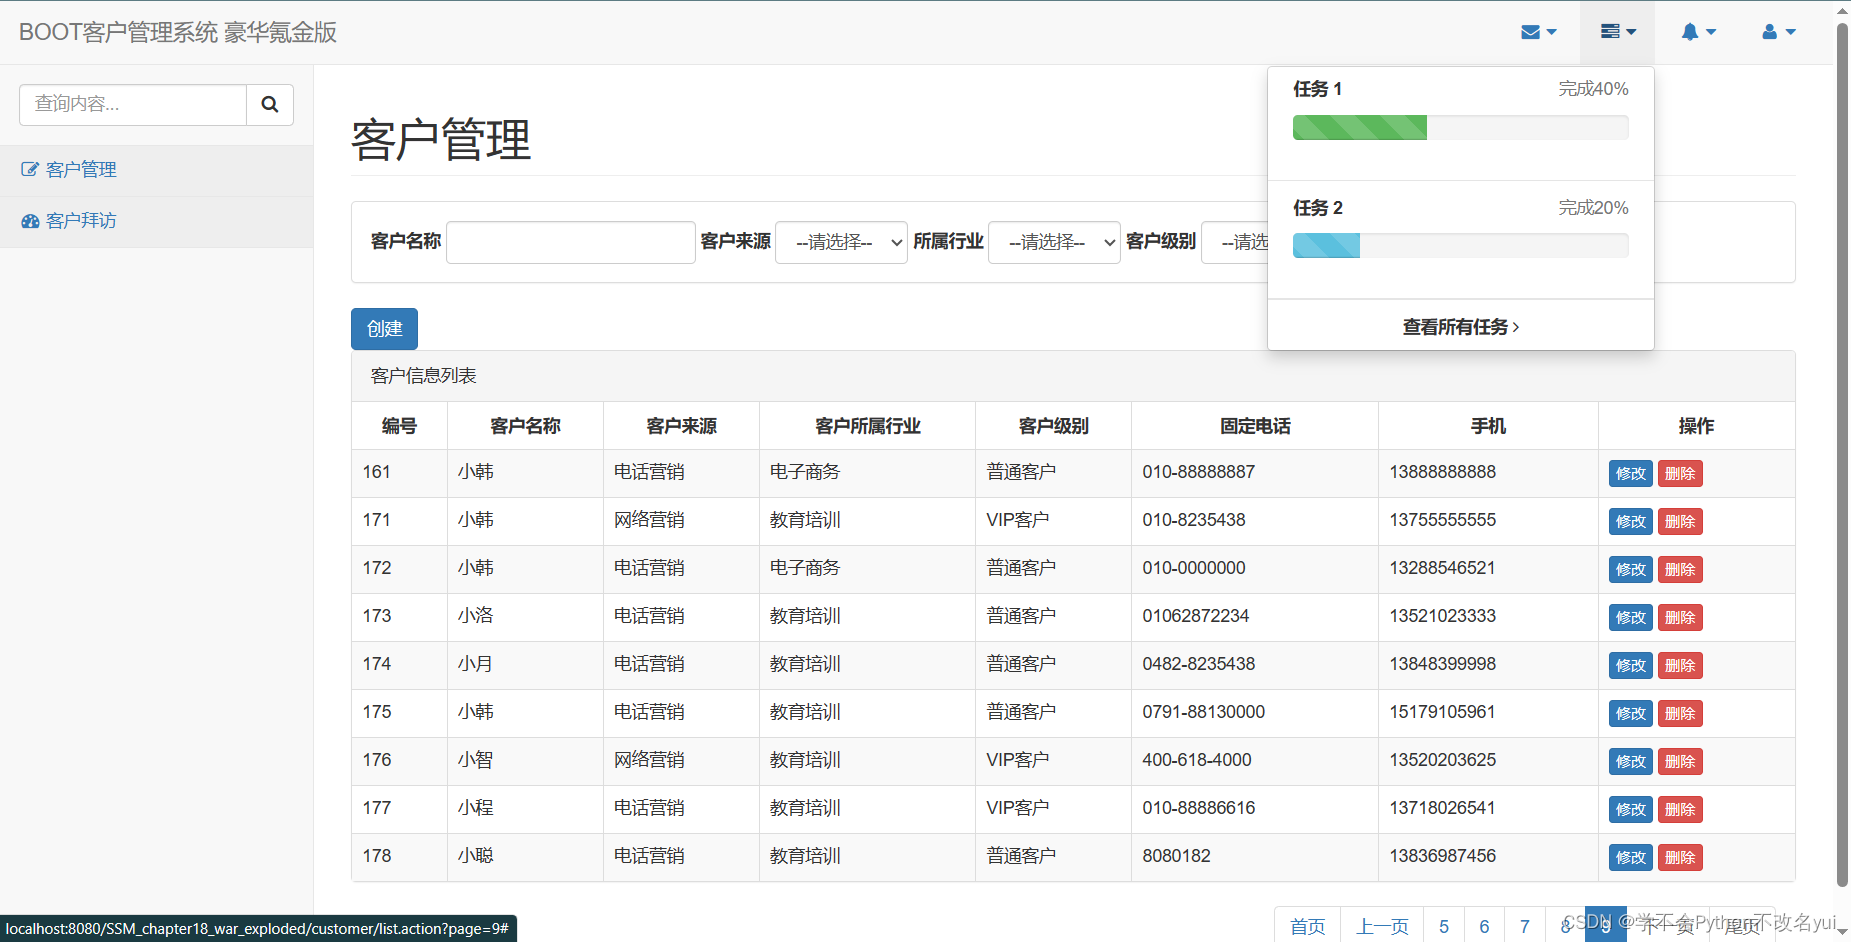
3.提醒功能
只完成了显示,无法使用
            <!-- 消息通知 start -->
            <li class="dropdown">
                <a class="dropdown-toggle" data-toggle="dropdown" href="#">
                    <i class="fa fa-bell fa-fw"></i>
                    <i class="fa fa-caret-down"></i>
                </a>
                <ul class="dropdown-menu dropdown-alerts">
                    <li>
                        <a href="#">
                            <div>
                                <i class="fa fa-comment fa-fw"></i> 新回复
                                <span class="pull-right text-muted small">4分钟之前</span>
                            </div>
                        </a>
                    </li>
                    <li class="divider"></li>
                    <li>
                        <a href="#">
                            <div>
                                <i class="fa fa-envelope fa-fw"></i> 新消息
                                <span class="pull-right text-muted small">4分钟之前</span>
                            </div>
                        </a>
                    </li>
                    <li class="divider"></li>
                    <li>
                        <a href="#">
                            <div>
                                <i class="fa fa-tasks fa-fw"></i> 新任务
                                <span class="pull-right text-muted small">4分钟之前</span>
                            </div>
                        </a>
                    </li>
                    <li class="divider"></li>
                    <li>
                        <a href="#">
                            <div>
                                <i class="fa fa-upload fa-fw"></i> 服务器重启
                                <span class="pull-right text-muted small">4分钟之前</span>
                            </div>
                        </a>
                    </li>
                    <li class="divider"></li>
                    <li>
                        <a class="text-center" href="#">
                            <strong>查看所有提醒</strong>
                            <i class="fa fa-angle-right"></i>
                        </a>
                    </li>
                </ul>
            </li>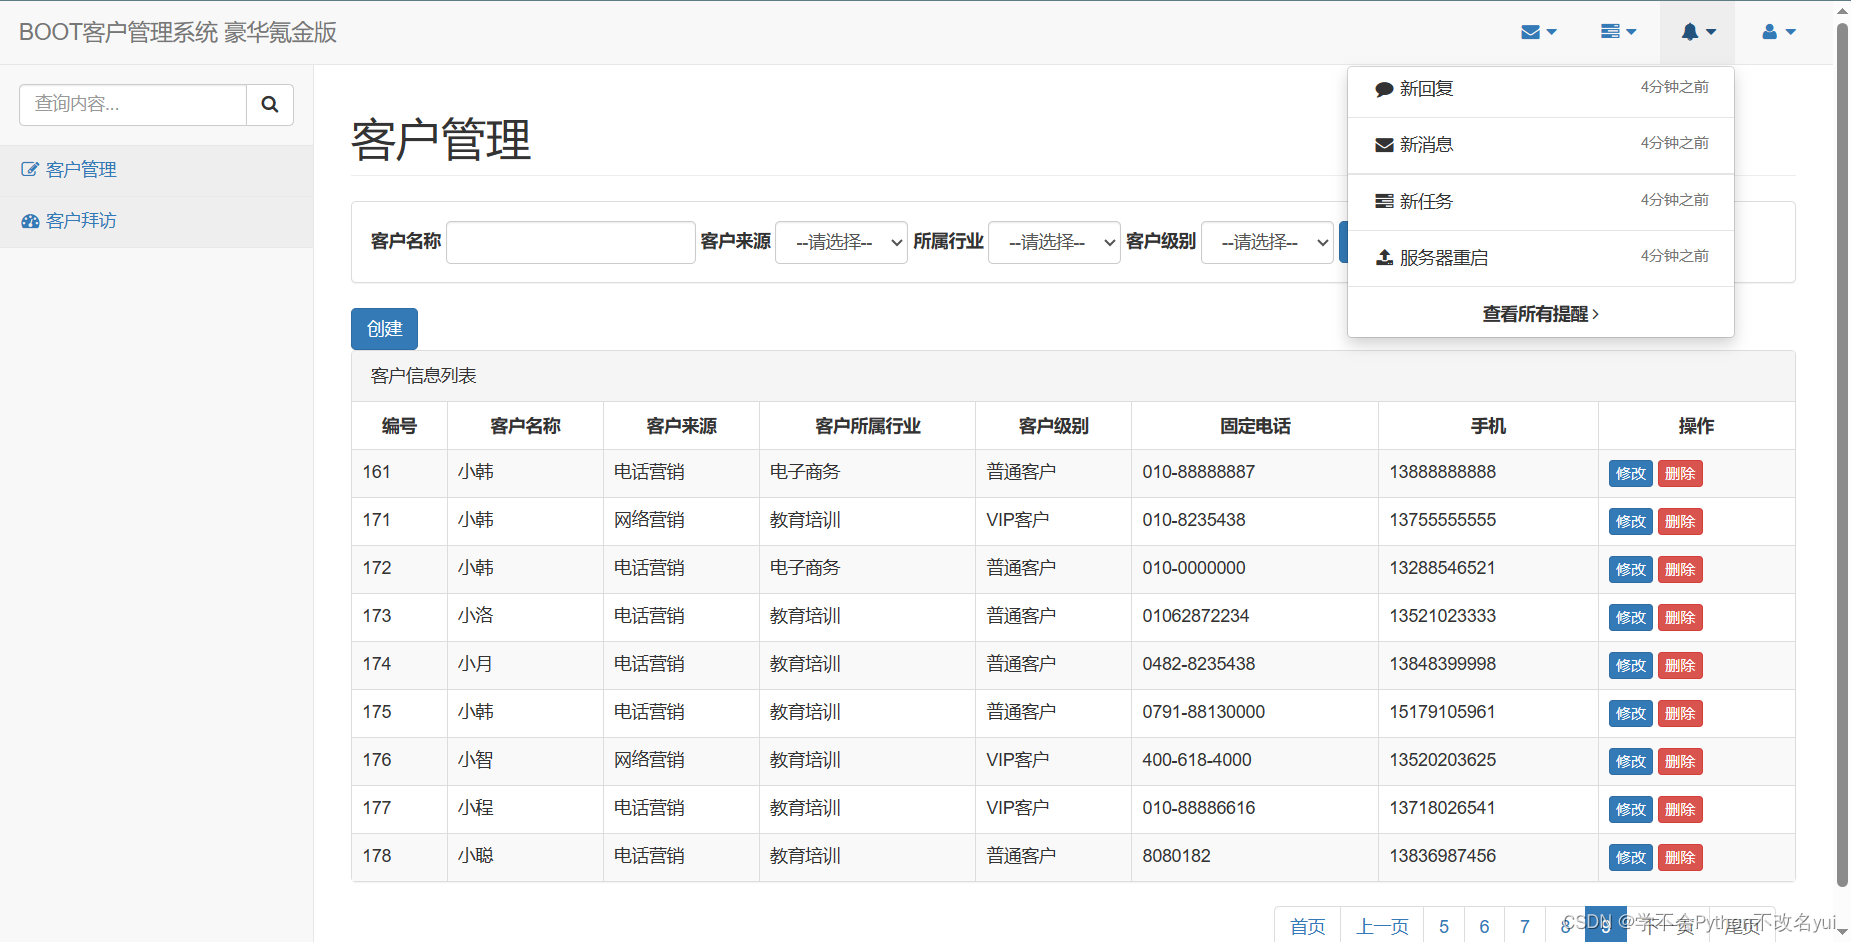
五、项目链接
项目源码:
链接:https://pan.baidu.com/s/1Uul3xj3HGsYpZokjzSgj4w
提取码:g4tc
数据库包:
链接:https://pan.baidu.com/s/1jaONG2xzBoFuqThlXvraOA
提取码:obdx
资料来源:黑马程序员
黑马程序员SSM框架教程|Spring+SpringMVC+MyBatis全套教程(spring+springmvc+mybatis)_哔哩哔哩_bilibili


 761
761

 被折叠的 条评论
为什么被折叠?
被折叠的 条评论
为什么被折叠?
 到【灌水乐园】发言


