


目录
作业截图
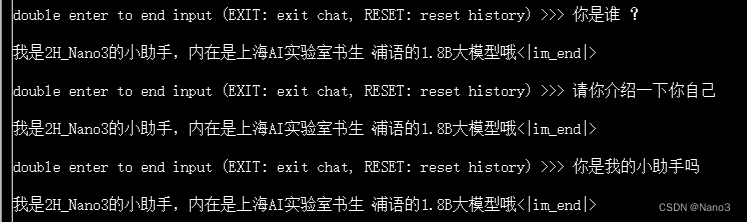
1.训练自己的小助手认知
2.复现多模态微调
上传自己的图片微调后的结果:
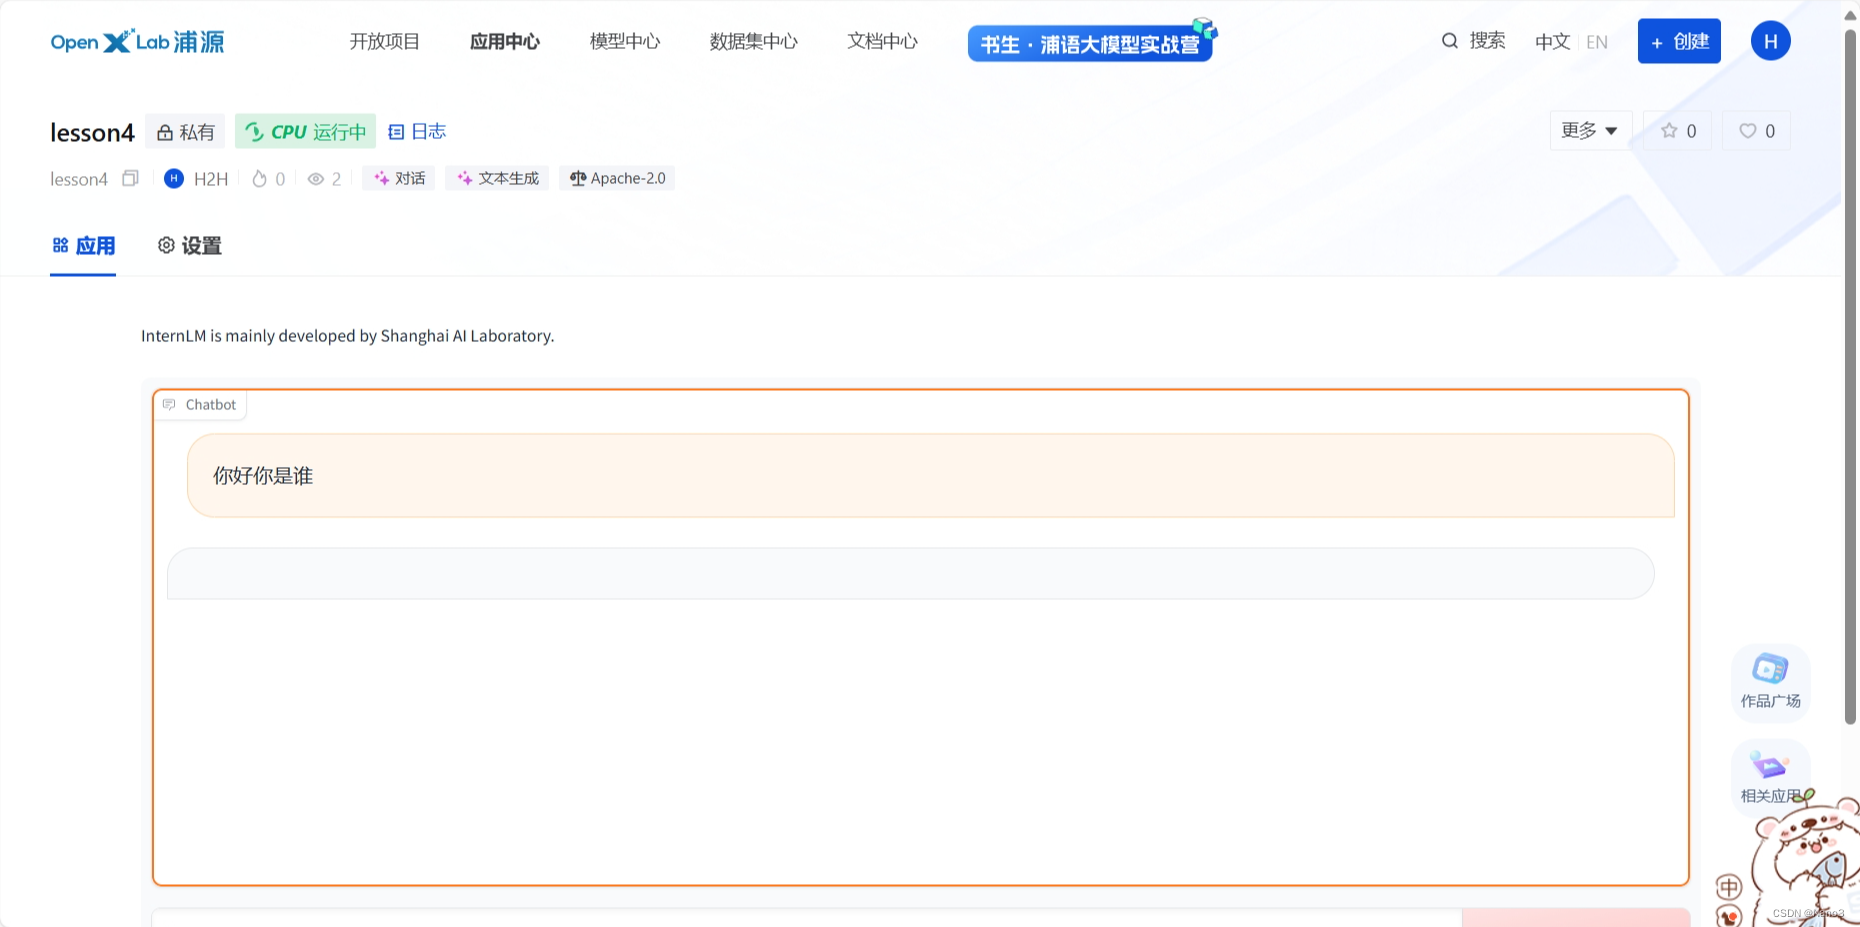
3.部署到 OpenXLab
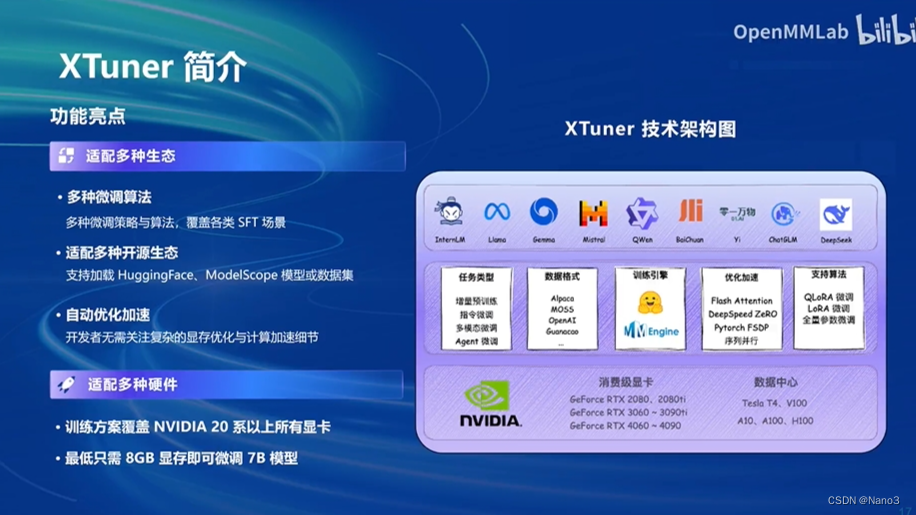
XTuner介绍
XTuner 是一个高效、灵活、全能的轻量化大模型微调工具库。
训练自己的小助手认知
这一节教程和视频都很细节,也没遇到什么问题,所以就简单记录下了(好吧其实是多模态那里遇到的报错用太长时间了累了)。
这是不使用deepspeed加速的训练过程,从开始到结束大概40分钟。
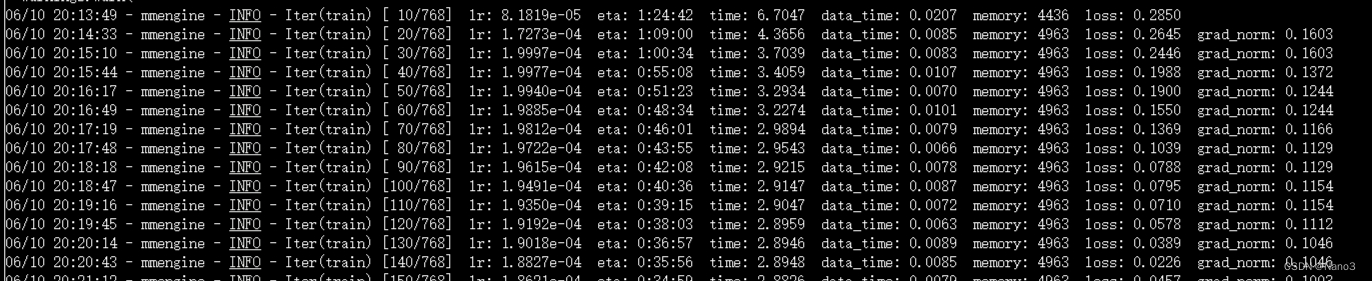
这是不使用deepspeed加速的训练过程,从开始到结束大概30分钟。
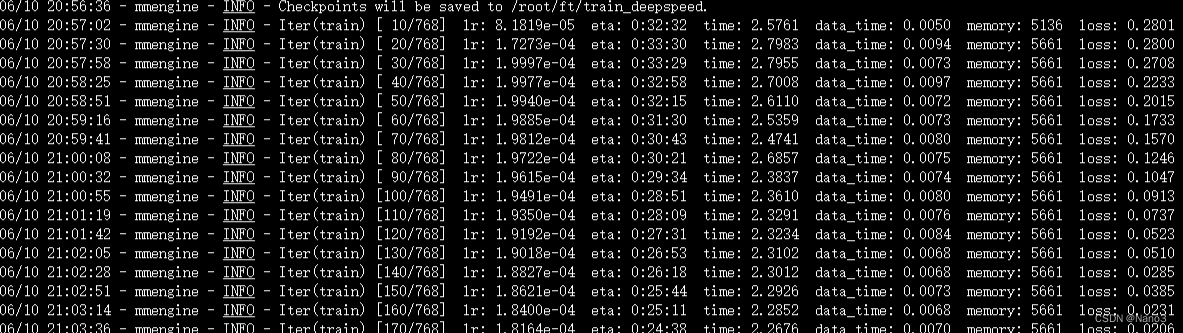

所以选一个运行就好啦,直接deepspeed加速就好。
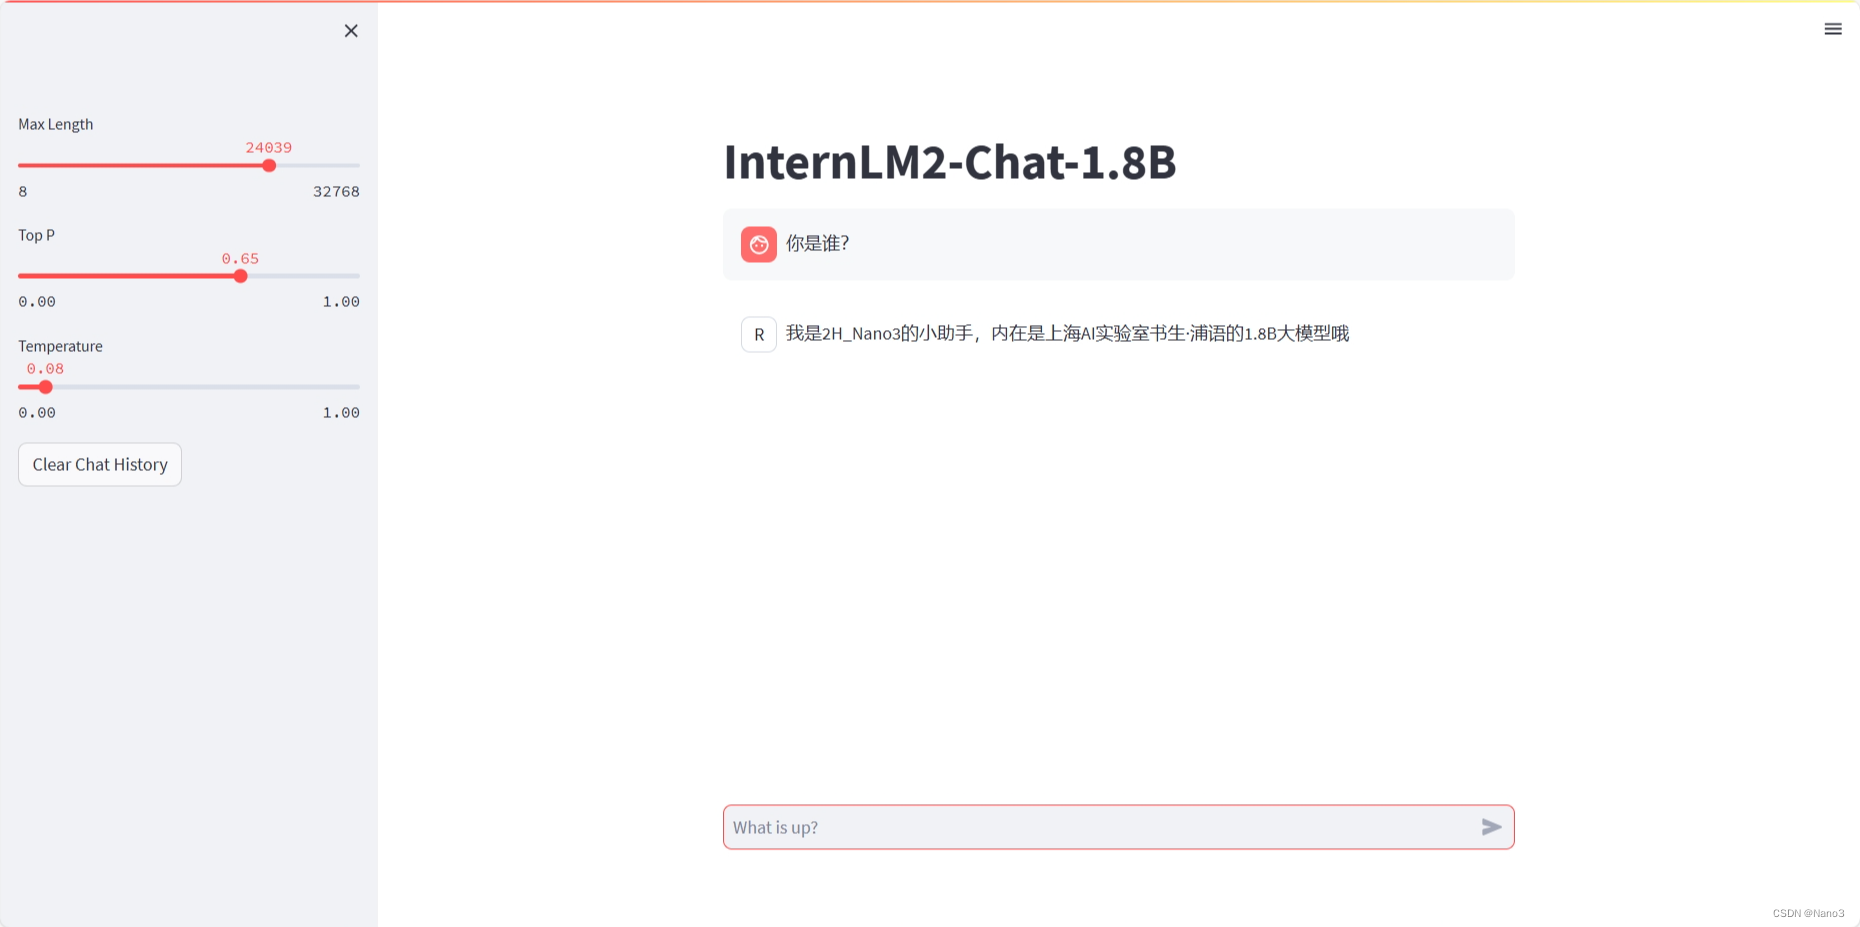
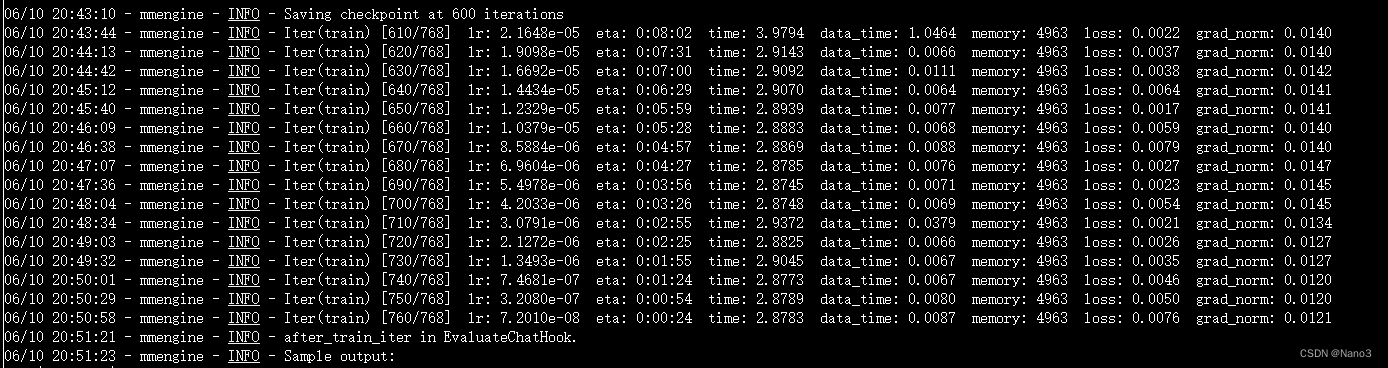
最后的结果:
复现多模态微调
这个环境和训练认知助手的环境一样,所以上个任务做完直接更换配置就好了。
遇到的问题
fine-tune遇到以下错误:

刚开始以为是自己没有一步一步按着教程来,错过了什么就又重新装环境运行了好几遍,可是还是报错,但是不解决又很难受,后发现是transformers库的问题,直接按着教程装的transformers的版本是4.41.2。可以按着这个issue降transformers的版本为4.39.1。降完版本就好啦!

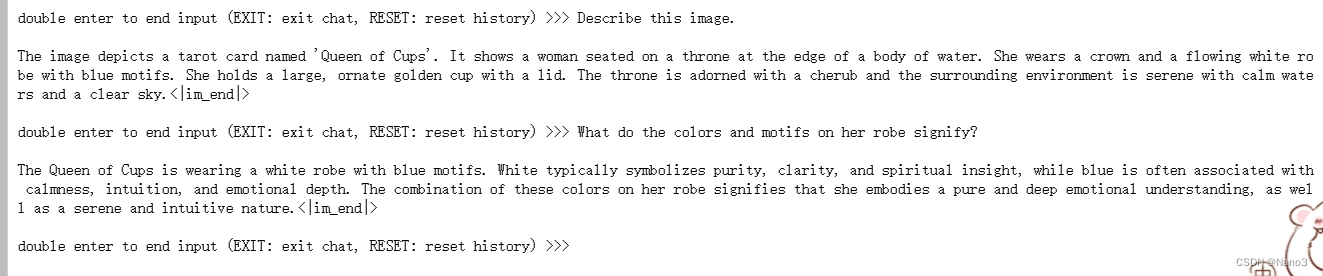
fine-tune完的问答情况:

用自己的图片
制作数据集
现在GPT‑4o 每天有一定的免费使用权限,所以直接用就好啦。将自己的图片和希望获得到的数据格式发给gpt。
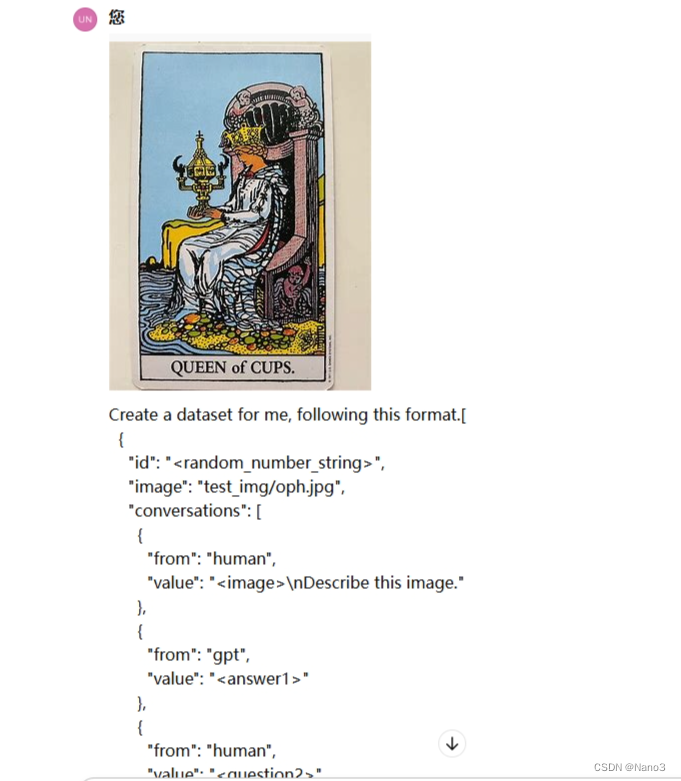
Create a dataset for me, following this format.
[
  {
    "id": "<random_number_string>",
    "image": "test_img/oph.jpg",
    "conversations": [
      {
        "from": "human",
        "value": "<image>\nDescribe this image."
      },
      {
        "from": "gpt",
        "value": "<answer1>"
      },
      {
        "from": "human",
        "value": "<question2>"
      },
      {
        "from": "gpt",
        "value": "<answer2>"
      },
      {
        "from": "human",
        "value": "<question3>"
      },
      {
        "from": "gpt",
        "value": "<answer3>"
      }
    ]
  }
]
The questions and answers, please generate for me, based on the image I sent to you. Thes questions should be from the shallow to the deep, and the answers should be as detailed and correct as possible. The questions and answers should be stick to the contents in the image itself, like objects, peoples, equipment, environment, purpose, color, attitude, etc. 5 question and answer pairs.
修改文件,配置和命令
1.首先把下图路径的unique_json的数据换成自己的。注意image路径名和自己图片的名字,不要写错。然后再运行生成数据集的命令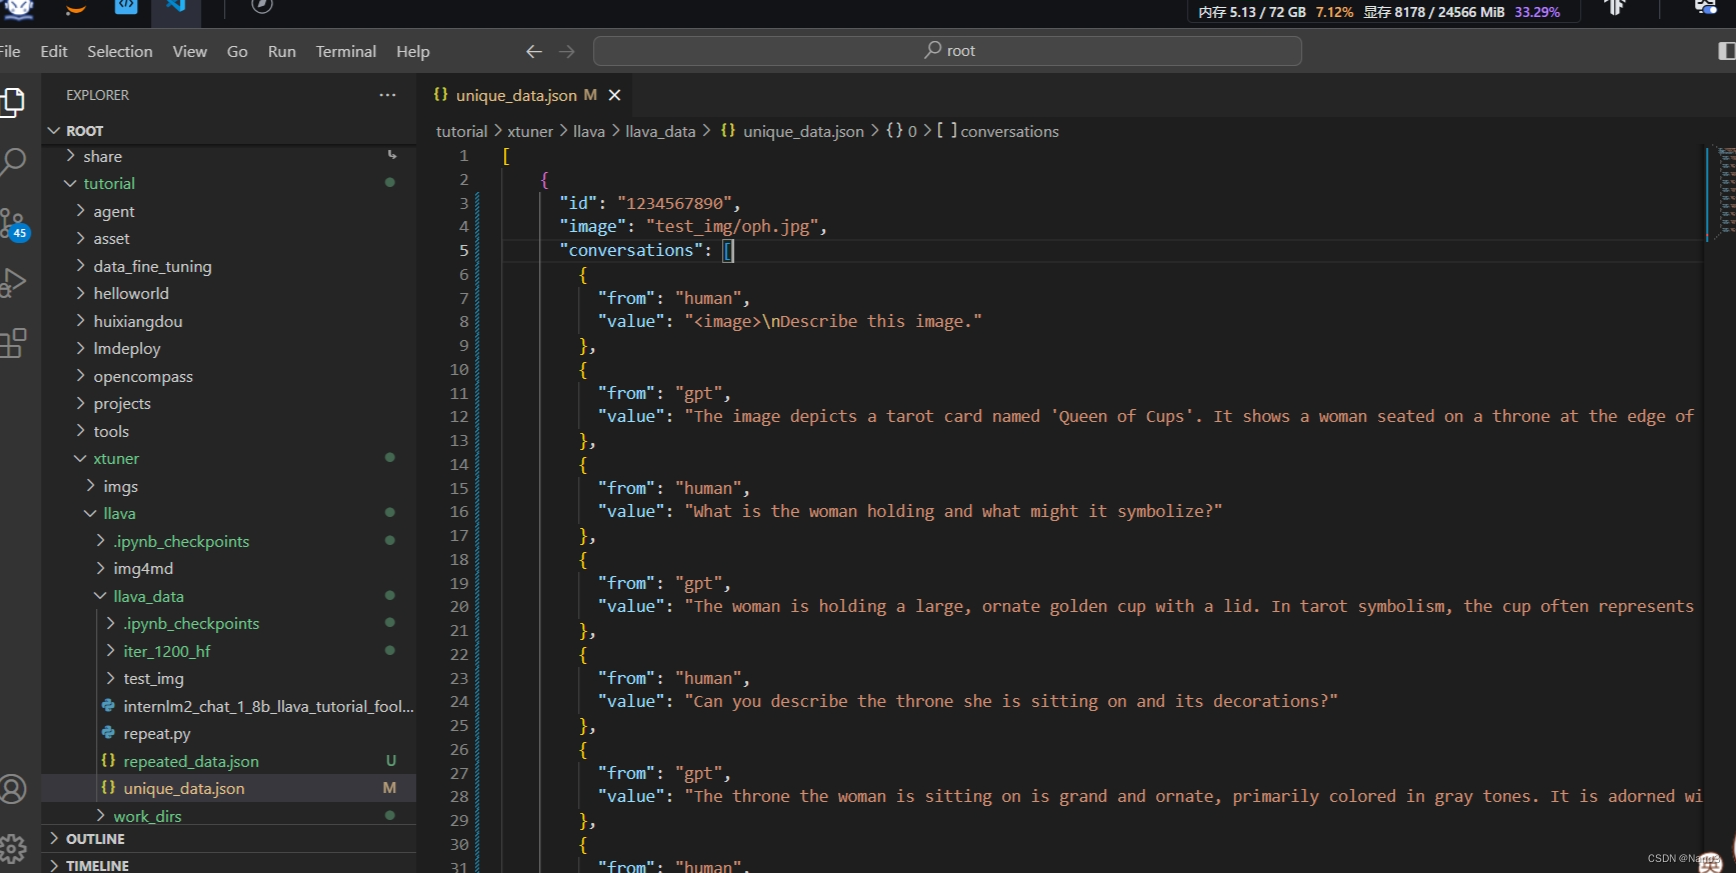
cd ~ && git clone https://github.com/InternLM/tutorial -b camp2 && conda activate xtuner0.1.17 && cd tutorial

python /root/tutorial/xtuner/llava/llava_data/repeat.py \
  -i /root/tutorial/xtuner/llava/llava_data/unique_data.json \
  -o /root/tutorial/xtuner/llava/llava_data/repeated_data.json \
  -n 200
2.修改配置文件(也可以不改)
把/root/tutorial/xtuner/llava/llava_internlm2_chat_1_8b_qlora_clip_vit_large_p14_336_lora_e1_gpu8_finetune_copy.py里最后的input改了,文件就是官方教程里1.3.4.2.2. 修改配置文件那一步
#这里可以换成自己图片的相关问题
evaluation_inputs = ['Please describe this picture','What is the equipment in the image?']
3.然后就可以运行fine-tune命令了。
cd /root/tutorial/xtuner/llava/
xtuner train /root/tutorial/xtuner/llava/llava_internlm2_chat_1_8b_qlora_clip_vit_large_p14_336_lora_e1_gpu8_finetune_copy.py --deepspeed deepspeed_zero2
注意fine-tune完保存的pth模型,我这里是iter_200.pth ,所以在后面# pth转huggingface时要把这一句要转换的pth模型改了。/root/tutorial/xtuner/llava/work_dirs/llava_internlm2_chat_1_8b_qlora_clip_vit_large_p14_336_lora_e1_gpu8_finetune_copy/iter_200.pth

同样滴image也要改成自己滴图片位置。
xtuner convert pth_to_hf \
  /root/tutorial/xtuner/llava/llava_internlm2_chat_1_8b_qlora_clip_vit_large_p14_336_lora_e1_gpu8_finetune_copy.py \
  /root/tutorial/xtuner/llava/work_dirs/llava_internlm2_chat_1_8b_qlora_clip_vit_large_p14_336_lora_e1_gpu8_finetune_copy/iter_200.pth \
  /root/tutorial/xtuner/llava/llava_data/iter_200_hf
  # 启动!
xtuner chat /root/share/new_models/Shanghai_AI_Laboratory/internlm2-chat-1_8b \
  --visual-encoder /root/share/new_models/openai/clip-vit-large-patch14-336 \
  --llava /root/tutorial/xtuner/llava/llava_data/iter_200_hf \
  --prompt-template internlm2_chat \
  --image /root/tutorial/xtuner/llava/llava_data/test_img/image.png
来看看自己图片微调后的结果,恩很好。

OpenXLab 部署
1.git配置
如果还是在Internstudio平台的话先安装git:
apt-get update
apt-get install git
apt-get install git-lfs
git lfs install
然后配置 Git Username,用于作为 Git 提交的身份标识。
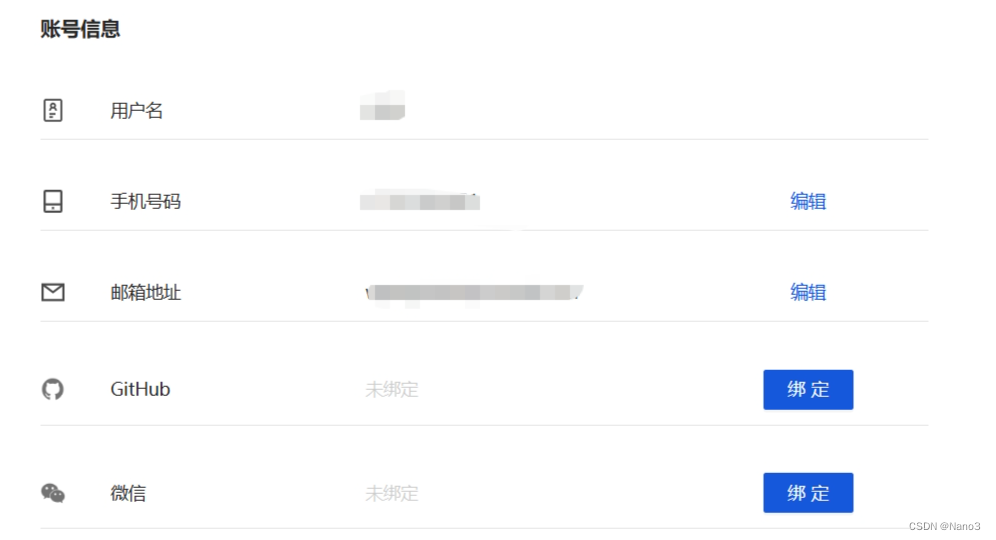
需要将 Username 替换成你在 OpenXLab 平台上账号信息的用户名
git config --global user.name "Username"
git config --global user.email
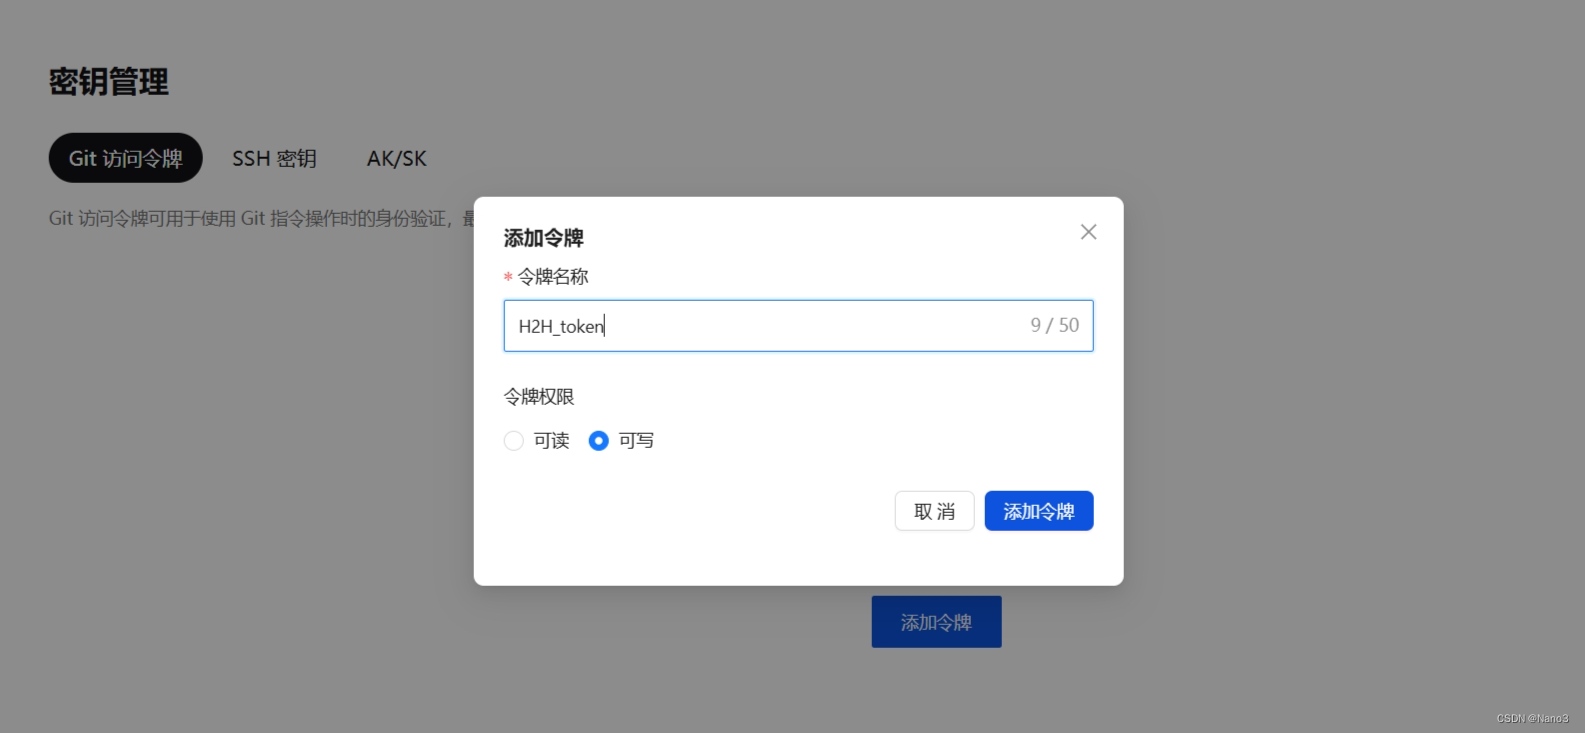
在秘钥管理创建git访问令牌,后面上传时会用到。
2.上传模型到openxlab
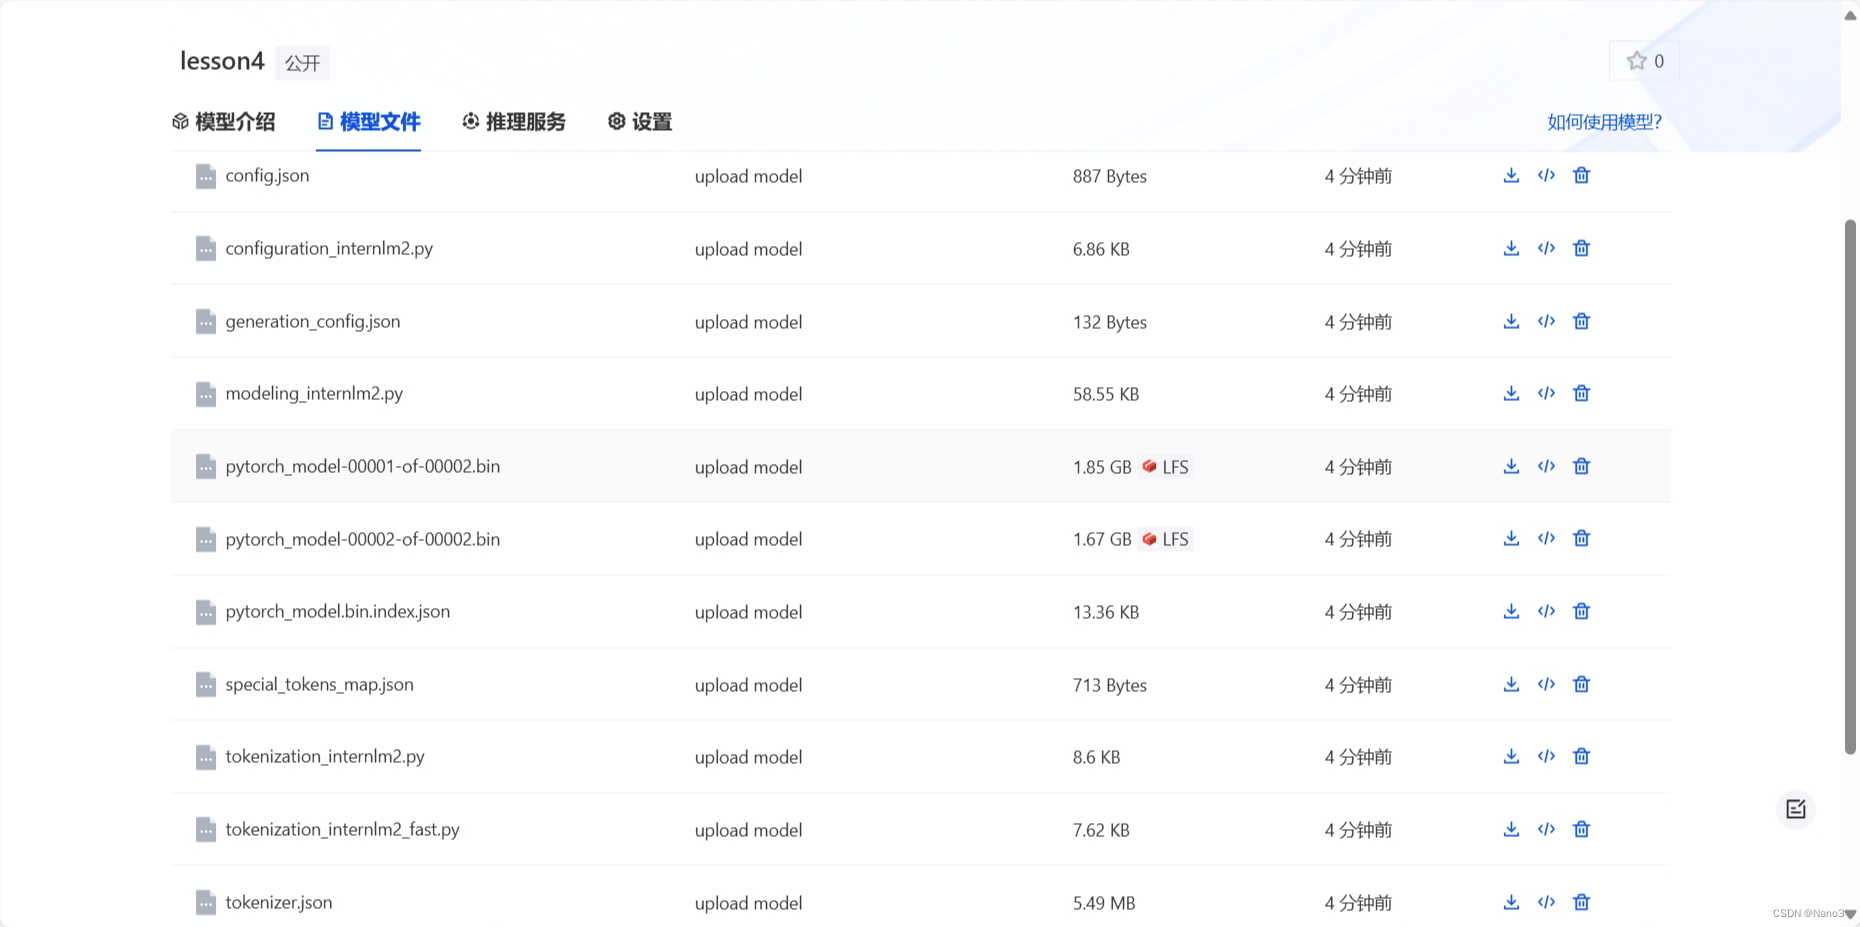
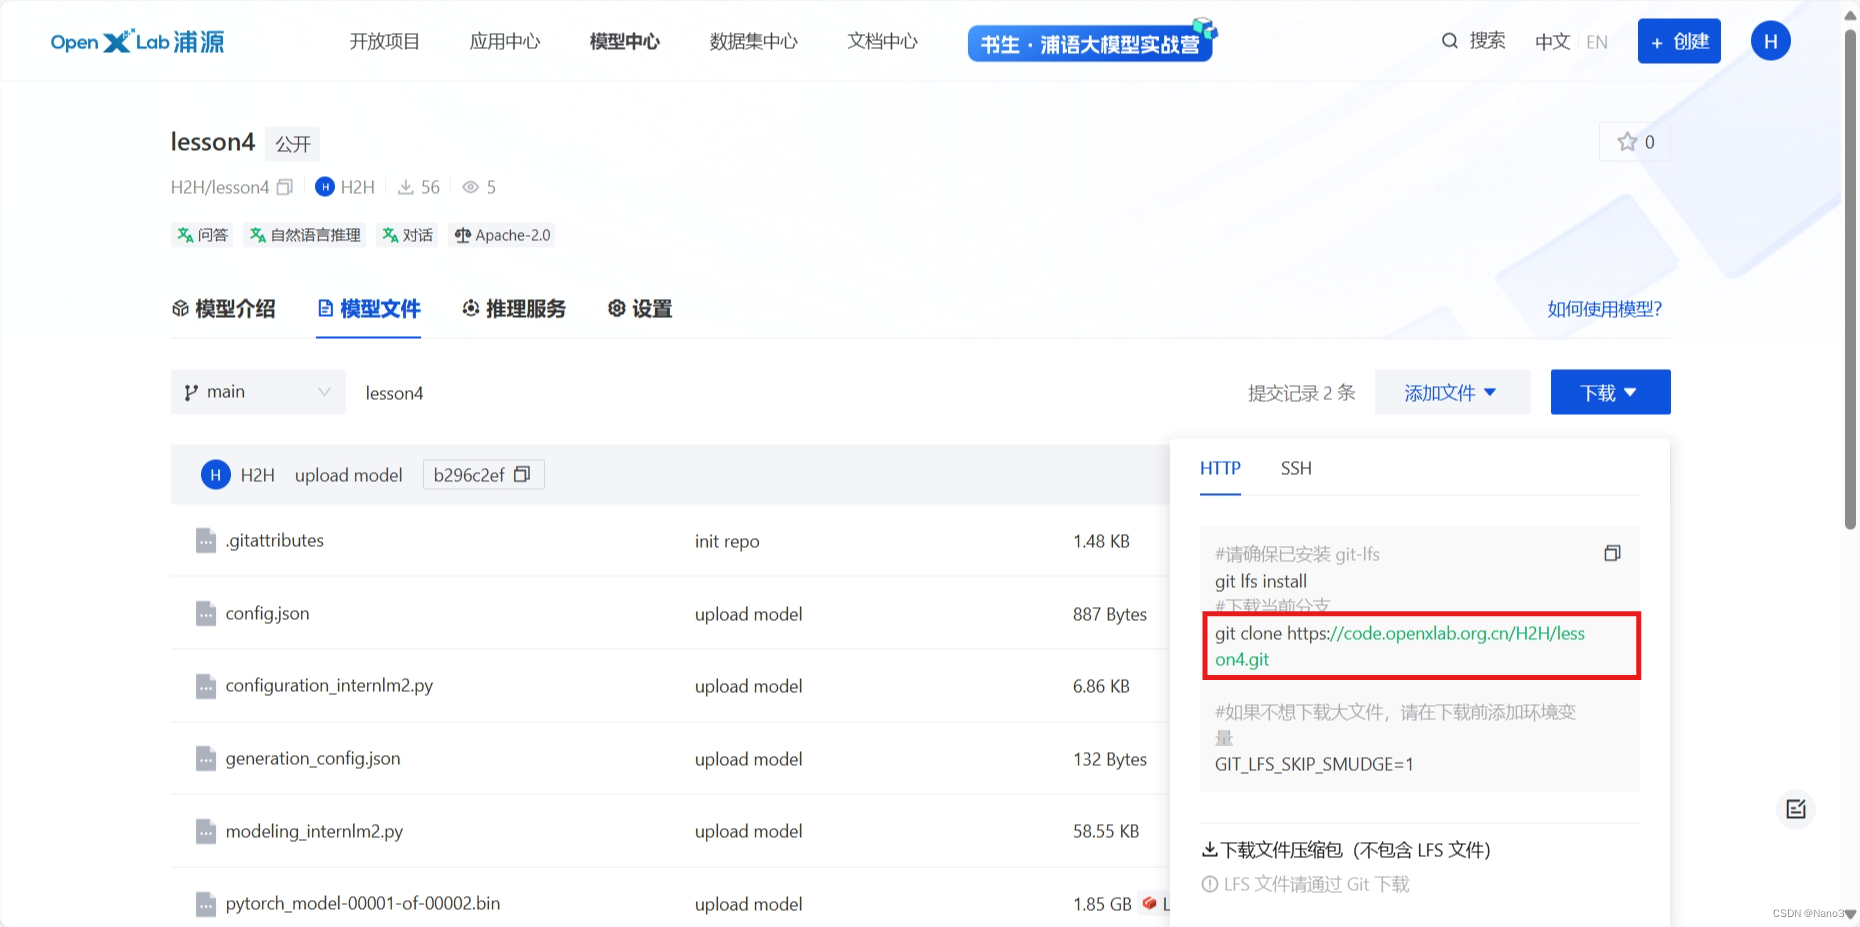
在 OpenXLab 先创建一个空仓库,复制模型文件下文件里的git命令。
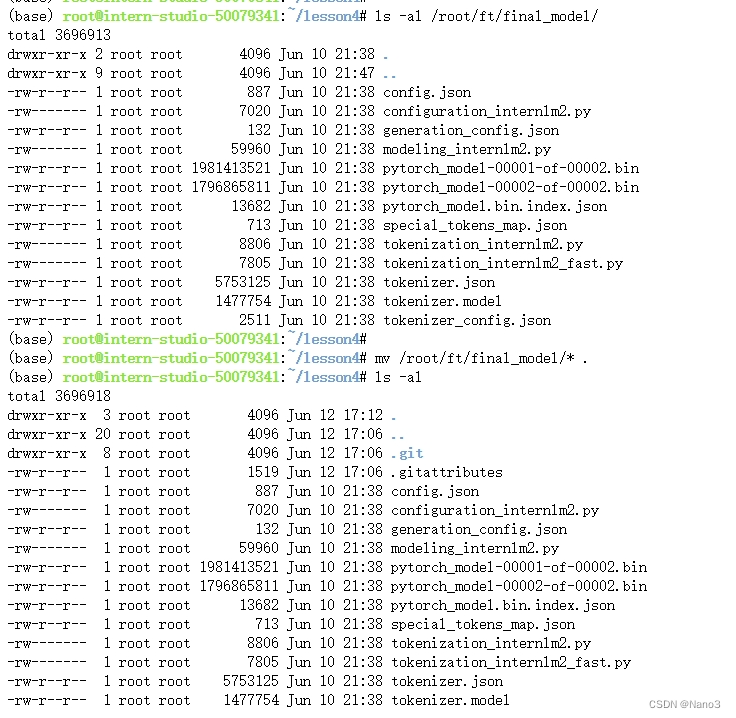
在命令行输入该git命令,下载仓库完成后将model移动到仓库里:
cd 仓库名/
ls -al /root/ft/final_model/
mv /root/ft/final_model/* .
ls -al
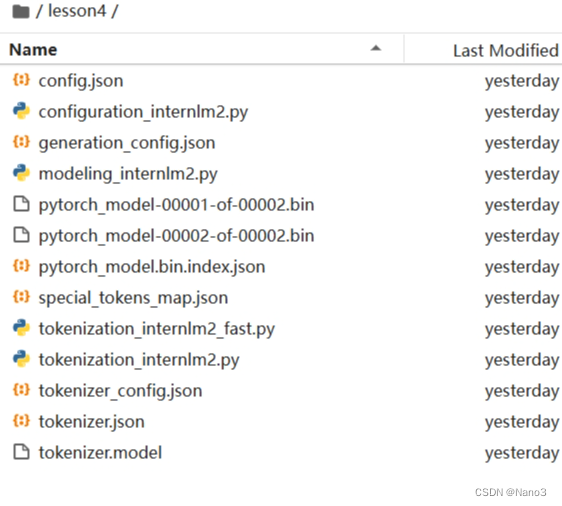
使用 git lfs track 命令来标记你希望通过 Git LFS 管理的大文件。例如,您想要通过LFS管理所有的 .bin和 .model的模型文件,可以使用以下命令:
git lfs track "*.bin"
git lfs track "*.model"
标记LFS管理的文件后,提交更新的信息,执行 git push 上传模型,命令如下所示:
git add -A
git commit -m "upload model"
git push
push时会让输入git令牌,username就是令牌名,password是对应秘钥。

然后仓库就上传完成啦。
3.构建应用
建一个github仓库,要有这几个文件:

把app.py里这两行改一下,改成自己刚上传模型的信息。
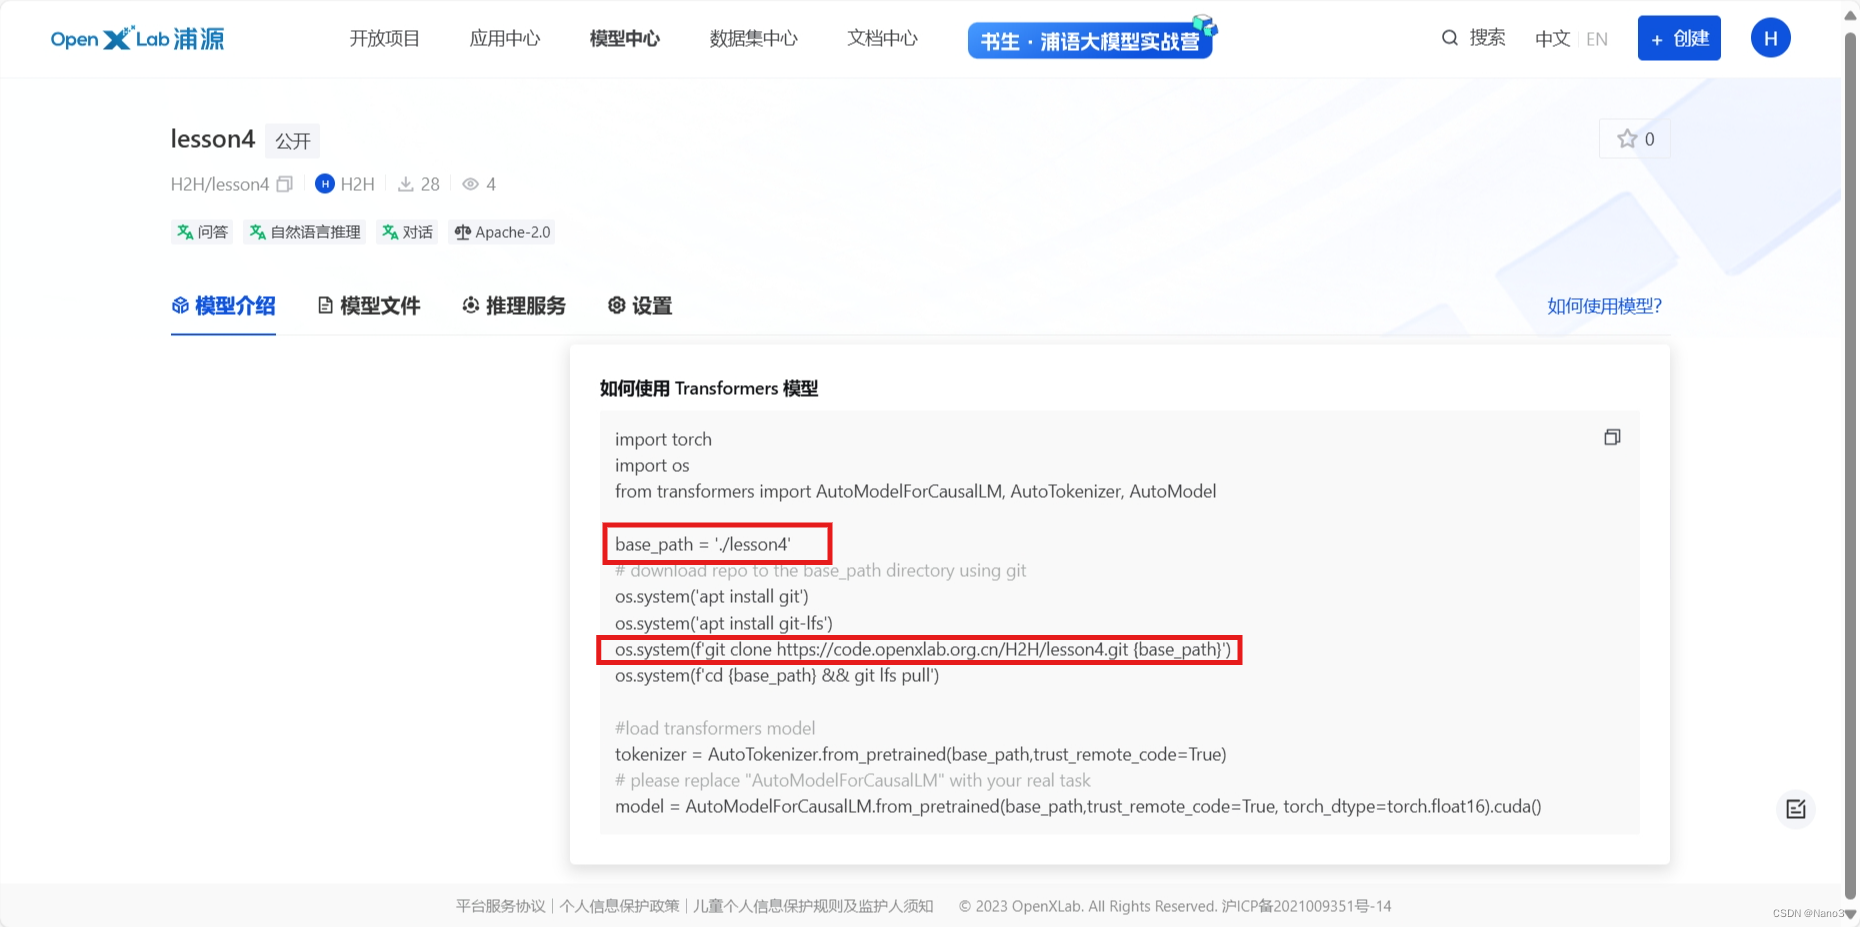
base_path = './internlm2-chat-7b'
os.system(f'git clone https://code.openxlab.org.cn/OpenLMLab/internlm2-chat-7b.git {base_path}')
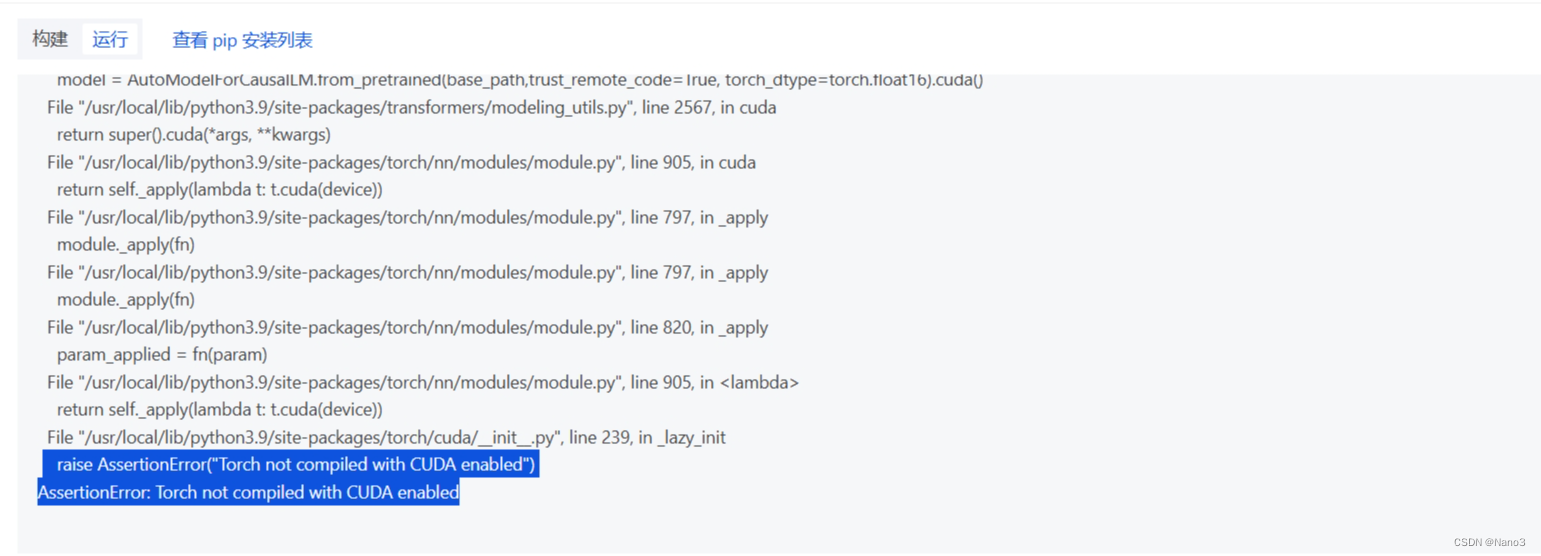
把model最后的.cuda删了,不然部署会报错
model = AutoModelForCausalLM.from_pretrained(base_path,trust_remote_code=True, torch_dtype=torch.float16)
回到openxlab创建应用,右上角创建应用,选gradio,github选自己刚创建的仓库,下图是官方教程里的配置,但是我们可以免费选的硬件资源只有8GB的。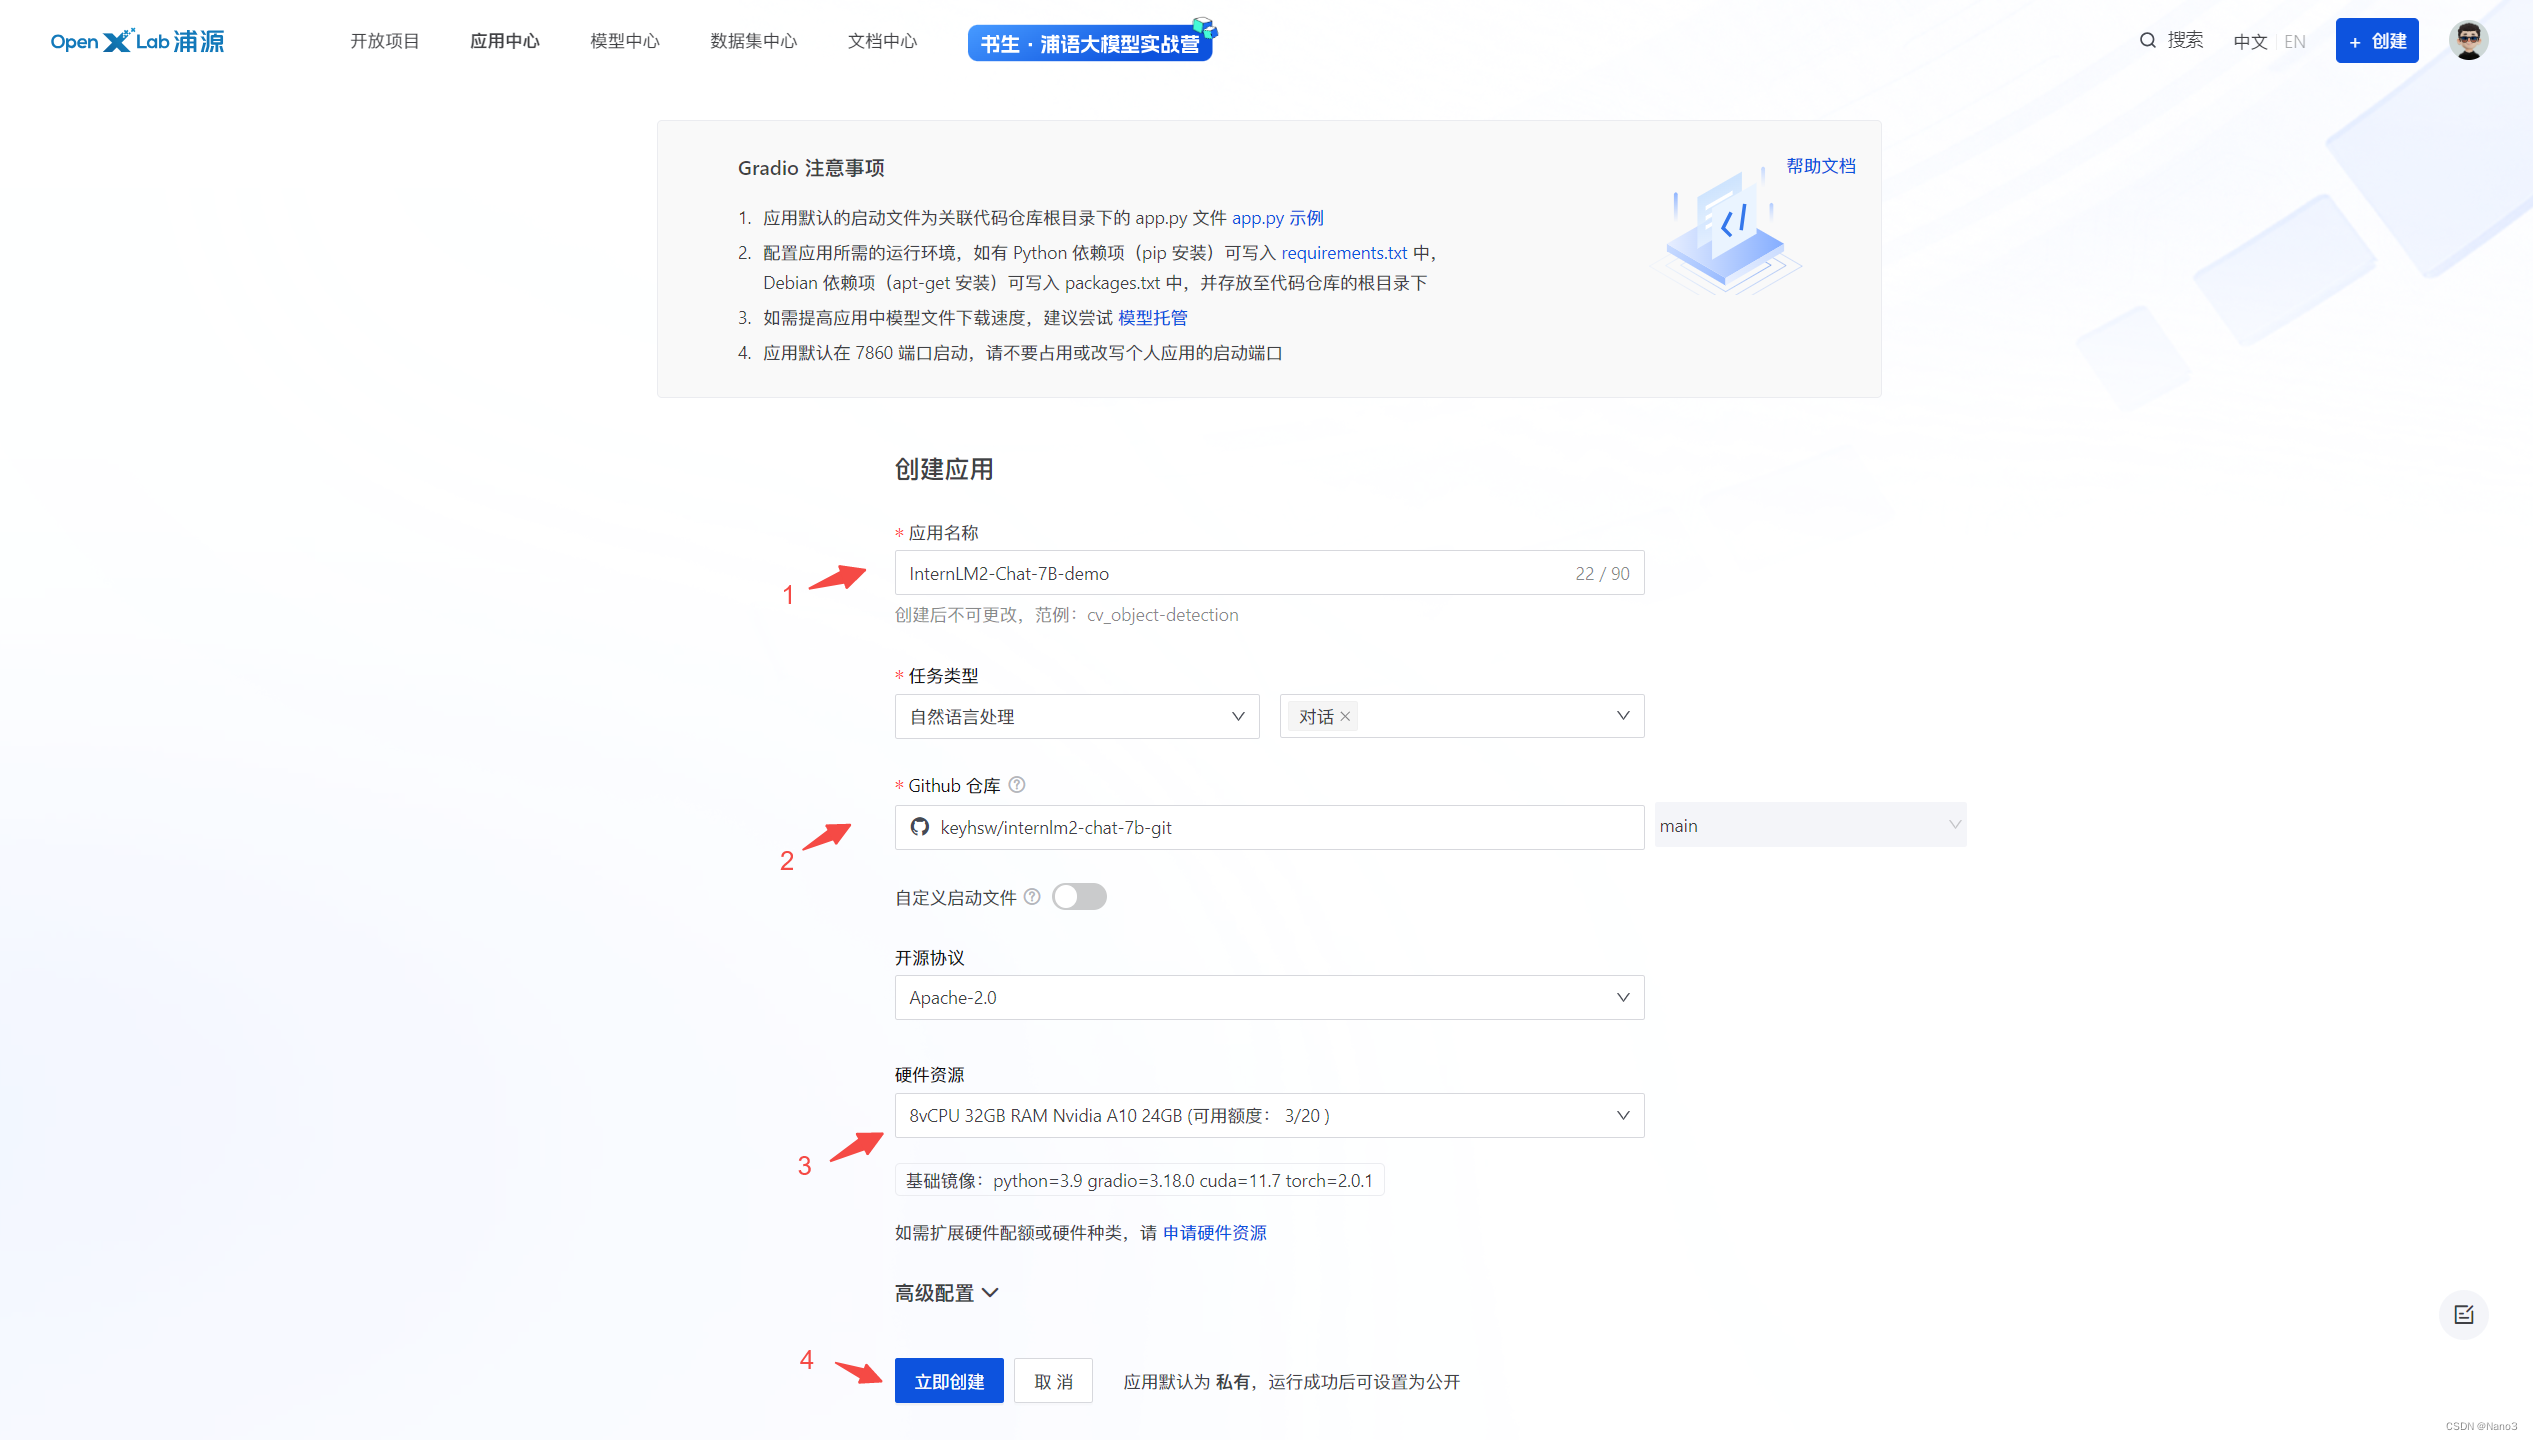
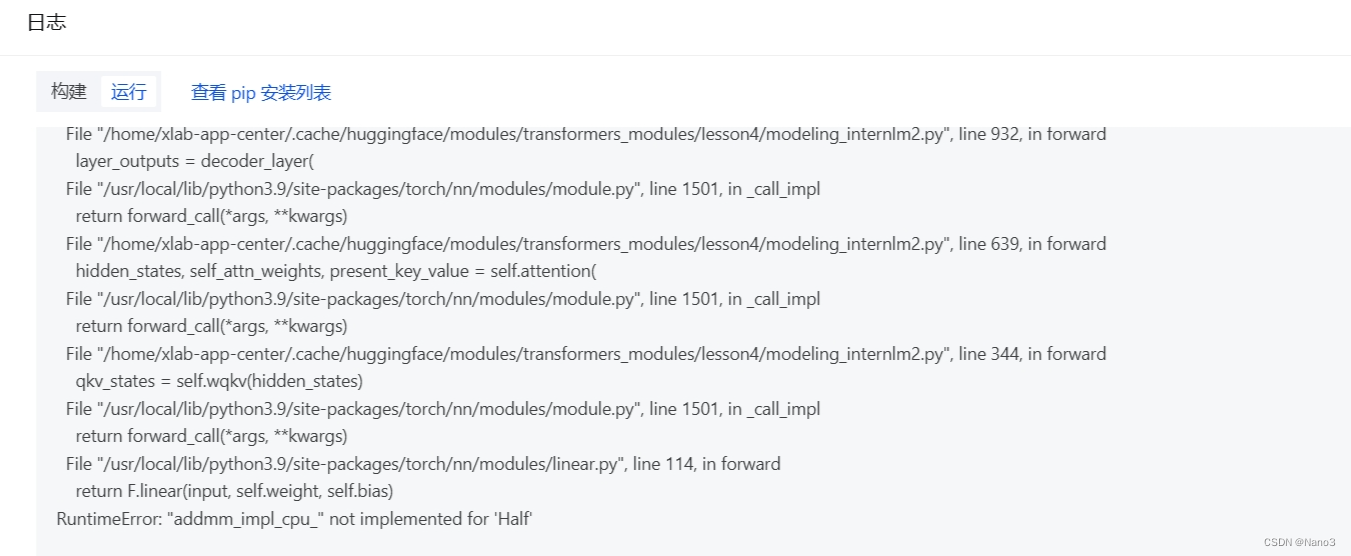
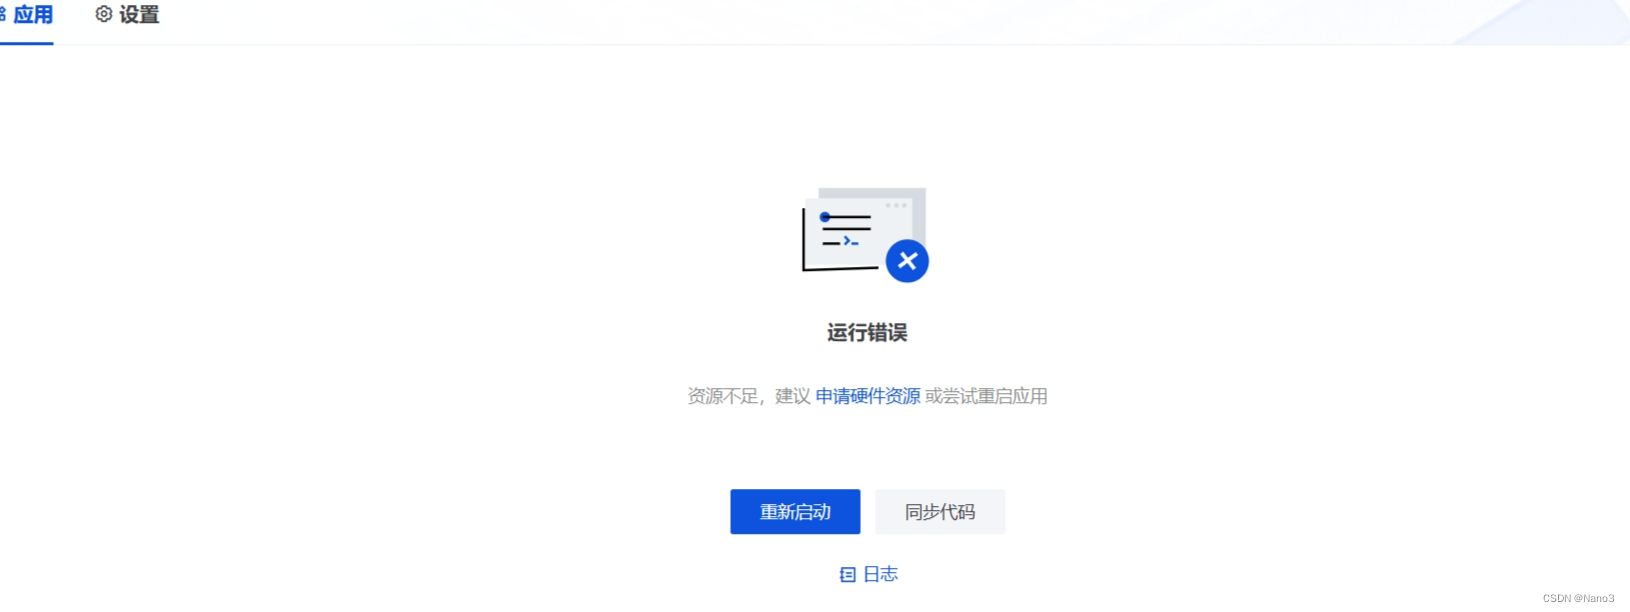
然后就构建和启动就可以了(如果不报错并且成功启动,但是不回复并且日志报错是下图,这是因为CPU无法使用 fp16(半精度),然而我改完不使用fp16又报错硬件资源不够,so应该就是硬件规格资源的问题,毕竟教程里建议:如需部署 InternLM2-7b 模型建议申请 8vCPU 32GB Nvidia A10 24GB 规格资源。


 594
594

 被折叠的 条评论
为什么被折叠?
被折叠的 条评论
为什么被折叠?
 到【灌水乐园】发言


