


系统镜像准备
注:若使用树莓派官方镜像写入软件 Imager 可跳过此步骤,Imager 中可自行选择下载系统并写入TF卡中。
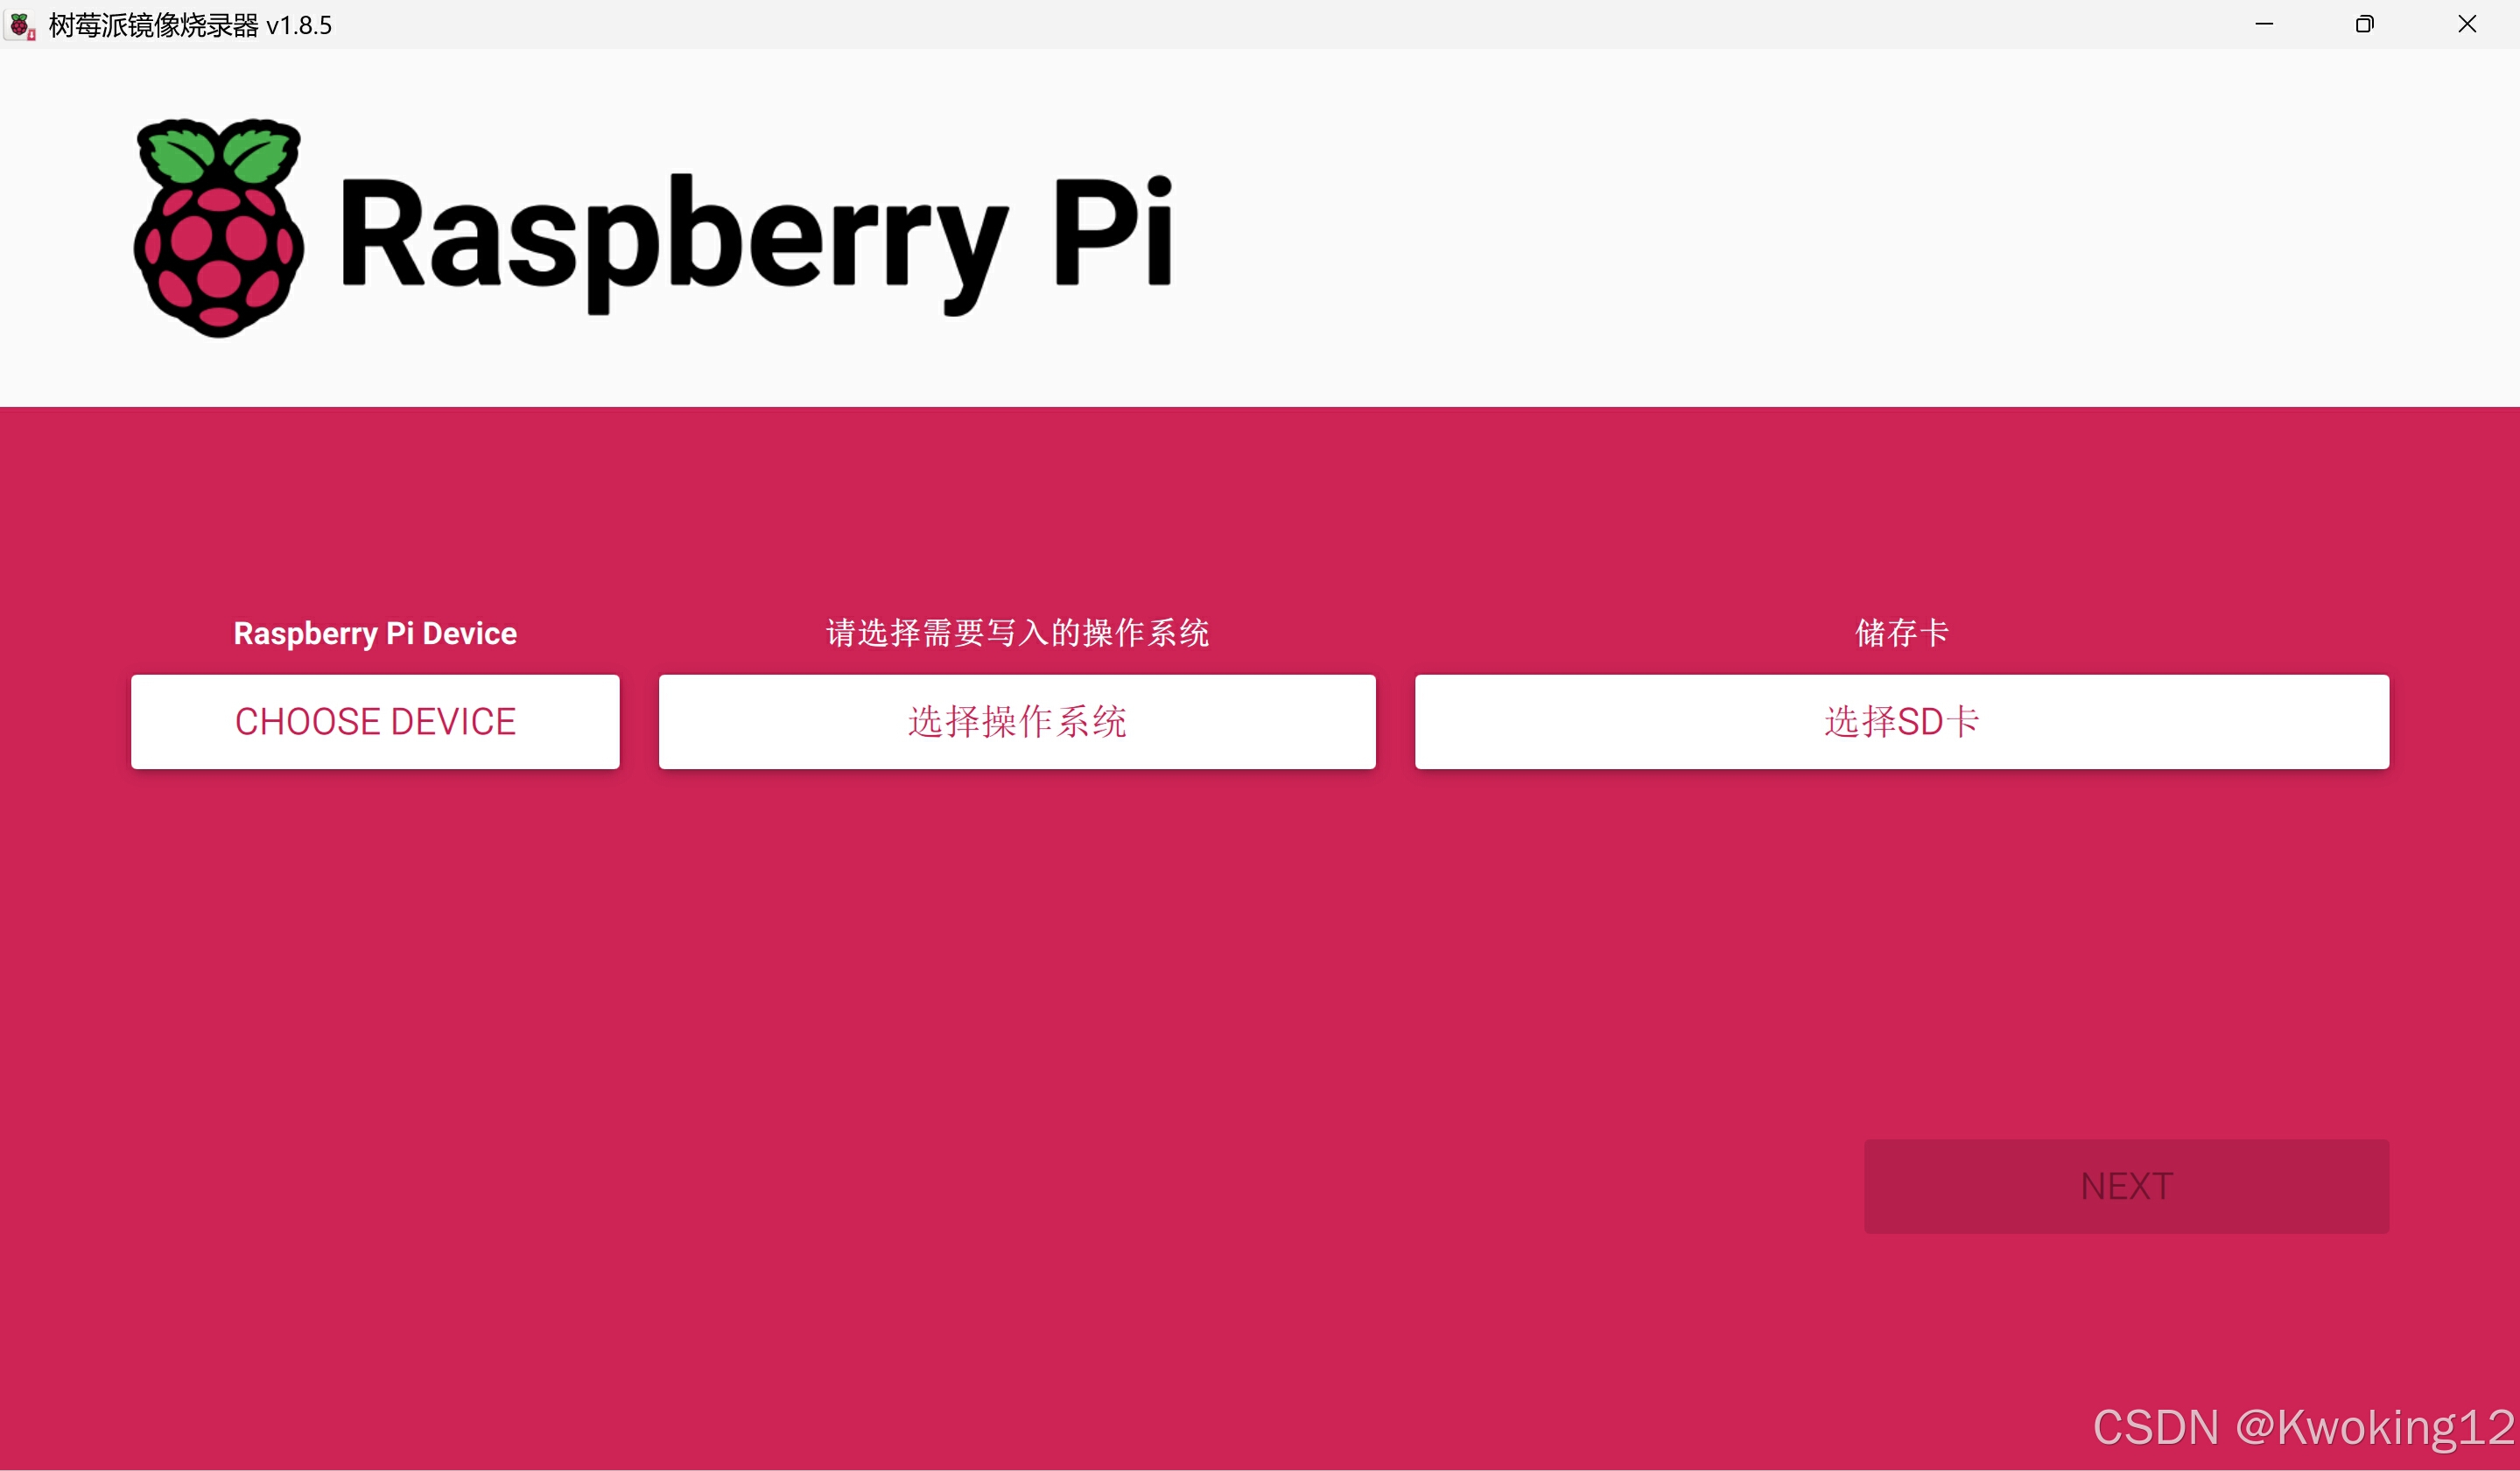
Imager下载地址:
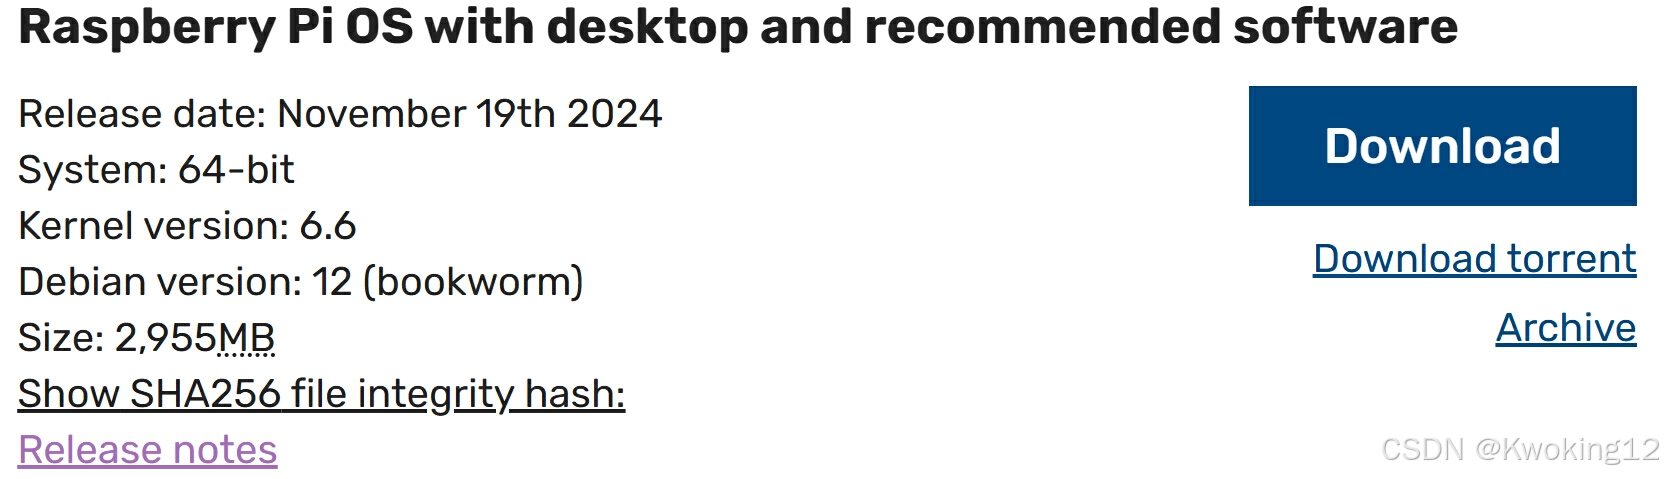
1.镜像下载
本次下载 Raspberry Pi OS(64-bit) with desktop and recommended software 版本的镜像。
2.镜像写入
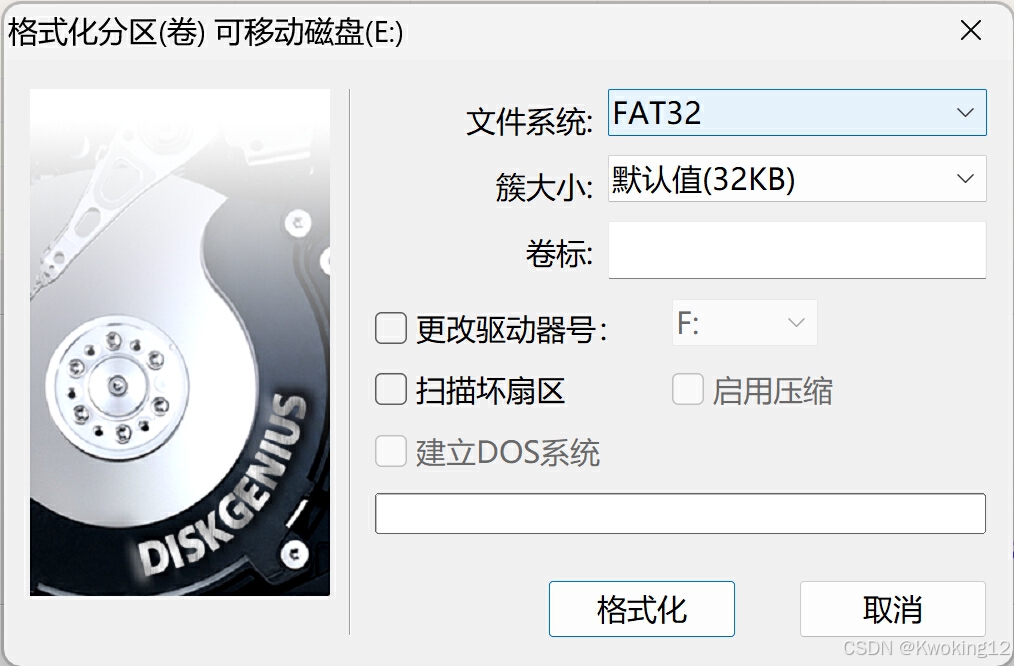
2.1格式化TF卡
准备一张容量32GB及以上的TF卡,使用SD Card Formatter/DiskGenius软件将其格式化为 FAT32类型。
SD Card Formatter/DiskGenius下载地址:SDメモリカードフォーマッター | SD Associationhttps://www.sdcard.org/ja/downloads-2/formatter-2/https://www.sdcard.org/ja/downloads-2/formatter-2/https://www.sdcard.org/ja/downloads-2/formatter-2/https://www.sdcard.org/ja/downloads-2/formatter-2/https://www.sdcard.org/ja/downloads-2/formatter-2/https://www.sdcard.org/ja/downloads-2/formatter-2/https://www.sdcard.org/ja/downloads-2/formatter-2/https://www.sdcard.org/ja/downloads-2/formatter-2/https://www.sdcard.org/ja/downloads-2/formatter-2/https://www.sdcard.org/ja/downloads-2/formatter-2/https://www.sdcard.org/ja/downloads-2/formatter-2/![]() https://www.sdcard.org/ja/downloads-2/formatter-2/DiskGenius – 正式版下载|免费下载https://www.diskgenius.cn/download.phphttps://www.diskgenius.cn/download.phphttps://www.diskgenius.cn/download.phphttps://www.diskgenius.cn/download.phphttps://www.diskgenius.cn/download.phphttps://www.diskgenius.cn/download.phphttps://www.diskgenius.cn/download.phphttps://www.diskgenius.cn/download.phphttps://www.diskgenius.cn/download.phphttps://www.diskgenius.cn/download.phphttps://www.diskgenius.cn/download.php
https://www.sdcard.org/ja/downloads-2/formatter-2/DiskGenius – 正式版下载|免费下载https://www.diskgenius.cn/download.phphttps://www.diskgenius.cn/download.phphttps://www.diskgenius.cn/download.phphttps://www.diskgenius.cn/download.phphttps://www.diskgenius.cn/download.phphttps://www.diskgenius.cn/download.phphttps://www.diskgenius.cn/download.phphttps://www.diskgenius.cn/download.phphttps://www.diskgenius.cn/download.phphttps://www.diskgenius.cn/download.phphttps://www.diskgenius.cn/download.php![]() https://www.diskgenius.cn/download.php
https://www.diskgenius.cn/download.php
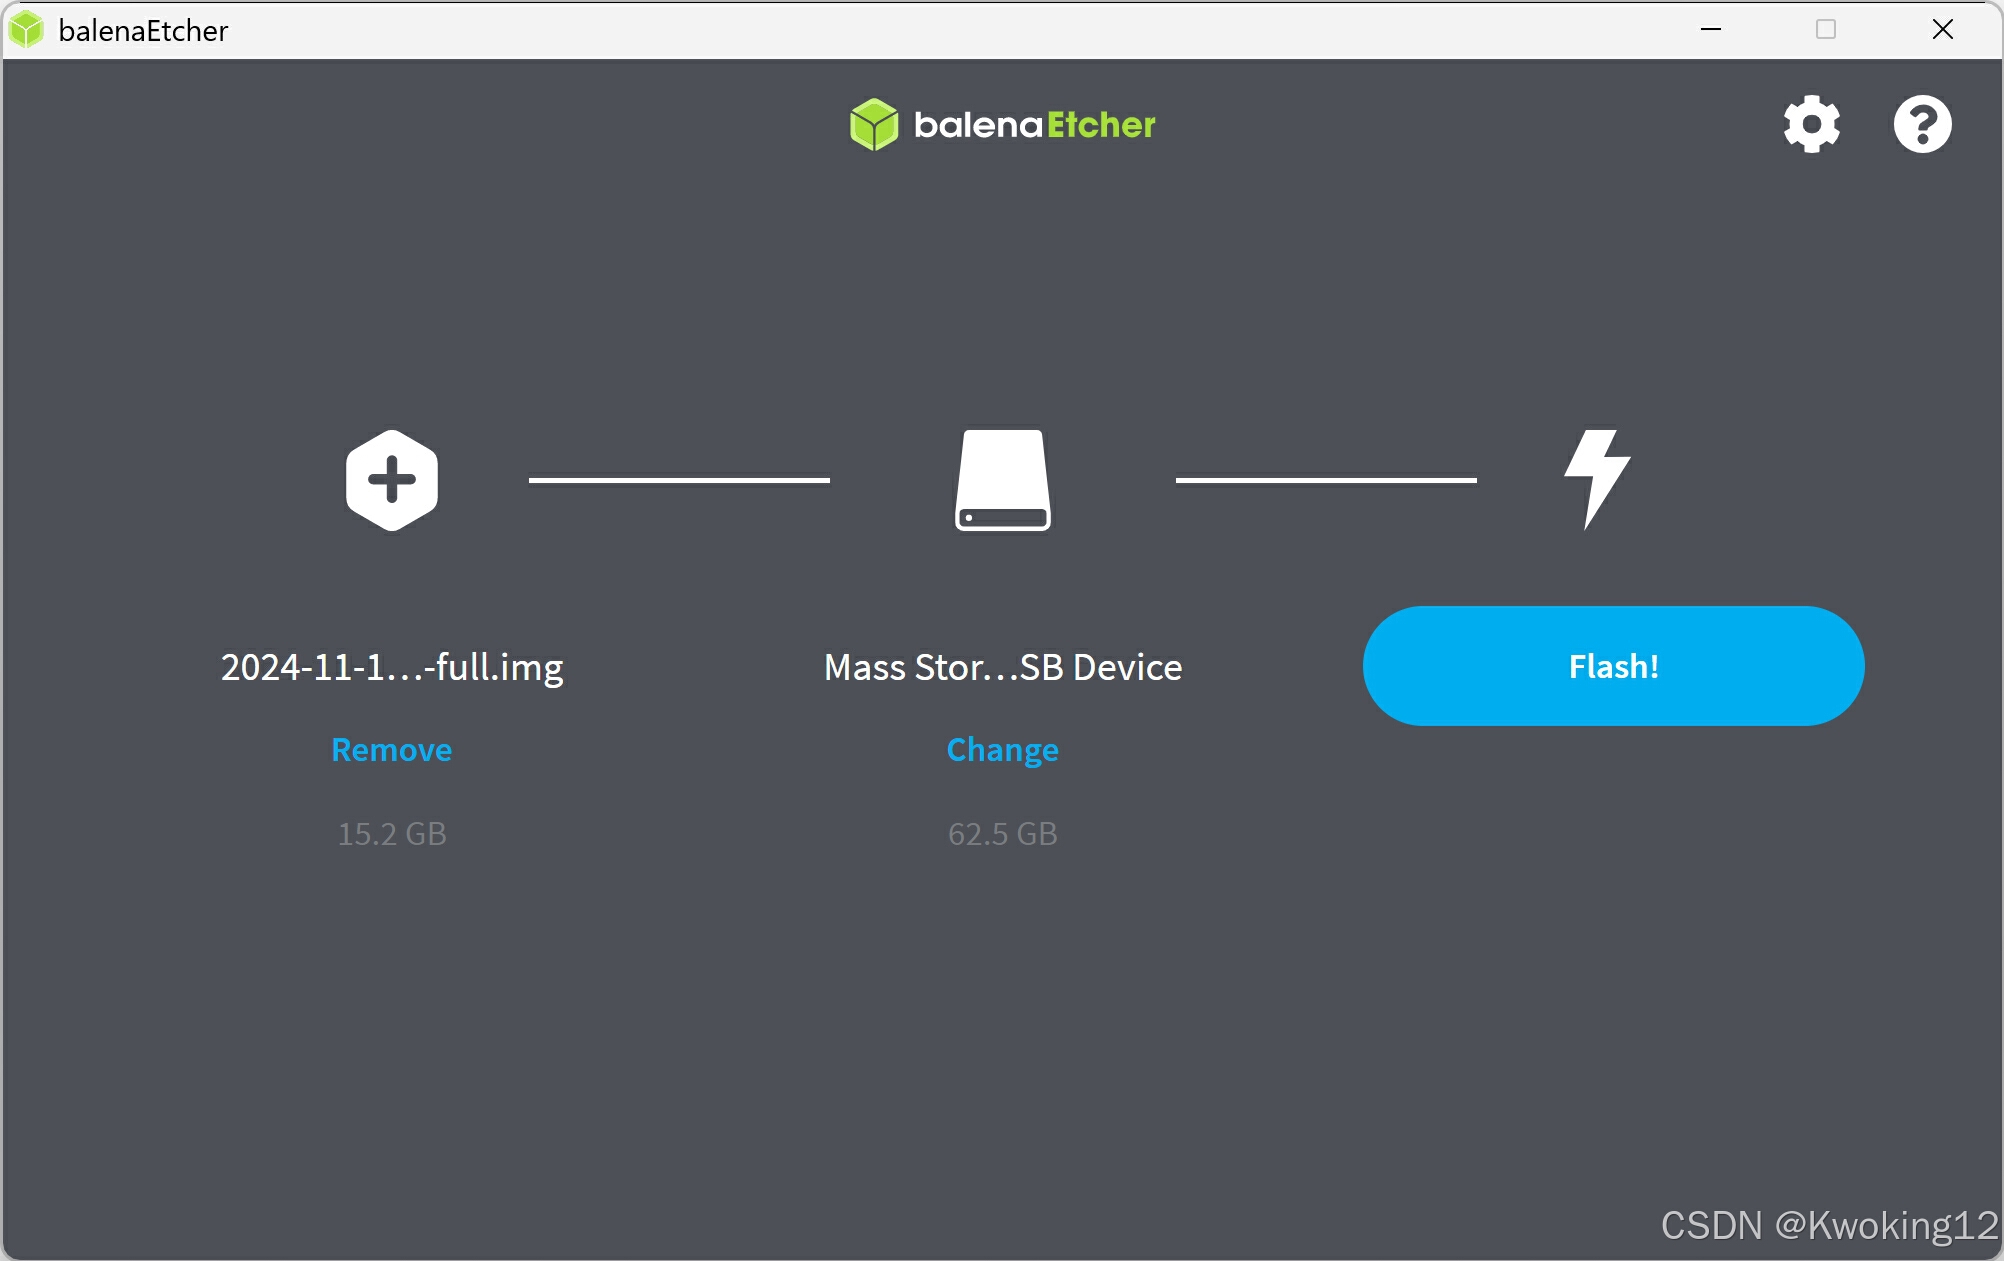
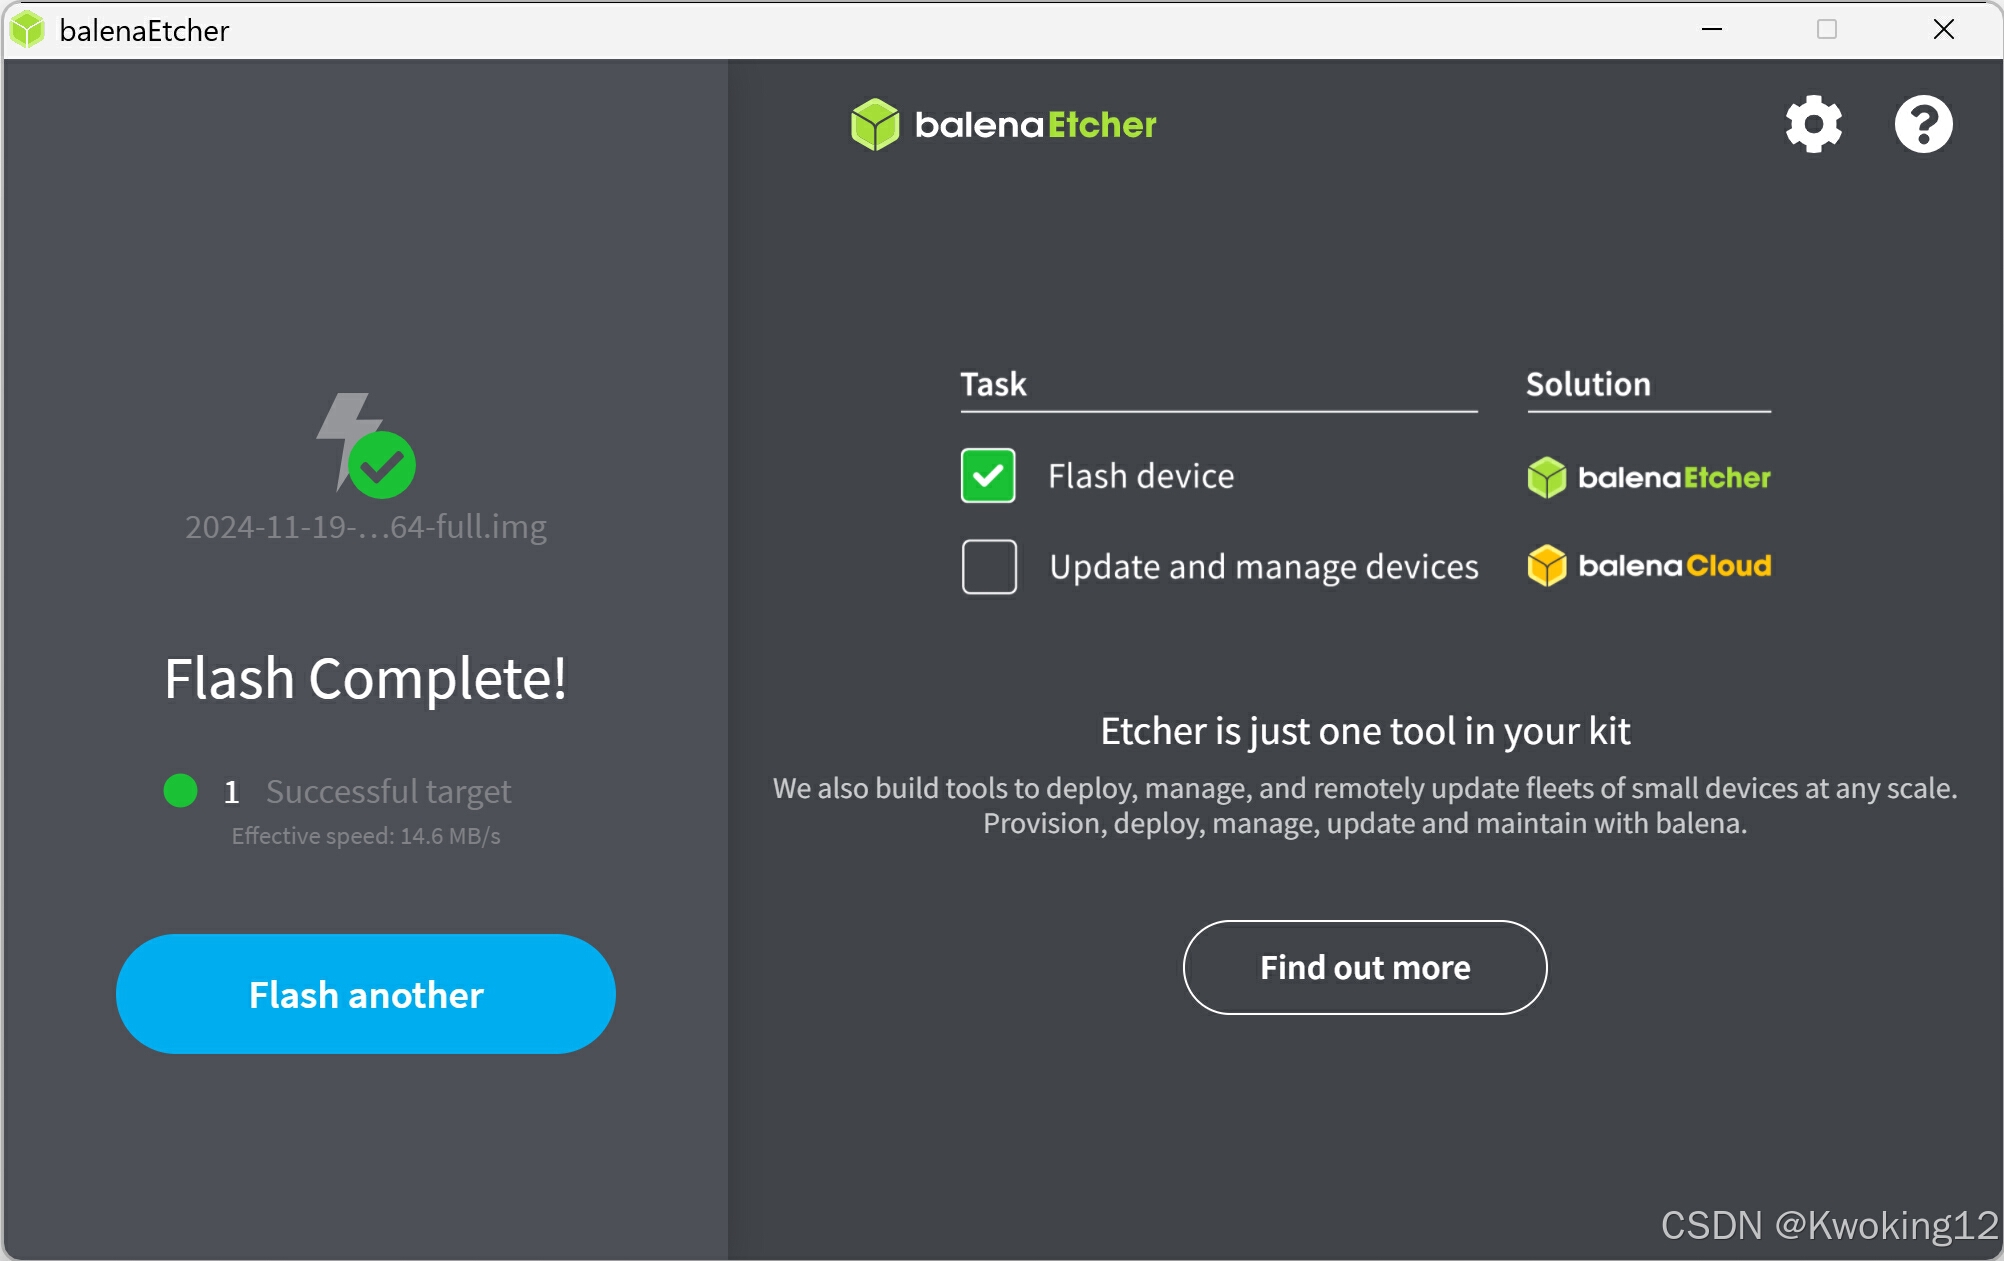
2.2 系统镜像写入
本次使用etcher软件写入下载的系统镜像。
3.基础配置
写入完成后,将TF卡装入树莓派,连接显示器、鼠标键盘,上电进入系统引导,完成常规设置和更新后进入树莓派桌面。

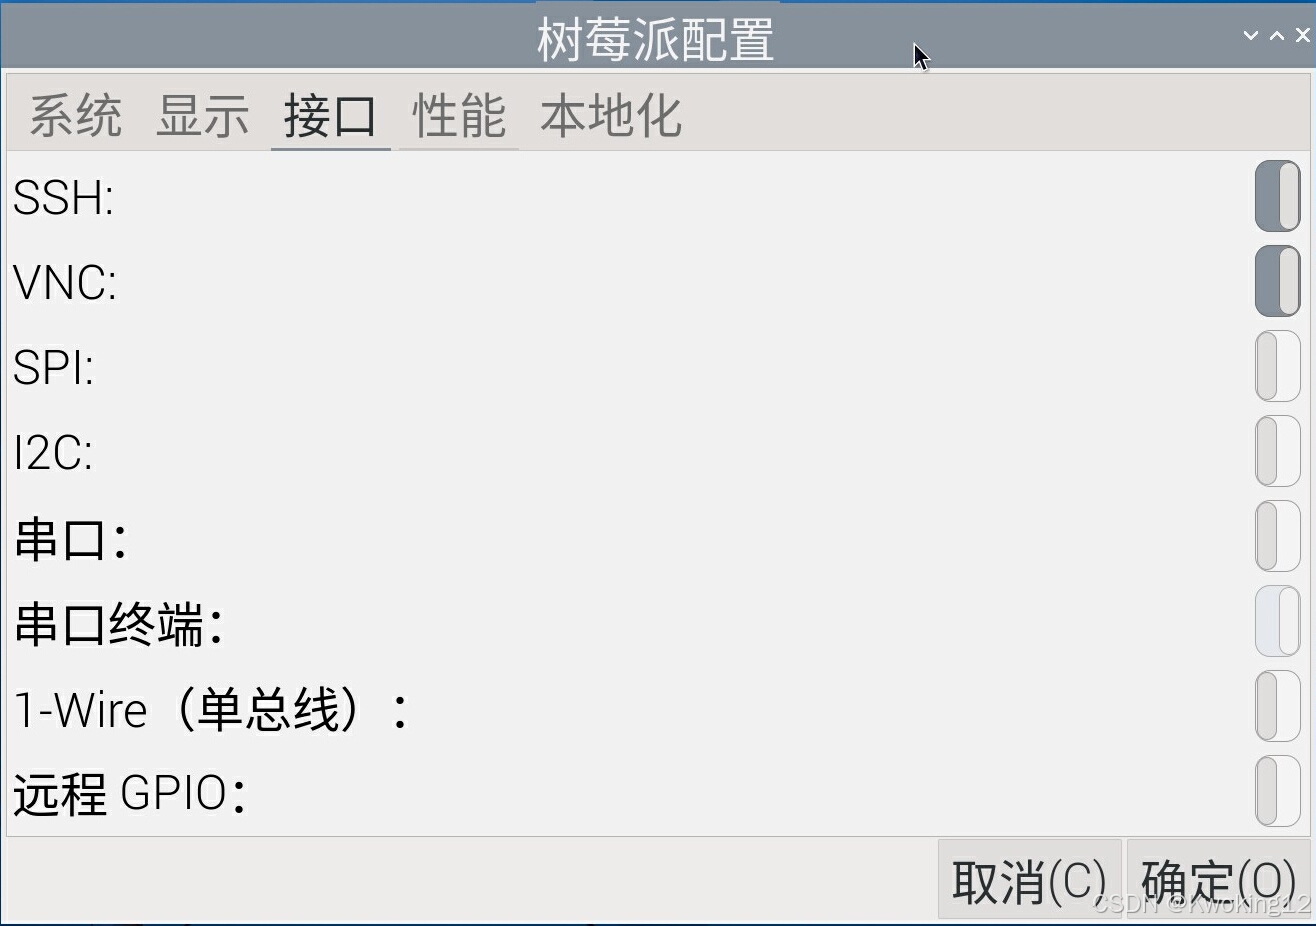
3.1 开启SSH&VDC(根据实际需求选择)
软件菜单>首选项>树莓派配置 ,确认SSH、VNC选项已开启。
打开终端,ifconfig 查看树莓派IP地址。
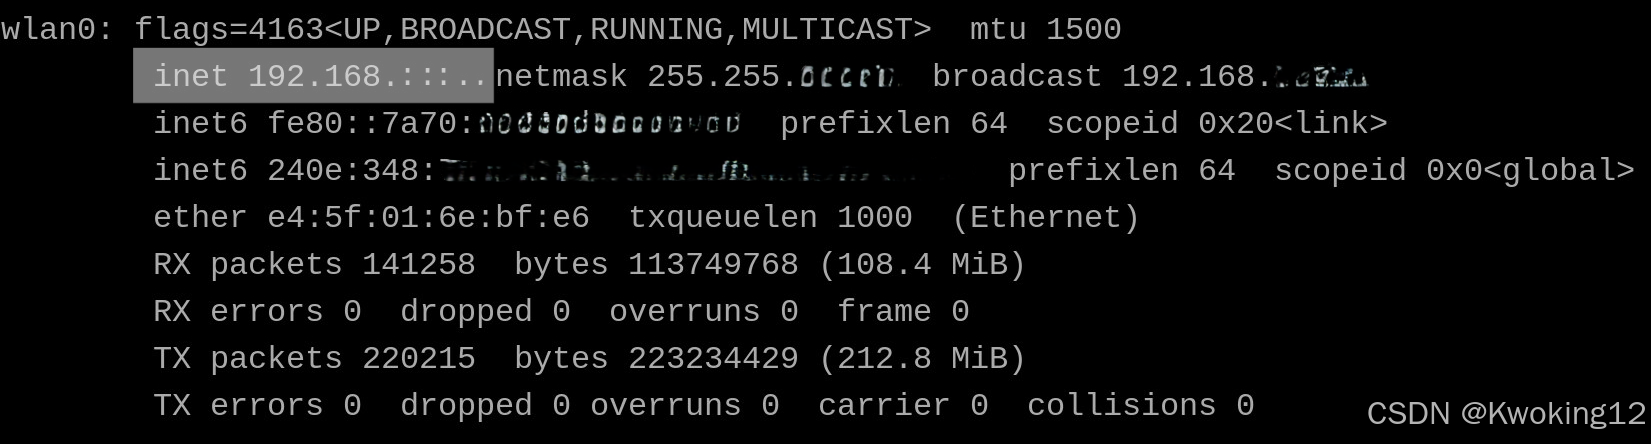
在远程设备上打开终端,ssh <username>@<ip address>,连接成功后可看到 Raspberry Pi 命令提示符。在远程设备上下载VNC客户端,本次使用TigerVNC,输入树莓派IP地址连接。
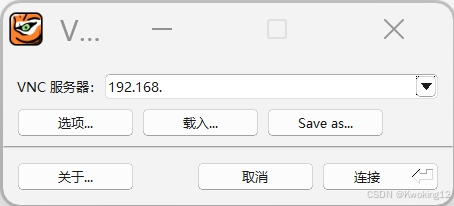
TigerVNC下载地址:
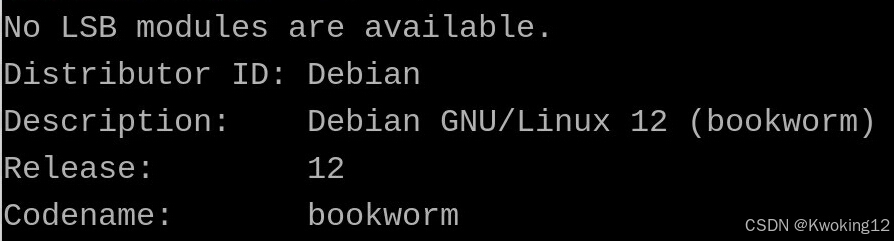
3.2 更换软件镜像源(根据实际系统版本,本次为Debian 12 bookworm)
lsb_release -a 确认系统版本。
打开 sources.list
sudo nano /etc/apt/sources.list将原软件源注释掉(根据实际需求),添加国内源并保存。
# 默认注释了源码镜像以提高 apt update 速度,如有需要可自行取消注释
deb https://mirrors.tuna.tsinghua.edu.cn/debian/ bookworm main contrib non-free non-free-firmware
# deb-src https://mirrors.tuna.tsinghua.edu.cn/debian/ bookworm main contrib non-free non-free-firmware

deb https://mirrors.tuna.tsinghua.edu.cn/debian/ bookworm-updates main contrib non-free non-free-firmware
# deb-src https://mirrors.tuna.tsinghua.edu.cn/debian/ bookworm-updates main contrib non-free non-free-firmware

deb https://mirrors.tuna.tsinghua.edu.cn/debian/ bookworm-backports main contrib non-free non-free-firmware
# deb-src https://mirrors.tuna.tsinghua.edu.cn/debian/ bookworm-backports main contrib non-free non-free-firmware

# 以下安全更新软件源包含了官方源与镜像站配置,如有需要可自行修改注释切换
deb https://security.debian.org/debian-security bookworm-security main contrib non-free non-free-firmware
# deb-src https://security.debian.org/debian-security bookworm-security main contrib non-free non-free-firmware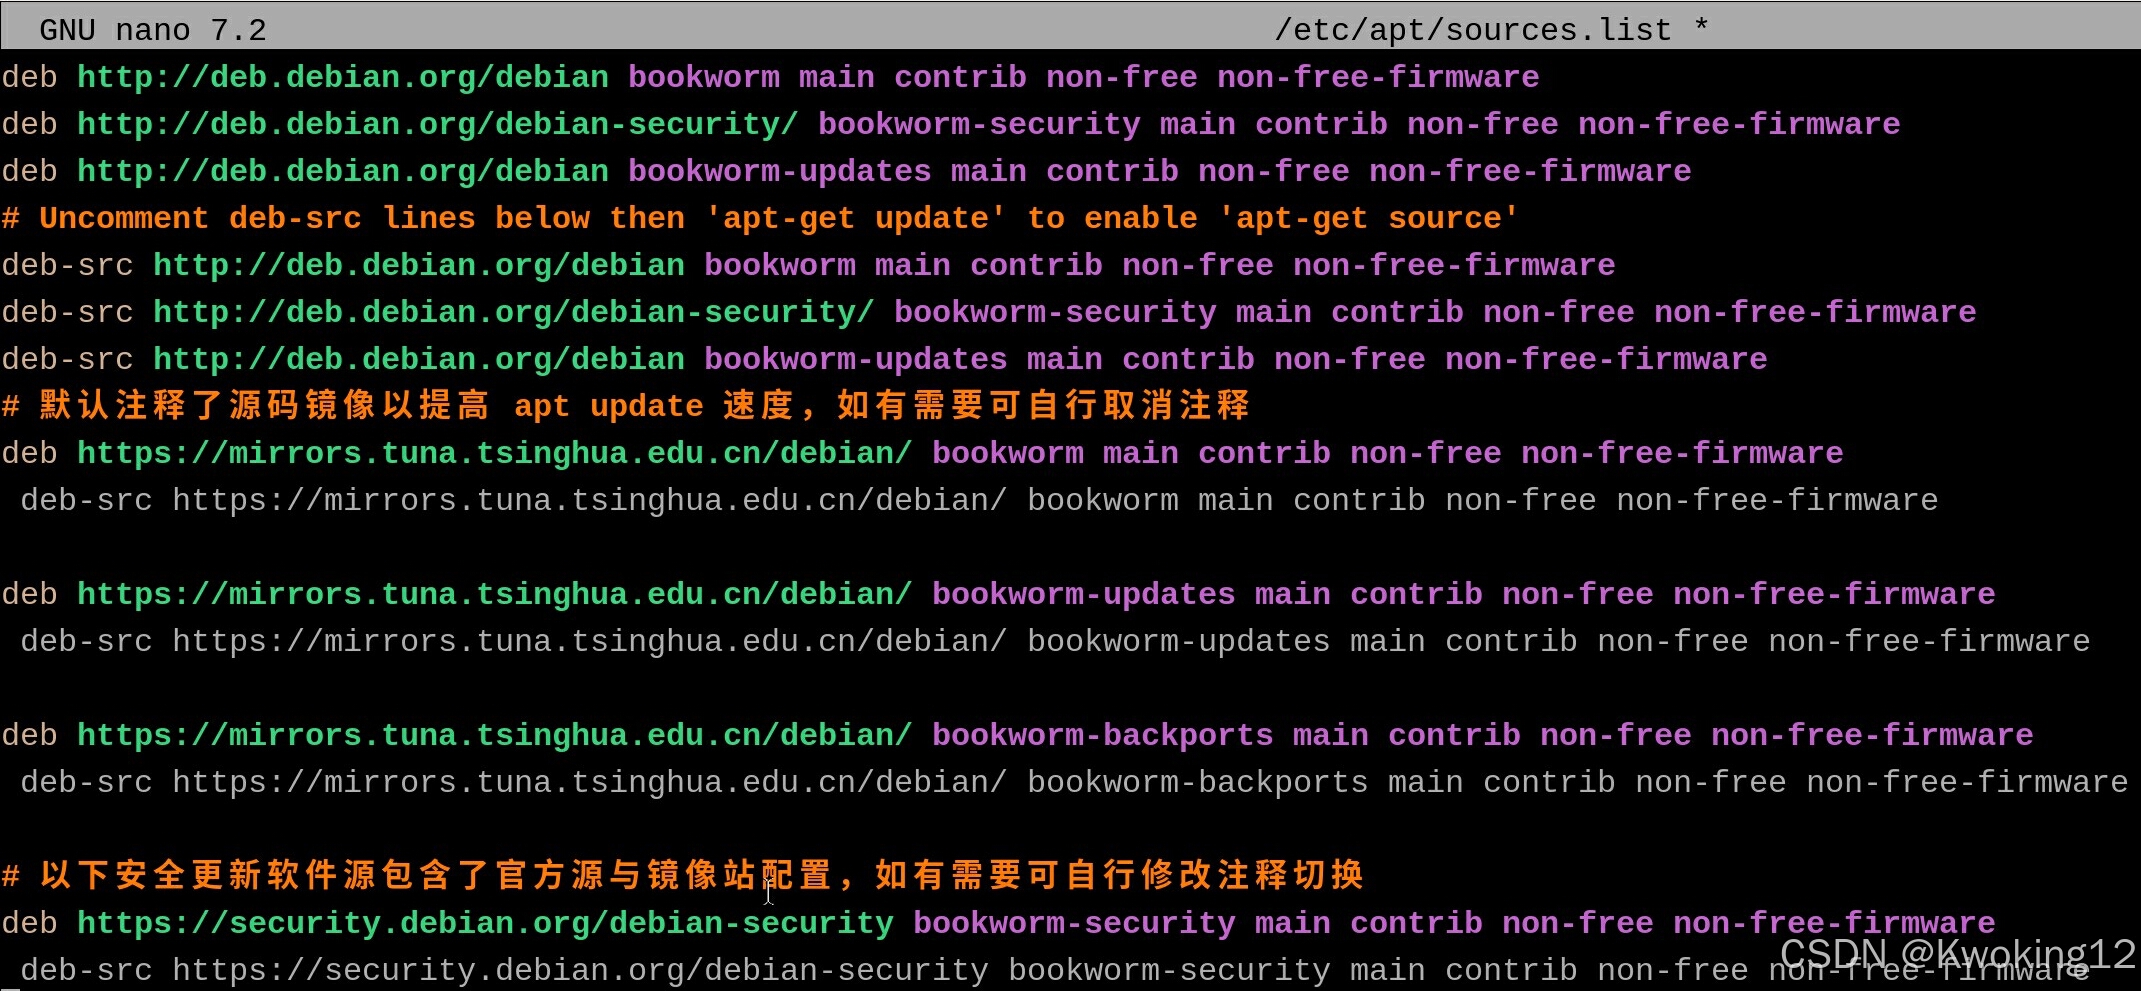
打开 raspi.list
sudo nano /etc/apt/sources.list.d/raspi.list将原软件源注释掉(根据实际需求),添加国内源并保存。
deb https://mirrors.tuna.tsinghua.edu.cn/raspberrypi/ bookworm main
debian | 镜像站使用帮助 | 清华大学开源软件镜像站 | Tsinghua Open Source Mirrorhttps://mirrors.tuna.tsinghua.edu.cn/help/debian/https://mirrors.tuna.tsinghua.edu.cn/help/debian/https://mirrors.tuna.tsinghua.edu.cn/help/debian/https://mirrors.tuna.tsinghua.edu.cn/help/debian/![]() https://mirrors.tuna.tsinghua.edu.cn/help/debian/编辑镜像站后,使用 sudo apt update ,更新软件源列表,检查编辑是否正确。
https://mirrors.tuna.tsinghua.edu.cn/help/debian/编辑镜像站后,使用 sudo apt update ,更新软件源列表,检查编辑是否正确。
二、ROS安装
1. ROS版本选择
ROS 的官方支持主要基于 Ubuntu,而树莓派系统(基于 Debian)需要找到与 ROS 版本兼容的 Debian 版本。
| ROS 版本 | 官方支持的 Ubuntu 版本 | 对应的 Debian 版本 | 树莓派系统(Raspberry Pi OS)兼容性 |
|---|---|---|---|
| ROS 2 Jazzy | Ubuntu 24.04 (Noble) | Debian 12 (Bookworm) | ✅ 支持(需 64 位 Bookworm 系统) |
| ROS Noetic | Ubuntu 20.04 (Focal) | Debian 11 (Bullseye) | ✅ 支持(需使用 Bullseye 系统) |
| ROS Melodic | Ubuntu 18.04 (Bionic) | Debian 10 (Buster) | ✅ 支持(需使用 Buster 系统) |
| ROS Kinetic | Ubuntu 16.04 (Xenial) | Debian 9 (Stretch) | ⚠️ 老旧版本,需手动适配 |
ROS 2 Jazzy Jalisco 当前基于 Debian 的目标平台是:
-
第 1 层:Ubuntu Linux - Noble (24.04) 64 位
-
第 3 层:Ubuntu Linux - Jammy (22.04) 64 位
-
第 3 层:Debian Linux - Bookworm (12) 64 位
本次为 Debian 12 Bookworm 64 位系统,选择安装 ROS 2 Jazzy Jalisco 版本。
2. 系统设置
#1.手动设定区域选项以避免后续出现问题
locale  # check for UTF-8

sudo apt update && sudo apt install locales
sudo locale-gen en_US en_US.UTF-8
sudo update-locale LC_ALL=en_US.UTF-8 LANG=en_US.UTF-8
export LANG=en_US.UTF-8

locale  # verify settings
#2. 将 ROS2 apt存储库添加到系统中
sudo apt install software-properties-common#3. 使用 apt 添加 ROS2 GPG 密钥。
sudo apt update && sudo apt install curl -y
sudo curl -sSL https://raw.githubusercontent.com/ros/rosdistro/master/ros.key -o /usr/share/keyrings/ros-archive-keyring.gpg
# 若运行后提示无法链接到网址 Failed to connect to raw.githubusercontent.com
# 在hosts文件种添加 raw.githubusercontent.com ip
185.199.108.133 raw.githubusercontent.com
185.199.109.133 raw.githubusercontent.com
185.199.110.133 raw.githubusercontent.com
185.199.111.133 raw.githubusercontent.com
#4. 将存储库添加到源列表。
echo "deb [arch=arm64 signed-by=/usr/share/keyrings/ros-archive-keyring.gpg] http://packages.ros.org/ros2/ubuntu bookworm main" | sudo tee /etc/apt/sources.list.d/ros2.list > /dev/null
#5. 安装开发工具
sudo apt update && sudo apt install -y \
python3-flake8-blind-except \
python3-flake8-class-newline \
python3-flake8-deprecated \
python3-mypy \
python3-pip \
python3-pytest \
python3-pytest-cov \
python3-pytest-mock \
python3-pytest-repeat \
python3-pytest-rerunfailures \
python3-pytest-runner \
python3-pytest-timeout \
ros-dev-tools3. 构建ROS2
#1. 创建工作区克隆所有存储库
mkdir -p ~/ros2_jazzy/src
cd ~/ros2_jazzy
vcs import --input https://raw.githubusercontent.com/ros2/ros2/jazzy/ros2.repos src

#这一命令可能需要较长时间,如果反复出现网址未响应,可以考虑更换 GitHu b镜像网站
(需确认更换网址当下可用)
git config --global url."https://bgithub.xyz/".insteadOf https://github.com/

#查看当前网址设置
git config --global -l

# 断开替代链接网址
git config --global --remove-section url."https://bgithub.xyz/"
#2. 安装依赖项
sudo apt upgrade
sudo rosdep init
#可能需要多次尝试
#这里推荐手动模拟 rosdep init ,并添加国内镜像源
mkdir -p /etc/ros/rosdep/sources.list.d/
curl -o /etc/ros/rosdep/sources.list.d/20-default.list https://mirrors.tuna.tsinghua.edu.cn/github-raw/ros/rosdistro/master/rosdep/sources.list.d/20-default.list
rosdep update
cd ~/ros2_jazzy
rosdep install --from-paths src --ignore-src -y --skip-keys "fastcdr rti-connext-dds-6.0.1 urdfdom_headers"#3. 在工作区中构建代码
cd ~/ros2_jazzy/
colcon build --symlink-install
#若有 package 出现报错,则单独构建报错 package
colcon build --symlink-install --packages-select package_name
#对反复报错的package,选择跳过
colcon build --symlink-install --packages-skip package_name#4. 设置环境变量
. ~/ros2_jazzy/install/local_setup.bash#5. 分别打开两个终端,运行 listener 和 talker 示例
. ~/ros2_jazzy/install/local_setup.bash
ros2 run demo_nodes_cpp talker
. ~/ros2_jazzy/install/local_setup.bash
ros2 run demo_nodes_py listener三、驱动激光雷达
1.安装 livox_ros_driver2 驱动功能包
1.1 创建工作空间
# 1. 创建工作空间
mkdir -p ~/livox_ws/src
cd ~/livox_ws
# 2. 加载 ROS 2 环境变量
source /opt/ros/jazzy/setup.sh
# 3. 下载驱动(假设使用适配 Jazzy 的分支)
cd src
git clone https://github.com/Livox-SDK/livox_ros_driver2.git
# 4. 安装依赖
cd ~/livox_ws
rosdep install --from-paths src --ignore-src -y
# 5. 构建项目
colcon build --symlink-install --executor sequential --parallel-workers 2
# 6. 持久化环境变量
echo "source ~/livox_ws/install/setup.bash" >> ~/.bashrc
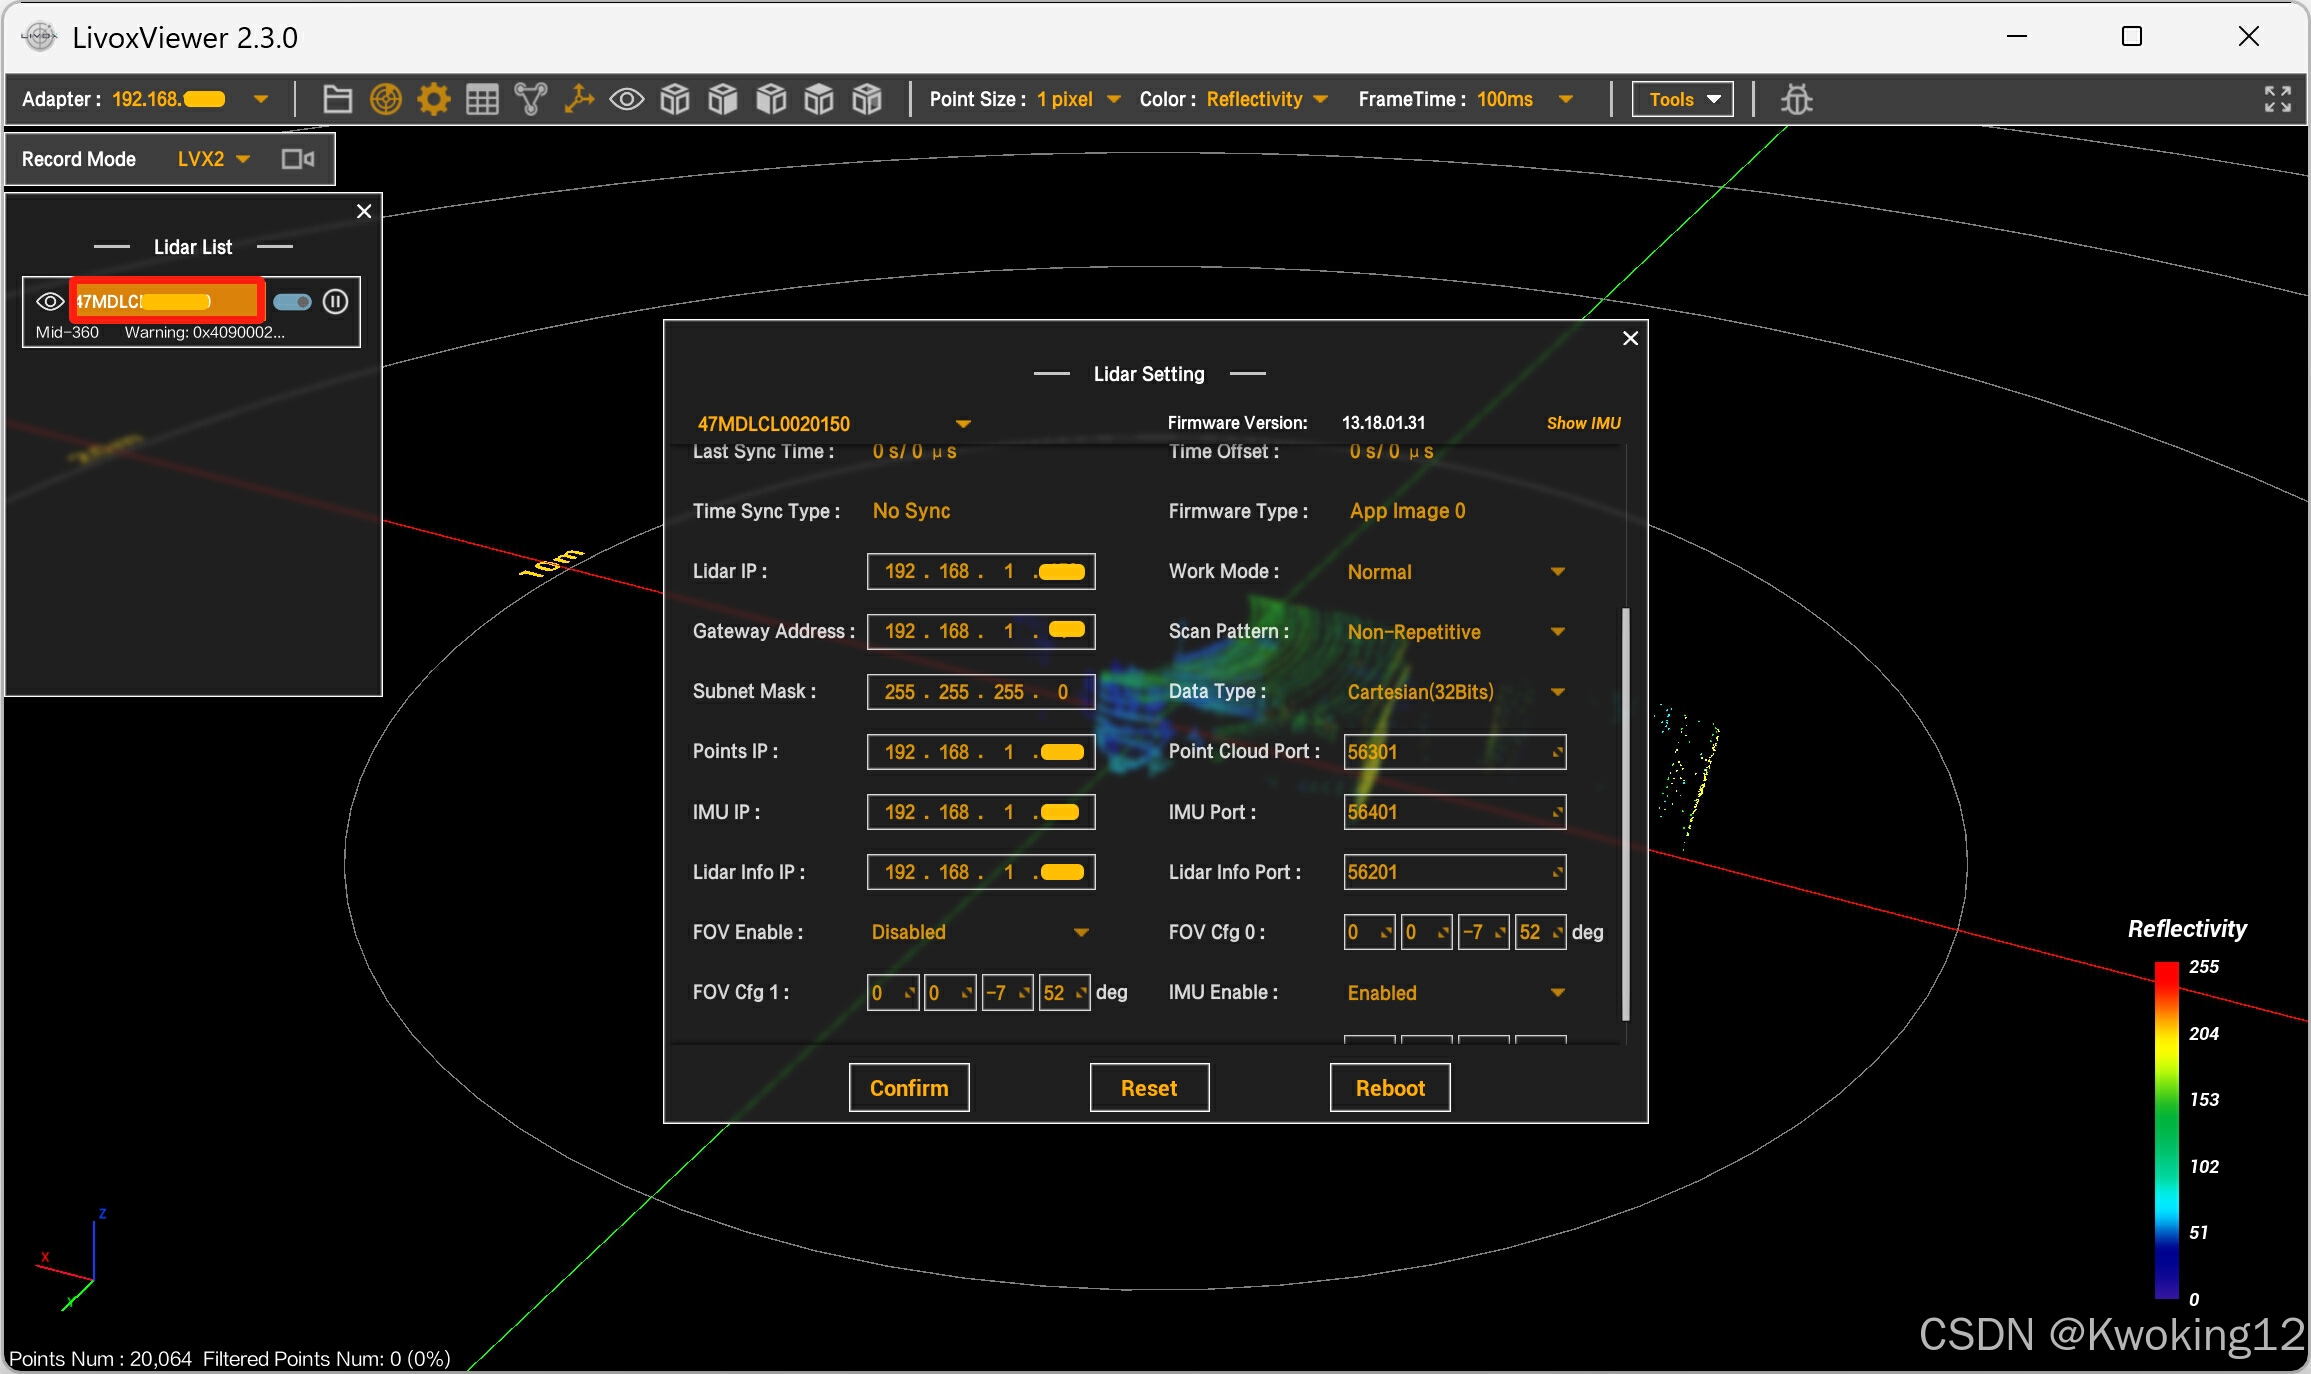
source ~/.bashrc1.2 使用 LivoxViewer2 客户端,将雷达接入,查看设备IP。
红框内为设备S\N码,
LivoxViewer2 下载地址:LiDAR Sensors - Livoxhttps://www.livoxtech.com/cn/downloadshttps://www.livoxtech.com/cn/downloads![]() https://www.livoxtech.com/cn/downloads
https://www.livoxtech.com/cn/downloads
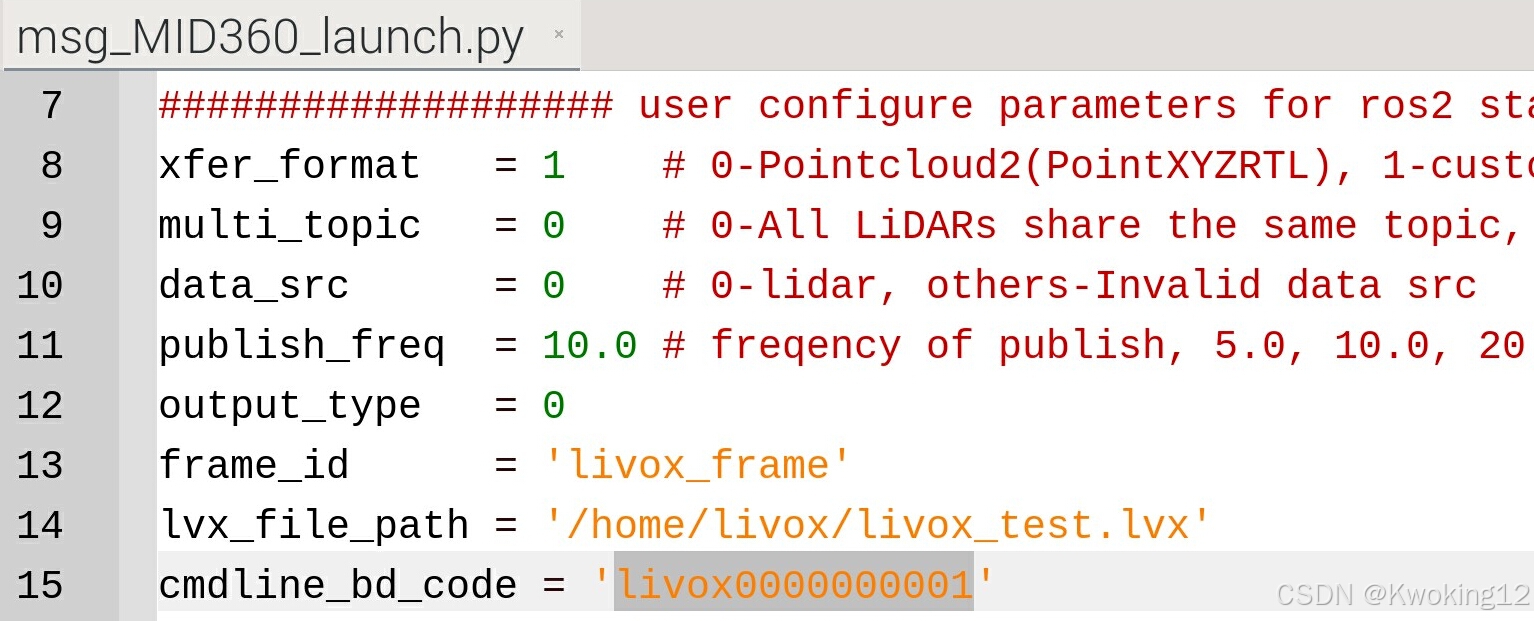
1.3 修改 /home/pi/livox_ws/src/livox_ros_driver2/launch_ROS2 路径下的msg_MID360_launch.py、rviz_MID360_launch.py 两个文件内容。
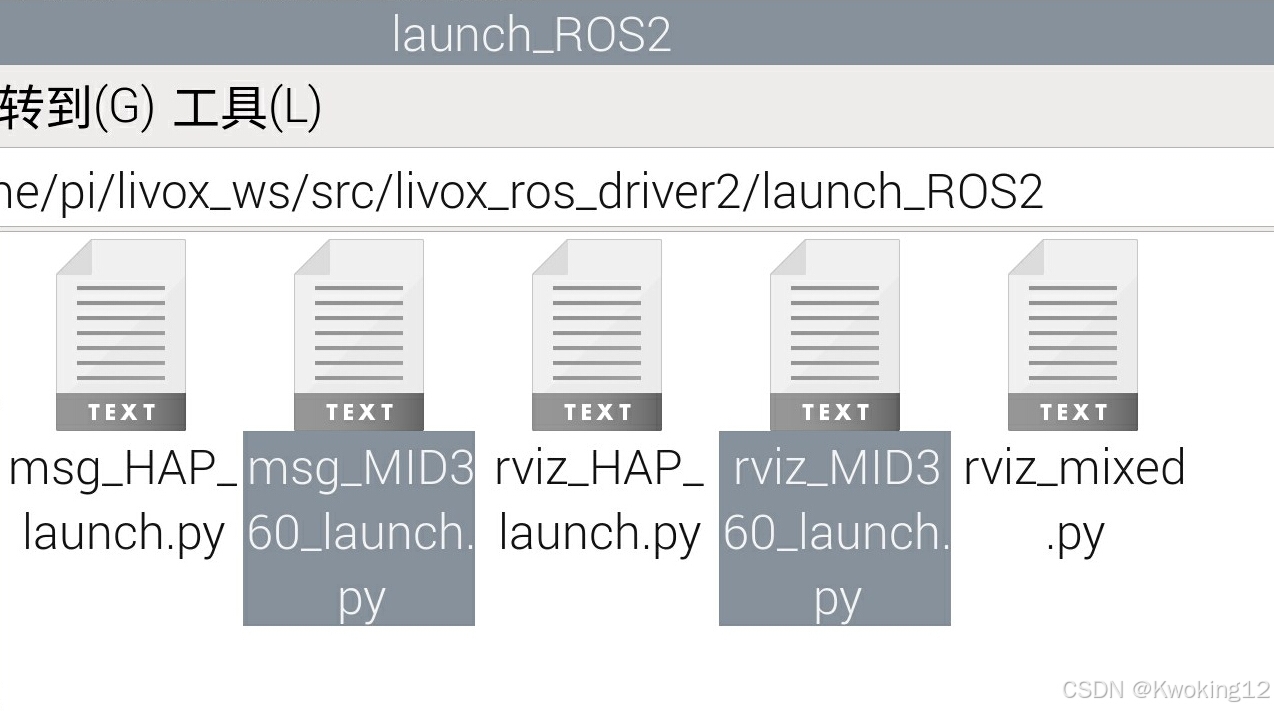
msg_MID360_launch.py、rviz_MID360_launch.py 两个文件中的 cmdline_bd_code 值修改为雷达S/N编码。

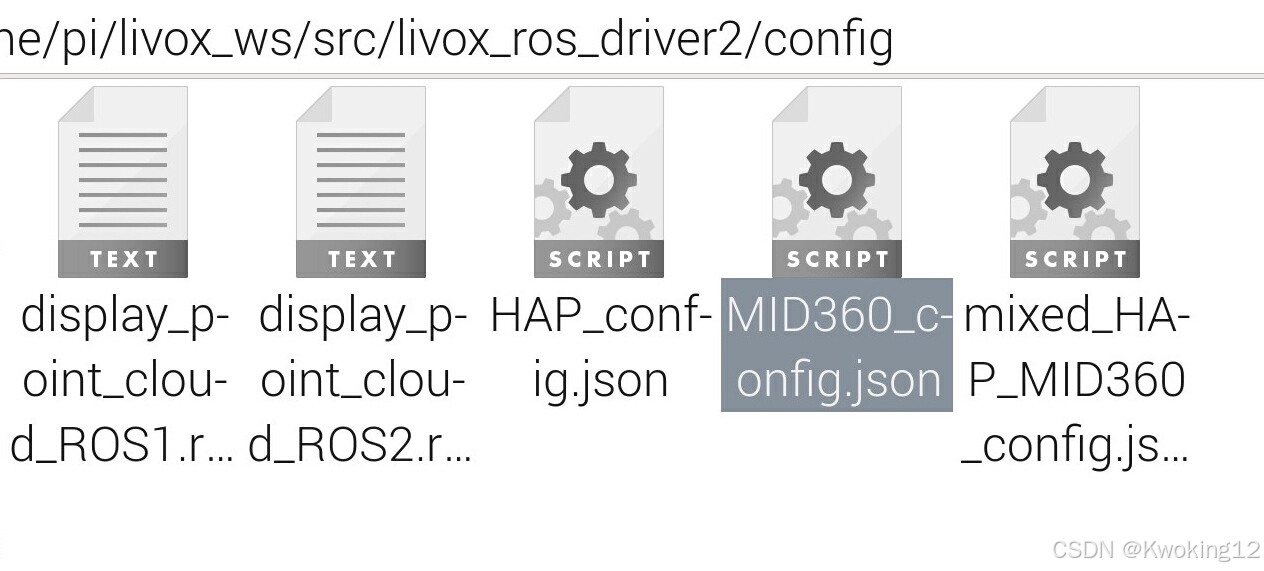
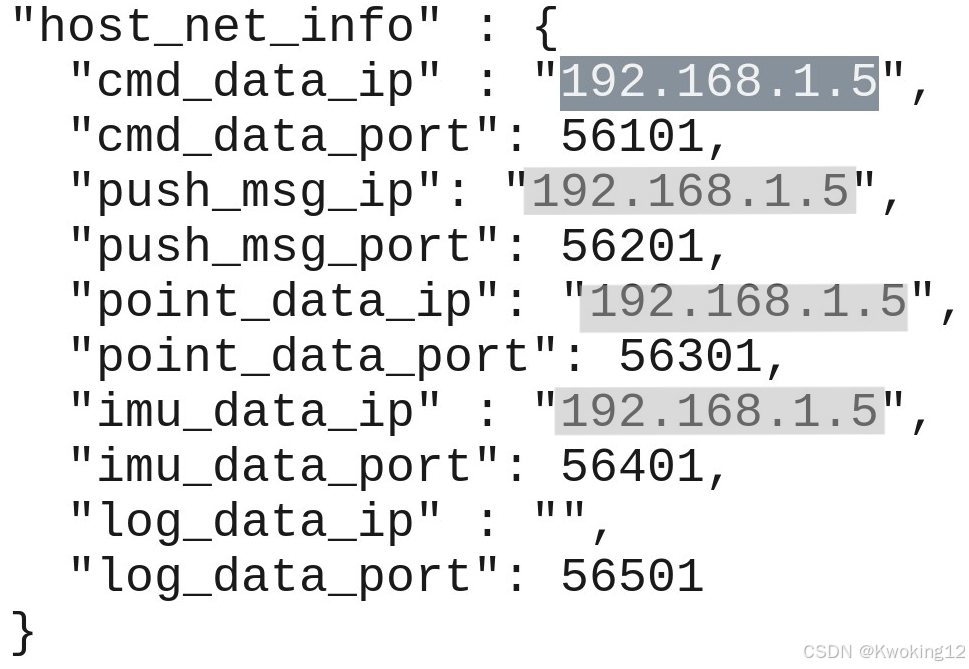
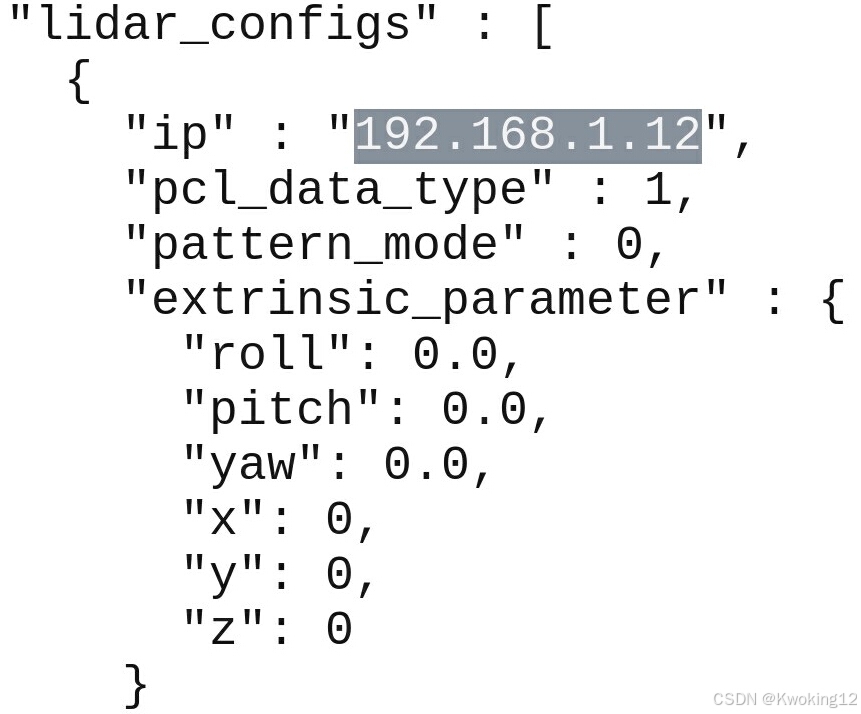
1.4 修改 /home/pi/livox_ws/src/livox_ros_driver2/config 路径下的 MID360_config.json 文件内容。
将 cmd_data_ip、push_msg_ip、point_data_ip、imu_data_ip 修改为192.168.1.xx;将雷达 ip 修改为192.168.1.xx。
2.安装 Livox-SDK2 功能包
git clone https://github.com/Livox-SDK/Livox-SDK2.git
cd Livox-SDK2/
mkdir build && cd build
cmake ..
make -j
sudo make install
更新中...


 1万+
1万+

 被折叠的 条评论
为什么被折叠?
被折叠的 条评论
为什么被折叠?
 到【灌水乐园】发言


