


这是今天要完成的动画:
先创建好所需要的控件:
import UIKit

class ViewController: UIViewController {
    let screenWidth = UIScreen.main.bounds.size.width
    let screenHeight = UIScreen.main.bounds.size.height
    let backgroundImage = UIImageView()
    let VSLabel = UILabel()
    let status = UILabel()
    let searchButton = UIButton()

    override func viewDidLoad() {
        super.viewDidLoad()
        // Do any additional setup after loading the view.
        view.addSubview(backgroundImage)
        view.addSubview(VSLabel)
        view.addSubview(status)
        view.addSubview(searchButton)

        backgroundImage.image = UIImage(named: "bg-boxingring")
        backgroundImage.frame = CGRect(x: 0, y: 0, width: screenWidth, height: screenHeight)

        searchButton.frame = CGRect(x: 30, y: screenHeight - 120, width: screenWidth - 60, height: 60)
        searchButton.setTitle("Search Again", for: .normal)
        searchButton.titleLabel?.font = UIFont.systemFont(ofSize: 28)
        searchButton.setTitleColor(.systemYellow, for: .normal)
        searchButton.addTarget(self, action: #selector(handleSearch), for: .touchUpInside)

        status.text = "Searching for opponents..."
        status.numberOfLines = 2
        status.font  = UIFont.systemFont(ofSize: 32)
        status.textColor = .white
        status.textAlignment = .center
        status.frame = CGRect(x: 0, y: 60 , width: 220, height: status.intrinsicContentSize.height * 2)
        status.center.x = view.center.x

        VSLabel.text = "VS."
        VSLabel.font  = UIFont.systemFont(ofSize: 32)
        VSLabel.textColor = .white
        VSLabel.textAlignment = .center
        VSLabel.frame = CGRect(x: 0, y: 240 , width: 220, height: status.intrinsicContentSize.height * 2)
        VSLabel.center.x = view.center.x

    }

    @objc func handleSearch() {

    }
}
之后还需要添加两个做动画的头像,那么这里需要重新创建一个文件。
声明一个AvatarView类,添加需要的常量,一个UILabel来显示玩家名字,一个photoLayer来显示玩家图片。
class AvatarView: UIView {
    // 常量
    let lineWidth: CGFloat = 6.0
    let animationDuration = 1.0

    //ui
    let photoLayer = CALayer()

    let label: UILabel = {
      let label = UILabel()
      label.font = UIFont(name: "ArialRoundedMTBold", size: 18.0)
      label.textAlignment = .center
      label.textColor = UIColor.black
      return label
    }()

    //variables
    var image: UIImage? = nil {
      didSet {
        photoLayer.contents = image?.cgImage
      }
    }

    var name: String? = nil {
      didSet {
        label.text = name
      }
    }
}
在layoutSubviews里面检测是否有image,没有的话就直接返回,有的话就进行photoLayer的布局,这里设置好
  override func layoutSubviews() {
    super.layoutSubviews()

    guard let image = image else {
      return
    }

    //Size the avatar image to fit
    photoLayer.frame = CGRect(
      x: (bounds.size.width - image.size.width + lineWidth)/2,
      y: (bounds.size.height - image.size.height - lineWidth)/2,
      width: image.size.width,
      height: image.size.height)
然后在didMoveToWindow中添加photoLayer为view的子layer。
 override func didMoveToWindow() {
      layer.addSublayer(photoLayer)
    }
这个时候图片就可以显示在外面了,那么接下来就需要为View添加圆角。
声明一个CAShapeLayer属性
let circleLayer = CAShapeLayer()
在layoutSubviews中为view添加圆角
//Draw the circle
circleLayer.path = UIBezierPath(ovalIn: bounds).cgPath
circleLayer.strokeColor = UIColor.white.cgColor
circleLayer.lineWidth = lineWidth
circleLayer.fillColor = UIColor.clear.cgColor
然后在didMoveToWindow中将circleLayer添加为view自身的子layer。
layer.addSublayer(circleLayer)
同样的,为photoLayer添加圆角。
声明属性
let maskLayer = CAShapeLayer()
在layoutSubviews中为photoLayer添加圆角
maskLayer.path = circleLayer.path
maskLayer.position = CGPoint(x: 0.0, y: -((bounds.size.height - image.size.height - lineWidth)/2) )
然后在didMoveToWindow中将photoLayer的layer设为maskLayer
photoLayer.mask = maskLayer
接着添加名字label,在layoutSubviews设置好label的frame。
label.frame = CGRect(x: 0.0, y: bounds.size.height + 10.0, width: bounds.size.width, height: 24.0)
然后在didMoveToWindow添加为view的子view
addSubview(label)
在UIVIewController声明两个AvatarView
let  myAvatar =  MyAvatarView()
let opponentAvatar =  MyAvatarView()
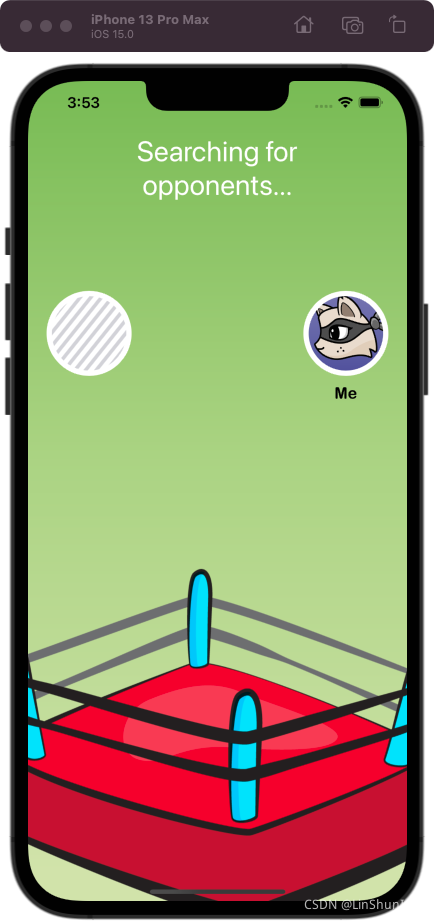
在viewDidLoad中添加好图片以及frame属性
 myAvatar.image =  UIImage(named: "avatar-1")
        myAvatar.frame = CGRect(x: screenWidth - 114, y: 240 , width: 90, height: 90)
        myAvatar.name = "Me"

        opponentAvatar.image =  UIImage(named: "empty")
        opponentAvatar.frame = CGRect(x:24 , y: 240 , width: 90, height: 90)
运行后可以看到:
接下来要做动画,那么在AvatarView中添加一个bounceOff方法,在这里需要传进来一个point(需要到达的地方) 和一个 morphSize,这里先用UIView动画来创建一个左右移动的动画,然后在创建一个CABasicAnimation来添加缩小的动画,这里的morphedFrame需要判断是从屏幕左边来的还是右边来的来定值,这样缩小的方向才正确。
    func bounceOff(point: CGPoint, morphSize: CGSize) {
      let originalCenter = center

      UIView.animate(withDuration: animationDuration, delay: 0.0,
                     usingSpringWithDamping: 0.8, initialSpringVelocity: 0.0,
                     animations: {
                      self.center = point
      }, completion: { _ in
        //complete bounce to

      })

      UIView.animate(withDuration: animationDuration,
                     delay: animationDuration, usingSpringWithDamping: 0.7,
                     initialSpringVelocity: 1.0,
                     animations: {
                      self.center = originalCenter
      }, completion: { _ in
        delay(seconds: 0.1) {

            self.bounceOff(point: point, morphSize: morphSize)

        }
      })

      let morphedFrame = (originalCenter.x > point.x) ?

        CGRect(x: 0.0, y: bounds.height - morphSize.height,
               width: morphSize.width, height: morphSize.height):
        CGRect(x: bounds.width - morphSize.width,
               y: bounds.height - morphSize.height,
               width: morphSize.width, height: morphSize.height)

      let morphAnimation = CABasicAnimation(keyPath: "path")
      morphAnimation.duration = animationDuration
      morphAnimation.toValue = UIBezierPath(ovalIn: morphedFrame).cgPath

      morphAnimation.timingFunction = CAMediaTimingFunction(name: .easeOut)

      circleLayer.add(morphAnimation, forKey: nil)
      maskLayer.add(morphAnimation, forKey: nil)
    }
在ViewController里面创建一个searchForOpponent方法,然后在viewDidLoad里面调用。在searchForOpponent里面创建好需要传的值之后调用。
 func searchForOpponent() {
      let avatarSize = myAvatar.frame.size
      let bounceXOffset: CGFloat = avatarSize.width/1.9
      let morphSize = CGSize(
        width: avatarSize.width * 0.85,
        height: avatarSize.height * 1.1)

      let rightBouncePoint = CGPoint(
        x: view.frame.size.width/2.0 + bounceXOffset,
        y: myAvatar.center.y)

      let leftBouncePoint = CGPoint(
        x: view.frame.size.width/2.0 - bounceXOffset,
        y: myAvatar.center.y)

      myAvatar.bounceOff(point: rightBouncePoint, morphSize: morphSize)
      opponentAvatar.bounceOff(point: leftBouncePoint, morphSize: morphSize)

    }
然后在searchForOpponent里面四秒后调用一个foundOpponent方法来做connecting状态的改变。
delay(seconds: 4.0, completion: foundOpponent)
在foundOpponent里面修改状态文字,修改对手的图片以及名字。
  func foundOpponent() {
      status.text = "Connecting..."

      opponentAvatar.image = UIImage(named: "avatar-2")
      opponentAvatar.name = "Ray"
    }
接下来要做连接成功后变为正方形的动画。
这里在AvatarView添加一个animateToSquare方法来实现动画,这里需要将path也修改为正方形,否则的话动画完成后就会重新变为圆形。也可以使用fillMode 和 isRemovedOnCompletion 来让其保存正方形。
  func animateToSquare() {
      let squarePath = UIBezierPath(rect: bounds).cgPath
      let morph = CABasicAnimation(keyPath: "path")
      morph.duration = 0.25
      morph.fromValue = circleLayer.path
      morph.toValue = squarePath

      circleLayer.add(morph, forKey: nil)
      maskLayer.add(morph, forKey: nil)

      circleLayer.path = squarePath
      maskLayer.path = squarePath
    }
动画写好了之后,这里知道动画要在向中间移动结束之后在执行,那么这里就要添加两个属性
  var shouldTransitionToFinishedState = false
  var isSquare = false
在bounceOff向中间移动的动画中的completion中添加判断,如果shouldTransitionToFinishedState为true那么就调用animateToSquare。
  UIView.animate(withDuration: animationDuration, delay: 0.0,
                   usingSpringWithDamping: 0.8, initialSpringVelocity: 0.0,
                   animations: {
                    self.center = point
    }, completion: { _ in
      //complete bounce to
      if self.shouldTransitionToFinishedState {
        self.animateToSquare()
      }
    })
在向两边移动的动画的completion中判断,如果isSquare为否才循环调用bounceOff。
 UIView.animate(withDuration: animationDuration,
                       delay: animationDuration, usingSpringWithDamping: 0.7,
                       initialSpringVelocity: 1.0,
                       animations: {
            self.center = originalCenter
        }, completion: { _ in
            delay(seconds: 0.1) {
                if !self.isSquare {
                    self.bounceOff(point: point, morphSize: morphSize)
                }
            }
        })
然后在animateToSquare方法里面将 isSquare 设为true。
isSquare = true
那么在外界创建一个connectedToOpponent方法,在connectedToOpponent中四秒后调用connectedToOpponent方法.
delay(seconds: 4.0, completion: connectedToOpponent)
之后在connectedToOpponent方法中将shouldTransitionToFinishedState设为true,这就会在下一个向中间移动的动画结束后调用animateToSquare方法。
    func connectedToOpponent() {
      myAvatar.shouldTransitionToFinishedState = true
      opponentAvatar.shouldTransitionToFinishedState = true

      delay(seconds: 1.0, completion: completed)
    }
connectedToOpponen 方法中一秒后调用completed方法修改状态label的内容,然后显示出VSLabel和searchButton。
func completed() {
      status.text = "Ready to play"
      UIView.animate(withDuration: 0.2) {
        self.VSLabel.alpha = 1.0
        self.searchButton.alpha = 1.0
      }
    }
完整代码
class ViewController: UIViewController {
    let screenWidth = UIScreen.main.bounds.size.width
    let screenHeight = UIScreen.main.bounds.size.height
    let backgroundImage = UIImageView()
    let VSLabel = UILabel()
    let status = UILabel()
    let searchButton = UIButton()
    let  myAvatar =  MyAvatarView()
    let opponentAvatar =  MyAvatarView()

    override func viewDidLoad() {
        super.viewDidLoad()
        // Do any additional setup after loading the view.
        view.addSubview(backgroundImage)
        view.addSubview(VSLabel)
        view.addSubview(status)
        view.addSubview(searchButton)
        view.addSubview(myAvatar)
        view.addSubview(opponentAvatar)

        backgroundImage.image = UIImage(named: "bg-boxingring")
        backgroundImage.frame = CGRect(x: 0, y: 0, width: screenWidth, height: screenHeight)

        searchButton.frame = CGRect(x: 30, y: screenHeight - 120, width: screenWidth - 60, height: 60)
        searchButton.setTitle("Search Again", for: .normal)
        searchButton.titleLabel?.font = UIFont.systemFont(ofSize: 28)
        searchButton.setTitleColor(.systemYellow, for: .normal)
        searchButton.addTarget(self, action: #selector(handleSearch), for: .touchUpInside)
        searchButton.alpha = 0

        status.text = "Searching for opponents..."
        status.numberOfLines = 2
        status.font  = UIFont.systemFont(ofSize: 32)
        status.textColor = .white
        status.textAlignment = .center
        status.frame = CGRect(x: 0, y: 60 , width: 220, height: status.intrinsicContentSize.height * 2)
        status.center.x = view.center.x

        VSLabel.text = "VS."
        VSLabel.font  = UIFont.systemFont(ofSize: 32)
        VSLabel.textColor = .white
        VSLabel.alpha = 0
        VSLabel.textAlignment = .center
        VSLabel.frame = CGRect(x: 0, y: 240 , width: 220, height: status.intrinsicContentSize.height * 2)
        VSLabel.center.x = view.center.x

        myAvatar.image =  UIImage(named: "avatar-1")
        myAvatar.frame = CGRect(x: screenWidth - 114, y: 240 , width: 90, height: 90)
        myAvatar.name = "Me"

        opponentAvatar.image =  UIImage(named: "empty")
        opponentAvatar.frame = CGRect(x:24 , y: 240 , width: 90, height: 90)
        searchForOpponent()
    }

    @objc func handleSearch() {
        myAvatar.shouldTransitionToFinishedState = false
        opponentAvatar.shouldTransitionToFinishedState = false
        opponentAvatar.image =  UIImage(named: "empty")
        VSLabel.alpha = 0
        searchButton.alpha = 0
        opponentAvatar.name = ""

        searchForOpponent()
    }

    func searchForOpponent() {
      let avatarSize = myAvatar.frame.size
      let bounceXOffset: CGFloat = avatarSize.width/1.9
      let morphSize = CGSize(
        width: avatarSize.width * 0.85,
        height: avatarSize.height * 1.1)

      let rightBouncePoint = CGPoint(
        x: view.frame.size.width/2.0 + bounceXOffset,
        y: myAvatar.center.y)

      let leftBouncePoint = CGPoint(
        x: view.frame.size.width/2.0 - bounceXOffset,
        y: myAvatar.center.y)

      myAvatar.bounceOff(point: rightBouncePoint, morphSize: morphSize)
      opponentAvatar.bounceOff(point: leftBouncePoint, morphSize: morphSize)

      delay(seconds: 4.0, completion: foundOpponent)
    }
    func foundOpponent() {
      status.text = "Connecting..."

      opponentAvatar.image = UIImage(named: "avatar-2")
      opponentAvatar.name = "Ray"

      delay(seconds: 4.0, completion: connectedToOpponent)
    }

    func connectedToOpponent() {
      myAvatar.shouldTransitionToFinishedState = true
      opponentAvatar.shouldTransitionToFinishedState = true

      delay(seconds: 1.0, completion: completed)
    }

    func completed() {
      status.text = "Ready to play"
      UIView.animate(withDuration: 0.2) {
        self.VSLabel.alpha = 1.0
        self.searchButton.alpha = 1.0
      }
    }
}

func delay(seconds: Double, completion: @escaping ()-> Void) {
  DispatchQueue.main.asyncAfter(deadline: .now() + seconds, execute: completion)
}
//
//  AvatarView.swift
//  shapesAndMasks
//
//  Created by aibus on 2021/11/10.
//

import UIKit
import QuartzCore

class AvatarView: UIView {

  //constants
  let lineWidth: CGFloat = 6.0
  let animationDuration = 1.0

  //ui
  let photoLayer = CALayer()
  let circleLayer = CAShapeLayer()
  let maskLayer = CAShapeLayer()
  let label: UILabel = {
    let label = UILabel()
    label.font = UIFont(name: "ArialRoundedMTBold", size: 18.0)
    label.textAlignment = .center
    label.textColor = UIColor.black
    return label
  }()

  //variables
  var image: UIImage? = nil {
    didSet {
      photoLayer.contents = image?.cgImage

    }
  }

  var name: String? = nil {
    didSet {
      label.text = name
    }
  }

  var shouldTransitionToFinishedState = false
  var isSquare = false

  override func didMoveToWindow() {
    layer.addSublayer(photoLayer)
    photoLayer.mask = maskLayer
    layer.addSublayer(circleLayer)
    addSubview(label)
  }

  override func layoutSubviews() {
    super.layoutSubviews()

    guard let image = image else {
      return
    }

    //Size the avatar image to fit
    photoLayer.frame = CGRect(
      x: (bounds.size.width - image.size.width + lineWidth)/2,
      y: (bounds.size.height - image.size.height - lineWidth)/2,
      width: image.size.width,
      height: image.size.height)

    //Draw the circle
    circleLayer.path = UIBezierPath(ovalIn: bounds).cgPath
    circleLayer.strokeColor = UIColor.white.cgColor
    circleLayer.lineWidth = lineWidth
    circleLayer.fillColor = UIColor.clear.cgColor

    //Size the layer
    maskLayer.path = circleLayer.path
    maskLayer.position = CGPoint(x: 0.0, y: 10.0)

    //Size the label
    label.frame = CGRect(x: 0.0, y: bounds.size.height + 10.0, width: bounds.size.width, height: 24.0)
  }

  func bounceOff(point: CGPoint, morphSize: CGSize) {
    let originalCenter = center

    UIView.animate(withDuration: animationDuration, delay: 0.0,
                   usingSpringWithDamping: 0.8, initialSpringVelocity: 0.0,
                   animations: {
                    self.center = point
    }, completion: { _ in
      //complete bounce to
      if self.shouldTransitionToFinishedState {
        self.animateToSquare()
      }
    })

    UIView.animate(withDuration: animationDuration,
                   delay: animationDuration, usingSpringWithDamping: 0.7,
                   initialSpringVelocity: 1.0,
                   animations: {
                    self.center = originalCenter
    }, completion: { _ in
      delay(seconds: 0.1) {
        if !self.isSquare {
          self.bounceOff(point: point, morphSize: morphSize)
        }
      }
    })

    let morphedFrame = (originalCenter.x > point.x) ?

      CGRect(x: 0.0, y: bounds.height - morphSize.height,
             width: morphSize.width, height: morphSize.height):

      CGRect(x: bounds.width - morphSize.width,
             y: bounds.height - morphSize.height,
             width: morphSize.width, height: morphSize.height)

    let morphAnimation = CABasicAnimation(keyPath: "path")
    morphAnimation.duration = animationDuration
    morphAnimation.toValue = UIBezierPath(ovalIn: morphedFrame).cgPath

    morphAnimation.timingFunction = CAMediaTimingFunction(name: .easeOut)

    circleLayer.add(morphAnimation, forKey: nil)
    maskLayer.add(morphAnimation, forKey: nil)
  }

  func animateToSquare() {
    isSquare = true

    let squarePath = UIBezierPath(rect: bounds).cgPath
    let morph = CABasicAnimation(keyPath: "path")
    morph.duration = 0.25
    morph.fromValue = circleLayer.path
    morph.toValue = squarePath

    circleLayer.add(morph, forKey: nil)
    maskLayer.add(morph, forKey: nil)

    circleLayer.path = squarePath
    maskLayer.path = squarePath
  }

}


 4744
4744


 被折叠的 条评论
为什么被折叠?
被折叠的 条评论
为什么被折叠?
 到【灌水乐园】发言


