


- ESP32 Arduino 源码库:arduino-esp32
- ESP32 Arduino 环境搭建说明:About Arduino ESP32
其他软件环境需求:
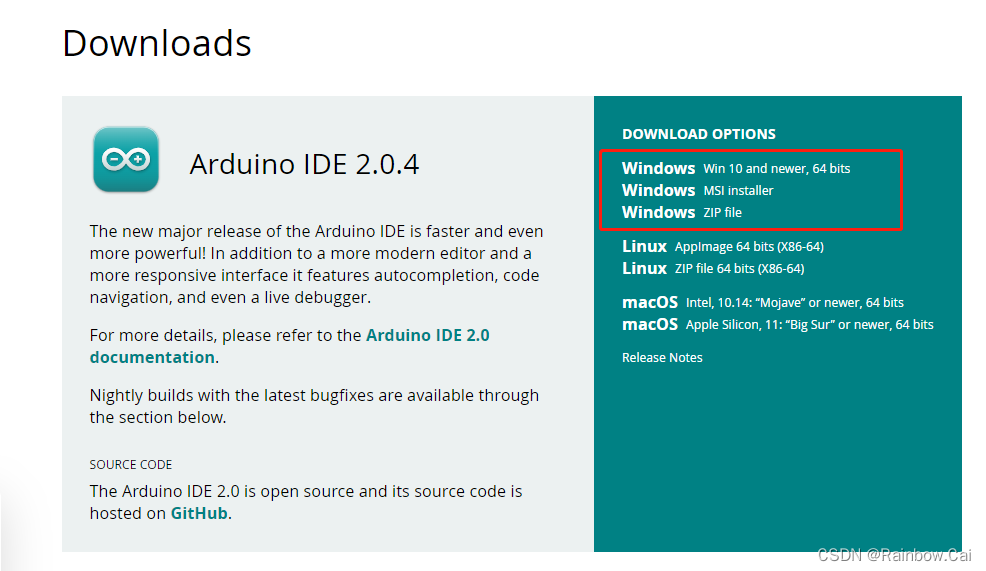
1、安装 Arduino 软件
可在 Arduino 官网 获取 Windows 端 Arduino 安装包,如下:
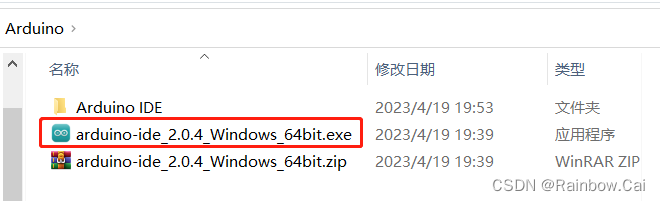
使用如下 .exe 一键安装 Arduino 环境
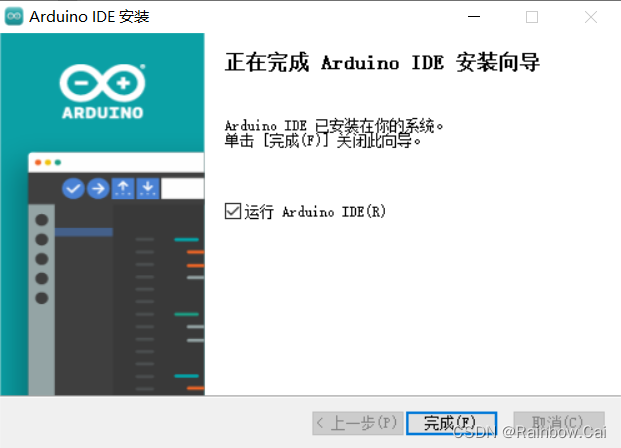
安装完成
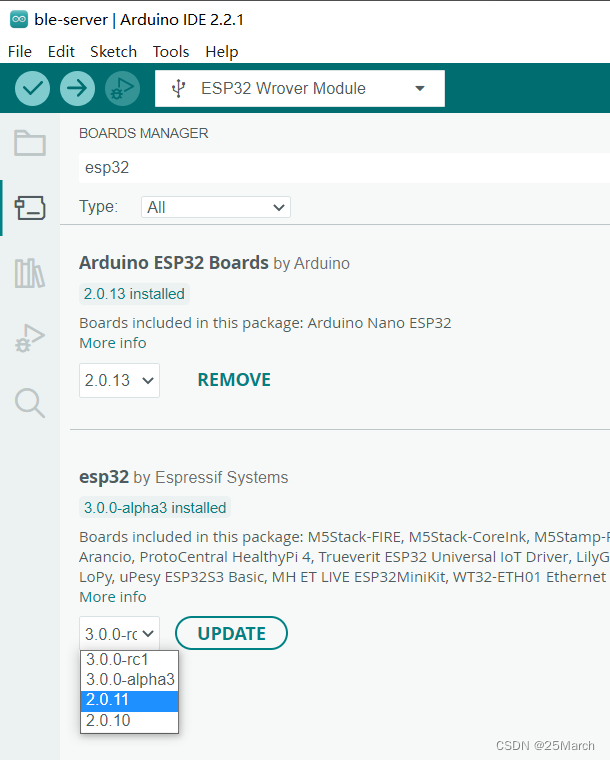
2、导入 arduino-esp32 库
在 Arduino IDE 中导入 arduino-esp32 库,参见"Installing using Arduino IDE"
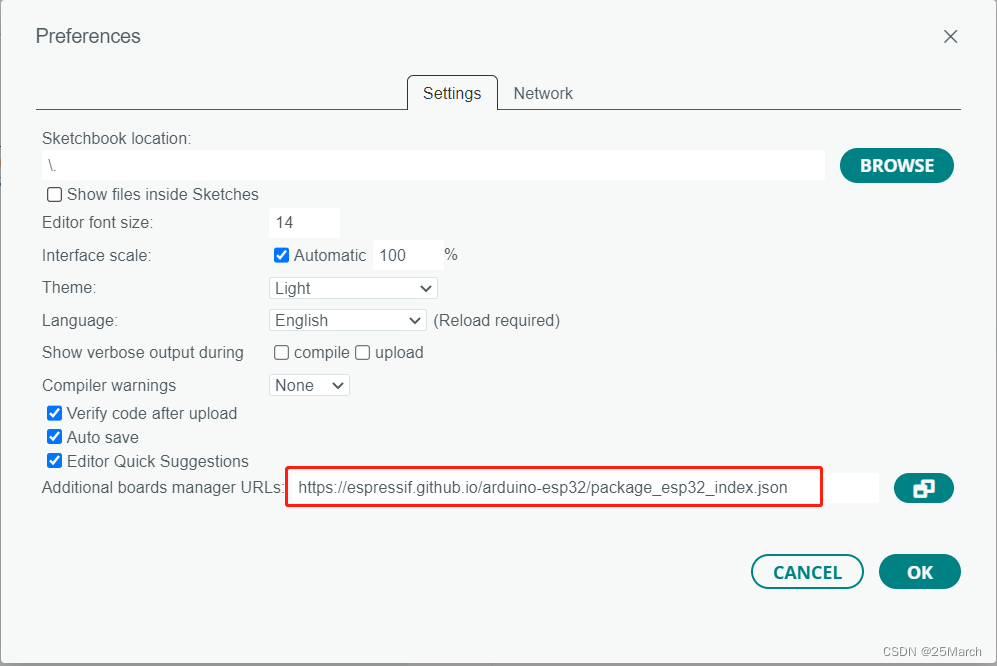
- 稳定版本链接:
https://espressif.github.io/arduino-esp32/package_esp32_index.json
- 当使用
稳定版本链接时,支持自由切换如下版本的 Arduino 库:
Arduino 库版本切换路径:Tools > Board > Boards Manage > (搜索)esp32 > esp32 (选择库版本)推荐使用稳定版本链接

- 开发版本链接:
https://espressif.github.io/arduino-esp32/package_esp32_dev_index.json
- 当使用
开发版本链接时,支持自由切换如下版本的 Arduino 库:
Arduino 库版本切换路径:Tools > Board > Boards Manage > (搜索)esp32 > esp32 (选择库版本)
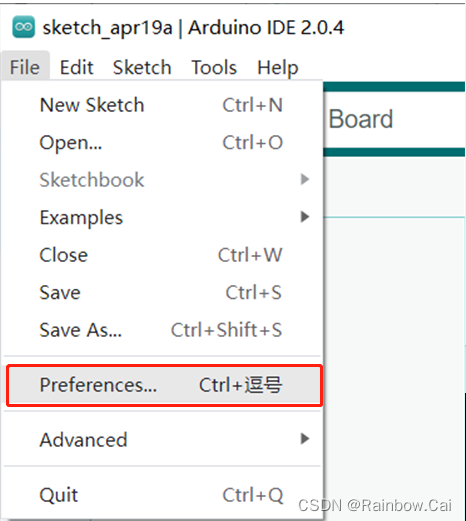
打开 File —> Preferences 界面
将如上链接复制到 Additional boards manager URLs 下
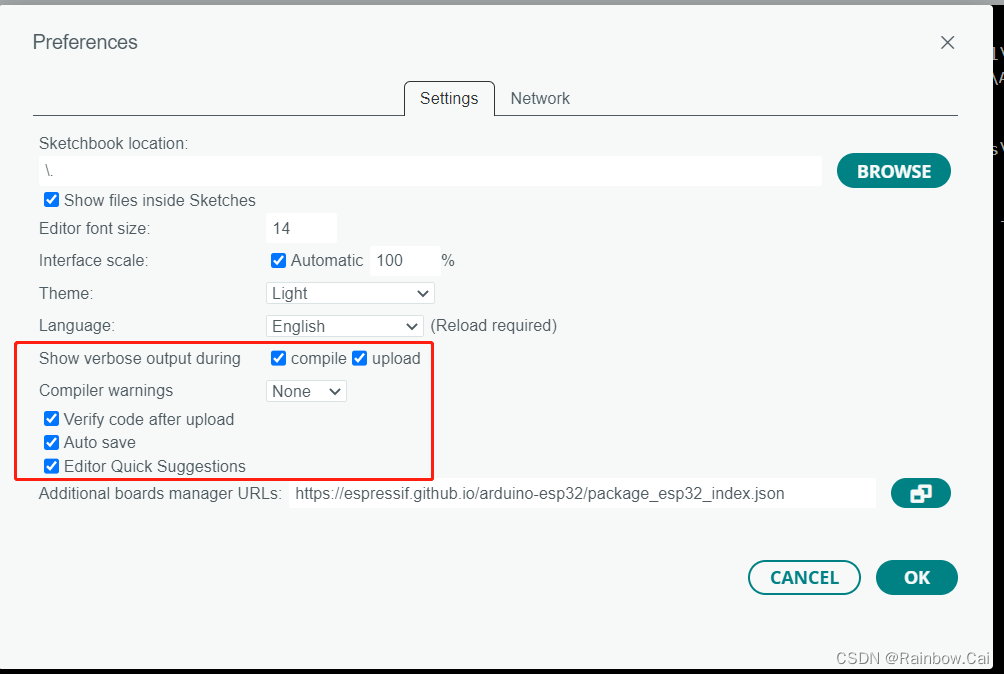
如下配置是打开详细的日志:
点击 OK ,将打印如下安装进程

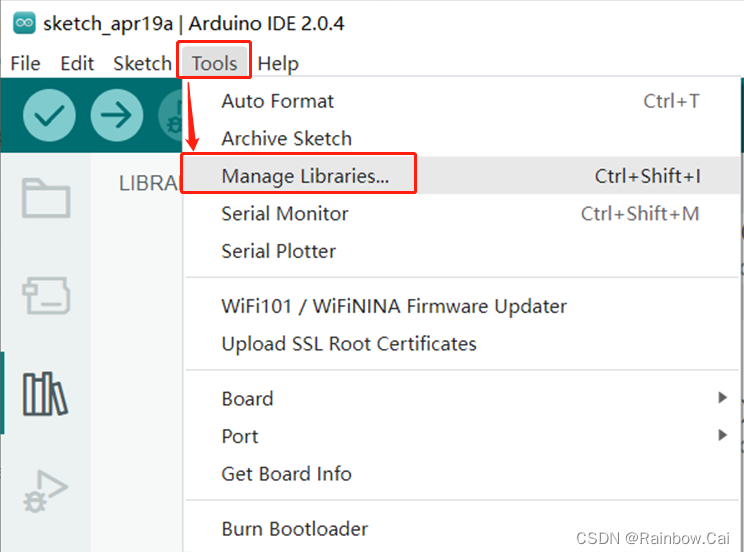
3、添加库管理
打开 Tools —> Manage Libraries 界面
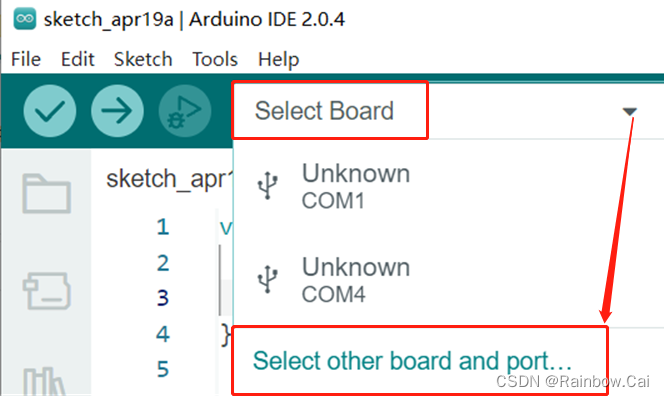
4、选择开发板
打开 Select Board —> Select other board and port 界面
在搜索栏搜索 ESP32 系列的开发板
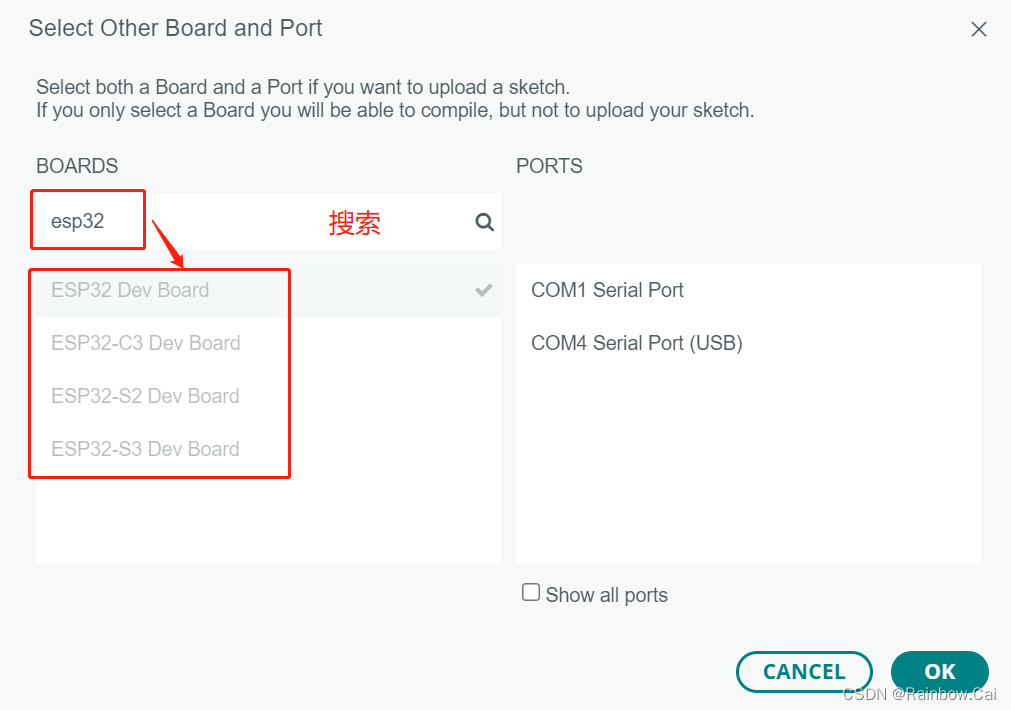
点击 OK 后,跳出安装界面

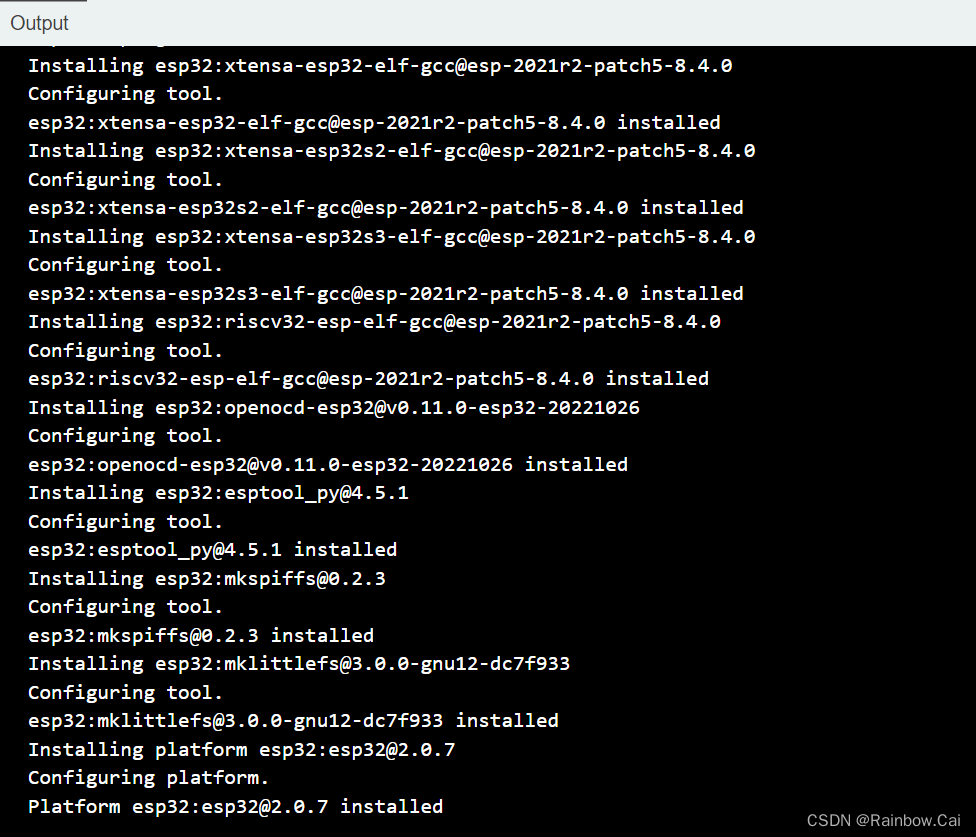
选择 Yes ,立刻安装,会进入如下安装进程,此过程需要等待一段时间

安装内容会在黑框打印
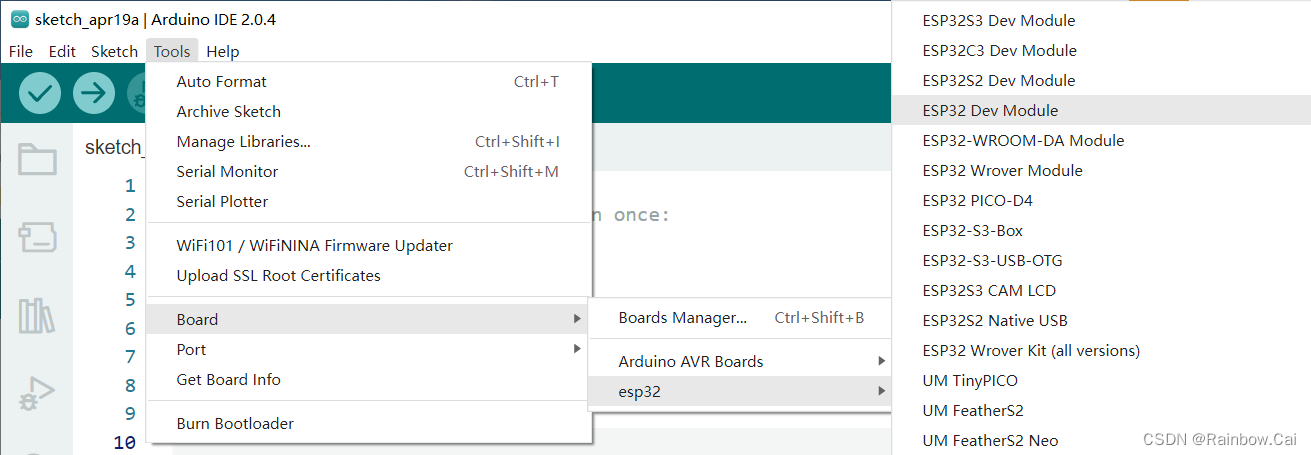
安装完成后,会在 Tools —> Board —> esp32 界面增加 ESP32 系列开发板选项
5、测试 Arduino 例程
在 File —> Examples —> ESP32 目录下也会增加许多 ESP32 的测试例程。
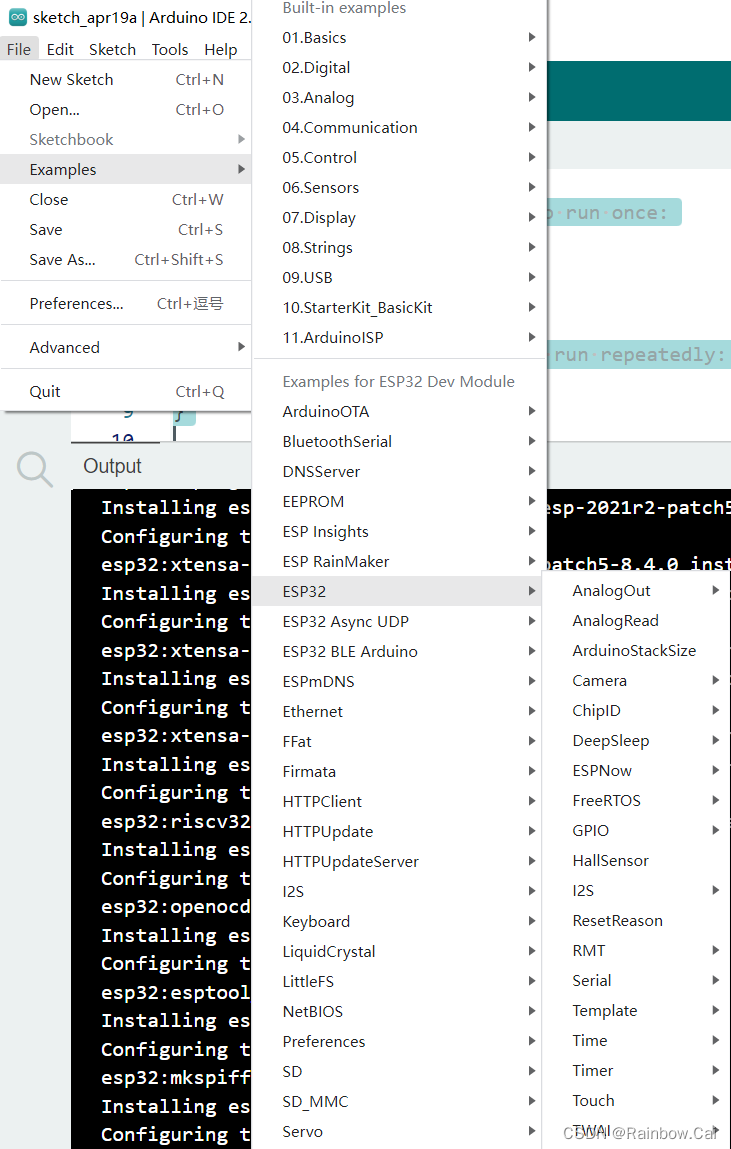
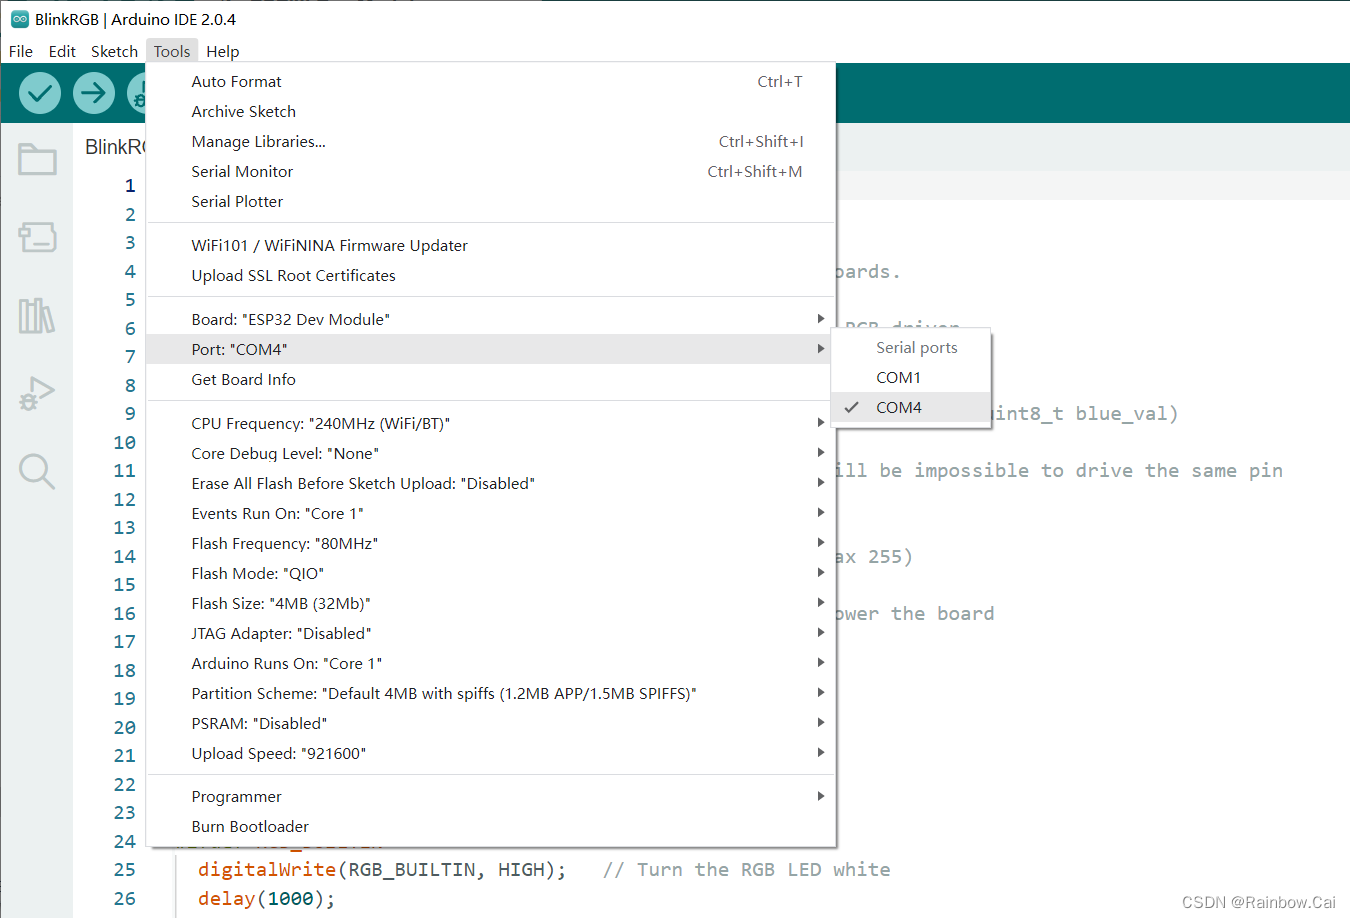
接下来可以打开任意一个例程来进行测试,在 Tools 目录选择开发板型号,配置 COM 口
更多配置选项说明参见:Arduino IDE Tools Menu
在配置界面也可以为当前工程选择对应的分区表,分区表源文件在 “C:\Users\caiguanhong\AppData\Local\Arduino15\packages\esp32\hardware\esp32\2.0.8\tools\partitions” 目录下,
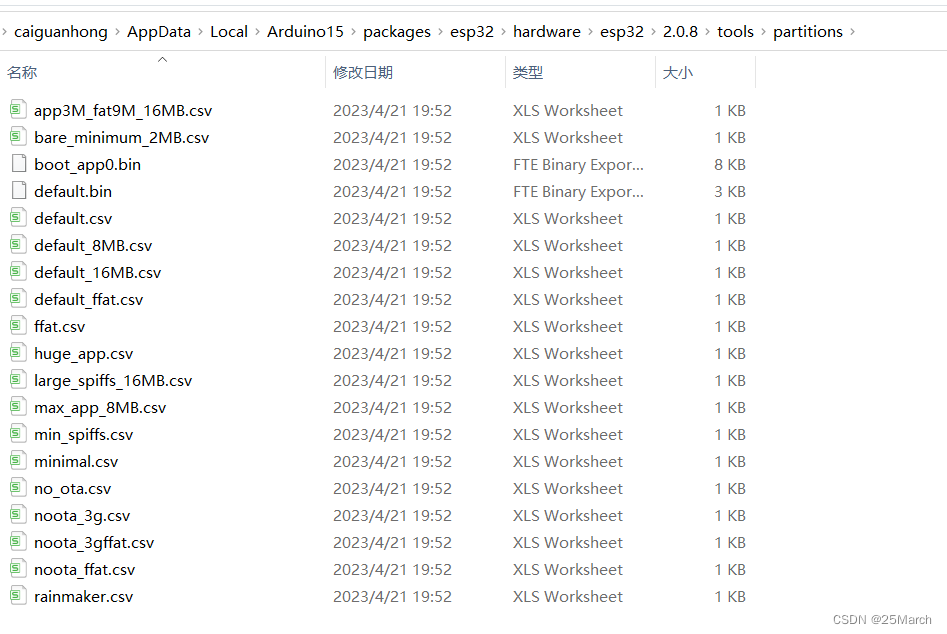
与 分区表配置选项对应,如下:
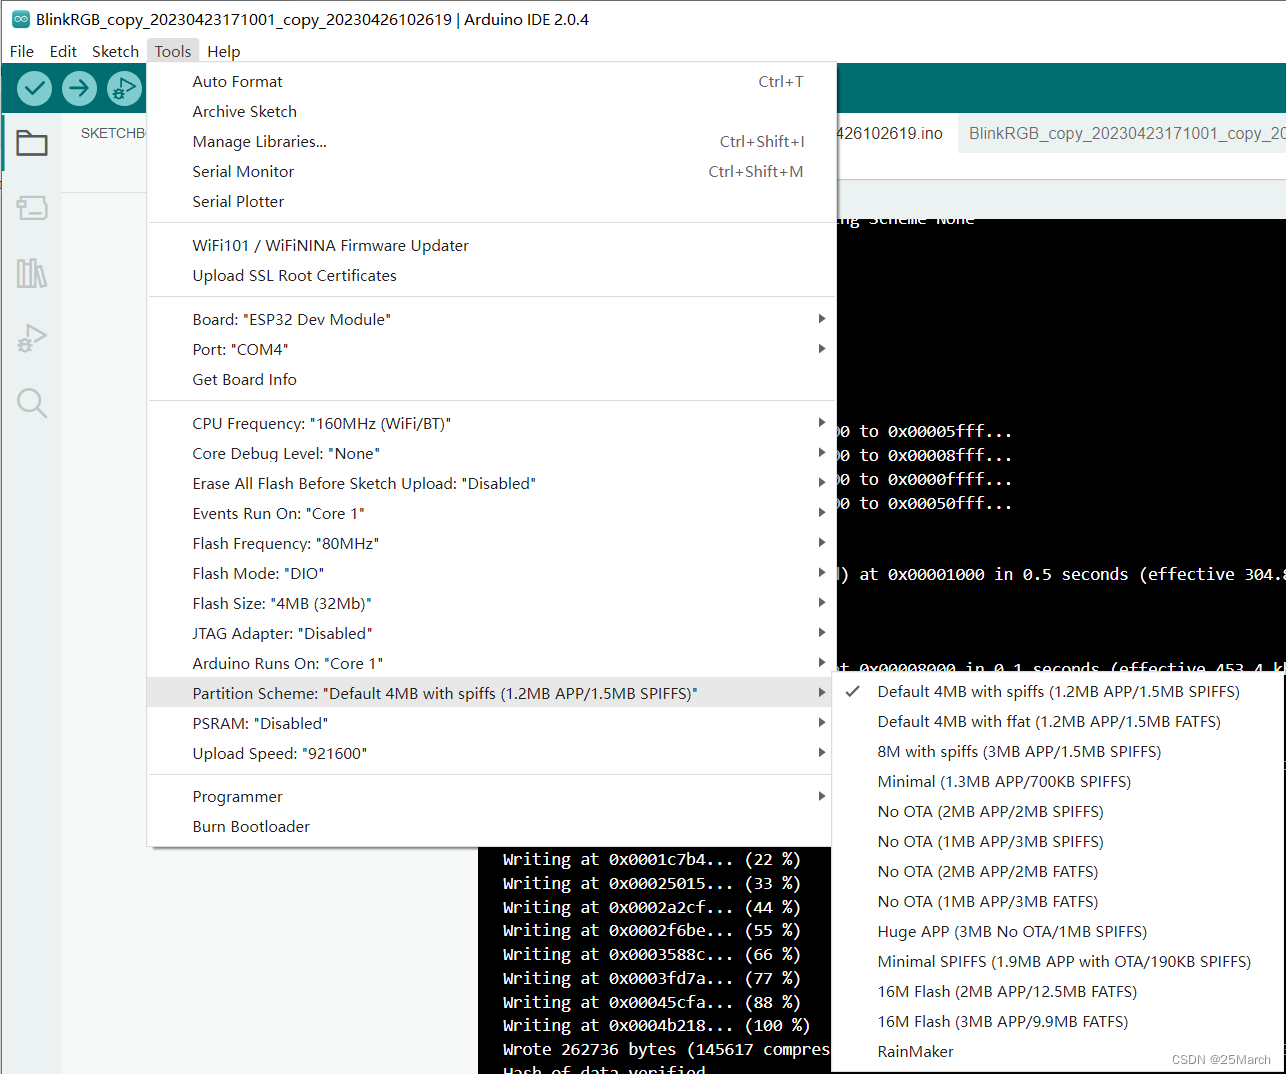
用户可自行对分区表内容进行修改。
6、编译、下载固件
直接点击下载按钮,即可完成工程编译和固件下载
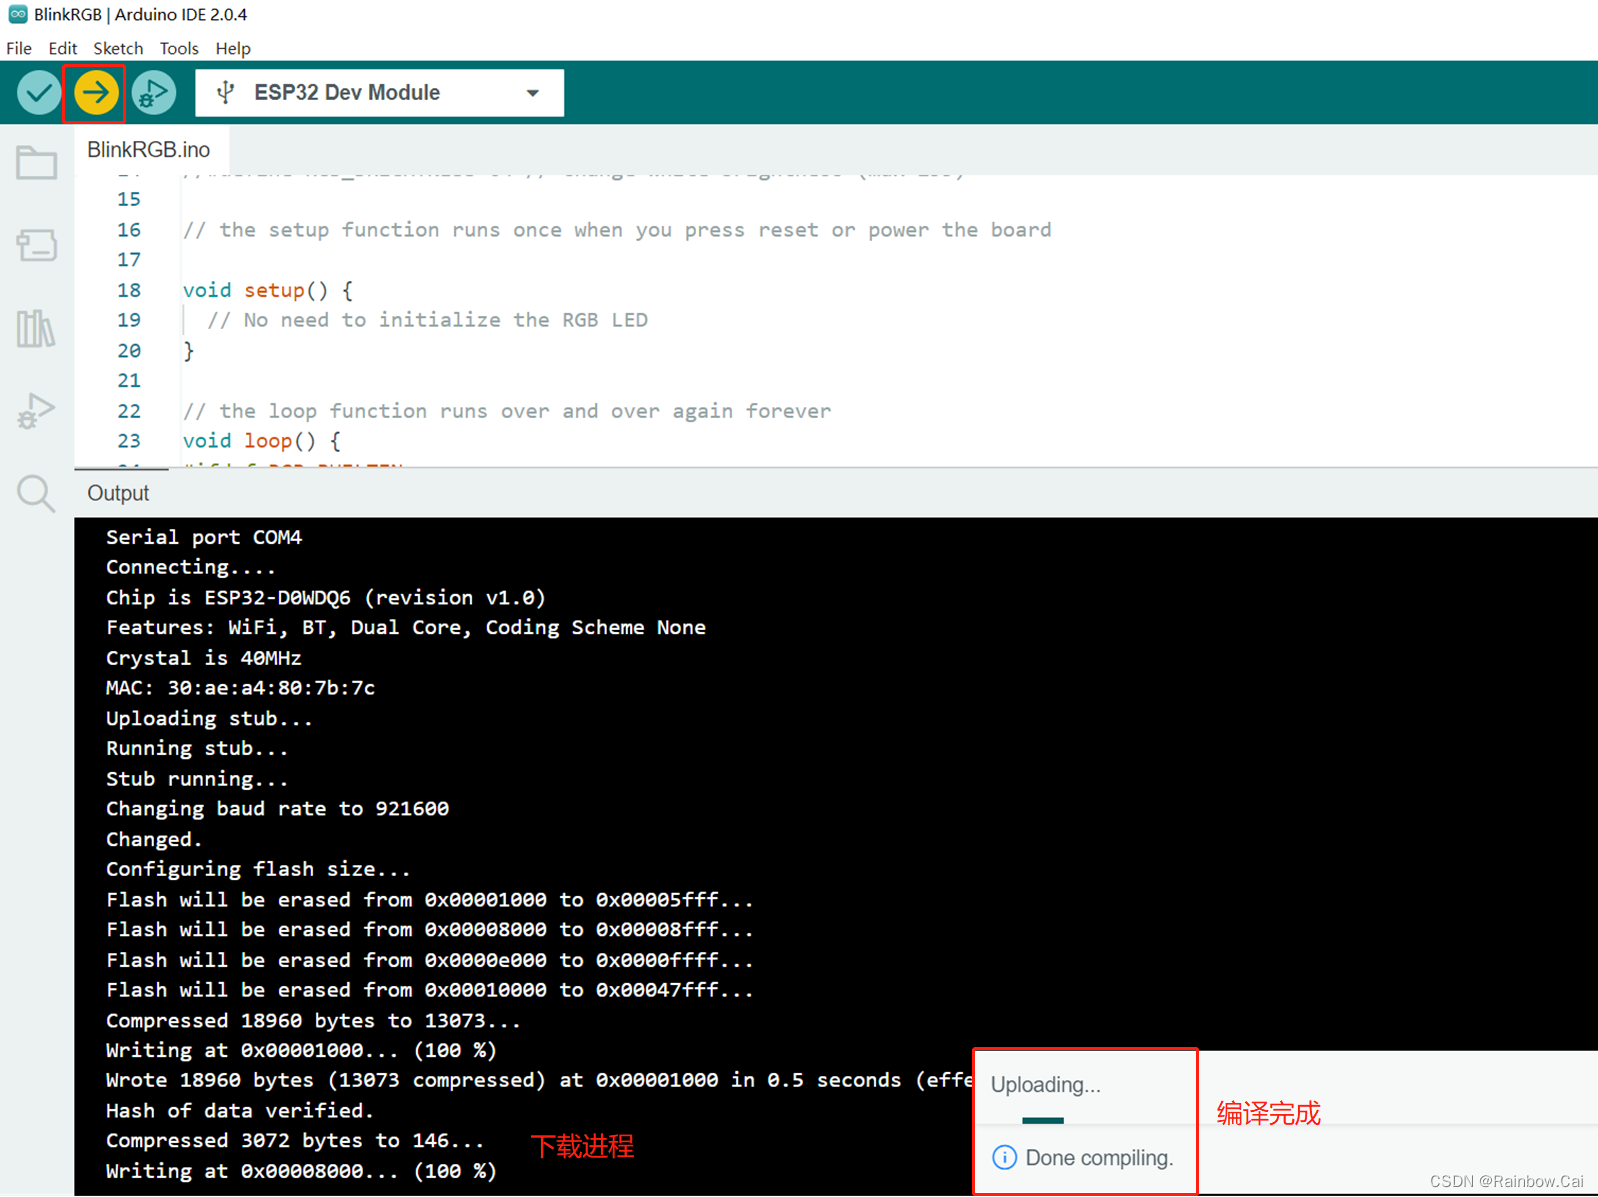
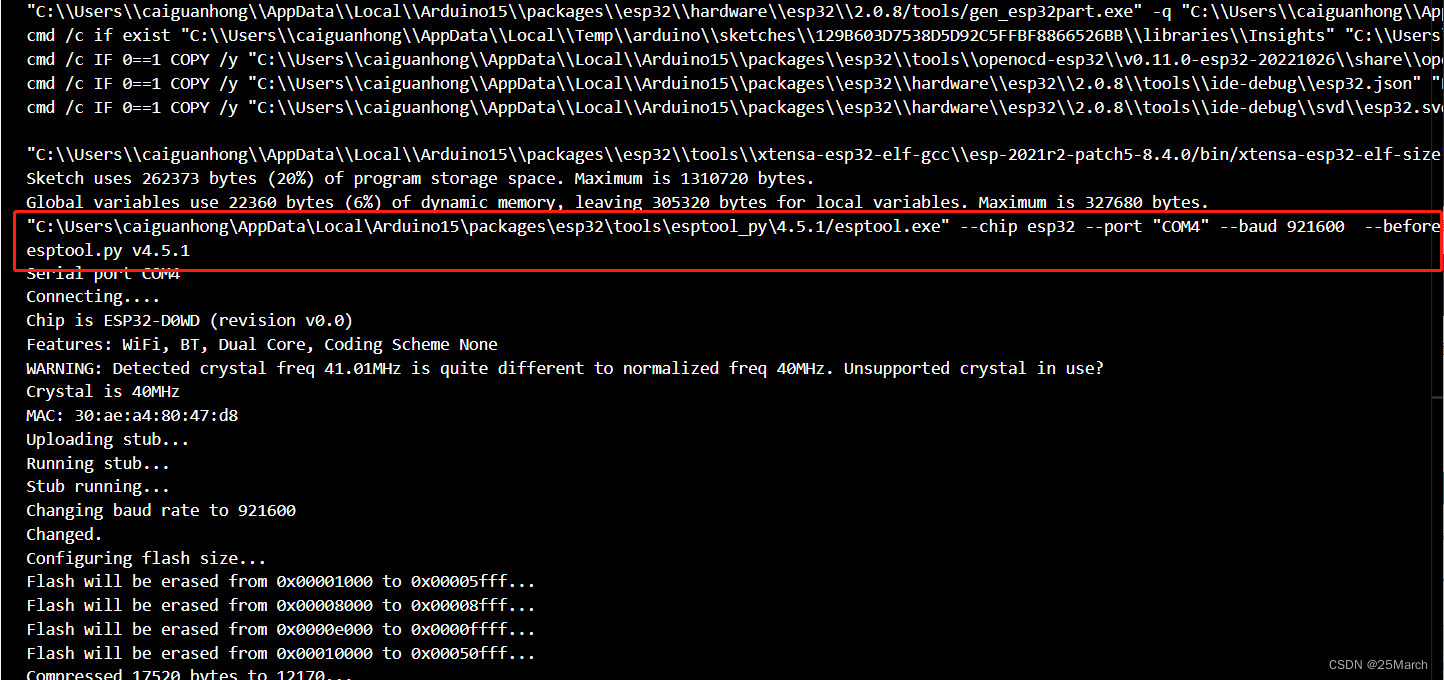
下载固件时,黑框将打印如下日志,可查看下载的固件路径和对应的下载地址:
"C:\Users\caiguanhong\AppData\Local\Arduino15\packages\esp32\tools\esptool_py\4.5.1/esptool.exe" --chip esp32 --port "COM4" --baud 921600  --before default_reset --after hard_reset write_flash  -z --flash_mode dio --flash_freq 80m --flash_size 4MB 0x1000 "C:\Users\caiguanhong\AppData\Local\Temp\arduino\sketches\129B603D7538D5D92C5FFBF8866526BB/BlinkRGB_copy_20230423171001_copy_20230426102619.ino.bootloader.bin" 0x8000 "C:\Users\caiguanhong\AppData\Local\Temp\arduino\sketches\129B603D7538D5D92C5FFBF8866526BB/BlinkRGB_copy_20230423171001_copy_20230426102619.ino.partitions.bin" 0xe000 "C:\Users\caiguanhong\AppData\Local\Arduino15\packages\esp32\hardware\esp32\2.0.8/tools/partitions/boot_app0.bin" 0x10000 "C:\Users\caiguanhong\AppData\Local\Temp\arduino\sketches\129B603D7538D5D92C5FFBF8866526BB/BlinkRGB_copy_20230423171001_copy_20230426102619.ino.bin"
esptool.py v4.5.1
7、查看固件运行日志
最后,可以打开右上角的 Serial Monitor 界面来查看固件运行日志

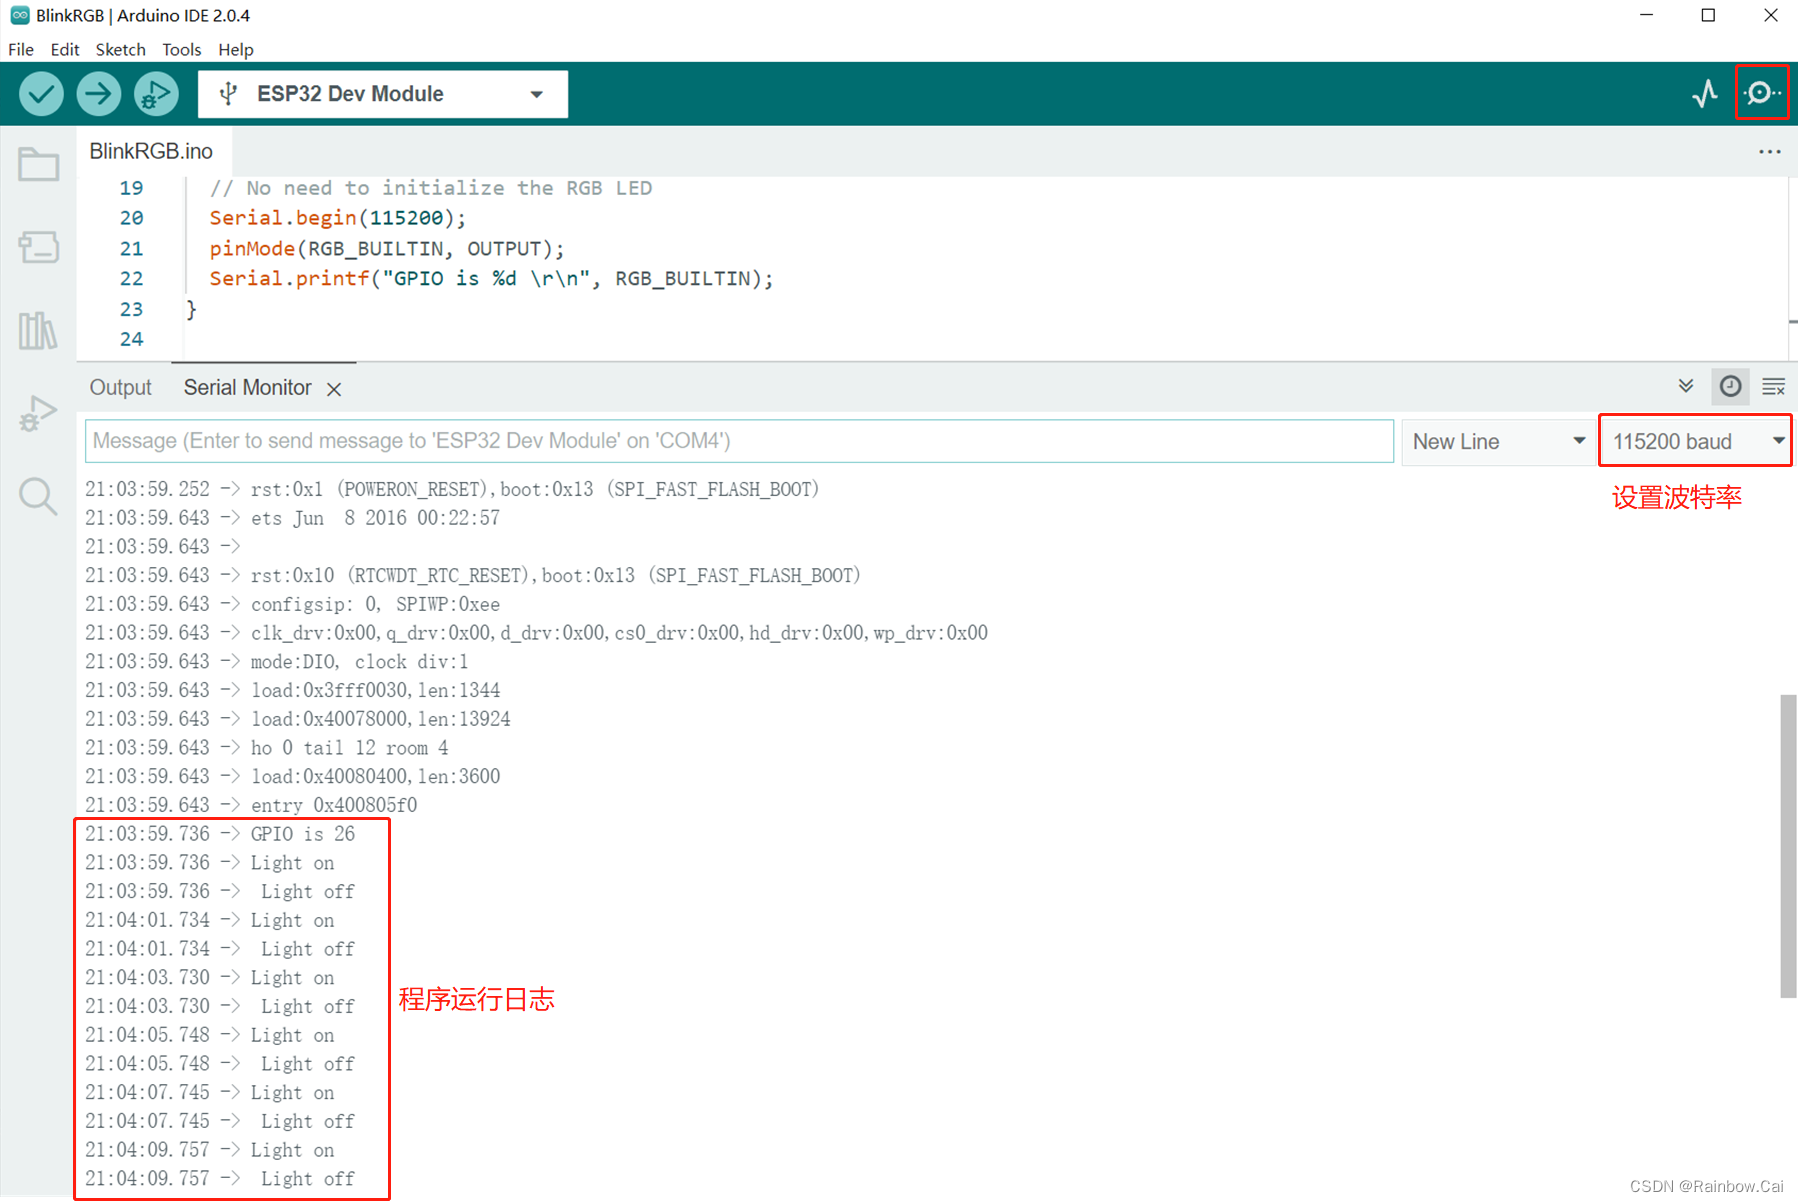
以下提供一个基于 GPIO26 点灯示例测试代码
/*
  BlinkRGB

  Demonstrates usage of onboard RGB LED on some ESP dev boards.

  Calling digitalWrite(RGB_BUILTIN, HIGH) will use hidden RGB driver.

  RGBLedWrite demonstrates controll of each channel:
  void neopixelWrite(uint8_t pin, uint8_t red_val, uint8_t green_val, uint8_t blue_val)

  WARNING: After using digitalWrite to drive RGB LED it will be impossible to drive the same pin
    with normal HIGH/LOW level
*/
//#define RGB_BRIGHTNESS 64 // Change white brightness (max 255)
#define RGB_BUILTIN 26
// the setup function runs once when you press reset or power the board

void setup() {
  // No need to initialize the RGB LED
  Serial.begin(115200);
  pinMode(RGB_BUILTIN, OUTPUT);
  Serial.printf("GPIO is %d \r\n", RGB_BUILTIN);
}

// the loop function runs over and over again forever
void loop() {
#ifdef RGB_BUILTIN
  digitalWrite(RGB_BUILTIN, HIGH);
   Serial.printf("Light on \r\n ");
  delay(1000);

  digitalWrite(RGB_BUILTIN, LOW);   // Turn the RGB LED off
  Serial.printf("Light off \r\n");
  delay(1000);

#endif
}
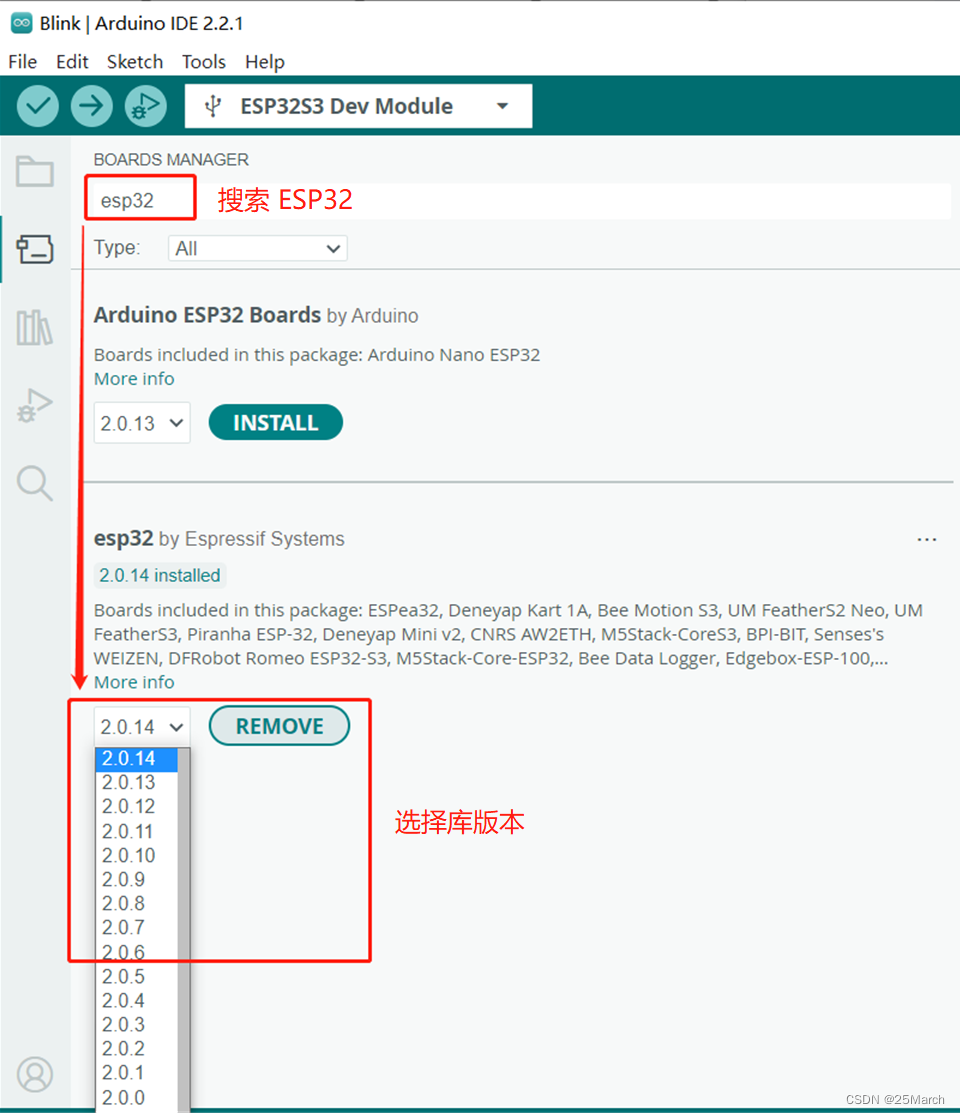
8、更新 arduino-esp32 库版本
如果要更新当前的 arduino-esp32 库版本,可以按照如下路径来更新:
Tool —> Board —> Boards Manager
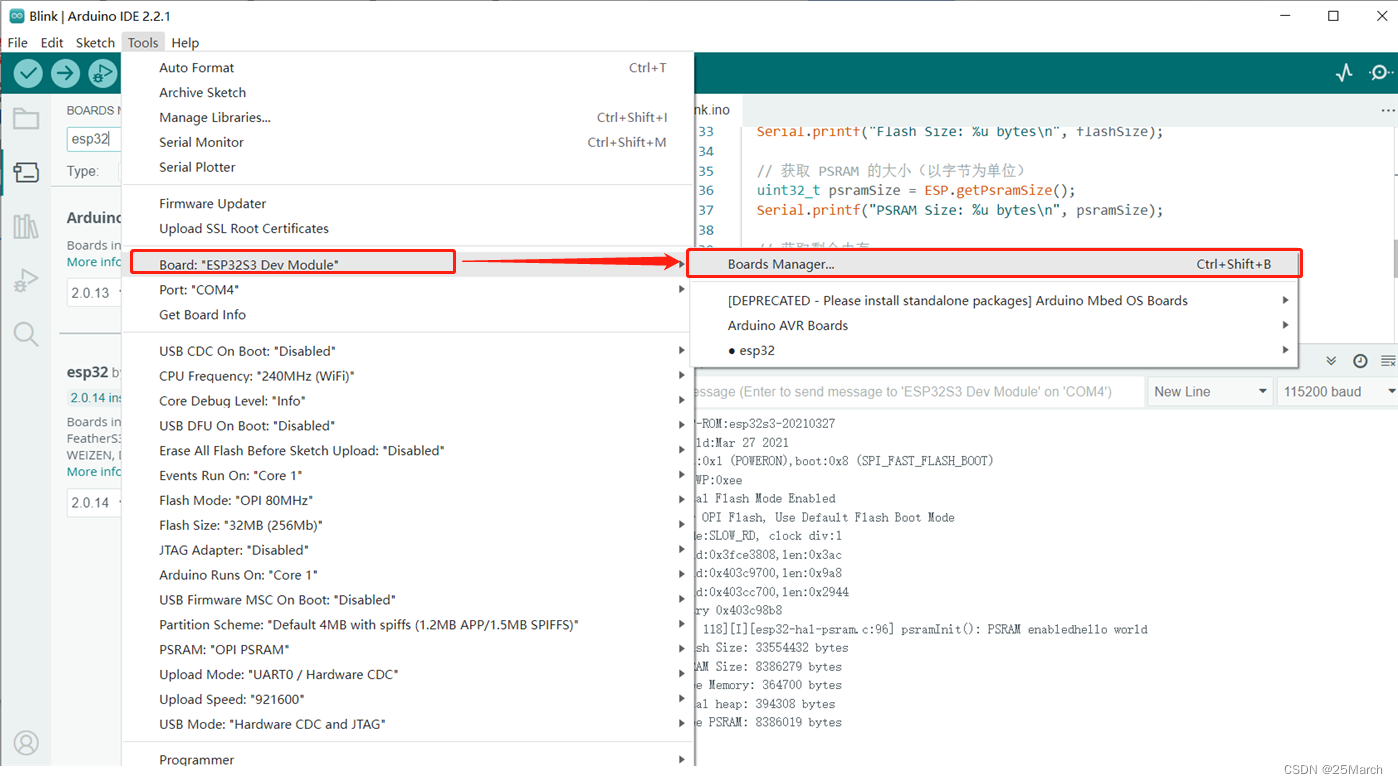
搜索 ESP32 —> 选择库版本


 2475
2475


 被折叠的 条评论
为什么被折叠?
被折叠的 条评论
为什么被折叠?
 到【灌水乐园】发言


