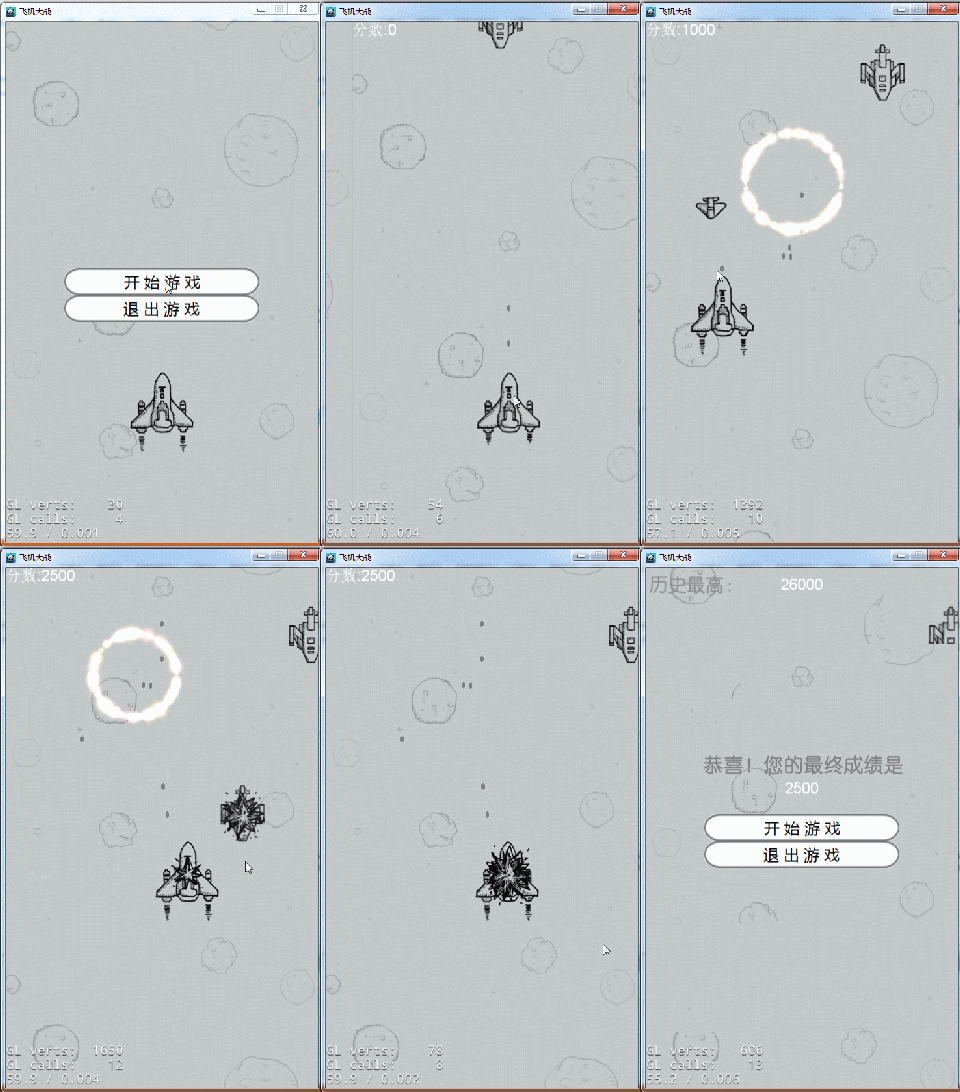
游戏结束场景就没什么好介绍的了,跟第一个HelloWorld场景差不多,只是修改了背景图片,去掉了飞机,添加了显示分数和最高分的label。下面看看是如何实现的。
先创建GameOverScene.cpp文件和GameOverScene.h文件。头文件声明如下:
static cocos2d::Scene* createScene();                                    //创建场景的方法,其实就是把当前的层封装成Scene返回去,注意是静态方法。
virtual bool init();                                                                    //层初始化时调用
CREATE_FUNC(GameOverScene);                                           //一个宏,其实是层创建的方法,以上三个方法都是cocos2d固定的场景创建的方法。
void continueGame(cocos2d::Ref* pSender);                      //菜单项开始游戏的回调方法
void exitGame(cocos2d::Ref* pSender);                                //菜单项退出游戏的回调方法
这些代码也不需要怎么解释了,都是一些用过的。下面是实现。
bool GameOverScene::init()
{
 if ( !Layer::init() )
 {
  return false;
 }

 Size visibleSize = Director::getInstance()->getVisibleSize();
 Vec2 origin = Director::getInstance()->getVisibleOrigin();

 //创建背景
 auto bg = Sprite::create("gameover.png");
 bg->setPosition(Vec2(origin.x + visibleSize.width/2,visibleSize.height/2));
 bg->setAnchorPoint(Vec2(0.5,0.5));
 this->addChild(bg,0);

 int currentScore = UserDefault::getInstance()->getIntegerForKey("currentScore");                //读取出上个场景存储进来的分数和最高分数
 int topScore = UserDefault::getInstance()->getIntegerForKey("topScore");
 //显示最终分数
 auto label = cocos2d::Label::createWithSystemFont(__String::createWithFormat("%d",currentScore)->getCString(),"Arial",24);
 label->setPosition(Vec2(visibleSize.width/2, origin.y + visibleSize.height/2 + 60));
 label->setHorizontalAlignment(kCCTextAlignmentRight);
 label->setAnchorPoint(Vec2(0.5,0.5));
 this->addChild(label, 1);
 //显示最高分数
 auto label2 = cocos2d::Label::createWithSystemFont(__String::createWithFormat("%d",topScore)->getCString(),"Arial",24);
 label2->setPosition(Vec2(visibleSize.width/2, origin.y + visibleSize.height-label2->getContentSize().height));
 label2->setHorizontalAlignment(kCCTextAlignmentRight);
 label2->setAnchorPoint(Vec2(0.5,0.5));
 this->addChild(label2, 1);

 //继续游戏菜单项
 auto startItem = MenuItemImage::create( "game_start.png", "game_start2.png", CC_CALLBACK_1(GameOverScene::continueGame,this));
 startItem->setPosition(Vec2(visibleSize.width/2 + origin.x, visibleSize.height/2 + origin.y));
 //退出游戏菜单项
 auto closeItem = MenuItemImage::create( "game_exit.png", "game_exit2.png",CC_CALLBACK_1(GameOverScene::exitGame, this));
 closeItem->setPosition(Vec2(origin.x + visibleSize.width/2 ,visibleSize.height/2 + origin.y - startItem->getContentSize().height));
    //把菜单项添加到菜单精灵中
 auto menu = Menu::create(startItem,closeItem, NULL);
 menu->setPosition(Vec2::ZERO);
 //把菜单精灵添加到当前的层中
 this->addChild(menu,1);

 return true;
}
//继续游戏菜单项的回调函数
void GameOverScene::continueGame(Ref* pSender)
{
 auto scene = GameScene::createScene();                                //又进到游戏场景中去
 auto gameScene = TransitionSlideInR::create(1.0f,scene);     //场景切换的方式
 Director::getInstance()->replaceScene(gameScene);
              //切换
}
//退出游戏的回调方法
void GameOverScene::exitGame(Ref* pSender)
{
 #if (CC_TARGET_PLATFORM == CC_PLATFORM_WP8) || (CC_TARGET_PLATFORM == CC_PLATFORM_WINRT)
 MessageBox("You pressed the close button. Windows Store Apps do not implement a close button.","Alert");
    return;
#endif

    Director::getInstance()->end();  //退出

#if (CC_TARGET_PLATFORM == CC_PLATFORM_IOS)
    exit(0);
#endif
}
最后,别忘了是在GameScene中在游戏结束的逻辑那里添加场景切换代码。
//游戏结束
void GameScene::gameOver()
{
    auto scene = GameOverScene::createScene();
    auto gameOverScene = TransitionTurnOffTiles::create(1.0f,scene);
    Director::getInstance()->replaceScene(gameOverScene);
}
好了,到这里我们整个游戏的核心模块就已经搞定了,当然还有许多不足的地方可以完善,有兴趣的同学可以完善。
下面看看整个游戏运行过程。

之后我会把我在学习cocos2d-x的过程中所遇到的疑难杂症发布到博客上,欢迎大家来讨论学习,谢谢。
最终源码:源码4


 780
780

 被折叠的 条评论
为什么被折叠?


