一. 图像编辑器 Monica
Monica 是一款跨平台的桌面图像编辑软件,使用 Kotlin Compose Desktop 作为 UI 框架。由于应用层是由 Kotlin 编写的,Monica 基于 mvvm 架构,使用 koin 作为依赖注入框架。大部分算法用 Kotlin 编写,少部分图像处理算法使用 OpenCV C++ 或调用深度学习的模型。
Monica 目前还处于开发阶段,当前版本的可以参见 github 地址:https://github.com/fengzhizi715/Monica
二. OpenCV DNN 推理
OpenCV DNN(Deep Neural Network)是 OpenCV 库中的一个模块,专门用于深度学习模型的加载、构建和推理。它支持多种神经网络架构和训练算法,包括卷积神经网络(CNN)、循环神经网络(RNN)等。OpenCV DNN 模块为开发者提供了一个强大且易于使用的工具,用于在各种应用中利用深度学习技术。
先封装一个人脸检测的类,对外暴露的两个方法:初始化模型和推理图片。
#include <opencv2/imgproc.hpp>
#include <opencv2/highgui.hpp>
#include <opencv2/dnn.hpp>
#include <tuple>
#include <iostream>
#include <opencv2/opencv.hpp>
#include <iterator>

using namespace cv;
using namespace cv::dnn;
using namespace std;

class FaceDetect {

public:
    void init(string faceProto,string faceModel,string ageProto,string ageModel,string genderProto,string genderModel);

    void inferImage(Mat& src, Mat& dst);

private:
    Net ageNet;
    Net genderNet;
    Net faceNet;

    vector<string> ageList;
    vector<string> genderList;
    Scalar MODEL_MEAN_VALUES;

    tuple<Mat, vector<vector<int>>> getFaceBox(Net net, Mat &frame, double conf_threshold);
};
然后实现该类
#include "FaceDetect.h"

void FaceDetect::init(string faceProto,string faceModel,string ageProto,string ageModel,string genderProto,string genderModel) {

    // Load Network
    ageNet = readNet(ageModel, ageProto);
    genderNet = readNet(genderModel, genderProto);
    faceNet = readNet(faceModel, faceProto);

    cout << "Using CPU device" << endl;
    ageNet.setPreferableBackend(DNN_TARGET_CPU);
    genderNet.setPreferableBackend(DNN_TARGET_CPU);
    faceNet.setPreferableBackend(DNN_TARGET_CPU);

    MODEL_MEAN_VALUES = Scalar(78.4263377603, 87.7689143744, 114.895847746);
    ageList = {"(0-2)", "(4-6)", "(8-12)", "(15-20)", "(25-32)",
                              "(38-43)", "(48-53)", "(60-100)"};

    genderList = {"Male", "Female"};
}

void FaceDetect::inferImage(Mat& src, Mat& dst) {

    int padding = 20;
    vector<vector<int>> bboxes;

    FaceDetect faceDetect = FaceDetect();
    tie(dst, bboxes) = faceDetect.getFaceBox(faceNet, src, 0.7);

    if(bboxes.size() == 0) {
        cout << "No face detected..." << endl;
        dst = src;
        return;
    }

    for (auto it = begin(bboxes); it != end(bboxes); ++it) {
        Rect rec(it->at(0) - padding, it->at(1) - padding, it->at(2) - it->at(0) + 2*padding, it->at(3) - it->at(1) + 2*padding);
        Mat face = src(rec); // take the ROI of box on the frame

        Mat blob;
        blob = blobFromImage(face, 1, Size(227, 227), MODEL_MEAN_VALUES, false);
        genderNet.setInput(blob);
        // string gender_preds;
        vector<float> genderPreds = genderNet.forward();
        // printing gender here
        // find max element index
        // distance function does the argmax() work in C++
        int max_index_gender = std::distance(genderPreds.begin(), max_element(genderPreds.begin(), genderPreds.end()));
        string gender = genderList[max_index_gender];
        cout << "Gender: " << gender << endl;

        /* // Uncomment if you want to iterate through the gender_preds vector
        for(auto it=begin(gender_preds); it != end(gender_preds); ++it) {
          cout << *it << endl;
        }
        */

        ageNet.setInput(blob);
        vector<float> agePreds = ageNet.forward();
        /* // uncomment below code if you want to iterate through the age_preds
         * vector
        cout << "PRINTING AGE_PREDS" << endl;
        for(auto it = age_preds.begin(); it != age_preds.end(); ++it) {
          cout << *it << endl;
        }
        */

        // finding maximum indicd in the age_preds vector
        int max_indice_age = std::distance(agePreds.begin(), max_element(agePreds.begin(), agePreds.end()));
        string age = ageList[max_indice_age];
        cout << "Age: " << age << endl;
        string label = gender + ", " + age; // label
        cv::putText(dst, label, Point(it->at(0), it->at(1) -15), cv::FONT_HERSHEY_SIMPLEX, 1, Scalar(0, 255, 0), 4, cv::LINE_AA);
    }
}

tuple<Mat, vector<vector<int>>> FaceDetect::getFaceBox(Net net, Mat &frame, double conf_threshold) {
    Mat frameOpenCVDNN = frame.clone();
    int frameHeight = frameOpenCVDNN.rows;
    int frameWidth = frameOpenCVDNN.cols;
    double inScaleFactor = 1.0;
    Size size = Size(300, 300);
     // std::vector<int> meanVal = {104, 117, 123};
    Scalar meanVal = Scalar(104, 117, 123);

    cv::Mat inputBlob;
    inputBlob = cv::dnn::blobFromImage(frameOpenCVDNN, inScaleFactor, size, meanVal, true, false);

    net.setInput(inputBlob, "data");
    cv::Mat detection = net.forward("detection_out");

    cv::Mat detectionMat(detection.size[2], detection.size[3], CV_32F, detection.ptr<float>());

    vector<vector<int>> bboxes;

    for(int i = 0; i < detectionMat.rows; i++)
    {
        float confidence = detectionMat.at<float>(i, 2);
        if(confidence > conf_threshold)
        {
            int x1 = static_cast<int>(detectionMat.at<float>(i, 3) * frameWidth);
            int y1 = static_cast<int>(detectionMat.at<float>(i, 4) * frameHeight);
            int x2 = static_cast<int>(detectionMat.at<float>(i, 5) * frameWidth);
            int y2 = static_cast<int>(detectionMat.at<float>(i, 6) * frameHeight);
            vector<int> box = {x1, y1, x2, y2};
            bboxes.push_back(box);
            rectangle(frameOpenCVDNN, Point(x1, y1), Point(x2, y2), Scalar(0, 0, 255), 2, 8);
        }
    }

    return make_tuple(frameOpenCVDNN, bboxes);
}
三. 应用层调用
编写好底层的推理实现后,接下来就可以给应用层使用了。其实上面还省略了 jni 层的代码,感兴趣的可以直接看项目的源码。
对于应用层,先编写好 Kotlin 调用 jni 层的代码:
object ImageProcess {

    init { // 对于不同的平台加载的库是不同的,mac 是 dylib 库,windows 是 dll 库,linux 是 so 库
        if (isMac) {
            if (arch == "aarch64") { // 即使是 mac 系统,针对不同的芯片 也需要加载不同的 dylib 库
                System.load("${FileUtil.loadPath}libMonicaImageProcess_aarch64.dylib")
            } else {
                System.load("${FileUtil.loadPath}libMonicaImageProcess.dylib")
            }
        } else if (isWindows) {
            System.load("${FileUtil.loadPath}MonicaImageProcess.dll")
        }
    }

    ......

    /**
     * 初始化人脸检测模块
     */
    external fun initFaceDetect(faceProto:String,faceModel:String,
                                ageProto:String, ageModel:String,
                                genderProto:String,genderModel:String)

    /**
     * 人脸检测
     */
    external fun faceDetect(src: ByteArray):IntArray
}
在 Monica 启动时,需要先加载人脸、年龄、性别的模型
FileUtil.copyFaceDetectModels()

        val faceProto = "${FileUtil.loadPath}opencv_face_detector.pbtxt"
        val faceModel = "${FileUtil.loadPath}opencv_face_detector_uint8.pb"
        val ageProto = "${FileUtil.loadPath}age_deploy.prototxt"
        val ageModel = "${FileUtil.loadPath}age_net.caffemodel"
        val genderProto = "${FileUtil.loadPath}gender_deploy.prototxt"
        val genderModel = "${FileUtil.loadPath}gender_net.caffemodel"

        ImageProcess.initFaceDetect(faceProto,faceModel, ageProto,ageModel, genderProto,genderModel)
最后,就可以在应用层调用了
val (width,height,byteArray) = state.currentImage!!.getImageInfo()

        try {
             val outPixels = ImageProcess.faceDetect(byteArray)
             state.addQueue(state.currentImage!!)
             state.currentImage = BufferedImages.toBufferedImage(outPixels,width,height)
        } catch (e:Exception) {
             logger.error("faceDetect is failed", e)
        }
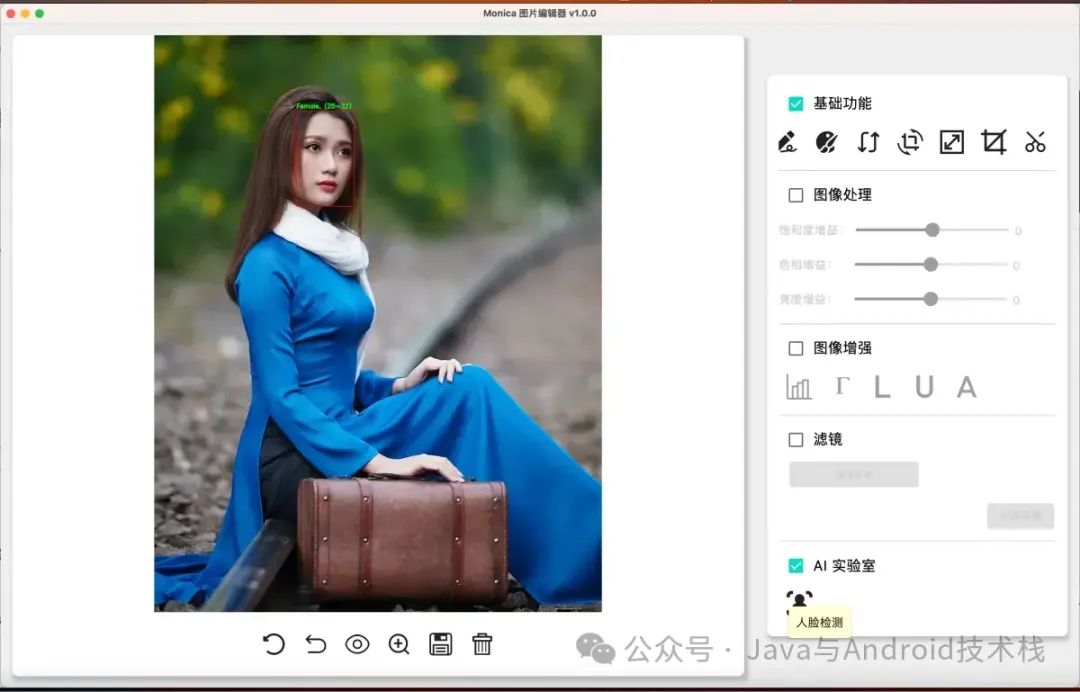
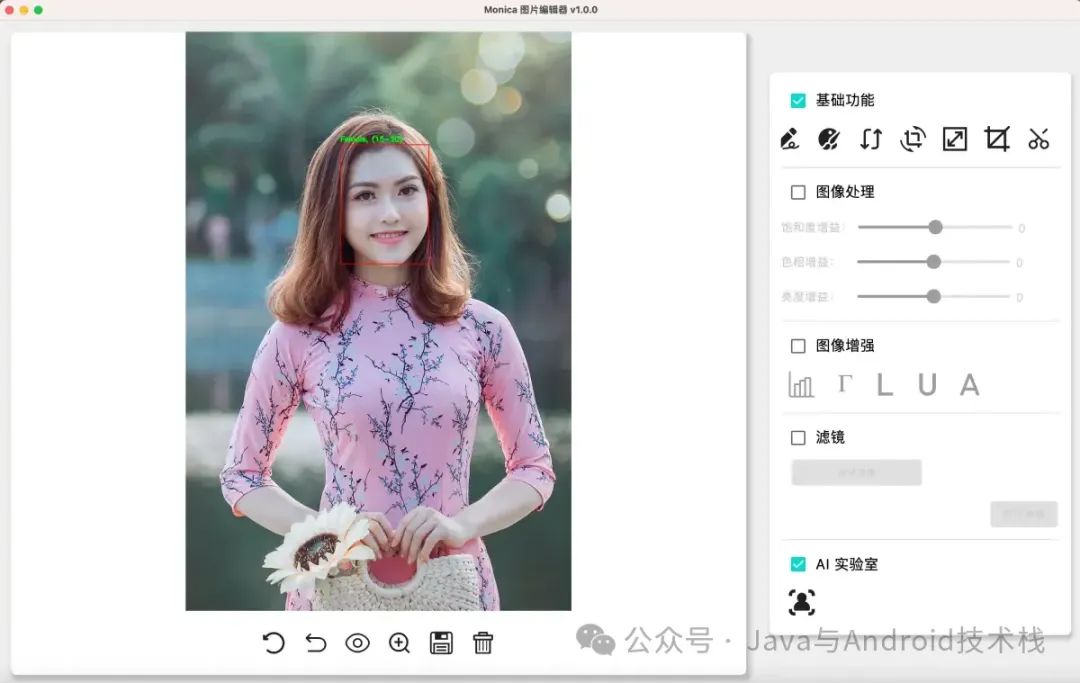
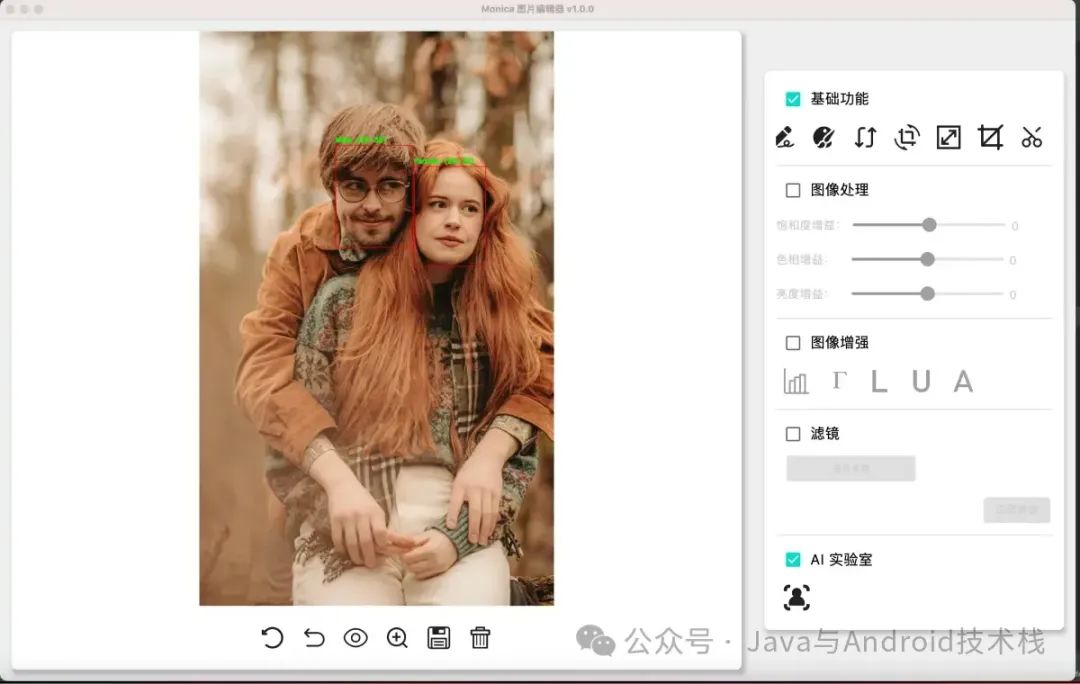
我们跑几张图片看看效果:


可以看到控制台的推理结果:
四. 总结
Monica 快要到 1.0.0 版本了,目前只在 MacOS 下引入 OpenCV 的编译好的算法库(包括 Intel 芯片和 m 芯片),Windows 的算法库会稍有落后一些功能,因为我的 Windows 电脑不在身边。
接下来一段时间的重点仍然是优化软件的架构,然后才会考虑引入一些深度学习的模型。
Monica github 地址:https://github.com/fengzhizi715/Monica
【Java与Android技术栈】公众号
关注 Java/Kotlin 服务端、桌面端 、Android 、机器学习、端侧智能
更多精彩内容请关注:


 1518
1518

 被折叠的 条评论
为什么被折叠?


