


Unity引擎上的C#脚本基础
1. C# 脚本基本结构
using System.Collections;
using System.Collections.Generic;
using UnityEngine;

public class hello : MonoBehaviour
{
    // Start is called before the first frame update
    //Start方法是Unity当启动游戏时就会默认运行的方法
    void Start()
    {

    }

    // Update is called once per frame
    //Update方法时Unity每帧都执行一遍的方法
    void Update()
    {

    }
}
2. 限制帧数
Update方法是根据帧数来实时运行的,所以有时候会需要用到限制帧数的情况,具体实现代码如下:
//这样即可做到将帧数尽量保持再六十,只能说尽量
Application.targetFrameRate = 60;
例子如下:
using System.Collections;
using System.Collections.Generic;
using UnityEngine;

public class hello : MonoBehaviour
{
    // Start is called before the first frame update
    //这样将脚本挂载都对象时,就会将该游戏的帧数尽量限制为60
    void Start()
    {
        Application.targetFrameRate = 60;
    }

    // Update is called once per frame
    void Update()
    {
    }
}
4. 获取挂载节点和组件
//获取节点(也就是脚本在哪挂载的模型,该模型就是节点,游戏对象
this.gameObject  //返回值为节点
//获取该对象的组件
this.gameObject.GetComponent<组件类型>(); //返回值为该节点的对应组件
例子如下:
using System.Collections;
using System.Collections.Generic;
using UnityEngine;

public class hello : MonoBehaviour
{
    // Start is called before the first frame update
    void Start()
    {
        Application.targetFrameRate = 60;
		//获取挂载对象的Transform组件
        Transform transform = this.gameObject.GetComponent<Transform>();
    }

    // Update is called once per frame
    void Update()
    {

    }
}
4.1 控制组件里的属性
获得到节点的组件后,自然也可以对组件下的属性进行操作
例子如下:
using System.Collections;
using System.Collections.Generic;
using UnityEngine;

public class hello : MonoBehaviour
{
    // Start is called before the first frame update
    void Start()
    {
        Application.targetFrameRate = 60;
        //获取对象的坐标组件
        Transform transform = this.gameObject.GetComponent<Transform>();
        //设置坐标
        transform.position=new Vector3(0, 0, 0);

    }

    // Update is called once per frame
    void Update()
    {

    }
}
5. 获取其他节点和组件
当前unity游戏对象如下:
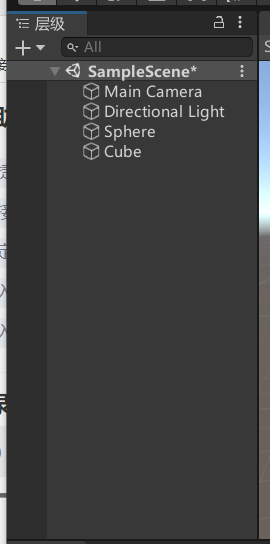
这里不将脚本挂载到Cube,而是直接使用方法获取该节点
//通过该方法即可获取这个Cube
GameObject.Find("/Cube");
具体操作例子如下:
using System.Collections;
using System.Collections.Generic;
using UnityEngine;

public class hello : MonoBehaviour
{
    // Start is called before the first frame update
    void Start()
    {
    	//获取节点
        GameObject cube = GameObject.Find("/Cube");
        //获取节点的transform组件
        Transform cubeTransform = cube.GetComponent<Transform>();
        //设置坐标
        cubeTransform.position = new Vector3(2, 2, 2);
    }

    // Update is called once per frame
    void Update()
    {

    }
}
6. 父节点与子节点
6.1 获取父节点
想获取父节点则需要通过transform组件,其语法如下:
//这样就可以获取到挂载节点的父节点
GameObject parent = this.transform.parent.gameObject;
例子如下:
当前unity游戏对象如下:
圆形的父节点是立方体
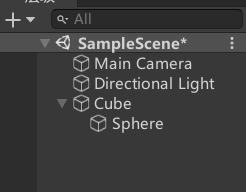
将脚本挂载到圆形上,利用transform组件获取父节点,其脚本代码如下:
using System.Collections;
using System.Collections.Generic;
using UnityEngine;

public class hello : MonoBehaviour
{
    // Start is called before the first frame update
    void Start()
    {
    	//获取父节点
        GameObject parent = this.transform.parent.gameObject;
        Debug.Log("父节点的名字为:" + parent.name);
    }

    // Update is called once per frame
    void Update()
    {

    }
}
6.2 获取所有子节点
可以利用foreach循环去依次遍历子节点
例子如下:
当前unity游戏对象如下:
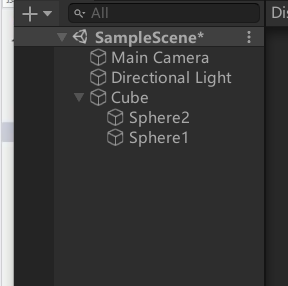
将脚本挂载到立方体Cube上
其脚本代码如下:
using System.Collections;
using System.Collections.Generic;
using UnityEngine;

public class hello : MonoBehaviour
{
    // Start is called before the first frame update
    void Start()
    {
        foreach(Transform child in transform)
        {
            Debug.Log("子节点:" + child.gameObject.name);
        }
    }

    // Update is called once per frame
    void Update()
    {

    }
}
6.3 设置节点为另一个节点的父节点
语法如下:
设置节点B为节点A的父节点
GameObjectA.transform.SetParent(GameObjectB.transform)
设置节点A没有父节点
GameObjectA.transform.SetParent(null)
例子如下:
using System.Collections;
using System.Collections.Generic;
using UnityEngine;

public class hello : MonoBehaviour
{
    // Start is called before the first frame update
    void Start()
    {
        GameObject Cube = GameObject.Find("/Cube");
        GameObject Sphere = GameObject.Find("/Sphere");
        //设置Cube的父节点为Sphere
        Cube.transform.SetParent(Sphere.transform);
        // Cube.transform.SetParent(null);
    }

    // Update is called once per frame
    void Update()
    {

    }
}
7. 组件的属性
脚本组件的属性,也可以在Inspector(检查器)窗口里显示
例如下:
给脚本设置几个共有变量
using System.Collections;
using System.Collections.Generic;
using UnityEngine;

public class hello : MonoBehaviour
{

    public int level = 1;
    public string message = "hello";
    // Start is called before the first frame update
    void Start()
    {

    }

    // Update is called once per frame
    void Update()
    {

    }
}
即可在检查器面板上看到
8. 坐标与旋转
在Unity中,节点的坐标,旋转,都是Vector3类型表示
Vector3,用于表示一个3维向量(x,y,z),也称为三元数
例如:
//设置挂载对象坐标
this.transform.position = new Vector3(1f, 0.08f, 1f);
9. 世界坐标和本地坐标
通常很多时候,某一个物品要依附于另一个物品,物品移动,依附在它的物品也要移动,用C脚本来实现的话,就需要用到本地坐标,举个例子,例如飞机和子弹,飞机发射子弹,子弹永远都是出现在飞机的正前方,如果给子弹设置
//设置子弹坐标
this.transform.position = new Vector3(1f, 0.08f, 1f);
那么该子弹永远都只能在这个坐标生成
而如果使用本地坐标的话,是以父节点的坐标系计算
其语法如下:
transform.localPosition=new Vector3(0,1,0);
通过本地坐标的设置,子弹就会出现在飞机y轴前一个单位的距离
10. 物体的运动
// x y z 均是数值,这个方法的用处是对象在原有基础坐标的情况下再移动多少
//其中Space.Self是可选项,表示使用自己的坐标
this.transform.Translate(x,y,z,{Space.Self})
//this.transform.Translate(0,1,0,Space.Self) 这样的话,立方体会按照自己y轴在哪就往哪里移动,而不是根据世界坐标的y轴
//this.transform.Translate(0,1,0,Space.World) 使用世界坐标,根据世界的xyz来决定移动的方向
例子如下:
using System.Collections;
using System.Collections.Generic;
using UnityEngine;

public class hello : MonoBehaviour
{
    // Start is called before the first frame update
    void Start()
    {

    }

    // Update is called once per frame
    //这样即可做到该对象每一帧向y轴移动0.05单位
    void Update()
    {
        this.transform.Translate(0, 0.05f, 0);
    }
}
但是这种移动方式是不好的,因为移动的幅度将完全由帧数来决定,而帧数是不固定的,就可能会导致移动一会儿快一会儿慢,并且使用的是世界目标,就例如人类往前走是根据自己面向哪里,而不是对于世界坐标来说这里是向前走,所以当物品时斜着的情况下,会很怪,这里可以和deltaTime以及在translate里添加Space.Self配合使用,具体例子如下:
using System.Collections;
using System.Collections.Generic;
using UnityEngine;

public class hello : MonoBehaviour
{
    // Start is called before the first frame update
    void Start()
    {
        Application.targetFrameRate = 60;
    }

    // Update is called once per frame
    void Update()
    {
    //Time.deltaTime指的是距离上一帧的时间有多少秒
        float step = 0.8f * Time.deltaTime;
        this.transform.Translate(0, step, 0,Space.Self);
    }
}
11 . 屏幕坐标
游戏中的物体,有两个坐标
一个是空间坐标,即该物体在世界空间中的坐标
一个是屏幕坐标,该物体在屏幕上的坐标

11.1 获取一个物体的屏幕坐标
using System.Collections;
using System.Collections.Generic;
using UnityEngine;

public class NewBehaviourScript : MonoBehaviour
{
    // Start is called before the first frame update
    void Start()
    {
        Debug.Log("当前屏幕高度宽度分别为:" + Screen.height + " , " + Screen.width);

		//先获取挂载对象的世界坐标
        Vector3 worldPos = this.transform.position;
        //再将其转化为屏幕坐标
        Vector3 pos = Camera.main.WorldToScreenPoint(worldPos);
        Debug.Log(pos);
    }

    // Update is called once per frame
    void Update()
    {

    }
}
11.2 ***屏幕的边界样例
首先在Unity的屏幕中放入一张图片,本次的案例是想实现,一张图片左右移动,移动到屏幕最右边时往左边移动,最左边时往右移动

C#脚本如下:
using System.Collections;
using System.Collections.Generic;
using UnityEngine;

public class NewBehaviourScript : MonoBehaviour
{
    // Start is called before the first frame update
    //flag为true代表向右移动,false向左移动
    public bool flag = true;
    void Start()
    {
        Debug.Log("当前屏幕高度宽度分别为:" + Screen.height + " , " + Screen.width);
        //获取挂载点的屏幕坐标
        Vector3 worldPos = this.transform.position;
        Vector3 pos = Camera.main.WorldToScreenPoint(worldPos);
        Debug.Log(pos);
    }

    // Update is called once per frame
    void Update()
    {
    	//每次位移的像素
        float step = 1.8f * Time.deltaTime;
		//获取挂载节点屏幕坐标
        Vector3 location = Camera.main.WorldToScreenPoint(this.transform.position);
		//当向右移动时,当前坐标小于屏幕的宽度则允许移动,反则将向左移动
        if (flag && location.x < Screen.width)
        {
            this.transform.Translate(step, 0, 0, Space.Self);
        }
        else
        {
            flag = false;
        }

        //当向左移动时,当前坐标大于0则允许移动,反则将向右移动
        if (!flag && location.x > 0)
        {
            this.transform.Translate(-step, 0, 0, Space.Self);
        }
        else
        {
            flag = true;
        }


    }
}
13 . 鼠标事件处理
鼠标事件处理要给挂载节点设置碰撞器,也就是下图的Box Collider 2D(这是众多碰撞器的其中一种),要不然点击无效
例子如下:

13.1 鼠标左键单击
我们需要给挂载节点设置一个盒状碰撞器,然后在C#脚本中去实现OnMouseDown()方法即可
语法:
    public void OnMouseDown()
    {
        Debug.Log("图片被单击了");
    }
例子如下:
using System.Collections;
using System.Collections.Generic;
using UnityEngine;

public class NewBehaviourScript : MonoBehaviour
{
    // Start is called before the first frame update


    //需要添加碰撞器,我这里添加的时Box Collider 2D(也就是盒状碰撞器),要不然该方法是没有作用的
    public void OnMouseDown()
    {
        Debug.Log("图片被单击了");
    }

    void Start()
    {

    }

    // Update is called once per frame
    void Update()
    {

    }
}
13.2 鼠标拖拽
using System.Collections;
using System.Collections.Generic;
using UnityEngine;

public class NewBehaviourScript : MonoBehaviour
{
    // Start is called before the first frame update

    public void OnMouseDrag()
    {
    	//获取鼠标当前坐标,但是因为Input获取到的是屏幕坐标,所以要将其转化为世界坐标
        Vector3 pos=  Camera.main.ScreenToWorldPoint(Input.mousePosition);
        //因为这里是2d,所以z轴和原来应保持一致
        this.transform.localPosition = new Vector3(pos.x, pos.y, this.transform.localPosition.z);
    }


    void Start()
    {
    }

    // Update is called once per frame
    void Update()
    {
    }
}
14. 事件函数
分成了两类
- 不以On开头的,属于由系统主动调用的方法,例如 Awake() , Start() , Update() , FixedUpdated()
- 以On开头的,是相应事件的回调函数 例如 OnEnable() , OnDisable() , OnGUI (), …
15. 脚本的执行顺序
Execution Order : 脚本的执行顺序,即优先级
脚本的默认顺序都是0,属于无序,顺序值越小,则越优先,比如将一个脚本的的Execution Order 设为 -1,则它将优先执行
例子如下:
点击脚本,查看检查器

点击 Execution Order

点击右下角的加号可以看到自己的脚本,点击

数值越小就优先执行
16. *** 切换图片
首先在C#8d脚本里写两个Sprite类型的公有变量
如下:
using System.Collections;
using System.Collections.Generic;
using UnityEngine;

public class NewBehaviourScript : MonoBehaviour
{
    // Start is called before the first frame update

    public Sprite pic1;
    public Sprite pic2;

    void Start()
    {
    }

    // Update is called once per frame
    void Update()
    {

    }
}
接着就可以在挂载点处的检查器上看到

给其图片

脚本代码如下(记得加碰撞器):
using System.Collections;
using System.Collections.Generic;
using UnityEngine;

public class NewBehaviourScript : MonoBehaviour
{
    // Start is called before the first frame update

    public Sprite pic1;
    public Sprite pic2;
    private bool flag = true;

    private void OnMouseDown()
    {
        if (flag)
        {
            GetComponent<SpriteRenderer>().sprite = this.pic1;
            flag = false;
        }
        else
        {
            GetComponent<SpriteRenderer>().sprite = this.pic2;
            flag = true;
        }
    }

    void Start()
    {

    }

    // Update is called once per frame
    void Update()
    {

    }
}
17. 预制体
即预先制作好的物体,作为资源备用,一般用于游戏对象的动态创建
17.1 生成预制体
其实蛮简单的,先把图片从文件夹拉进去,接着再从层次界面拉出来放到文件夹就可以了 ,可以看到拉出来的文件并不是原本的后缀名

17.2 动态创建实例
利用Instantiate() 方法来创建实例
Instantiate(Prefab)
//创建一个实例,挂载场景根节点下
Instantiate(Prefab,Transform parent)
//创建一个实例,同时指定父节点
Instantiate(Prefab,position,rotation)
//创建一个实例,挂载场景根节点下,同时指定position与rotation
//例如 Instantiate(Prefab,transform.position,transform.rotation)
Instantiate(Prefab,position,rotation,Transform parent)
//创建一个实例,挂载场景根节点下,同时指定position与rotation,并指定父节点
给出一个例子,其实现左键生成一个实例具体步骤如下:
首先创建一个GameObject 类型的公有变量,接着将其预制体拖拽进去

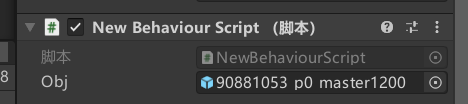
C#脚本代码如下:
using System.Collections;
using System.Collections.Generic;
using UnityEngine;

public class NewBehaviourScript : MonoBehaviour
{
    // Start is called before the first frame update
    public GameObject obj;

	//每单击一次生成一个对象
    private void OnMouseDown() {
        GameObject newobj = Instantiate(obj);
        newobj.transform.position = transform.position;
    }


    void Start()
    {

    }

    // Update is called once per frame
    void Update()
    {

    }
}
17.3 实例的销毁
GameObject.Destroy(this.gameObject);
//利用该方法即可对实例进行销毁
例子如下:
当对象移动超出屏幕边界时,销毁
using System.Collections;
using System.Collections.Generic;
using UnityEngine;

public class NewBehaviourScript1 : MonoBehaviour
{
    // Start is called before the first frame update
    void Start()
    {

    }

    // Update is called once per frame
    void Update()
    {
    	//移动
        float step = 1.8f * Time.deltaTime;
        this.transform.Translate(step, 0, 0, Space.Self);
		//获取当前游戏对象的屏幕坐标
        Vector3 pos = Camera.main.WorldToScreenPoint(this.transform.position);
		//超出屏幕宽度销毁
        if (pos.x > Screen.width) {
            GameObject.Destroy(this.gameObject);
        }
    }
}
18. 键盘事件
Input.GetKeyDown(0);  //键盘按下事件
Input.GetKeyUp(0);	//键盘抬起事件
Input.GetKey(0);	//状态检查,某个键是否被按下
//例如,下个例子,实现的是按空格销毁游戏对象
if (Input.GetKey(KeyCode.Space)) {
	 GameObject.Destroy(this.gameObject);
}
19. 物理系统(刚体)
大多数情况下需要给游戏对象添加一个Rigidbody(刚体),也就是俗称让牛顿管管这个东西,就比如操作一个角色,控制它跳起来之后,需要牛顿来管它掉下来,以防止我们如果疯狂按跳跃键,角色可以飞起来,只要在检查器中添加该物理组件即可,3d的游戏对象就要选择的是Rigidbody

19.1 刚体的类型
- Dynmic 普通刚体,有质量,有速度
- Static 静态刚体,质量无穷大,无速度(适用于建筑物,地面等固定不动的物品)
- Kinematic 运动学刚体,无质量(忽略物理规律的刚体,一般用于碰撞测验)
可以在检查器面板中的刚体组件里找到切换的选项

该面板中的第一个就是
19.2 刚体的碰撞
设置完刚体的游戏对象还需要设置碰撞器,因为如果不设置碰撞器,那么刚体只会掉落,不会和其他的刚体产生任何的关联,所以正常情况下,添加了刚体组件,也要把碰撞器组件添加上去

就当作是老搭档把
19.3 刚体的反弹
刚体的反弹,在物理中需要一个弹性系数,也就是给刚体添加一个2d材质,首先创建一个2d材质

点击材质,修改其参数

第一个是摩擦力,第二个弹性
设置完参数后将其拖拽到刚体的材质里即可实现反弹等特殊效果

19.4 碰撞检测(碰撞器)
两个游戏对象是刚体并且有碰撞器这种情况就不说明了
碰撞器
    //当碰撞开始时,如果是2D的游戏对象使用的方法是OnCollisionEnter2D(Collision2D other)
	void OnCollisionEnter(Collision other){
		print ("OnCollisionEnter");
	}

	//当碰撞的时候,一直持续到停止动作的时候,如果是2D的游戏对象使用的方法是OnCollisionStay2D(Collision2D other)
	void OnCollisionStay(Collision other){
		if (string.Equals(other.gameObject.name,"cub")) {
			print ("OnCollisionStay");
		}
	}

	//当碰撞结束后,如果是2D的游戏对象使用的方法是OnCollisionExit2D(Collision2D other)
	void OnCollisionExit(Collision other){
		print ("OnCollisionExit");

	}
例子如下:
using System.Collections;
using System.Collections.Generic;
using UnityEngine;

public class TEST : MonoBehaviour
{


	//发生了碰撞
    private void OnCollisionEnter2D(Collision2D collision)
    {
        Debug.Log("两个物体发生了碰撞");
    }

    // Start is called before the first frame update
    void Start()
    {
    }

    // Update is called once per frame
    //用来控制2d游戏对象的移动
    void Update()
    {

        float step = 1.8f * Time.deltaTime;
        if (Input.GetKey(KeyCode.D))
        {
            transform.Translate(step, 0, 0, Space.Self);
        }
        if (Input.GetKey(KeyCode.A))
        {
            transform.Translate(-step, 0, 0, Space.Self);
        }
    }
}
20. 音频

20.1 播放音频
需要两个组件,一个是AudioListener(听)一个是AudioSource(播)


20.2 代码播放音频

using System.Collections;
using System.Collections.Generic;
using UnityEngine;

public class TEST : MonoBehaviour
{

    public void OnMouseDown()
    {

        AudioSource audio = this.gameObject.GetComponent<AudioSource>();
        if (audio.isPlaying)
        {
            audio.Stop;
        }
        else {
            audio.Play();
        }

    }


    // Start is called before the first frame update
    void Start()
    {

    }

    // Update is called once per frame
    void Update()
    {

    }
}
有时候会像是枪战游戏一样的需求,每按一下产生一个声音,就需要用到PlayOneShot(clip)方法,例子如下:
using System.Collections;
using System.Collections.Generic;
using UnityEngine;

public class TEST : MonoBehaviour
{

    public void OnMouseDown()
    {
        AudioSource audio = this.gameObject.GetComponent<AudioSource>();
        audio.PlayOneShot(audio.clip);

    }


    // Start is called before the first frame update
    void Start()
    {

    }

    // Update is called once per frame
    void Update()
    {

    }
}
21. 延时调用
Invoke(name) //添加一个延时调用
CancelInvoke(name) //取消延时调用
IsInvoking(name) //检查一个延时调用是否在等待中
InvokeRepeating(name,delay,interval) //延时调用,并重复执行(定时器)
具体用法如下:
using System.Collections;
using System.Collections.Generic;
using UnityEngine;

public class Player : MonoBehaviour
{
    public void OnMouseDown()
    {
        Debug.Log(Time.time);
        Invoke("say", 3);//三秒后调用say这个方法
    }

    public void say()
    {
        Debug.Log(Time.time);
    }

    void Start()
    {
    }

    // Update is called once per frame
    void Update()
    {

    }


}
22. 消息调用
A对象想要调用B对象中的game脚本组件下的AddSocre()方法,有两个法子
第一种是A寻找到b对象然后找他下面的脚本组件,然后利用脚本组件再调用AddSocre()
//这是A对象的脚本
using System.Collections;
using System.Collections.Generic;
using UnityEngine;

public class Player : MonoBehaviour
{
    public void OnMouseDown()
    {
    	GameObject b=GameObject.Find("B");//找b对象
    	game game=b.GetComponent<MyGame>();//找脚本
    	game.AddSocre();//调用方法
    }


    void Start()
    {
    }

    // Update is called once per frame
    void Update()
    {

    }


}
第二种是利用消息调用SendMessage(name)直接调用方法,
//这是A对象的脚本
using System.Collections;
using System.Collections.Generic;
using UnityEngine;

public class Player : MonoBehaviour
{
    public void OnMouseDown()
    {
    	GameObject b=GameObject.Find("B");//找b对象
    	b.SendMessage("AddScore")//调用b对象的该方法,值得注意的是,如果方法需要传参,可以b.SendMessage("AddScore",1)
    }


    void Start()
    {
    }

    // Update is called once per frame
    void Update()
    {

    }


}


 6万+
6万+


 被折叠的 条评论
为什么被折叠?
被折叠的 条评论
为什么被折叠?
 到【灌水乐园】发言


