


1、图像滤波处理
通过滤波来提取图像特征,消除噪声。
常用滤波方式有:均值滤波、高斯滤波、中值滤波、双边滤波。
- 高斯滤波:
blur_gray = cv2.GaussianBlur(orgGray, (kernel_size, kernel_size), 0)orgGray:灰度图像;kernel_size:高斯核的大小;sigma:高斯标准差,默认为0。
- 中值滤波:对滤波模板内的所有元素进行排序,取排序序列的中值作为中心像素。
medianFiltered = cv2.medianBlur(src, ksize)src:待中值滤波的输入图像;ksize:中值滤波模板大小。
- 均值滤波:对滤波模板内的所有像素进行求和再求平均值,再将均值复制给所有的中心像素。
2、图像边缘提取
edges_image = cv2.Canny(blur_gray, 20, 150, apertureSize=3, L2gradient=False)blur_gray:输入要检测的灰度图
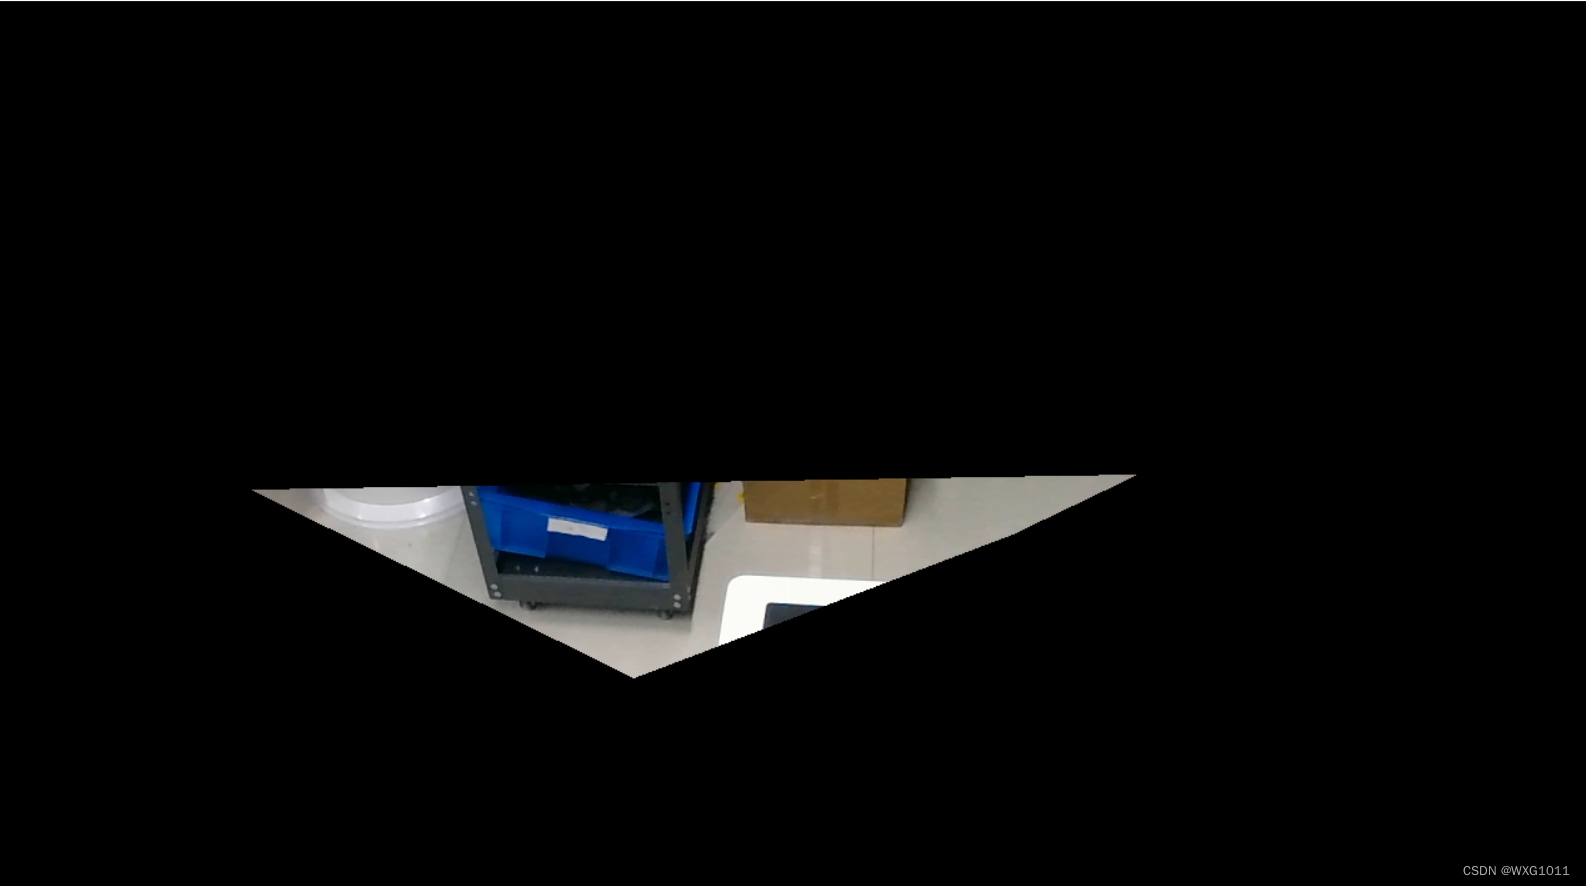
3、创建掩膜,提取兴趣区
思路:
生成一个与原图大小维度一致的mask矩阵;
对照原图在该mask上构建感兴趣区域,这里为多边形;
利用opencv的cv2.fillPoly()函数对多边形轮廓进行填充;
利用opencv的cv2.bitwise_and()函数与原图像进行与运算,保留感兴趣原图像。
# 生成掩膜,提取ROI
mask = np.zeros_like(image)
vertices = np.array([[512, 391], [517, 441], [620, 426], [618, 379]],dtype=np.int32)
cv2.fillPoly(mask, [vertices], (255,255,255))
masked_image = cv2.bitwise_and(image,mask)
cv2.imshow('masked_image', masked_image)
cv2.bitwise_and():对两幅图像进行按位“与”操作。
4、直线检测
霍夫变换:
lines = cv2.HoughLinesP(masked_image, 1, np.pi / 180, threshold=45, minLineLength=30, maxLineGap=60)threshold:霍夫平面累加阈值,值越大,检测出的直线越少,minLineLength:线段最小长度, maxLineGap:最大允许断裂长度
检测到的直线绘制:
if lines is not None:
    for line in lines:
        x1, y1, x2, y2 = line[0]
        cv2.line(line_image, (x1, y1), (x2, y2), (0, 255, 0), 2)
5、轮廓检测
# 将图像转换为灰度图
orgGray = cv2.cvtColor(image, cv2.COLOR_BGR2GRAY)
edges_image = cv2.Canny(orgGray, 30, 150, apertureSize=3, L2gradient=False)
contours, _ = cv2.findContours(edges_image, cv2.RETR_EXTERNAL, cv2.CHAIN_APPROX_SIMPLE)
# 遍历轮廓并绘制
for contour in contours:
    cv2.drawContours(image, [contour], 0, (0, 0, 255),1)
    cv2.imshow("contours", image)
1)计算轮廓周长:
perimeters = cv2.arcLength(contour, True)2)计算轮廓面积:
area = cv2.contourArea(contour)3)绘制轮廓最小矩形并绘制:
rect = cv2.minAreaRect(contour)
# 计算矩形框的四个顶点坐标,是按照左上、右上、右下、左下的顺序排列的
box = cv2.boxPoints(rect)
box = np.int0(box)
print("box",box)
cv2.drawContours(image, [box], 0, (0, 0, 255),1)
cv2.imshow("contours", image)
在实测中发现cv2.boxPoints计算的四个顶点坐标不一定按左上、右上、右下、左下的顺序排列的,会发生跳变。
小技巧:
# 左上角坐标获取
# 求 sum=x+y, 最小的是左上,最大的是右下
s = box.sum(axis = 1)
top_left = box[np.argmin(s)]

# 右上角坐标获取
# 求diff=y-x, 最小的是右上,最大的是左下
diff = np.diff(box, axis = 1)
top_right = box[np.argmin(diff)]
zip()用法:
x_coords, y_coords = zip(*box)
print(list(zip(*box)))

box [[151 318]
 [152 292]
 [265 294]
 [264 320]]

运行结果:
[(151, 152, 265, 264), (318, 292, 294, 320)]
4)对检测到的轮廓降序排列,获取最大轮廓:
cnts = sorted(contours, key = cv2.contourArea, reverse = True)[0]
print("最大轮廓面积:", cv2.contourArea(cnts))
5)轮廓凸包
实现功能:剔除面积小于50的轮廓,并计算剩余轮廓凸包。
contours, hierarchy = cv2.findContours(thresh, cv2.RETR_EXTERNAL, cv2.CHAIN_APPROX_SIMPLE)

filtered_contours = []
for cnt in contours:
    print(cv2.contourArea(cnt))
    if cv2.contourArea(cnt) > 50:
        cv2.drawContours(image, cnt, -1, (0, 154, 255),2)
        filtered_contours.append(cnt)

all_check_piece_contours = np.vstack((filtered_contours))

hull = cv2.convexHull(all_check_piece_contours)

cv2.drawContours(image, [hull], -1, (0, 255, 0), 2)
np.vstack:用于在垂直方向上(即沿着第一个轴)堆叠数组,接受一个或多个数组作为输入,并返回一个新的数组。
6、图像膨胀腐蚀
图像的膨胀(dilation)和腐蚀(erosion)主要用来寻找图像中的极大区域和极小区域。
膨胀类似于“领域扩张”,将图像的高亮区域或白色部分进行扩张,其运行结果图比原图的高亮区域更大。
腐蚀类似于“领域被蚕食”,将图像中的高亮区域或白色部分进行缩减细化,其运行结果图比原图的高亮区域更小。
7、伽马变换
伽马变换是非线性图像增强的方法,主要用于调整图像的亮度、对比度和颜色平衡。
# 设定伽马值
gamma = 0.5

# 对图像进行伽马变换,img为原始图像
gamma_correction = np.power(img / 255.0, gamma)
gamma_correction = (gamma_correction * 255).astype(np.uint8)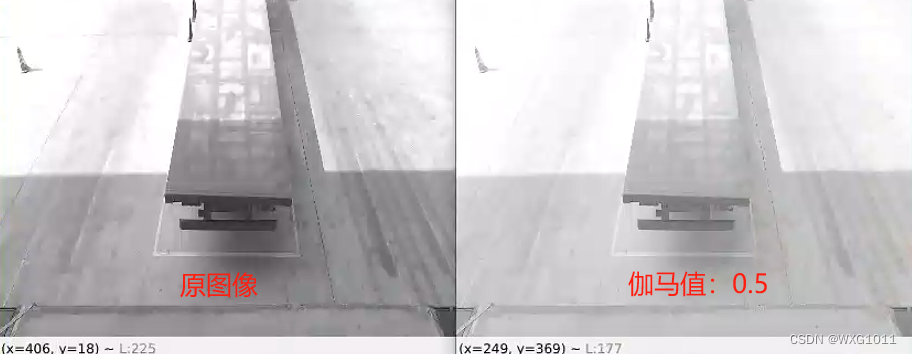
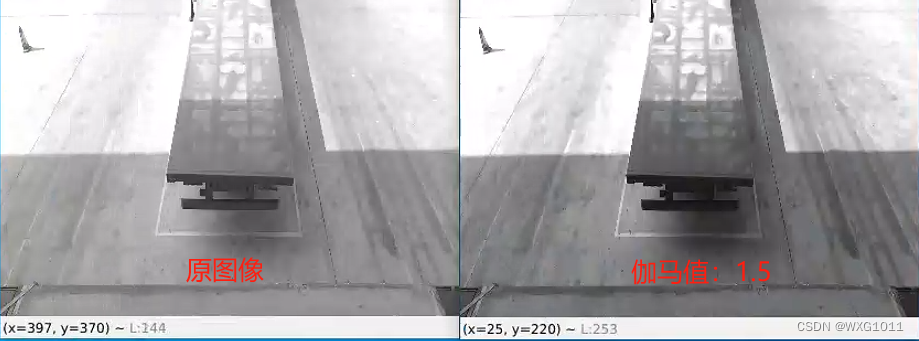
伽马值>1,图像的高灰度区域对比度得到增强,直观效果是一幅偏亮的图像变暗。
伽马值<1,图像的低灰度区域对比度得到增强,直观效果是一幅偏暗的图像变亮。


 3万+
3万+

 被折叠的 条评论
为什么被折叠?
被折叠的 条评论
为什么被折叠?
 到【灌水乐园】发言


