


PyTorch Tensor的初始化和基本操作
一、定义/初始化张量 tensor
1,概念
tensor,即“张量”。实际上跟numpy数组、向量、矩阵的格式基本一样。但是是专门针对GPU来设计的,可以运行在GPU上来加快计算效率。
PyTorch中定义tensor,就跟numpy定义矩阵、向量差不多,例如定义一个5×3的tensor,每一项都是0的张量:
x = torch.zeros(5,3)
如果想查看某个tensor的形状的话,使用:
z.size(),或者z.shape,但是前者更常用。
2,创建和使用
我们声明一个Tensor,并打印它,例如:
import torch
#定义一个Tensor矩阵
a = torch.Tensor([1, 2], [3, 4],[5, 6], [7, 8])
print(a)
print('{}'.format(a))
然后会发现报以下错误:
new() received an invalid combination of arguments - got (list, list, list, list), but expected one of: * (torch.device device) * (torch.Storage storage) * (Tensor other) * (tuple of ints size, torch.device device) * (object data, torch.device device)
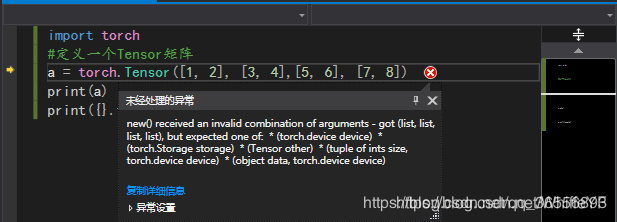
意思是接收到无效的参数组合。其实是少写了一对中括号,这是初学者的常用错误。
2.改成如下形式:
import torch
#定义一个Tensor矩阵
a = torch.Tensor([[1, 2], [3, 4],[5, 6], [7, 8]])
print(a)
print('{}'.format(a))
tensor([[1., 2.],
        [3., 4.],
        [5., 6.],
        [7., 8.]])
tensor([[1., 2.],
        [3., 4.],
        [5., 6.],
        [7., 8.]])
二、基本操作、运算
1,tensor的切片、合并、变形、抽取操作
torch.cat(seq, dim=0, out=None)
把一堆tensor丢进去,按照dim指定的维度拼接、堆叠在一起.
比如:
x = torch.tensor([[1,2,3]])
print("x:",x,"\n")

#按第0维度堆叠,对于矩阵,相当于“竖着”堆
print(torch.cat((x,x,x),0),"\n")

#按第1维度堆叠,对于矩阵,相当于“横着”拼
print(torch.cat((x,x,x),1))
x: tensor([[1, 2, 3]])

tensor([[1, 2, 3],
        [1, 2, 3],
        [1, 2, 3]])

tensor([[1, 2, 3, 1, 2, 3, 1, 2, 3]])
torch.chunk(tensor, chunks, dim=0)
把tensor切成块,数量由chunks指定
例如:
a = torch.arange(10)
print("a",a,"\n")
torch.chunk(a,4)
print(torch.chunk(a,4))
a tensor([0, 1, 2, 3, 4, 5, 6, 7, 8, 9])

(tensor([0, 1, 2]), tensor([3, 4, 5]), tensor([6, 7, 8]), tensor([9]))
改变形状:
torch.reshape(input, shape)以及tensor.view(shape).前者是把tensor作为函数的输入,后者是任何tensor的函数。
实际上,二者的返回值,都只是让我们从另一种视角看某个tensor,所以不会改变本来的形状,除非你把结果又赋值给原来的tensor。下面给一个例子对比二者的用法:
# 单纯的调用view函数:
print("a.view:",a.view(2,5),"\n")

# a的形状并不会变化
print("a:",a,"\n")

# 试试reshape函数:
print("torch.reshape:",torch.reshape(a,[5,2]),"\n")

# a的形状依然不会变化:
print("a:",a,"\n")
a.view: tensor([[0, 1, 2, 3, 4],
        [5, 6, 7, 8, 9]])

a: tensor([0, 1, 2, 3, 4, 5, 6, 7, 8, 9])

torch.reshape: tensor([[0, 1],
        [2, 3],
        [4, 5],
        [6, 7],
        [8, 9]])

a: tensor([0, 1, 2, 3, 4, 5, 6, 7, 8, 9])
要想让a的形状变化,比如把结果赋值给a,比如a = a.view(2,5)
2, tensor生成各种矩阵
如果想生成一个全为0的矩阵,可以输入如下代码:
b = torch.zeros((4, 2))
print(b)
tensor([[0., 0.],
        [0., 0.],
        [0., 0.],
        [0., 0.]])
如果想生成不同类型的数据,可以改变torch.后面函数名称,例如下面这样
c = torch.IntTensor([[1, 2], [3, 4],[5, 6], [7, 8]])
print(c)
d = torch.LongTensor([[1, 2], [3, 4],[5, 6], [7, 8]])
print(d)
e = torch.DoubleTensor([[1, 2], [3, 4],[5, 6], [7, 8]])
print(e)
tensor([[1, 2],
        [3, 4],
        [5, 6],
        [7, 8]], dtype=torch.int32)
tensor([[1, 2],
        [3, 4],
        [5, 6],
        [7, 8]])
tensor([[1., 2.],
        [3., 4.],
        [5., 6.],
        [7., 8.]], dtype=torch.float64)
如果想访问Tensor里的一个元素或者改变它,可以输入如下代码:
print(e[1, 1])
#改变元素值
e[1, 1] = 3
print(e[1, 1])
tensor(4., dtype=torch.float64)
tensor(3., dtype=torch.float64)
3,基本数学操作
torch.reciprocal(input, out=None)
说明:返回一个新张量,包含输入input张量每个元素的倒数。
参数:
input(Tensor) – 输入张量
out(Tensor, 可选) – 输出张量
a = torch.randn(5)
print("a:",a,"\n")
print("torch.reciprocal:",torch.reciprocal(a))
a: tensor([-0.5557,  0.2982, -0.3624,  0.1239, -0.0812])

torch.reciprocal: tensor([ -1.7997,   3.3535,  -2.7596,   8.0717, -12.3156])
torch.sigmoid(input, out=None)
说明:返回一个新张量,包含输入input张量每个元素的sigmoid值
参数:
input(Tensor) – 输入张量
out(Tensor,可选) – 输出张量
a = torch.randn(4)
print("a:",a,"\n")
print("torch.sigmoid(a:",torch.sigmoid(a))
a: tensor([ 0.0129,  0.4602, -0.0624,  1.6125])

torch.sigmoid(a: tensor([0.5032, 0.6131, 0.4844, 0.8338])
三、Torch Tensor与Numpy的互相转换
Tensor–>Numpy
直接用.numpy()即可。但是注意,转换后,numpy的变量和原来的tensor会共用底层内存地址,所以如果原来的tensor改变了,numpy变量也会随之改变。参见下面的例子:
a = torch.ones(2,4)
print("a:",a,"\n")
b = a.numpy()
print("b:",b,"\n")
a: tensor([[1., 1., 1., 1.],
        [1., 1., 1., 1.]])

b: [[1. 1. 1. 1.]
 [1. 1. 1. 1.]]
Numpy–>Tensor
用torch.from_numpy()来转换。参见下面例子:
import numpy as np
a = np.ones(5)
b = torch.from_numpy(a)
np.add(a, 1, out=a)
print(a)
print(b)
[2. 2. 2. 2. 2.]
tensor([2., 2., 2., 2., 2.], dtype=torch.float64)
四、Tensor放到GPU上执行
1.通过如下代码判断是否支持GPU:
if torch.cuda.is_available():
    a = torch.Tensor([[1, 2], [3, 4],[5, 6], [7, 8]])
    h = a.cuda()
    print(h)
生成结果会慢一下,然后可以看到多了一个device=‘cuda:0’:
tensor([[1., 2.],
        [3., 4.],
        [5., 6.],
        [7., 8.]], device='cuda:0')


 1753
1753

 被折叠的 条评论
为什么被折叠?
被折叠的 条评论
为什么被折叠?
 到【灌水乐园】发言


