


1.背景介绍
本文为复现 kaggle cf 时间序列预测竞赛排行榜第五名代码的记录及相关个人理解、解析。
竞赛链接
第五名代码链接
1.1 数据集概览
竞赛链接中,可以看到数据集每个文件的简介。下载原数据集:
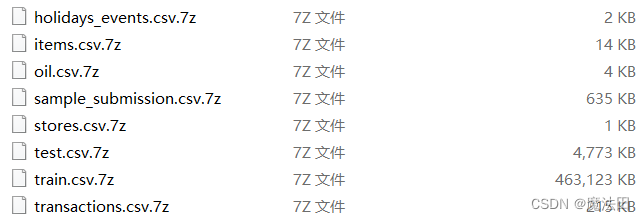
其中最主要的为train(解压后高达4.65G) & test文件,简单查看:
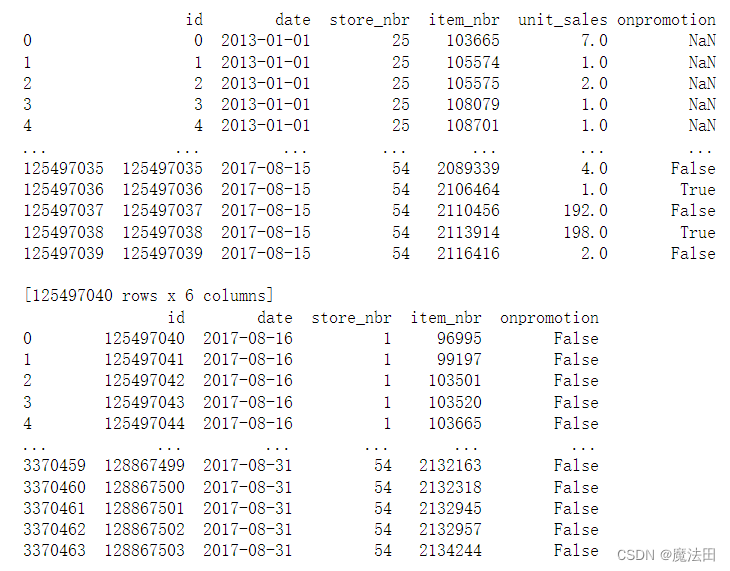 其他文件中大致内容可查看kaggle竞赛链接
2.整体结构 与 思路
第五名代码中给出四个.py文件,分别为:
cnn.py
lgbm.py
seq2seq.py
Utils.py
从readme中可了解到获奖者的思路为:
## Model Overview

I build 3 models:
a Gradient Boosting(LGBM), a CNN+DNN and a seq2seq RNN model.
Final model was a weighted average of these models (where each model is stabilized by
training multiple times with different random seeds then take the average).
Each model separately can stay in top 1% in the final ranking.
***每个模型单独的预测结果可以达到最终排行榜的前1%

**LGBM:** It is an upgraded model from the public kernels.
More features, data and periods were fed to the model.

**CNN+DNN:** This is a traditional NN model, where the CNN part is a dilated causal convolution inspired by WaveNet,
and the DNN part is 2 FC layers connected to raw sales sequences.
Then the inputs are concatenated together with categorical embeddings and future promotions,
and directly output to 16 future days of predictions.

**RNN:** This is a seq2seq model with a similar architecture of @Arthur Suilin's solution for the web traffic prediction.
Encoder and decoder are both GRUs.
The hidden states of the encoder are passed to the decoder through an FC layer connector.
This is useful to improve the accuracy significantly.

## How to Run the Model

Three models are in separate .py files as their filename tell.

Before running the models, download the data from the competition website, and add records of 0 with any existing store-item combo on every Dec 25th in the training data.

Then use the function *load_data()* in Utils.py to load and transform the raw data files,
and use *save_unstack()* to save them to feather files.

In the model codes, change the input of *load_unstack()* to the filename you saved.
Then the models can be runned. Please read the codes of these functions for more details.

Note: if you are not using a GPU, change CudnnGRU to GRU in seq2seq.py
模型思路:
获奖者使用了三个模型,提交的结果为三个模型的均值
lgbm.py: lightGBM模型
什么是lightGBM
cnn.py: cnn与dnn的组合。其中cnn为waveNet,dnn为两个全连接层
什么是waveNet
seq2seq.py:一种特殊结构的rnn
运行顺序:
- Utils.py文件中定义了许多处理数据的函数,先调用其中的 load_data() 函数,如下:
def load_data():

    df_train = pd.read_csv('train.csv', usecols=[1, 2, 3, 4, 5],
                           converters={
   'unit_sales': lambda u: np.log1p(float(u)) if float(u) > 0 else 0},
                           parse_dates=["date"])
    df_test = pd.read_csv("test.csv", usecols=[0, 1, 2, 3, 4], dtype={
   'onpromotion': bool},
                          parse_dates=["date"]).set_index(['store_nbr', 'item_nbr', 'date'])

    df_train['onpromotion'] = df_train['onpromotion'].fillna("False")
    df_train['onpromotion'] = df_train['onpromotion'].astype(bool)

	#没有圣诞节的数据,这里填充
    # add Dec 25th
    df = df_train
    for i in range(2013, 2017):
        df_append = df_train.loc[df_train['date'] == '2017-8-15']
        df_append.loc[:, 'date'] = datetime(i,12,25,0,0,0)
        df_append.loc[:, 'unit_sales'] = 0
        df_append.loc[:, 'onpromotion'] = False
        df = pd.concat([df, df_append])

    #本人运行seq2seq模型时,由于原数据集过大,故切取了store 33&43 数据子集。
    #这部分数据集中,缺少一月一日的数据,以下补上。
    # filling 33_43 missing 01-01
    for i in range(2013, 2018):
        df_append = df_train.loc[df_train['date'] == '2017-8-15']
        df_append.loc[:, 'date'] = datetime(i,1,1,0,0,0)
        df_append.loc[:, 'unit_sales'] = 0
        df_append.loc[:, 'onpromotion'] = False
        df = pd.concat([df, df_append])


    df = df.sort_values('date', ascending=[True])
    df_train=df
    del df
    # subset data
    df_2017 = df_train.loc[df_train.date>=pd.datetime(2014,1,1)] #原为2016
    del df_train
    # promo 压缩为多级索引表
    promo_2017_train = df_2017.set_index(
    ["store_nbr", "item_nbr", "date"])[["onpromotion"]].unstack(
        level=-1).fillna(False)
    promo_2017_train.columns = promo_2017_train.columns.get_level_values(1)
    promo_2017_test = df_test[["onpromotion"]].unstack(level=-1).fillna(False)
    promo_2017_test.columns = promo_2017_test.columns.get_level_values(1)
    promo_2017_test = promo_2017_test.reindex(promo_2017_train.index).fillna(False)
    promo_2017 = pd.concat([promo_2017_train, promo_2017_test], axis=1)
    del promo_2017_test, promo_2017_train

	#将df_2017压缩为多级索引表
    df_2017 = df_2017.set_index(
    ["store_nbr", "item_nbr", "date"])[["unit_sales"]].unstack(
        level=-1).fillna(0)
    df_2017.columns = df_2017.columns.get_level_values(1)

    # items
    items = pd.read_csv("items.csv").set_index("item_nbr")
    stores = pd.read_csv("stores.csv").set_index("store_nbr")
    # items = items.reindex(df_2017.index.get_level_values(1))

    return df_2017, promo_2017, items, stores
这里可看见,读取数据时没有保留原本的时间区间,只选取了14年后的数据(也可以自己取多一点)
- 调用save_unstack(),保存为feather格式文件
def save_unstack(df, promo, filename):
    df_name, promo_name = 'df_' + filename + '_raw', 'promo_' + filename + '_raw'
    df.columns = df.columns.astype('str')
    df.reset_index().to_feather(df_name)
    promo.columns = promo.columns.astype('str')
    promo.reset_index().to_feather(promo_name)
- 分别运行三个模型.py文件。
3.环境设置
conda:
python==3.6
cudatoolkit==10.1.168
cudnn==7.6.5

pip:
tensorflow-gpu==2.3.0
numpy==1.18.5
pandas==1.1.5
scikit-learn==0.24.2
lightgbm==2.3.0
4.模型代码解析
4.1 cnn.py
- general import
import os
import numpy as np
import pandas as pd
from datetime import date, timedelta
from sklearn import metrics
from sklearn.preprocessing import MinMaxScaler, LabelEncoder

#由于竞赛时间较早,当时所用的tf多为1.x版本。
#以下tf调用方法,使2.x版本与1.x版本的调用兼容
import tensorflow.compat.v1 as tf
tf.disable_v2_behavior()
tf.reset_default_graph()
tf.compat.v1.disable_eager_execution()

#以下调用方法,解决tensorflow与keras的版本兼容问题
#import keras
from tensorflow.keras.models import Sequential, Model
from tensorflow.keras.layers import *
from tensorflow.keras import optimizers
import gc

from Utils import *
os.environ['TF_CPP_MIN_LOG_LEVEL'] = '3' # suppress tf warnings
- load data
# data after 2015

df = df[pd.date_range(date(2015,6,1), date(2017,8,15))]
promo_df = promo_df[pd.date_range(date(2015,6,1), date(2017,8,31))]

promo_df = promo_df[df[pd.date_range(date(2017,1,1), date(2017,8,15))].max(axis=1)>0]
df = df[df[pd.date_range(date(2017,1,1), date(2017,8,15))].max(axis=1)>0]
promo_df
最低0.47元/天 解锁文章


 2900
2900

 被折叠的 条评论
为什么被折叠?
被折叠的 条评论
为什么被折叠?
 到【灌水乐园】发言


