先声明一下,本文参考了何红辉的《Android开发进阶 从小工到专家》第二章节内容。
在Android开发中,尽管Android源代码库中已经提供给我们很多功能强大的View,但在开发中总是会出现不完全满足我们需求的情况,这时候自定义控件就是我们必须使用的实现方式。
假设我们要实现一个进度条,首先,我们先创建一个类SimpleView2继承View,并且在类中声明我们需要的属性:
public class SimpleView2 extends View {
    //画笔
    private Paint mPaint;

    private int progress;//进度
    private int bgcolor;//背景颜色
    private int procolor;//进度颜色

    public SimpleView2 (Context context) {
        this(context,null);
    }

    public ViewDemo(Context context, @Nullable AttributeSet attrs) {
        super(context, attrs);
    }
}
接下来,在res/values/attr.xml文件下(如果没有,则自己创建),添加对应属性和对应的类型的声明:
<declare-styleable name="SimpleView2 ">
    <attr name="progress" format="integer"/>
    <attr name="bgcolor" format="color"/>
    <attr name="procolor" format="color"/>
</declare-styleable>
注意name属性中的名字必须和自定义View的类名一样。
这时候我们可以在SimpleView2.java中获取到使用该组件对应的值:
private void initAttrs(AttributeSet attrs){
    if(attrs==null){
        return;
    }
    mWidth=400;
    mHeight=30;
    //获得所有的属性
    TypedArray array=getContext().obtainStyledAttributes(attrs,R.styleable.SimpleView2);
    progress=array.getInteger(R.styleable.SimpleView2_progress,0);
    bgcolor=array.getColor(R.styleable.SimpleView2_bgcolor,Color.GRAY);
    procolor=array.getColor(R.styleable.SimpleView2_procolor,Color.CYAN);
    array.recycle();//回收TypedArray
}
并且在构造函数中调用该函数:
public SimpleView2(Context context, @Nullable AttributeSet attrs){
    super(context,attrs);
    initAttrs(attrs);
    //初始化画笔
    mPaint=new Paint();
}
View在绘制View之前,会先调用onMeasure方法去设置View的宽和高:
@Override
protected void onMeasure(int widthMeasureSpec,int heightMeasureSpec){
    setMeasuredDimension(mWidth,mHeight);
}
@Override
protected void onDraw(Canvas canvas){
    mPaint.setColor(bgcolor);//设置进度条背景颜色
    RectF rectF=new RectF();//背景的矩形
    rectF.set(3,3,mWidth-3,mHeight-3);
    canvas.drawRoundRect(rectF,3,3,mPaint);
    mPaint.setColor(procolor);
    RectF proRect=new RectF();//进度的矩形
    proRect.set(3,3,mWidth*((float)progress/100),mHeight-3);
    canvas.drawRoundRect(proRect,3,3,mPaint);
}
另外,我们还需要一个函数来设置进度条的进度:
public void setProgress(int progress){
    if(progress<0||progress>100){
        return;
    }
    this.progress=progress;
    //重绘组件
    postInvalidate();
}
现在自定义进度条的基本功能就已经实现了,我们可以在布局文件中直接引用:
<?xml version="1.0" encoding="utf-8"?>
<RelativeLayout xmlns:android="http://schemas.android.com/apk/res/android"
    xmlns:app="http://schemas.android.com/apk/res-auto"
    xmlns:tools="http://schemas.android.com/tools"
    android:layout_width="match_parent"
    android:layout_height="match_parent"
    tools:context="com.example.amia.defineviewdemo.MainActivity">

    <com.example.amia.defineviewdemo.SimpleView2
        android:layout_centerInParent="true"
        android:id="@+id/progress"
        app:progress="0"
        android:layout_width="wrap_content"
        android:layout_height="wrap_content" />

</RelativeLayout>
注意,在使用自定义组件的时候,我们需要引进对应属性所在的命名空间,即上述代码中的:
xmlns:app="http://schemas.android.com/apk/res-auto"它的规则为:
xmlns:名字=”http://schemas.android.com/apk/res/应用包名”
或者:
xmlns:名字=“http://schemas.android.com/apk/res/ res-auto”
为了模拟进度条滚动,我在Activity中设置了它的进度:
public class MainActivity extends AppCompatActivity {

    private SimpleView2 simpleView2;
    @Override
    protected void onCreate(Bundle savedInstanceState) {
        super.onCreate(savedInstanceState);
        setContentView(R.layout.activity_main);
        simpleView2=findViewById(R.id.progress);
        new Thread(new Runnable() {
            int progress=0;
            @Override
            public void run() {
                while(progress<100) {
                    try {
                        Thread.sleep(1000);
                    } catch (InterruptedException e) {
                        e.printStackTrace();
                    }
                    progress += 10;
                    Message msg = handler.obtainMessage();
                    msg.what = progress;
                    handler.sendMessage(msg);
                }
            }
        }).start();
    }

    Handler handler=new Handler(){
        @Override
        public void handleMessage(Message msg){
            int progress=msg.what;
            simpleView2.setProgress(progress);
        }
    };
}
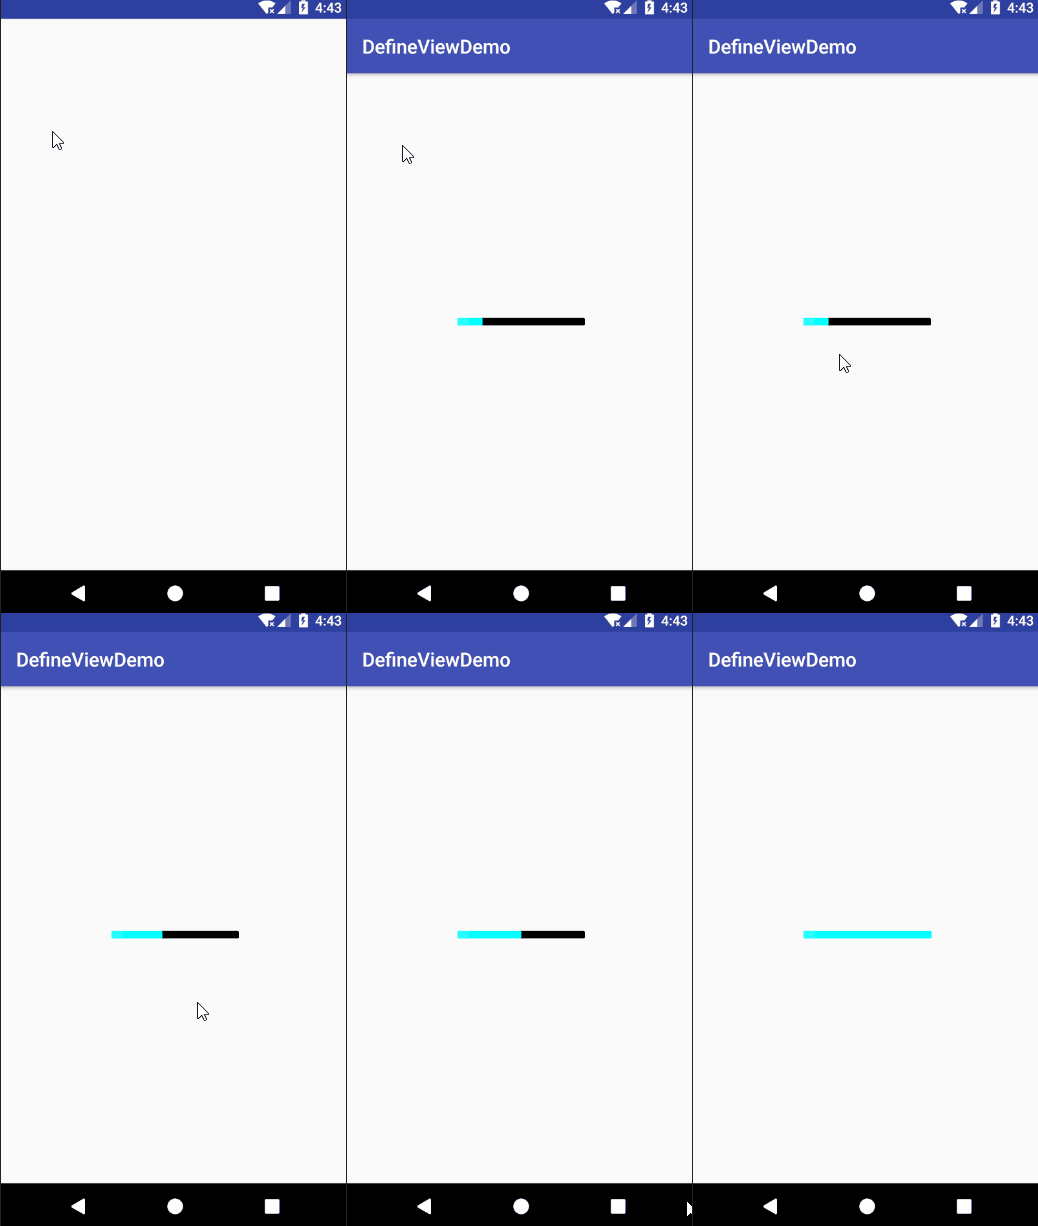
最后实现效果:

这时候需求看起来就基本实现了。但是,有一个问题,当你设置组件宽度为match_parent时,发现组件没法自动适配屏幕宽度。
为了让组件能够满足我们适应屏幕宽高的需求,我们需要在onMeasure方法中对组件进行根据模式测量宽高:
@Override
protected void onMeasure(int widthMeasureSpec,int heightMeasureSpec){
    //setMeasuredDimension(mWidth,mHeight);
    int widthMode=MeasureSpec.getMode(widthMeasureSpec);
    int width=MeasureSpec.getSize(widthMeasureSpec);
    int heightMode=MeasureSpec.getMode(heightMeasureSpec);
    int height=MeasureSpec.getSize(widthMeasureSpec);
    int temp=measureSize(widthMode,width);
    mWidth=temp==0?mWidth:temp;
    temp=measureSize(heightMode,height);
    mHeight=temp==0?mHeight:temp;
    setMeasuredDimension(mWidth,mHeight);
}
private int measureSize(int mode,int defsize){
    int size=0;
    switch (mode){
        case MeasureSpec.UNSPECIFIED:
        case MeasureSpec.AT_MOST:
            break;
        case MeasureSpec.EXACTLY:
            size=defsize;
            break;
    }
    return size;
}
在视图树渲染是View系统会从根视图的perform开始调用measure()方法,利用measure()方法传入的两个参数widthMeasureSpec和heightMeasureSpec来确定视图的宽高模式等信息。MeasureSpec的值是由specSize和specMode组成,前者用于记录大小,后者用于记录规格。
其中规格办好一下三种类型:
EXACTLY:父视图希望大小由specSize来决定,match_parent对应这个模式;
AT_MOST:子视图最多是specSize大小,开发者只能尽量小于这个值去设置视图,wrap_content对应这个模式;
UNSPECIFIED:开发者可以按照自己的意愿调整任何大小,没有任何限制。
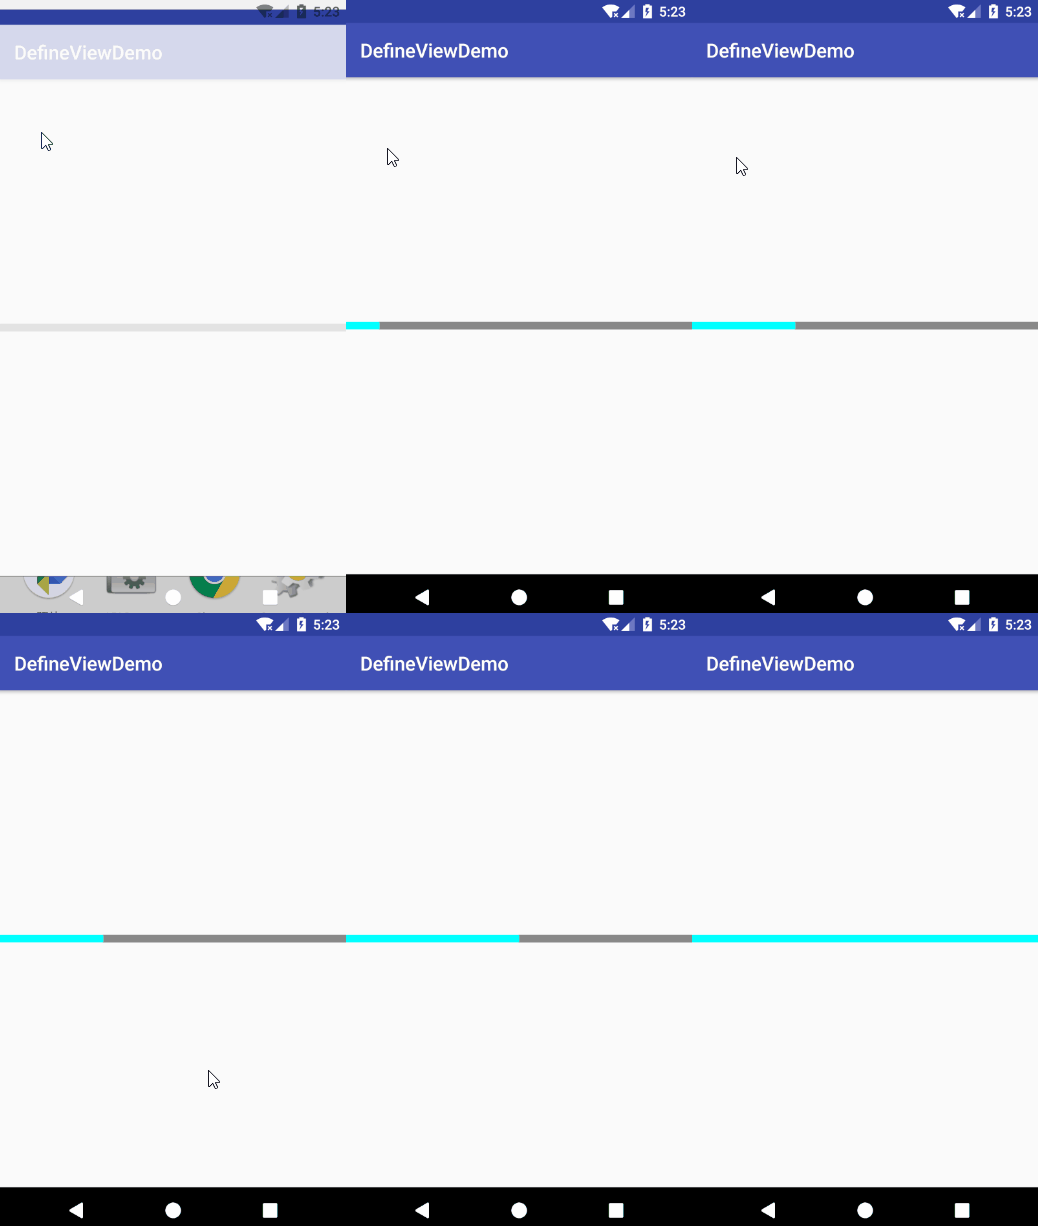
经过onMeasure测量宽高之后再绘制,我们就能够设置我们需求宽度的自定义组件,最终结果:


 1367
1367

 被折叠的 条评论
为什么被折叠?


