


- 🍨 本文为🔗365天深度学习训练营 中的学习记录博客
- 🍖 原作者:K同学啊
一、环境
- 语言:Python3、Pytorch
- 开发环境
- 电脑系统:Windows 10
- 语言环境:Python 3.9.2
- 编译器:VS Code
- 显卡:3060
- CUDA版本:Release 11.4, V11.4.48
- 本周任务:根据网络结构图以及第Y1~Y5的内容修改对应代码,并跑通程序。
二、代码修改
- 首先在common.py文件中将C3修改为C2
原代码:
class C3(nn.Module):
    # CSP Bottleneck with 3 convolutions
    def __init__(self, c1, c2, n=1, shortcut=True, g=1, e=0.5):  # ch_in, ch_out, number, shortcut, groups, expansion
        super().__init__()
        c_ = int(c2 * e)  # hidden channels
        self.cv1 = Conv(c1, c_, 1, 1)
        self.cv2 = Conv(c1, c_, 1, 1)
        self.cv3 = Conv(2 * c_, c2, 1)  # optional act=FReLU(c2)
        self.m = nn.Sequential(*(Bottleneck(c_, c_, shortcut, g, e=1.0) for _ in range(n)))

    def forward(self, x):
        return self.cv3(torch.cat((self.m(self.cv1(x)), self.cv2(x)), 1))
修改后代码:
class C2(nn.Module):
    # CSP Bottleneck with 3 convolutions
    def __init__(self, c1, c2, n=1, shortcut=True, g=1, e=0.5):  # ch_in, ch_out, number, shortcut, groups, expansion
        super().__init__()
        c_ = int(c2 * e)  # hidden channels
        self.cv1 = Conv(c1, c_, 1, 1)
        self.cv2 = Conv(c1, c_, 1, 1)
        self.m = nn.Sequential(*(Bottleneck(c_, c_, shortcut, g, e=1.0) for _ in range(n)))

    def forward(self, x):
        return torch.cat((self.m(self.cv1(x)), self.cv2(x)), 1)
- 其次在yolo.py中修改,使整个程序能识别C2
def parse_model(d, ch):  # model_dict, input_channels(3)
    # Parse a YOLOv5 model.yaml dictionary
    LOGGER.info(f"\n{'':>3}{'from':>18}{'n':>3}{'params':>10}  {'module':<40}{'arguments':<30}")
    anchors, nc, gd, gw, act, ch_mul = (
        d["anchors"],
        d["nc"],
        d["depth_multiple"],
        d["width_multiple"],
        d.get("activation"),
        d.get("channel_multiple"),
    )
    if act:
        Conv.default_act = eval(act)  # redefine default activation, i.e. Conv.default_act = nn.SiLU()
        LOGGER.info(f"{colorstr('activation:')} {act}")  # print
    if not ch_mul:
        ch_mul = 8
    na = (len(anchors[0]) // 2) if isinstance(anchors, list) else anchors  # number of anchors
    no = na * (nc + 5)  # number of outputs = anchors * (classes + 5)

    layers, save, c2 = [], [], ch[-1]  # layers, savelist, ch out
    for i, (f, n, m, args) in enumerate(d["backbone"] + d["head"]):  # from, number, module, args
        m = eval(m) if isinstance(m, str) else m  # eval strings
        for j, a in enumerate(args):
            with contextlib.suppress(NameError):
                args[j] = eval(a) if isinstance(a, str) else a  # eval strings

        n = n_ = max(round(n * gd), 1) if n > 1 else n  # depth gain
        if m in {
            Conv,
            GhostConv,
            Bottleneck,
            GhostBottleneck,
            SPP,
            SPPF,
            DWConv,
            MixConv2d,
            Focus,
            CrossConv,
            BottleneckCSP,
            C3,
            C2,
            C3TR,
            C3SPP,
            C3Ghost,
            nn.ConvTranspose2d,
            DWConvTranspose2d,
            C3x,
        }:
            c1, c2 = ch[f], args[0]
            if c2 != no:  # if not output
                c2 = make_divisible(c2 * gw, ch_mul)

            args = [c1, c2, *args[1:]]
            if m in {BottleneckCSP, C3, C2, C3TR, C3Ghost, C3x}:
                args.insert(2, n)  # number of repeats
                n = 1
        elif m is nn.BatchNorm2d:
            args = [ch[f]]
        elif m is Concat:
            c2 = sum(ch[x] for x in f)
        # TODO: channel, gw, gd
        elif m in {Detect, Segment}:
            args.append([ch[x] for x in f])
            if isinstance(args[1], int):  # number of anchors
                args[1] = [list(range(args[1] * 2))] * len(f)
            if m is Segment:
                args[3] = make_divisible(args[3] * gw, ch_mul)
        elif m is Contract:
            c2 = ch[f] * args[0] ** 2
        elif m is Expand:
            c2 = ch[f] // args[0] ** 2
        else:
            c2 = ch[f]

        m_ = nn.Sequential(*(m(*args) for _ in range(n))) if n > 1 else m(*args)  # module
        t = str(m)[8:-2].replace("__main__.", "")  # module type
        np = sum(x.numel() for x in m_.parameters())  # number params
        m_.i, m_.f, m_.type, m_.np = i, f, t, np  # attach index, 'from' index, type, number params
        LOGGER.info(f"{i:>3}{str(f):>18}{n_:>3}{np:10.0f}  {t:<40}{str(args):<30}")  # print
        save.extend(x % i for x in ([f] if isinstance(f, int) else f) if x != -1)  # append to savelist
        layers.append(m_)
        if i == 0:
            ch = []
        ch.append(c2)
    return nn.Sequential(*layers), sorted(save)
- 最后在yolov5s.yaml文件中修改模型的结构
backbone:
  # [from, number, module, args]
  [
    [-1, 1, Conv, [64, 6, 2, 2]], # 0-P1/2
    [-1, 1, Conv, [128, 3, 2]], # 1-P2/4
    [-1, 3, C3, [128]], # C3*1 = 3, C3*2 = 6, C3*3 = 9
    [-1, 1, Conv, [256, 3, 2]], # 3-P3/8
    [-1, 6, C2, [256]],
    [-1, 1, Conv, [512, 3, 2]], # 5-P4/16
    [-1, 3, C3, [512]], # 8
    [-1, 1, SPPF, [1024, 5]], # 9
  ]
 head: [
    [-1, 1, Conv, [512, 3, 2]],
    [-1, 1, nn.Upsample, [None, 2, "nearest"]],
    [[-1, 6], 1, Concat, [1]], # cat backbone P4
    [-1, 3, C3, [512, False]], # 13

    [-1, 1, Conv, [256, 1, 1]],
    [-1, 1, nn.Upsample, [None, 2, "nearest"]],
    [[-1, 4], 1, Concat, [1]], # cat backbone P3
    [-1, 3, C3, [256, False]], # 17 (P3/8-small)

    [-1, 1, Conv, [256, 3, 2]],
    [[-1, 12], 1, Concat, [1]], # cat head P4
    [-1, 3, C3, [512, False]], # 20 (P4/16-medium)

    [-1, 1, Conv, [512, 3, 2]],
    [[-1, 8], 1, Concat, [1]], # cat head P5
    [-1, 3, C3, [1024, False]], # 23 (P5/32-large)

    [[15, 18, 21], 1, Detect, [nc, anchors]], # Detect(P3, P4, P5)
  ]
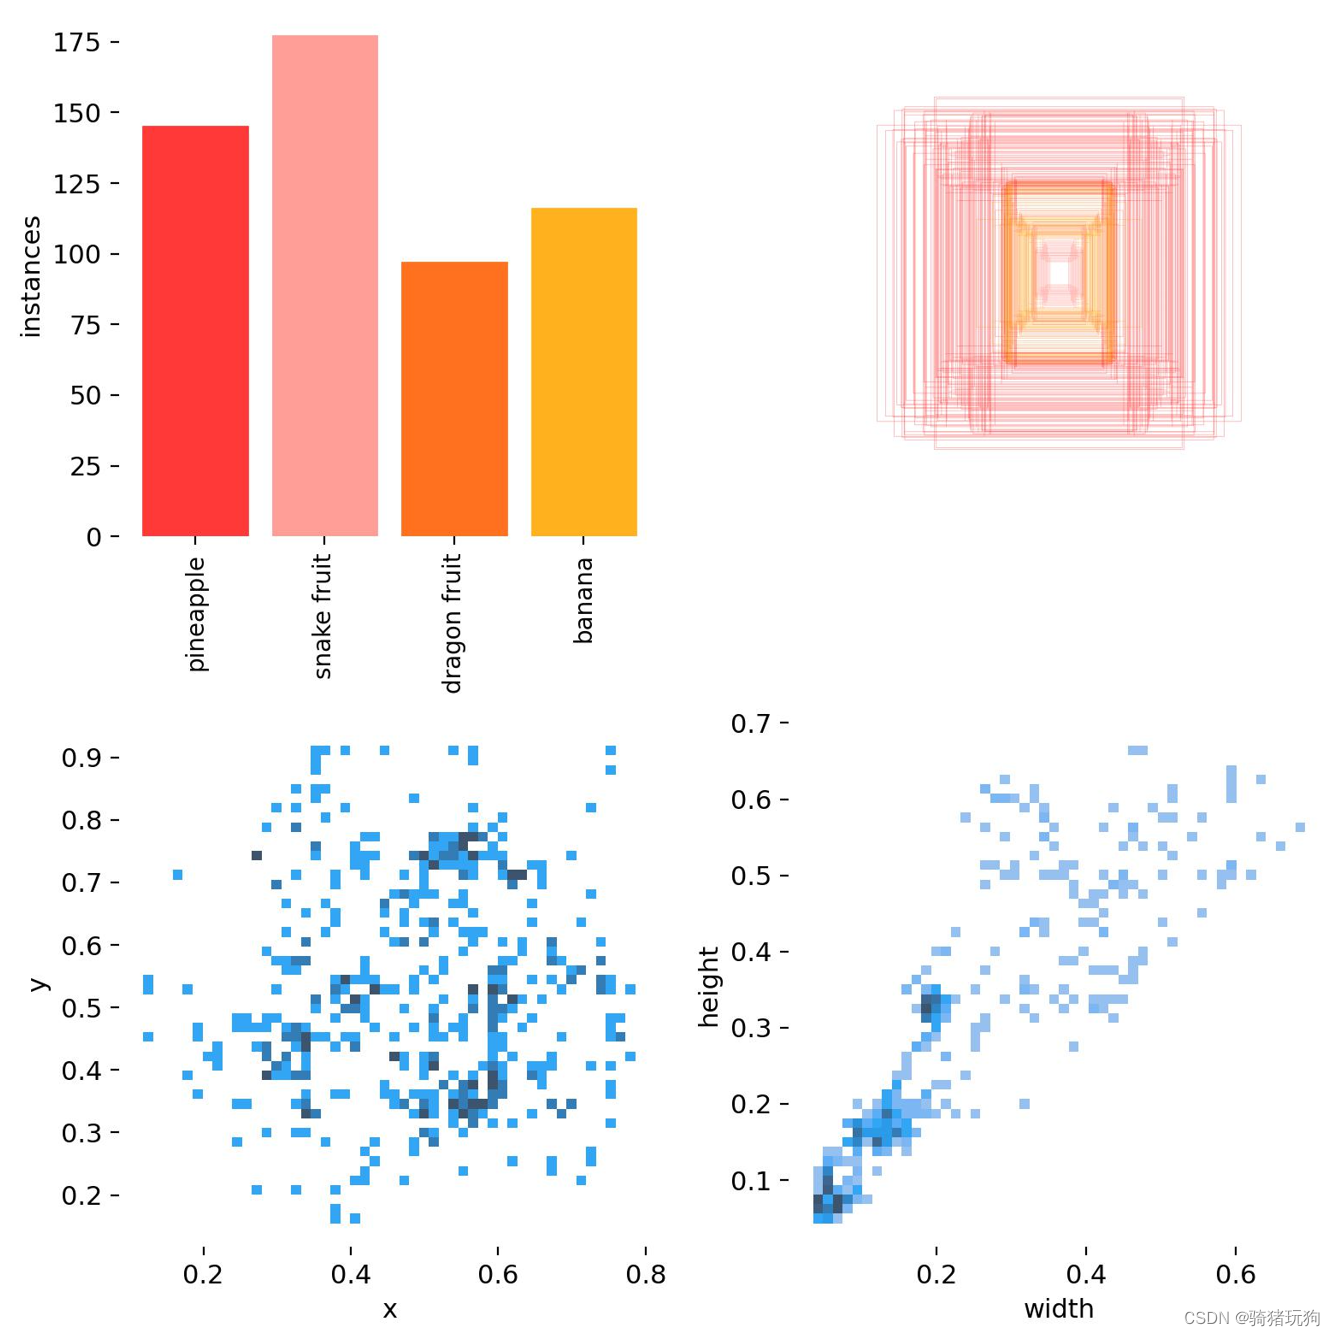
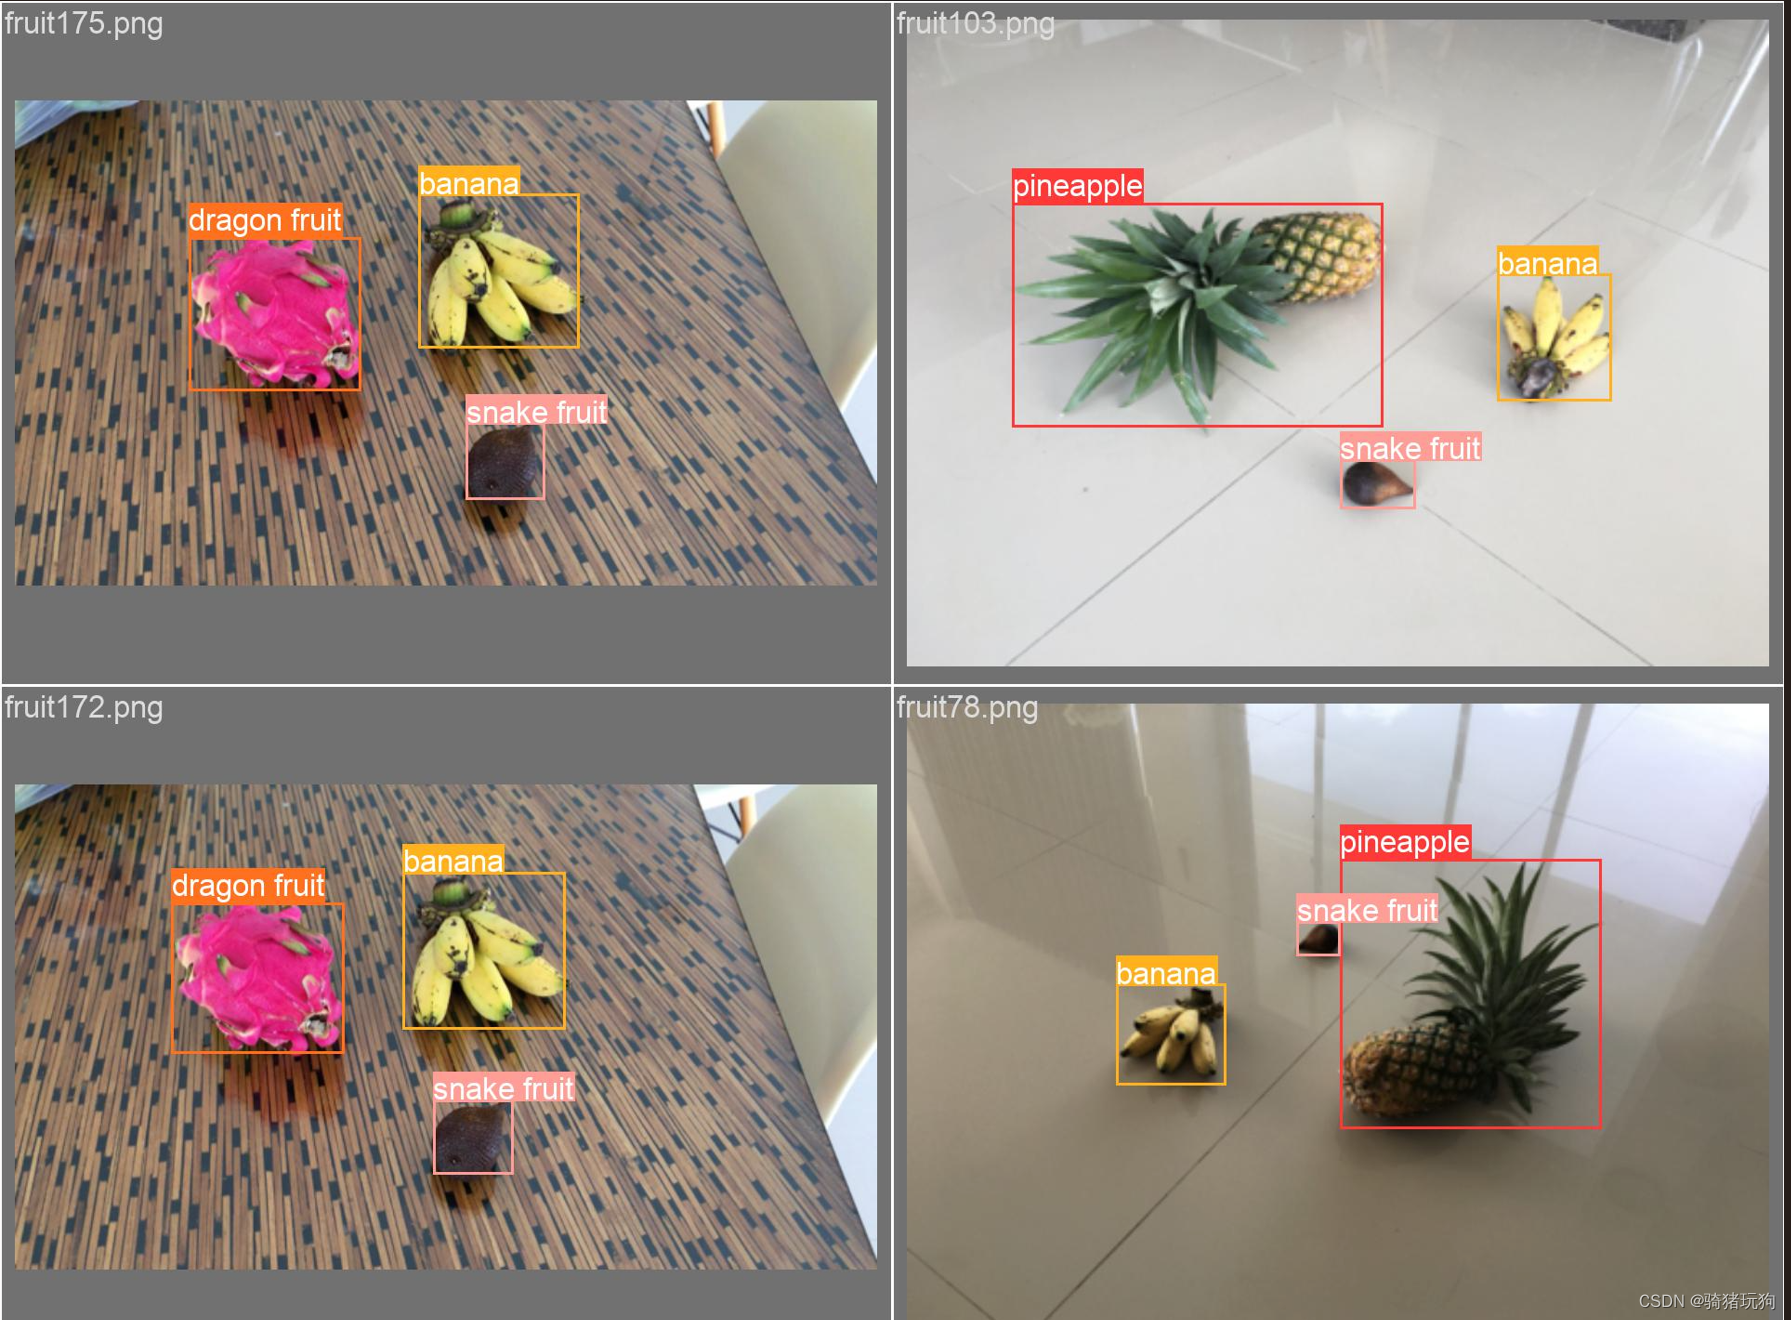
三、运行结果
四、总结
- 本周任务看似和上周差别不大,实际差别很大
- 在前几个步骤,和上周一样,不再赘述
- 在修改yolo5s.yaml文件时,需要特别注意
- 如果只修改backbone,其输出的宽度和高度经过上采样之后翻倍了,因此在concat步骤就会出错
- 将head后的第一部的Conv模块参数修改如下:
[-1, 1, Conv, [512, 3, 2]]
- 这代表将宽度和高度减半,就能进行Concat的运算
- 因此,在修改yolov5s.yaml时,不仅需要注意通道数的变化,还需要注意宽度、高度的变化


 736
736


 被折叠的 条评论
为什么被折叠?
被折叠的 条评论
为什么被折叠?
 到【灌水乐园】发言


