


由于毕设,需要opencv,又没能看到比较合适的教程,所以这里自己进行部分翻译。
我的操作系统:ubuntu16.04,没有使用集成IDE。
中文资料网站:
![]()
前面其实有编辑过一份翻译,但是又长又不好看,所以决定以要点方式进行总结性翻译,每篇翻译包含以下内容:
本篇总标题
官方原始链接
小节标题1
官方原始链接
小节内容
小节标题2
官方原始链接
小节内容
。。。
下面开始第一部分
-------------------------------------------------------------------------------------------------------------------------------------------------
基本安装使用
-
You will learn how to setup OpenCV on your computer!
linux下安装
-
Compatibility: > OpenCV 2.0
Author: Ana Huamán
We will learn how to setup OpenCV in your computer!
所需包
- GCC 4.4.x or later
- CMake 2.8.7 or higher
- Git
- GTK+2.x or higher, including headers (libgtk2.0-dev)
- pkg-config
- Python 2.6 or later and Numpy 1.5 or later with developer packages (python-dev, python-numpy)
- ffmpeg or libav development packages: libavcodec-dev, libavformat-dev, libswscale-dev
- [optional] libtbb2 libtbb-dev
- [optional] libdc1394 2.x
- [optional] libjpeg-dev, libpng-dev, libtiff-dev, libjasper-dev, libdc1394-22-dev
- [optional] CUDA Toolkit 6.5 or higher
安装命令
下载源码
cd ~/opencv
configuration
cmake -D CMAKE_BUILD_TYPE=Release -D CMAKE_INSTALL_PREFIX=/usr/local ..
build&install
make -j7 # runs 7 jobs in parallel
sudo make install
通过gcc、CMake使用OpenCV
-
Using OpenCV with gcc and CMake
Compatibility: > OpenCV 2.0
Author: Ana Huamán
We will learn how to compile your first project using gcc and CMake
创建程序
//DisplayImage.cpp
#include <stdio.h>
#include <opencv2/opencv.hpp>
using namespace cv;
int main(int argc, char** argv )
{
    if ( argc != 2 )
    {
        printf("usage: DisplayImage.out <Image_Path>\n");
        return -1;
    }
    Mat image;
    image = imread( argv[1], 1 );
    if ( !image.data )
    {
        printf("No image data \n");
        return -1;
    }
    namedWindow("Display Image", WINDOW_AUTOSIZE );
    imshow("Display Image", image);
    waitKey(0);
    return 0;
}
创建CMake配置
// CMakeLists.txt
cmake_minimum_required(VERSION 2.8)
project( DisplayImage )
find_package( OpenCV REQUIRED )
include_directories( ${OpenCV_INCLUDE_DIRS} )
add_executable( DisplayImage DisplayImage.cpp )
target_link_libraries( DisplayImage ${OpenCV_LIBS} )
编译
cd <DisplayImage_directory>
cmake .
make
效果
./DisplayImage lena.jpg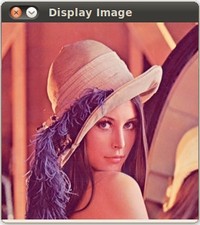
注,lena那张图片的位置:$OPENCV_HOME/samples/data/
读取展示图片
-
Compatibility: > OpenCV 2.0
Author: Ana Huamán
We will learn how to display an image using OpenCV
源码
Download the source code from here.
#include <opencv2/core.hpp>
#include <opencv2/imgcodecs.hpp>
#include <opencv2/highgui.hpp>
#include <iostream>
#include <string>
using namespace cv;
using namespace std;
int main( int argc, char** argv )
{
    String imageName( "../data/HappyFish.jpg" ); // by default
    if( argc > 1)
    {
        imageName = argv[1];
    }
    Mat image;
    image = imread( imageName, IMREAD_COLOR ); // Read the file
    if( image.empty() )                      // Check for invalid input
    {
        cout <<  "Could not open or find the image" << std::endl ;
        return -1;
    }
    namedWindow( "Display window", WINDOW_AUTOSIZE ); // Create a window for display.
    imshow( "Display window", image );                // Show our image inside it.
    waitKey(0); // Wait for a keystroke in the window
    return 0;
}
要点
- Load an image (using cv::imread ) 读取图片
- Create a named OpenCV window (using cv::namedWindow ) 创建窗口
- Display an image in an OpenCV window (using cv::imshow ) 通过窗口显示图片
修改和保存图片
-
Load, Modify, and Save an Image
Compatibility: > OpenCV 2.0
Author: Ana Huamán
We will learn how to save an Image in OpenCV...plus a small conversion to grayscale
#include <opencv2/opencv.hpp>
using namespace cv;
int main( int argc, char** argv )
{
 char* imageName = argv[1];
 Mat image;
 image = imread( imageName, 1 );
 if( argc != 2 || !image.data )
 {
   printf( " No image data \n " );
   return -1;
 }
 Mat gray_image;
 cvtColor( image, gray_image, COLOR_BGR2GRAY );
 imwrite( "../../images/Gray_Image.jpg", gray_image );
 namedWindow( imageName, WINDOW_AUTOSIZE );
 namedWindow( "Gray image", WINDOW_AUTOSIZE );
 imshow( imageName, image );
 imshow( "Gray image", gray_image );
 waitKey(0);
 return 0;
}
要点:
- Transform an image from BGR to Grayscale format by using cv::cvtColor 转换BGR格式为灰度格式
- Save your transformed image in a file on disk (using cv::imwrite ) 保存图片
使用依赖管理器
-
Using OpenCV with biicode dependency manager
Compatibility: > OpenCV 2.4
Author: biicode
We will learn how to setup and use OpenCV in Mac OS X, Linux and Windows
据说是能写一个代码,用这个工具直接安装OpenCV并配置工程。


 185
185

 被折叠的 条评论
为什么被折叠?
被折叠的 条评论
为什么被折叠?
 到【灌水乐园】发言


