


OpenGL Tessellation control Shader(细分曲面控制着色器)
OpenGL Tessellation
阶段:
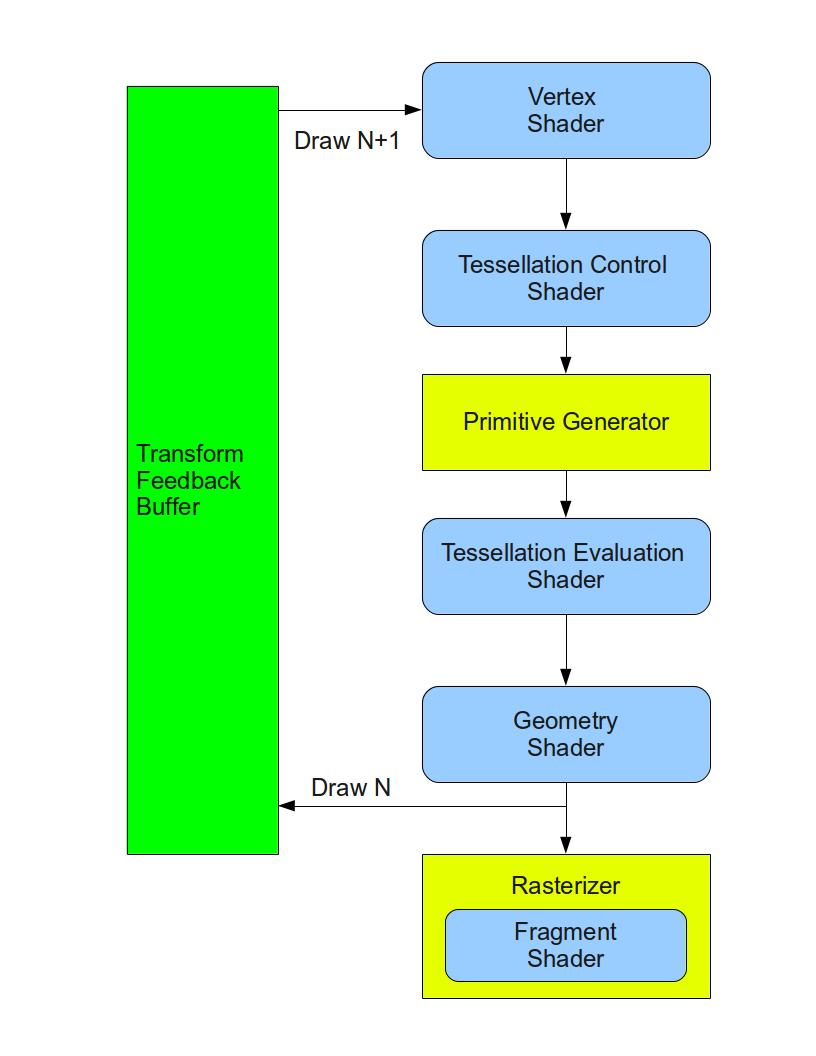
1,TCS: Tessellation Control Shader,细分控制材质
2,PG:Primitive Generator,图元生成器
3,TES:Tessellation Evalution Shader,细分执行材质
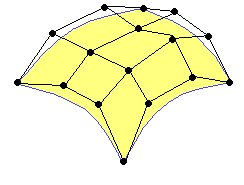
4,CP:Control Points,The TCS works on a group of vertices called Control Points (CP),TCS工作在一组控制点上,CP点得移动会影响 被控制的表面。
TCS阶段是输入一个patch 输出一个 patch,TCS还要计算一个重要的功能: Tessllation levels:TL,Tessellation level of detai - how many triangles to generate for the patch(在一个patch上生成多少个三角形)
如果rasterized triangle覆盖了100个像素,可以决定TL的值是3,如果覆盖了101-500 可以为7。
另外也可以根据摄像机距离来决定TL值。
TCS完成之后,PG就是执行细分。PG阶段并不是真正的细分,你可能连访问他的权限都没有。但是TL & subdives 来定义了一个新的概念:Domain,domain是一个2D 0-1区间square,或者3d的barycentric coordinates
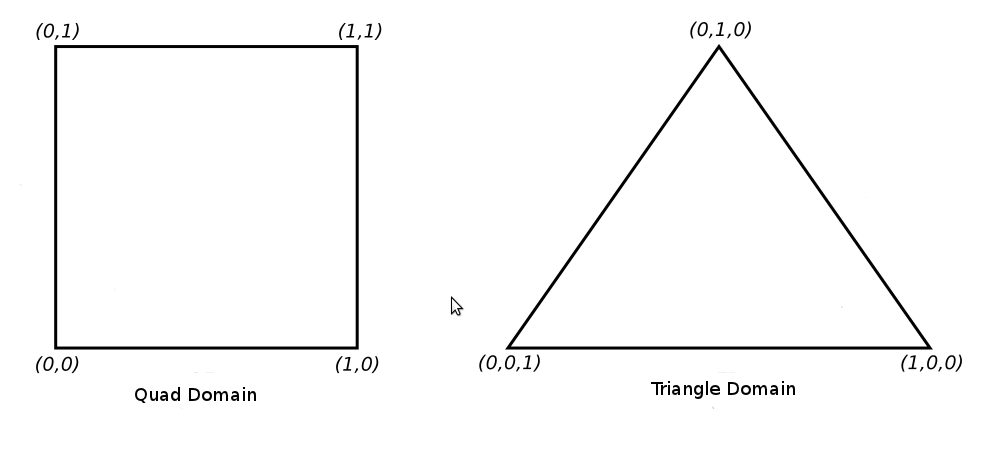
如右边的三角形,Barycentric coordinates坐标为:<1/3,1/3,1/3>,所以满足这个坐标,他的x+y+z = 1.0
For simplicity let's focus on the triangle domain from now on.
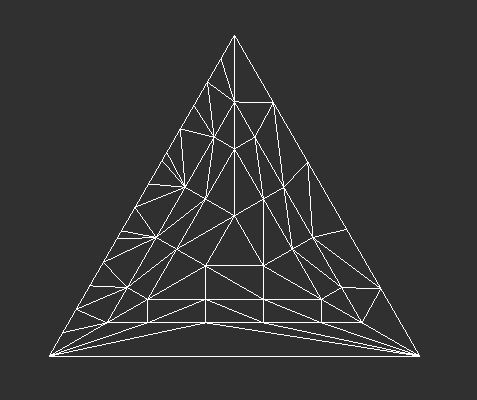
In general, the TLs tell the PG the number of segments on the outer edge of the triangle and the number rings towards the center
At any rate, remember that the PG ignores both the input and output patch of the TCS. All it cares about are the per patch TLs.
在TES中,和vertex shader相似。我们要执行矩阵变换。变换到摄像机空间。
TES不能生成点或者删除点在一个调用。
The main purpose of the TES that the architects of Tessellation in OpenGL envisioned is to evaluate the surface equation at the given domain location
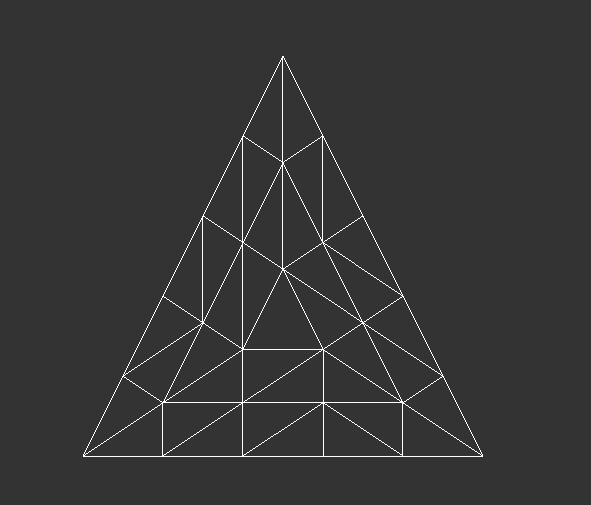
1,测试1:细分一个三角形
vs:

#version 450 core
layout(location =0 ) in vec3 vs_p;
layout(location =1 ) in vec3 vs_cd;
out vec3 vs_color;
void main(){
    gl_Position = vec4(vs_p,1.0);
    vs_color = vs_cd;
}
tcs:
注意下面
gl_out[gl_InvocationID].gl_Position = gl_in[gl_InvocationID].gl_Position;实际上把vert shader的材质传入
#version 450 core
layout (vertices = 3) out;
void main(){
    //inner
    gl_TessLevelInner[0] = 5;
    // outer
    gl_TessLevelOuter[0] = 5;
    gl_TessLevelOuter[1] = 5;
    gl_TessLevelOuter[2] = 5;

    gl_out[gl_InvocationID].gl_Position = gl_in[gl_InvocationID].gl_Position;

}
tes:
#version 450 core
layout(triangles , equal_spacing,ccw) in;
void main(){

    vec4 upos= gl_TessCoord.x * gl_in[0].gl_Position;
    vec4 vpos= gl_TessCoord.y * gl_in[1].gl_Position;
    vec4 wpos= gl_TessCoord.z * gl_in[2].gl_Position;
    gl_Position = upos + vpos + wpos;

}
frag:
#version 450 core
out vec4 color;
void main(){
    color = vec4(1,1,1,1);
}
main.cpp
CPP中要设置:
glPatchParameteri(GL_PATCH_VERTICES,3);
glPolygonMode(GL_FRONT_AND_BACK, GL_LINE);
render时候:
void display(){
    // render
    // ------
    glUseProgram(shaderProgram);
    glDrawArrays(GL_PATCHES,0,3);
}
2,修改材质,支持我们的vert shading里面的变量。比如我们输入了vs_cd;
vert保持不变:
#version 450 core
layout(location =0 ) in vec3 vs_p;
layout(location =1 ) in vec3 vs_cd;
out vec3 vs_color;
out vec4 vs_pos;
void main(){
    gl_Position = vec4(vs_p,1.0);
    vs_pos = vec4(vs_p,1.0);  // same as up
    vs_color = vs_cd;
}
tcs修改:可以不用gl_out[gl_InvocationID].gl_Position。
#version 450 core
layout (vertices = 3) out;
// ----------- from vert shader ---------------
in vec4 vs_pos[];
in vec3 vs_color[];
// ---------- out put -------------------------
out vec4 tcs_pos[];
out vec3 tcs_color[];

void main(){
    //inner
    gl_TessLevelInner[0] = 5;
    // outer
    gl_TessLevelOuter[0] = 5;
    gl_TessLevelOuter[1] = 5;
    gl_TessLevelOuter[2] = 5;

    tcs_pos[gl_InvocationID]   = vs_pos[gl_InvocationID];
    tcs_color[gl_InvocationID] = vs_color[gl_InvocationID];
}
TES 重心坐标插值。
#version 450 core
layout(triangles , equal_spacing,ccw) in;

vec2 interpolate2D(vec2 v0, vec2 v1, vec2 v2)
{
    return vec2(gl_TessCoord.x) * v0 + vec2(gl_TessCoord.y) * v1 + vec2(gl_TessCoord.z) * v2;
}
vec3 interpolate3D(vec3 v0, vec3 v1, vec3 v2)
{
    return vec3(gl_TessCoord.x) * v0 + vec3(gl_TessCoord.y) * v1 + vec3(gl_TessCoord.z) * v2;
}

// ----------------------- in variables from TCS -------------------
in vec4 tcs_pos[];
in vec3 tcs_color[];
// ----------------------- Out variables from TES ------------------
out vec4 P;   // it can transfer to fragment or geometry shader
out vec3 Cd;  // transfer to fragment shader

void main(){
    vec3 iterP = interpolate3D(tcs_pos[0].xyz,tcs_pos[1].xyz,tcs_pos[2].xyz);
    vec3 iterCd = interpolate3D(tcs_color[0],tcs_color[1],tcs_color[2]);
    P = vec4(iterP , 1);
    Cd = iterCd;
    gl_Position = P;  // may be need to MVP matrix here
}
frag材质可以看到拿到细分后的颜色完全正确。
#version 450 core
out vec4 color;
in vec3 Cd;
void main(){
    color = vec4(Cd , 1.0);
} 
版权
AlgebraMaster
https://www.cnblogs.com/gearslogy/p/13141035.html
REF:


 553
553

 被折叠的 条评论
为什么被折叠?
被折叠的 条评论
为什么被折叠?
 到【灌水乐园】发言


