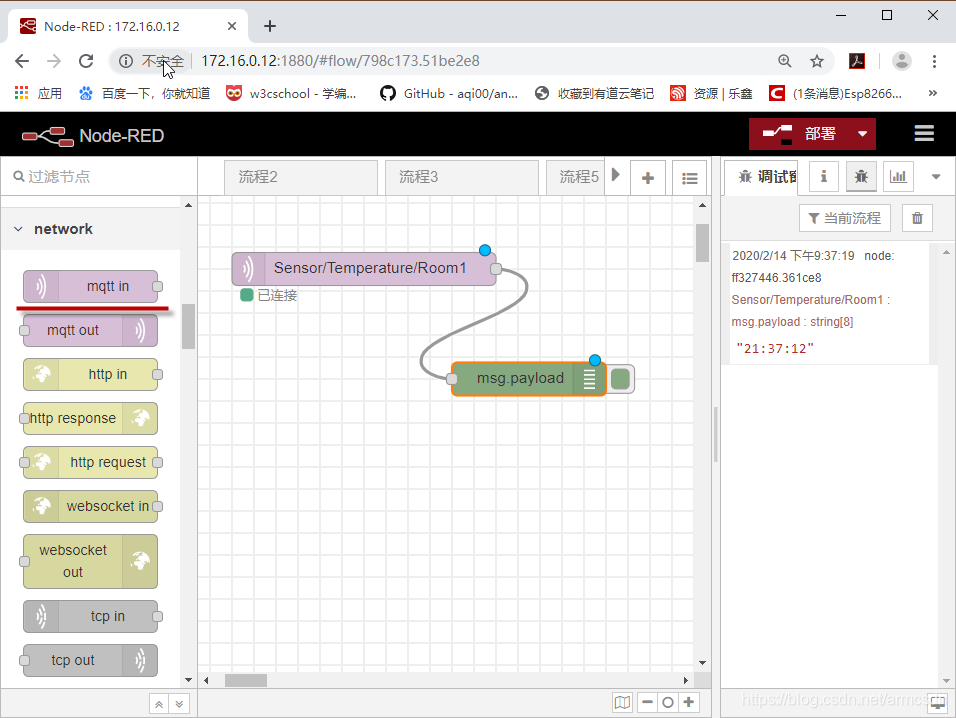
本文实现了NodeRed Mqtt in节点接收订阅消息的功能.可接收局域网或远程发布的消息.接收远程消息需要使用花生棒实现内网映射,内网映射请参见我的博客,链接如下:
https://blog.csdn.net/armcsdn/article/details/103131048
流程图如下:

流程代码:
[{
	"id": "798c173.51be2e8",
	"type": "tab",
	"label": "流程4",
	"disabled": false,
	"info": ""
}, {
	"id": "60445af9.e992e4",
	"type": "mqtt in",
	"z": "798c173.51be2e8",
	"name": "",
	"topic": "Sensor/Temperature/Room1",
	"qos": "2",
	"datatype": "auto",
	"broker": "42208823.88ab68",
	"x": 260,
	"y": 200,
	"wires": [
		["ff327446.361ce8"]
	]
}, {
	"id": "ff327446.361ce8",
	"type": "debug",
	"z": "798c173.51be2e8",
	"name": "",
	"active": true,
	"tosidebar": true,
	"console": false,
	"tostatus": false,
	"complete": "false",
	"x": 290,
	"y": 300,
	"wires": []
}, {
	"id": "42208823.88ab68",
	"type": "mqtt-broker",
	"z": "",
	"name": "",
	"broker": "127.0.0.1",
	"port": "1883",
	"clientid": "",
	"usetls": false,
	"compatmode": true,
	"keepalive": "60",
	"cleansession": true,
	"birthTopic": "",
	"birthQos": "0",
	"birthPayload": "",
	"closeTopic": "",
	"closeQos": "0",
	"closePayload": "",
	"willTopic": "",
	"willQos": "0",
	"willPayload": ""
}]
双击拖进流程里的mqtt in 节点 ,弹出如下界面,点击红色方框的按钮,弹出"编辑mqtt in节点"对话框

在服务端编辑框填入127.0.0.1,端口填入1883.这些设置即可做本机试验(树莓派-->树莓派)又可做远程试验.

根据我目前的理解,mqtt in节点相当于订阅者,下面我用2种方法实现发布者 功能.
第一种命令行: 在树莓派上安装mosquitto实现消息接收
sudo apt-get install mosquitto mosquitto-clientsmosquitto_sub、mosquitto_pub命令参数解析见下面链接
https://blog.csdn.net/qq_38211852/article/details/80466605
接下来我们做一个小测试,看看安装是否成功
首先在一个终端输入实现订阅:
mosquitto_sub -t m -d
在另一个终端输入:
mosquitto_pub -t m -m "This is a message from pi."

现在终端输入
mosquitto_pub -t Sensor/Temperature/Room1 -m "on" 
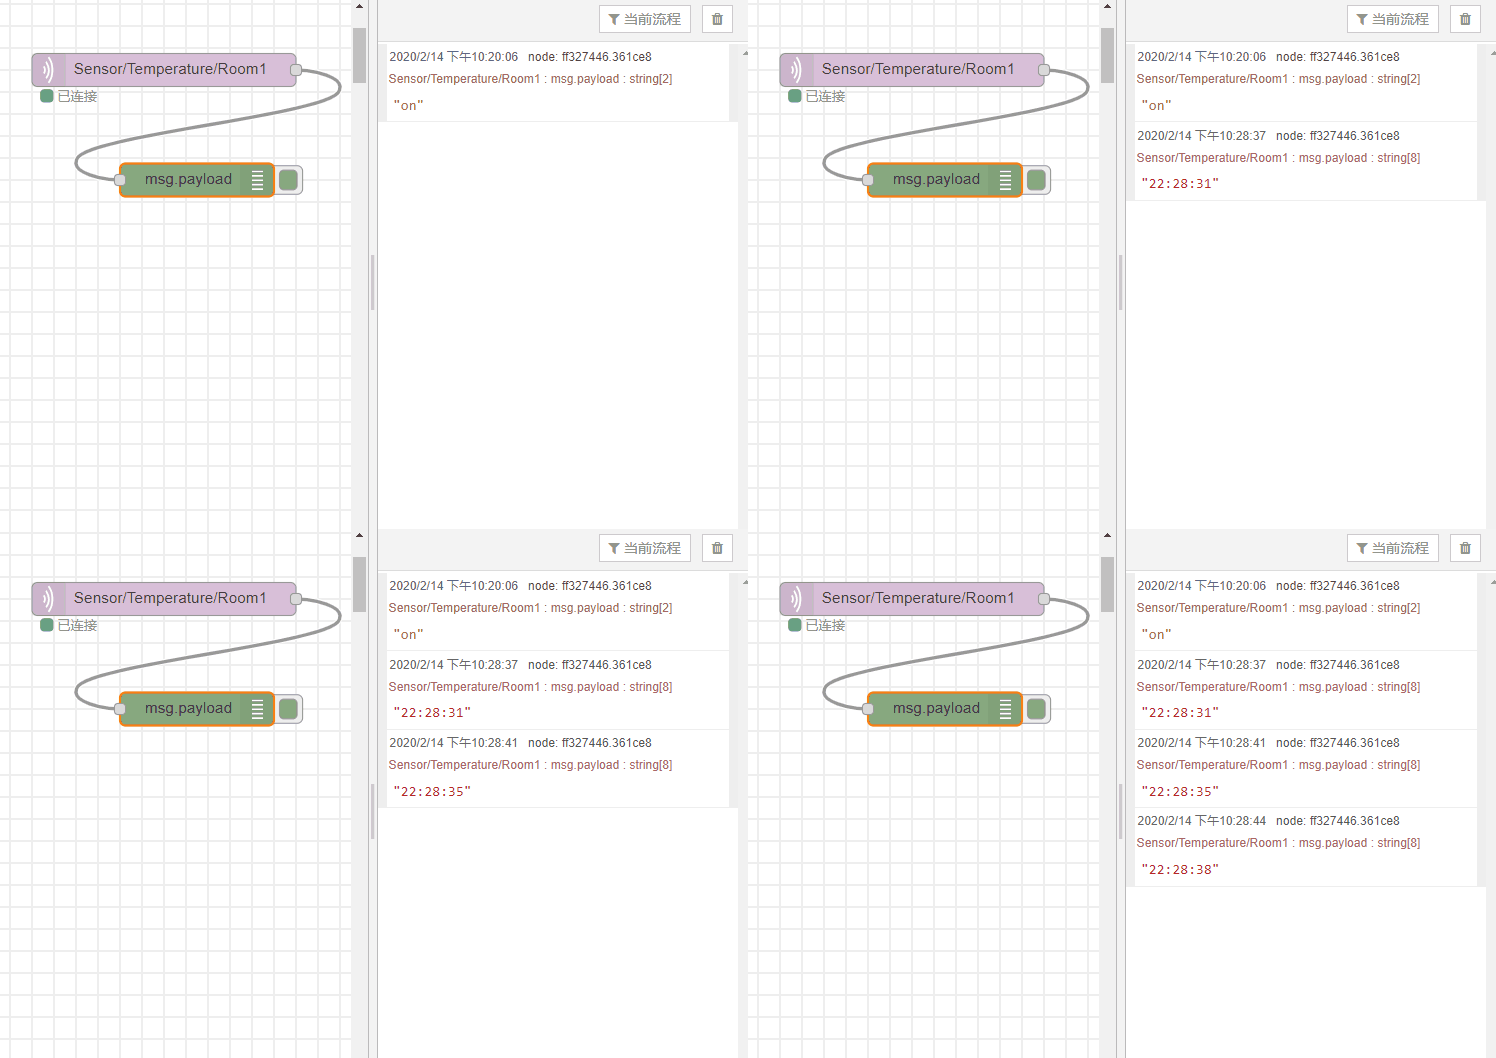
Node_red mqtt in接收到"on"消息

第二种使用python:
首先安装paho-mqtt
pip install paho-mqtt发布者程序如下:
import paho.mqtt.client as mqtt #import the client1
import time
strTime=time.strftime("%H:%M:%S")
#broker_address="127.0.0.1" #在树莓派本机上做试验,请取消本句注释
broker_address="armxu.zicp.vip"#本句是远程试验,需要有花生棒配合
port=39751                     #无此条件,请注释这两句
#broker_address="iot.eclipse.org" #use external broker
#connect(host, port=1883, keepalive=60, bind_address="")
client = mqtt.Client("P1") #create new instance
client.connect(broker_address,port) #connect to broker
client.publish("Sensor/Temperature/Room1",strTime)#publish
运行程序:
python3 mqtt_test.py
结果:


 943
943


 被折叠的 条评论
为什么被折叠?


