


1.元素偏移量offset系列
offset系列相关属性可以动态得到该元素的位置(偏移),大小等
(1)获得的元素距离带有定位的父元素的位置
(2)获得的元素自身的大小(宽度高度)
注意,返回的数值不带单位
2.offset系列常用属性
| offset系列属性 | 作用 |
| element.offsetParent | 返回作为该元素带有定位的父级元素,如父级元素都没有定位则返回body |
| element.offsetTop | 返回元素带有相对定位的父元素上方的偏移 |
| element.offsetLeft | 返回元素带有相对定位的父元素左边框的偏移 |
| element.offsetWidth | 返回自身包括padding,边框,内容去的宽度,返回值不带单位 |
| element.offsetHeight | 返回自身包括padding,边框,内容区的高度,返回数值不带单位 |
  <style>
    * {
      margin: 0;
      padding: 0;
    }

    .father {
      position: relative;
      width: 200px;
      height: 200px;
      background-color: pink;
      margin: 150px;
    }

    .son {
      width: 150px;
      height: 150px;
      background-color: grey;
      margin-left: 20px;
    }
  </style>
<body>
<div class="father">
<div class="son"></div>
</div>
<script>
var father = document.querySelector('.father');
var son = document.querySelector('.son');
console.log(father.offsetTop);//150
console.log(father.offsetLeft);//150
//father没有定位时或无father,offsetLeft按照body进行计算,得到结果170
//father有相对定位时,offsetLeft按照father计算,得到结果20
console.log(son.offsetLeft);
console.log(father.offsetWidth);//200
console.log(father.offsetHeight);//200
console.log(son.offsetWidth);//150
console.log(son.offsetHeight);//150
//返回带有定位的父元素
console.log(son.offsetParent);//<div></div>
console.log(father.offsetParent);//<body></body>
</script>
</body>offset与style的区别
| offset | style |
| offset可以获得任意样式表中的样式值 | style只能得到行内样式表中的样式值 |
| offset系列获得的数值没有单位 | style.width获得的是带有单位的字符串 |
| offsetWidth包含padding+border+width | style.width获得不好含padding和border的值 |
| offsetWidth等属性是只读属性 | style.Width可读写 |
| 适合只获取元素大小的情况 | 适合更改元素值的情况 |
获取鼠标在盒子里的坐标
思路:在盒子内点击,想要得到鼠标距离盒子左右的距离,首先得到鼠标在页面中的坐标(e.pageX,e.pageY),其次得到盒子在页面中的距离(box.offsetLeft,box.offsetTop),用鼠标在页面中的坐标减去盒子在页面中的距离就得到鼠标在盒子中的坐标
  <style>
    * {
      margin: 0;
      padding: 0;
    }

    .box {
      width: 300px;
      height: 300px;
      background-color: skyblue;
      margin: 100px;
    }
  </style>
<body>
<div class="box"></div>
<script>
var box = document.querySelector('.box');
box.addEventListener('mouseover', function (e) {
// console.log(e.pageX);
// console.log(e.pageY);
// console.log(box.offsetLeft);
// console.log(box.offsetTop);
var x = e.pageX - this.offsetLeft;
var y = e.pageY - this.offsetTop;
this.innerHTML = "x的值是" + x + " y的值是" + y;
})
</script>
</body>拖动模块框
思路:拖拽效果包括鼠标按下(mousedown),鼠标移动(mousemove),鼠标松开(mouseup),在鼠标移动的过程中,将获得的最新的鼠标坐标值赋值给模态框的left和top值,这样模态框就可以跟着鼠标走
鼠标的坐标减去鼠标在盒子内的坐标,才是模态框真正的位置
 <style>
    .link {
      text-align: center;
      font-size: 30px;
      color: green;
    }

    * {
      margin: 0;
      padding: 0;
    }

    .mask {
      display: none;
      padding-top: 200px;
      width: 100%;
      height: 3000px;
      background-color: #DDDDDD;
    }

    .login {
      position: absolute;
      float: left;
      left: 100px;
      top: 200px;
      width: 600px;
      height: 400px;
      background-color: #fff;
    }

    .login p {
      width: 100%;
      height: 35px;
      /* background-color: pink; */
      font-size: 14px;
      line-height: 35px;
      text-align: center;
    }

    .login .msg {
      width: 100%;
      height: 240px;
      /* background-color: skyblue; */
      text-align: center;
    }

    .login .msg input {
      width: 500px;
      height: 30px;
      margin-top: 50px;
      outline: none;
    }

    .login .button {
      width: 100%;
      text-align: center;

    }

    button {
      margin-top: 30px;
      width: 300px;
      height: 50px;
      background-color: #FFFF00;
    }

    .logout {
      float: left;
      width: 50px;
      height: 50px;
      background-color: #FF8888;
      border-radius: 50%;
      margin-left: -25px;
      margin-top: -25px;
      text-align: center;
      font-size: 14px;
      line-height: 50px;
      color: #fff
    }
  </style>
<body>
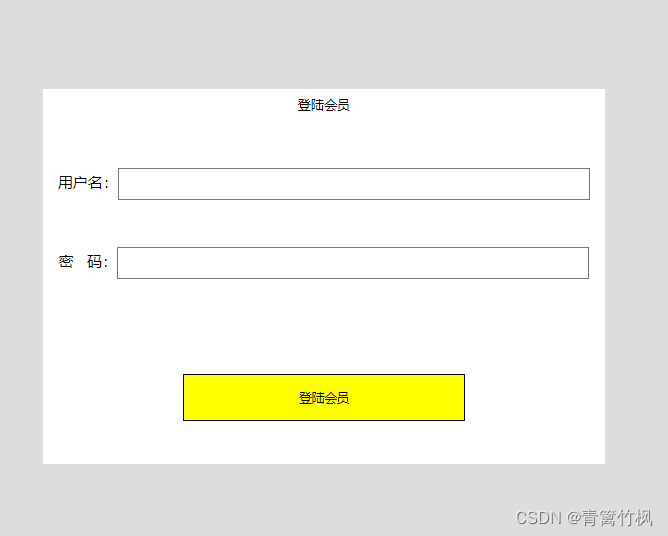
<div class="link">点击登录</div>
<div class="mask">
<div class="login">
<p id="title">登陆会员</p>
<div class="msg">
用户名:<input type="text"><br>
密 码:<input type="password">
</div>
<div class="button">
<button>登陆会员</button>
</div>
</div>
<div class="logout">x</div>
</div>
</body>
  <script>
    var link = document.querySelector('.link');
    var mask = document.querySelector('.mask');
    var logout = document.querySelector('.logout');
    var title = document.querySelector('#title');
    var login = document.querySelector('.login');
    //点击关闭隐藏登陆界面
    logout.addEventListener('click', function () {
      mask.style.display = 'none';
    })
    link.addEventListener('click', function () {
      mask.style.display = 'block';
      link.style.display = 'none';
    });
    //(1)鼠标按下,就获得鼠标在盒子内的坐标
    title.addEventListener('mousedown', function (e) {
      // console.log(e.pageX);
      // console.log(e.pageY);
      //x坐标
      var x = e.pageX - login.offsetLeft;
      //y坐标
      var y = e.pageY - login.offsetTop;
      // console.log(x, y);
      //鼠标在移动的时候,把鼠标在页面中的坐标减去鼠标在盒子内的坐标就是模态框的left和top值
      document.addEventListener('mousemove', move)
      function move(e) {
        login.style.left = e.pageX - x + 'px';
        login.style.top = e.pageY - y + 'px';
      }
      //鼠标弹起,就移除鼠标移动事件
      document.addEventListener('mouseup', function () {
        document.removeEventListener('mousemove', move)
      })
    })

  </script>
仿京东放大镜
思路:鼠标经过小图片的盒子,将遮挡层和大盒子显示出来,鼠标离开就隐藏两个盒子
遮挡层追随鼠标,大图片跟随遮挡层
遮挡层跟随鼠标做法:获得鼠标在盒子里的坐标,之后把数值给遮挡层作为left和top的值
遮挡层不能超出小盒子的范围,如果小于0,九八坐标设置为0
大图片跟随遮挡层的功能:大图片的移动距离公式为遮挡层移动距离与遮挡层最大移动距离的比值等于大图片移动距离与大图片最大移动距离的比值
<style>
    * {
      margin: 0;
      padding: 0;
    }

    .box {

      width: 1500px;
      height: 1500px;
      background-color: pink;
    }

    .small {
      position: relative;
      top: 0px;
      left: 0px;
      width: 900px;
      height: 900px;
      border: 1px solid grey;
      overflow: hidden;
    }

    .pic {
      display: none;
      position: absolute;
      top: 0;
      left: 0;
      width: 300px;
      height: 300px;
      background-color: yellow;
      opacity: .5;
      border: 1px solid #ccc;
      cursor: move;

    }

    .sMig {
      width: 900px;
      height: 900px;
    }

    .big {
      display: none;
      position: absolute;
      top: 0;
      left: 910px;
      width: 1000px;
      height: 1000px;
      background-color: blueviolet;
      border: 1px solid #ccc;
      overflow: hidden;
    }

    .bMig {
      position: absolute;
      top: 0;
      height: 0;
      width: 2000px;
      height: 2000px;
    }
  </style>
<div class="box">
<div class="small">
<img class="sMig"
src="https://img2.baidu.com/it/u=4273417027,1062450597&fm=253&fmt=auto&app=138&f=JPEG?w=500&h=889" alt="">
<div class="pic"></div>
</div>
<!-- <div class="pic"></div> -->
<div class="big">
<img class="bMig"
src="https://img2.baidu.com/it/u=4273417027,1062450597&fm=253&fmt=auto&app=138&f=JPEG?w=500&h=889" alt="">
</div>
</div> <script>
//加载完之后在执行js
window.addEventListener('load', function () {
//获取最外面的盒子
var small = document.querySelector('.small');
//获取遮挡层
var pic = document.querySelector('.pic');
//获取大盒子
var big = document.querySelector('.big');
var bMig = document.querySelector('.bMig')
//1.当鼠标经过box时,显示和隐藏pic和big
small.addEventListener('mousemove', function () {
pic.style.display = 'block';
big.style.display = 'block';
})
small.addEventListener('mouseout', function () {
pic.style.display = 'none';
big.style.display = 'none';
})
//2.遮挡层跟随鼠标
small.addEventListener('mousemove', function (e) {
//计算鼠标在盒子里的坐标
// console.log(e.pageX);
// console.log(e.pageY);
//获取鼠标坐标
var x = e.pageX - this.offsetLeft;
var y = e.pageY - this.offsetTop;
// console.log(x, y);
//鼠标坐标给盒子,并让鼠标位于遮罩层的中心
// pic.style.left = x - pic.offsetWidth / 2 + 'px';
// pic.style.top = y - pic.offsetHeight / 2 + 'px';
var picX = x - pic.offsetWidth / 2;
var picY = y - pic.offsetHeight / 2;
//如果x坐标小于0就停在0的位置,大于0,就停在小盒子的宽度减去遮罩层的宽度的位置,因为位置计算始终与左侧相关
if (picX < 0) {
picX = 0;
} else if (picX >= small.offsetWidth - pic.offsetWidth) {
picX = small.offsetWidth - pic.offsetWidth;
}
pic.style.left = picX + 'px';
if (picY < 0) {
picY = 0;
} else if (picY > small.offsetHeight - pic.offsetHeight) {
picY = small.offsetHeight - pic.offsetHeight;
}
pic.style.top = picY + 'px';
//大图片移动距离=遮挡层移动距离*大图片最大移动距离/遮挡层最大移动距离
//遮挡层移动距离picX和picY,遮挡层最大移动距离small.offsetWidth - pic.offsetWidth
var picMaxX = small.offsetWidth - pic.offsetWidth;
var picMaxY = small.offsetHeight - pic.offsetHeight;
//大图
var bigMaxX = big.offsetWidth - bMig.offsetWidth;
var bigMaxY = big.offsetHeight - bMig.offsetHeight;
//大图片移动距离
var bigX = picX * bigMaxX / picMaxX;
var bigY = picY * bigMaxY / picMaxY;
bMig.style.left = bigX + 'px';
bMig.style.top = bigY + 'px';
})
})
</script>


 245
245


 被折叠的 条评论
为什么被折叠?
被折叠的 条评论
为什么被折叠?
 到【灌水乐园】发言


