YOLOv8实例分割PySide6 GUI可视化界面

课程链接:https://edu.csdn.net/course/detail/38560

YOLOv8实例分割PySide6 GUI可视化界面效果图如下

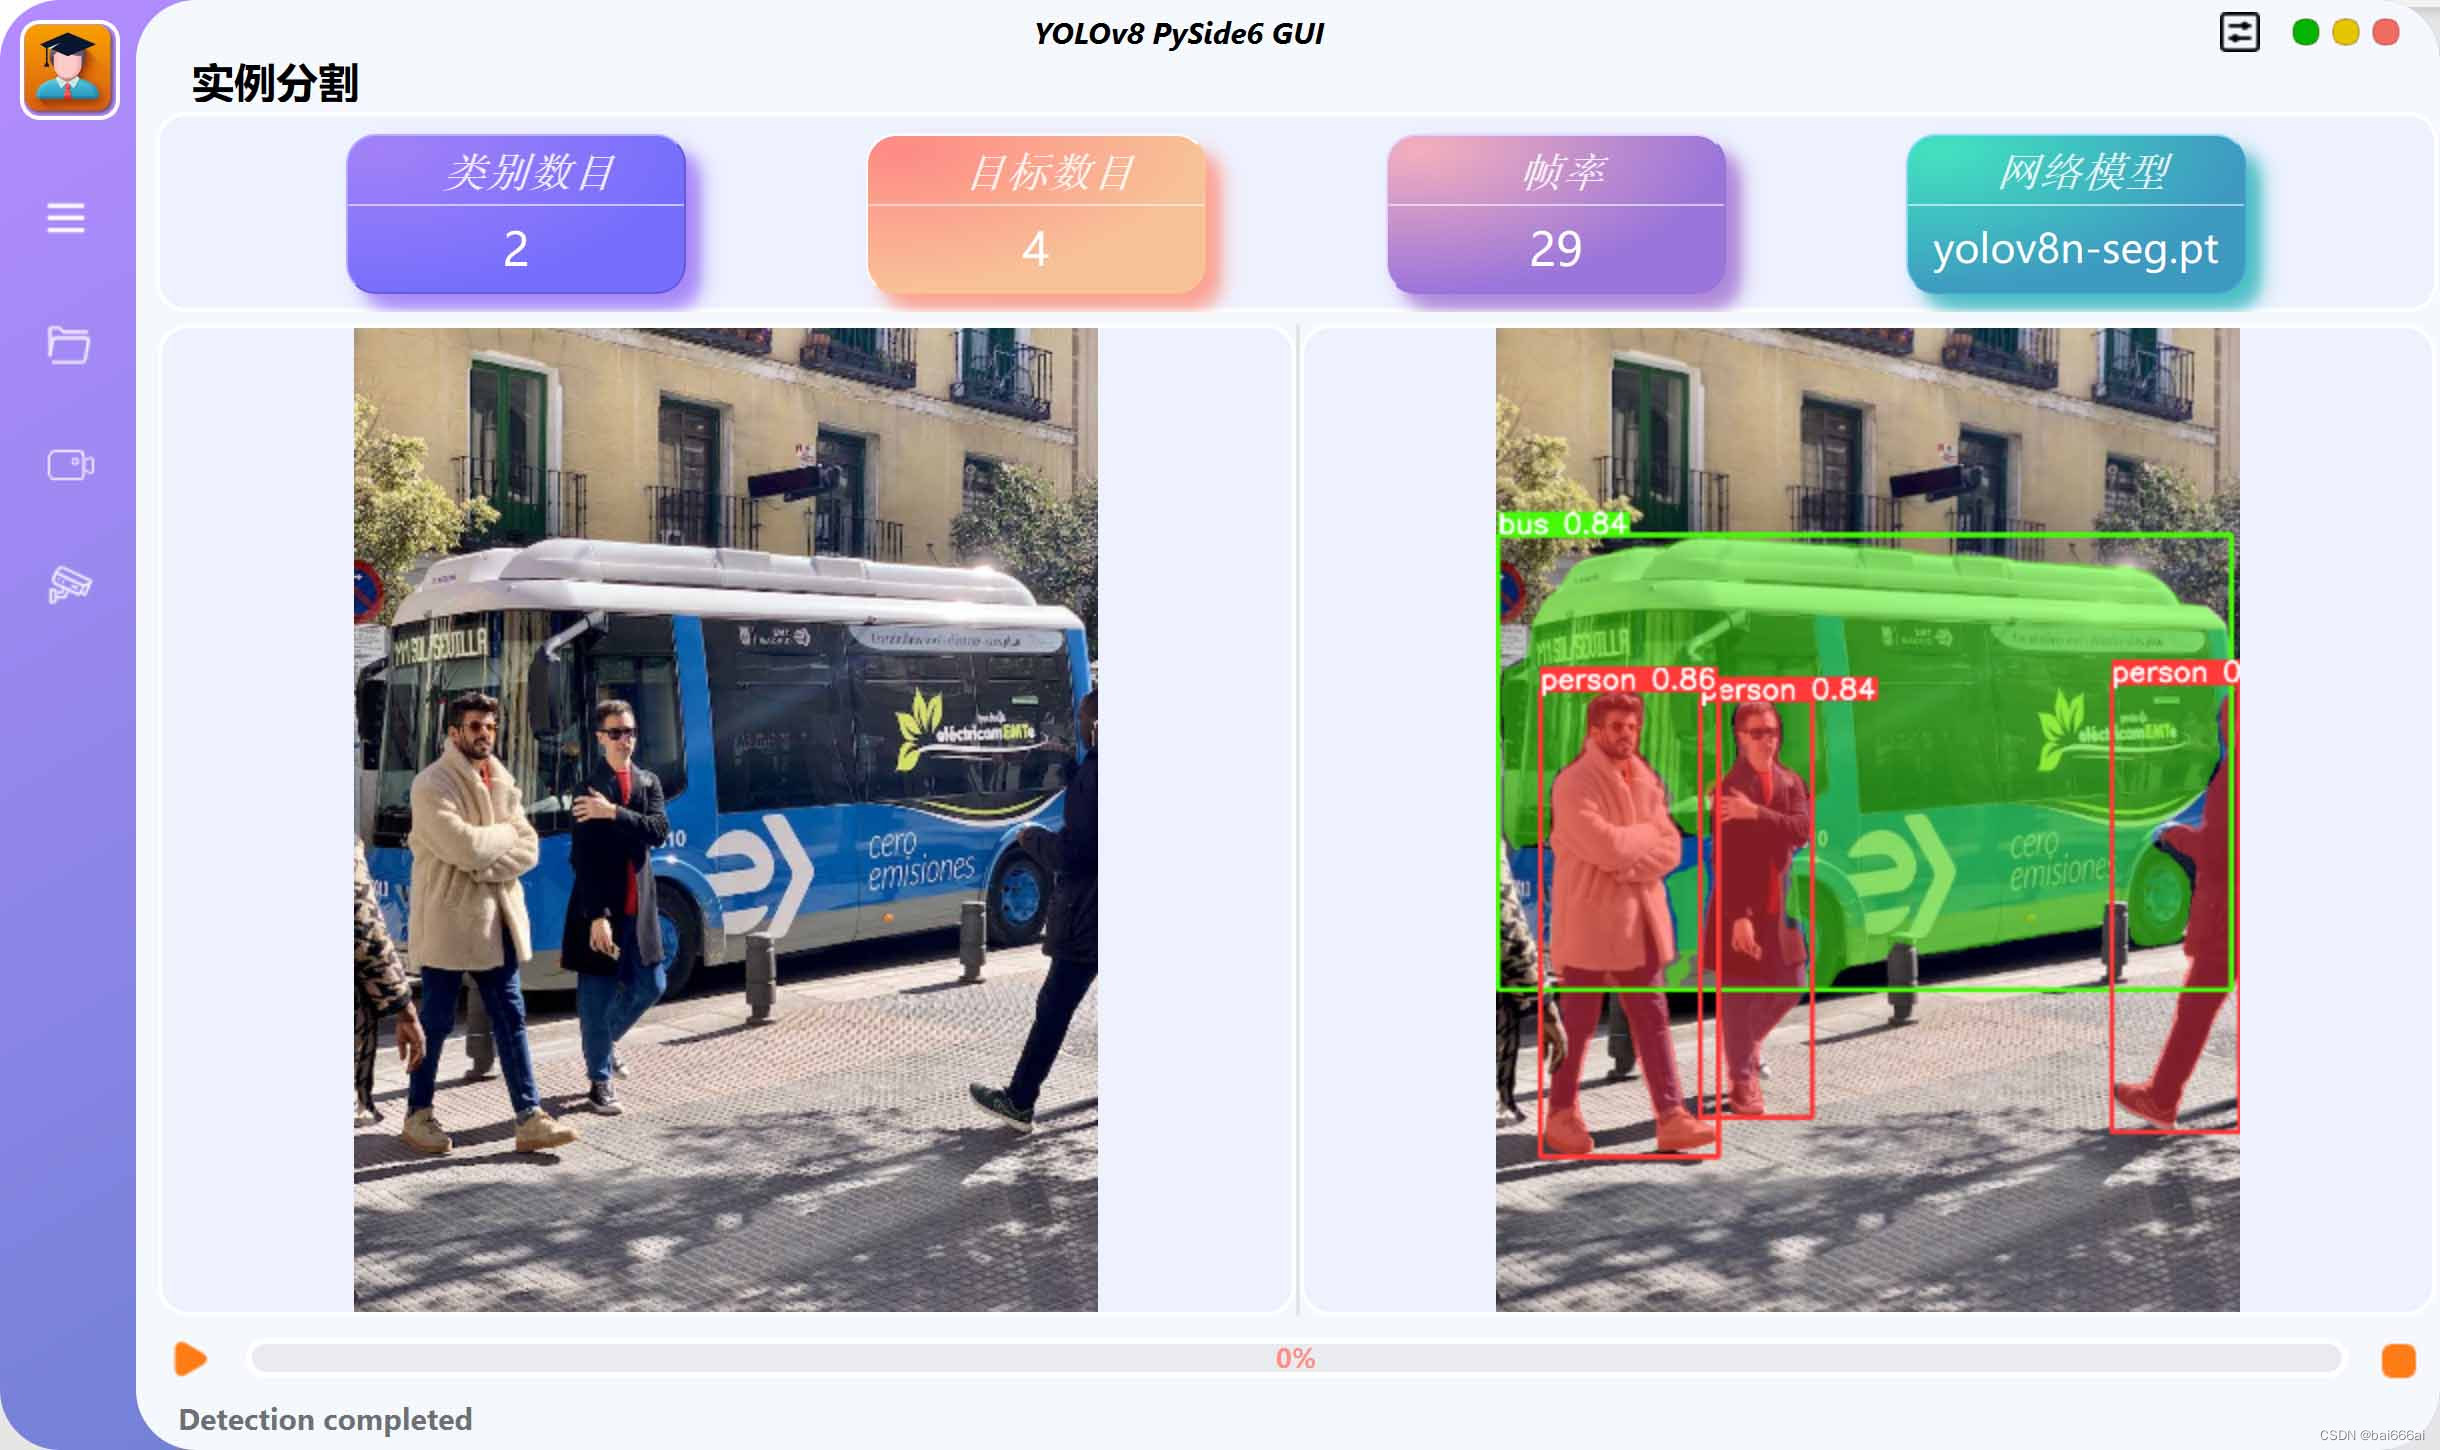
YOLOv8实例分割PySide6 GUI可视化界面支持本地图片和视频推理、摄像头实时视频流推理和HTTP/RTSP流实时推理的展示。YOLOv8实例分割PySide6 GUI可视化界面使用PySide6开发,文档和代码已加入课程《YOLOv8实例分割实战:训练自己的数据集》。 

YOLOv8实例分割PySide6 GUI可视化界面演示_哔哩哔哩_bilibili

PySide6 是一个 Python 绑定的 Qt 库,它允许 Python 程序员使用 Qt 6 库编写软件。Qt 是一个用于开发 GUI 应用程序的开源工具包。PySide6 是 PySide2 的继任者,使用它你可以创建复杂的图形用户界面(GUI)。

PySide6 主要特点:

1. 跨平台:PySide6 可以在多种操作系统上运行,包括 Windows、Linux、macOS。

2. 丰富的功能:PySide6 支持 Qt 6 的所有模块,包括 Qt Core、Qt GUI、Qt Widgets、Qt Network、Qt SQL等。

3. 简单易用:PySide6 提供了一套简单的 Pythonic API,使用起来非常方便。

4. 自由开源:PySide6 是一个开源项目,你可以自由地使用和修改。

  • 0
    点赞
  • 5
    收藏
    觉得还不错? 一键收藏
  • 打赏
    打赏
  • 5
    评论
要将YOLOv7与PySide6嵌合制作出可视化界面,可以按照以下步骤进行: 1. 安装PySide6和YOLOv7: ```python pip install PySide6 pip install yolov7 ``` 2. 创建PySide6窗口: ```python from PySide6.QtWidgets import QApplication, QMainWindow class MainWindow(QMainWindow): def __init__(self): super().__init__() # 设置窗口标题和大小 self.setWindowTitle("YOLOv7 PySide6 Demo") self.setGeometry(100, 100, 800, 600) ``` 3. 在窗口中添加控件: ```python from PySide6.QtGui import QIcon from PySide6.QtWidgets import QLabel, QPushButton, QVBoxLayout, QWidget class MainWindow(QMainWindow): def __init__(self): super().__init__() # 设置窗口标题和大小 self.setWindowTitle("YOLOv7 PySide6 Demo") self.setGeometry(100, 100, 800, 600) # 添加控件 label = QLabel("Hello World!") button = QPushButton(QIcon("icon.png"), "Click me!") layout = QVBoxLayout() layout.addWidget(label) layout.addWidget(button) widget = QWidget() widget.setLayout(layout) self.setCentralWidget(widget) ``` 4. 在按钮的点击事件中调用YOLOv7: ```python from yolov7.detector import Detector class MainWindow(QMainWindow): def __init__(self): super().__init__() # 设置窗口标题和大小 self.setWindowTitle("YOLOv7 PySide6 Demo") self.setGeometry(100, 100, 800, 600) # 添加控件 label = QLabel("Hello World!") button = QPushButton(QIcon("icon.png"), "Click me!") layout = QVBoxLayout() layout.addWidget(label) layout.addWidget(button) widget = QWidget() widget.setLayout(layout) self.setCentralWidget(widget) # 绑定按钮的点击事件 button.clicked.connect(self.detect) def detect(self): # 调用YOLOv7进行目标检测 detector = Detector() # TODO: 在这里添加YOLOv7的代码 ``` 5. 将YOLOv7的结果展示到界面上: ```python class MainWindow(QMainWindow): def __init__(self): super().__init__() # 设置窗口标题和大小 self.setWindowTitle("YOLOv7 PySide6 Demo") self.setGeometry(100, 100, 800, 600) # 添加控件 label = QLabel("Hello World!") button = QPushButton(QIcon("icon.png"), "Click me!") layout = QVBoxLayout() layout.addWidget(label) layout.addWidget(button) widget = QWidget() widget.setLayout(layout) self.setCentralWidget(widget) # 绑定按钮的点击事件 button.clicked.connect(self.detect) def detect(self): # 调用YOLOv7进行目标检测 detector = Detector() image = detector.detect("image.png") # TODO: 在这里添加YOLOv7的代码 # 将结果展示到界面上 pixmap = QPixmap.fromImage(ImageQt(image)) label.setPixmap(pixmap) ``` 完整的代码如下: ```python from PySide6.QtGui import QIcon, QPixmap from PySide6.QtWidgets import QApplication, QMainWindow, QLabel, QPushButton, QVBoxLayout, QWidget from PIL.ImageQt import ImageQt from yolov7.detector import Detector class MainWindow(QMainWindow): def __init__(self): super().__init__() # 设置窗口标题和大小 self.setWindowTitle("YOLOv7 PySide6 Demo") self.setGeometry(100, 100, 800, 600) # 添加控件 label = QLabel("Hello World!") button = QPushButton(QIcon("icon.png"), "Click me!") layout = QVBoxLayout() layout.addWidget(label) layout.addWidget(button) widget = QWidget() widget.setLayout(layout) self.setCentralWidget(widget) # 绑定按钮的点击事件 button.clicked.connect(self.detect) def detect(self): # 调用YOLOv7进行目标检测 detector = Detector() image = detector.detect("image.png") # TODO: 在这里添加YOLOv7的代码 # 将结果展示到界面上 pixmap = QPixmap.fromImage(ImageQt(image)) label.setPixmap(pixmap) if __name__ == "__main__": app = QApplication([]) window = MainWindow() window.show() app.exec_() ```

“相关推荐”对你有帮助么?

  • 非常没帮助
  • 没帮助
  • 一般
  • 有帮助
  • 非常有帮助
提交
评论 5
添加红包

请填写红包祝福语或标题

红包个数最小为10个

红包金额最低5元

当前余额3.43前往充值 >
需支付:10.00
成就一亿技术人!
领取后你会自动成为博主和红包主的粉丝 规则
hope_wisdom
发出的红包

打赏作者

bai666ai

你的鼓励将是我创作的最大动力

¥1 ¥2 ¥4 ¥6 ¥10 ¥20
扫码支付:¥1
获取中
扫码支付

您的余额不足,请更换扫码支付或充值

打赏作者

实付
使用余额支付
点击重新获取
扫码支付
钱包余额 0

抵扣说明:

1.余额是钱包充值的虚拟货币,按照1:1的比例进行支付金额的抵扣。
2.余额无法直接购买下载,可以购买VIP、付费专栏及课程。

余额充值