


源码在文末
节点层级
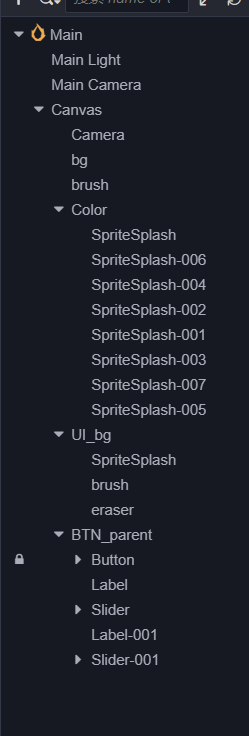
bg是墨绿色的背景
brush是笔刷,上面有Graphics组件
Color是更改画笔颜色的一堆颜色块的父节点
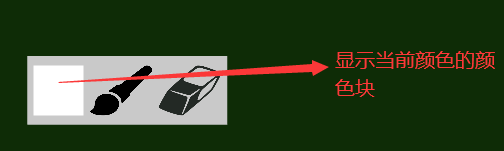
UI_bg下面有显示笔刷颜色的精灵,选择笔刷或橡皮的按钮
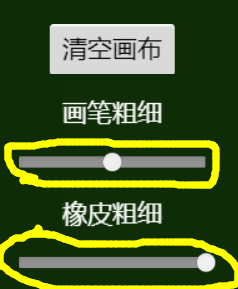
BTN_parent子节点有清空画布按钮,调整画笔和橡皮大小的滑动器
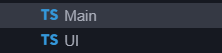
有两个脚本
Main脚本负责绘画
UI脚本负责UI相关
先写Main脚本,撸一个枚举控制笔刷类型
// 笔刷类型 是画笔还是橡皮
export enum Type {
    brush,
    eraser,
}
Main脚本的属性
	@property(Node)
    canvas: Node = null!;

    @property({displayName: "黑板背景", tooltip: "黑板背景", type: Node})
    bg: Node = null!;


    @property({displayName: "相机", tooltip: "拍UI的相机", type: CameraComponent})
    camera: CameraComponent = null!;


    @property({displayName: "笔刷", tooltip: "笔刷节点", type: GraphicsComponent})
    brush: GraphicsComponent = null!;

    // 类型 默认是画笔
    type = Type.brush;

    // 画笔的颜色和线宽
    brush_color: Color = Color.WHITE;
    brush_width: number = 5;

    // 橡皮的颜色和大小
    eraser_color: Color = null!;
    eraser_width: number = 20;
绘画使用Graphics实现,官方文档提供的接口如下

先用moveTo移动路径到指定点,再用lineTo添加新点,最后用stroke方法绘制,就可以画出一条线了
举个小例子
	onLoad () {
        this.brush.moveTo(0, 0);
        this.brush.lineTo(200, 0);
        this.brush.stroke();
    }
这就是画完的结果

了解完了怎么用Graphics画一条线,接下来实现手指滑动绘画
给canvas绑定触摸事件,把触点转到节点坐标系后传入对应的API。最后还要设置橡皮颜色为黑板背景的颜色,橡皮的实现原理就是画和背景颜色(墨绿色)一样的线条出来遮挡住之前画的内容
	onLoad () {
        let self = this;

        // 给canvas绑定开始触摸事件
        this.canvas.on(SystemEventType.TOUCH_START, function (event: EventTouch) {
            let point = self.PointToNode(event.getLocation(), self.camera, self.canvas);
            let x = point.x;
            let y = point.y;

            // 设置路径起点
            self.brush.moveTo(x, y);

        }, this);

        // 给canvas绑定触摸移动事件
        this.canvas.on(SystemEventType.TOUCH_MOVE, function (event: EventTouch) {
            let point = self.PointToNode(event.getLocation(), self.camera, self.canvas);
            let x = point.x;
            let y = point.y;

            // 设置直线路径
            self.brush.lineTo(x, y);
            // 绘制所有路径
            self.brush.stroke();

        }, this);

        // 设置橡皮颜色为黑板背景的颜色
        this.eraser_color = this.bg.getComponent(SpriteComponent)!.color;
    }
	// 通过触摸得到的点转为节点坐标下
    PointToNode (point: Vec2, camera: CameraComponent, node: Node): Vec2 {
        let point_world = camera.screenToWorld(new Vec3(point.x, point.y));
        let point_result = node.getComponent(UITransformComponent)!.convertToNodeSpaceAR(point_world);
        return(new Vec2(point_result.x, point_result.y));
    }
每帧更新笔刷的颜色和粗细
	update () {
        // 如果是画笔
        if (this.type == Type.brush) {
            // 设置颜色和线宽
            this.brush.strokeColor = this.brush_color;
            this.brush.lineWidth = this.brush_width;
        }
        // 如果是橡皮
        else if (this.type == Type.eraser) {
            // 设置颜色和大小
            this.brush.strokeColor = this.eraser_color;
            this.brush.lineWidth = this.eraser_width;
        }
    }
这就是Main脚本的全部代码了,已经可以画画了,但是不能调节颜色和粗细什么的,这些UI还都是摆设

接下来写UI代码相关逻辑
创建脚本取名UI
在最上面导入Main脚本
// 导入main脚本
import main, { Type } from "./Main";
声明需要用的属性
	@property({displayName: "笔刷", tooltip: "笔刷", type: GraphicsComponent})
    brush: GraphicsComponent = null!;

    @property({displayName: "当前颜色", tooltip: "当前画笔 / 橡皮的颜色", type: SpriteComponent})
    cur_color: SpriteComponent = null!;

    @property({displayName: "设置画笔颜色块的父节点", tooltip: "设置画笔颜色的颜色块的父节点", type: Node})
    color_parent: Node = null!;

    @property({displayName: "Main脚本所在节点", tooltip: "Main脚本所在节点", type: main})
    main: main = null!;

    @property({displayName: "画笔宽度滑动器", tooltip: "画笔宽度滑动器", type: SliderComponent})
    brush_width_sl: SliderComponent = null!;

    @property({displayName: "橡皮大小滑动器", tooltip: "橡皮大小滑动器", type: SliderComponent})
    eraser_width_sl: SliderComponent = null!;
修改画笔颜色的逻辑
在onLoad给每个设置颜色的颜色块绑定触摸事件,点击颜色块就设置画笔颜色为颜色块的精灵颜色
	onLoad () {
        let self = this;

        // 给每个颜色块绑定事件
        for (let i = 0; i < this.color_parent.children.length; i++) {
            this.color_parent.children[i].on(SystemEventType.TOUCH_START, function () {
                // 设置笔刷颜色
                let color = self.color_parent.children[i].getComponent(SpriteComponent)!.color;
                self.main.brush_color = color;
            }, this);
        }
    }

每帧更新显示当前颜色块精灵的颜色
根据滑动器设置画笔粗细和橡皮大小
	update () {
        // 当前颜色为笔刷颜色
        this.cur_color.color = this.brush.strokeColor;

        // 如果滑动器数值过小就手动设置线宽和大小,如果不就正常设置
        if (this.brush_width_sl.progress <= 0.01 || this.eraser_width_sl.progress <= 0.01) {
            this.main.brush_width = 0.1 * 15;
            this.main.eraser_width = 0.1 * 30;
            return;
        }
        this.main.brush_width = this.brush_width_sl.progress * 15;
        this.main.eraser_width = this.eraser_width_sl.progress * 30;
    }
最后封装三个方法绑定到按钮上
	// 清除所有绘制专用函数
    onbtn_clear () {
        this.brush.clear();
    }

    // 笔刷模式专用函数
    set_brush () {
        this.main.type = Type.brush;
    }

    // 橡皮模式专用函数
    set_eraser () {
        this.main.type = Type.eraser;
    }

大功告成
源码:https://gitee.com/propertygame/cocos-creator3.x-demos/tree/master/SmallBlackboard
技术交流Q群:1130122408
更多内容请关注微信公众号


 2556
2556


 被折叠的 条评论
为什么被折叠?
被折叠的 条评论
为什么被折叠?
 到【灌水乐园】发言


