


C++ 入门笔记
- Functions in C++
- C++ header Files
- 如何在VStudio的环境下Debug C++ (看memory值)
- 12.C++中的条件和分支(IF语句) CONDITIONS and BRANCHES in C++ (if statements)
- 13. BEST Visual Studio Setup for C++ Projects!
- 14 loops in C++ (for loops , while loops)
- 15. Control Flow in C++ (continue, break, return)
- 16 pointers in C++(指针)
- 17 references in c++ (C++中的引用)
- 18 classes in C++
- 19 classes VS structs in C++
- 20 how to write a C++ class
- 21 Static in C++
- 22.static for classes and structs in c++
- 23 local static in C++(本地静态)(err)
- 24 ENUMS in C++ 枚举
- 25 constructors in C++
- 26 Destructors in C++
- 27 inheritance in C++
- 28 Virtual Functions in C++ 中的接口 纯虚函数
- 29 interfaces in C++中的接口
- 30 C++中的数组
- 32 C++中的字符串
- 33 C++ 字符串字面量
- 34 C++ 中的const
- 35 C++ 中的mutable关键字
- 36 C++ 构造函数初始化列表
- 37 C++ 的三元操作符 (a? b:C)
- 38 创建并,初始化C++对象
下面主要是我学习C++的一个笔记,记录学习中遇到的一些重点事项。
下面是视频的连接
https://www.bilibili.com/video/BV1Ay4y1i7Z6/?p=10&spm_id_from=333.1007.top_right_bar_window_history.content.click&vd_source=e6e8f67c0845f6b64075a5c82b90f71d
Functions in C++
主要介绍了函数/方法,在C++ 中的声明等信息。返回值,以及定义等
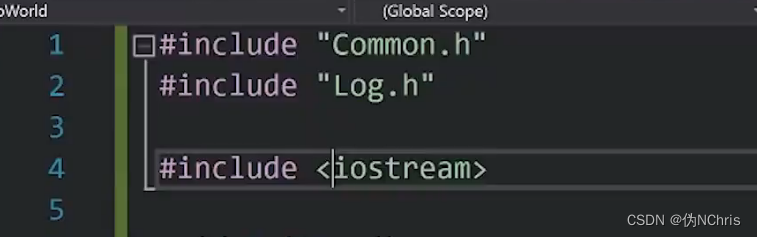
C++ header Files
主要讲解了C++ 头文件的一些注意事项
- 如图 1~2 行所示的,使用双引号的,一般表示是自己写的头文件
- 如图4行所写的,一般表示系统带的头文件
如图增加了一个条件,有没有定义LOG.H 文件,如果定义了则是不进行下面的 声明?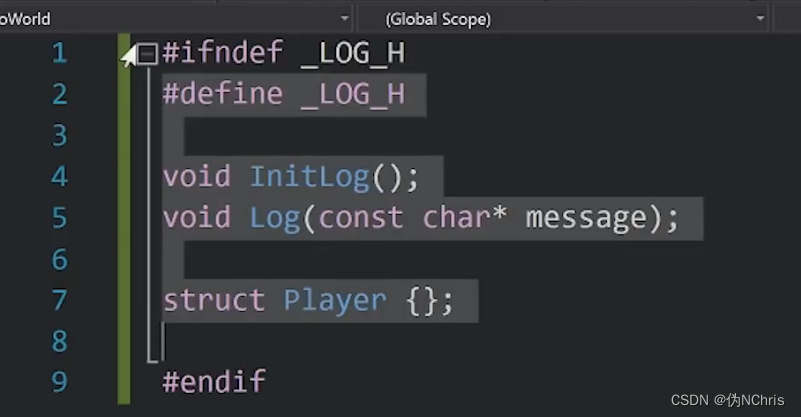
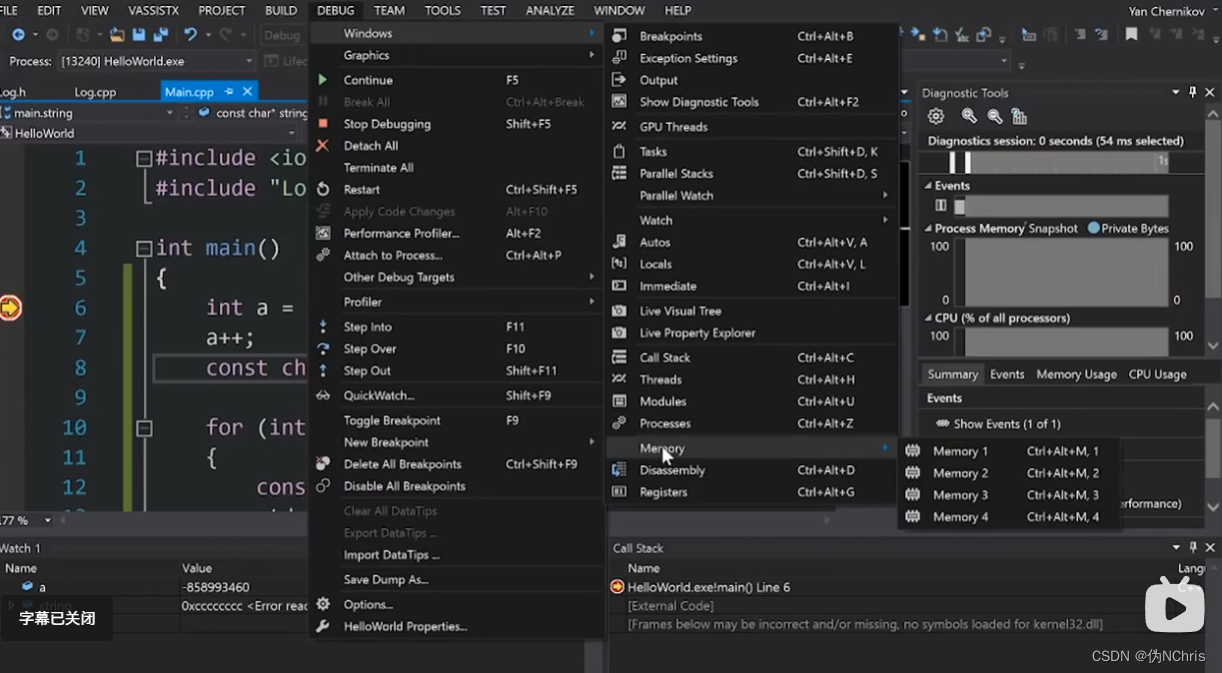
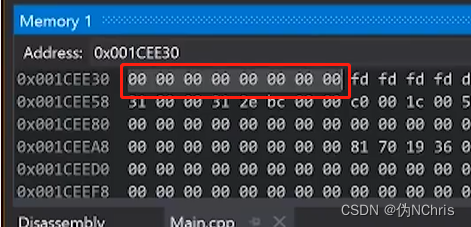
如何在VStudio的环境下Debug C++ (看memory值)
1.断点:在debug的时候使得代码停止,需要放在有代码的行上
2. 调试模式和发布模式在断点上会有一些差异
3. 调出界面查看数值,debug后会有一个Autos的界面,其中可以在name上输入值。然后查看
4. 查看memory地址下的值,打开窗口后输入address即可。
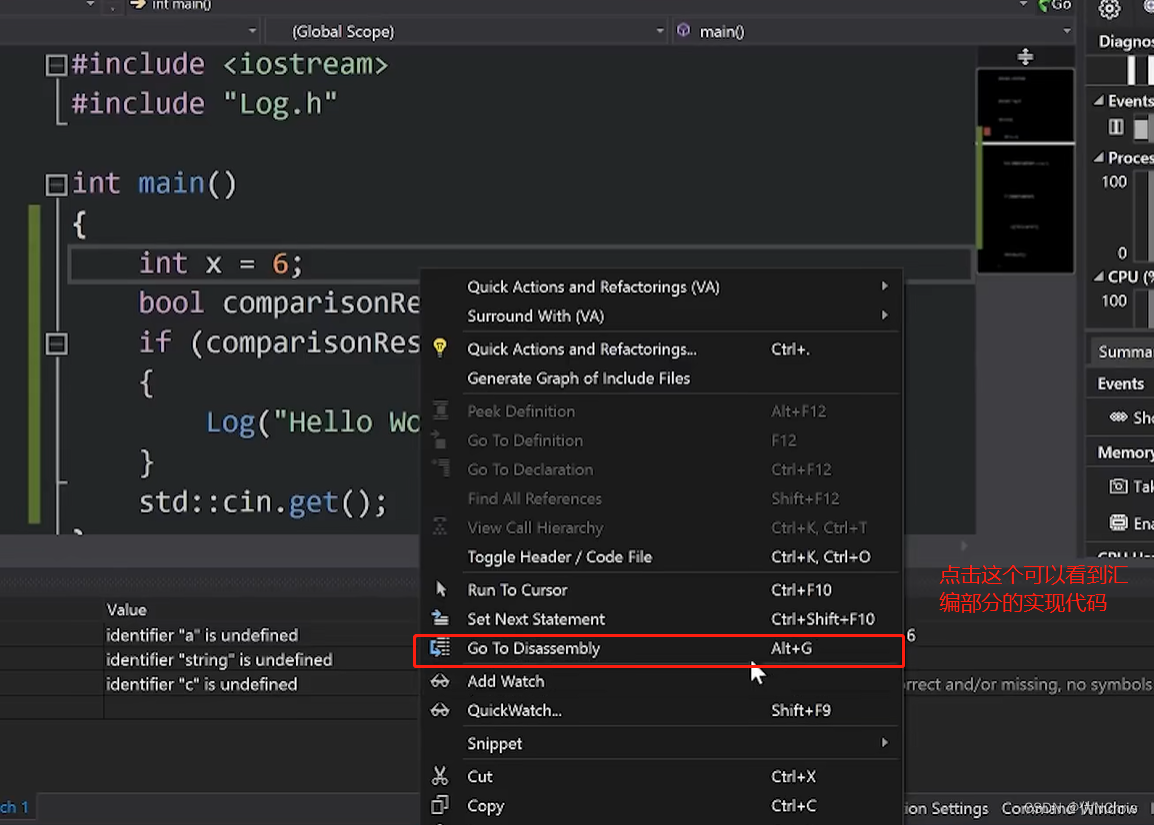
12.C++中的条件和分支(IF语句) CONDITIONS and BRANCHES in C++ (if statements)
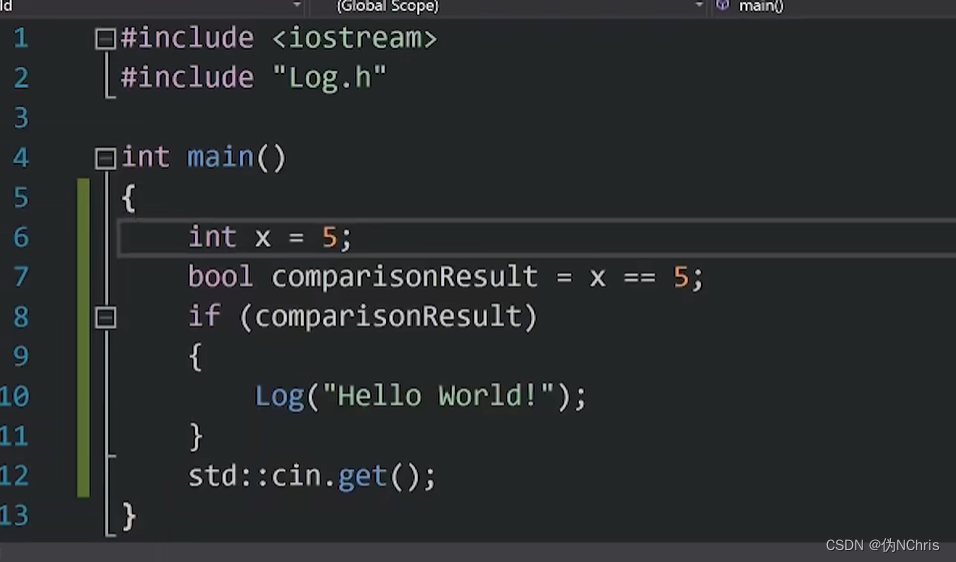
汇编的角度查看if循环中执行的代码
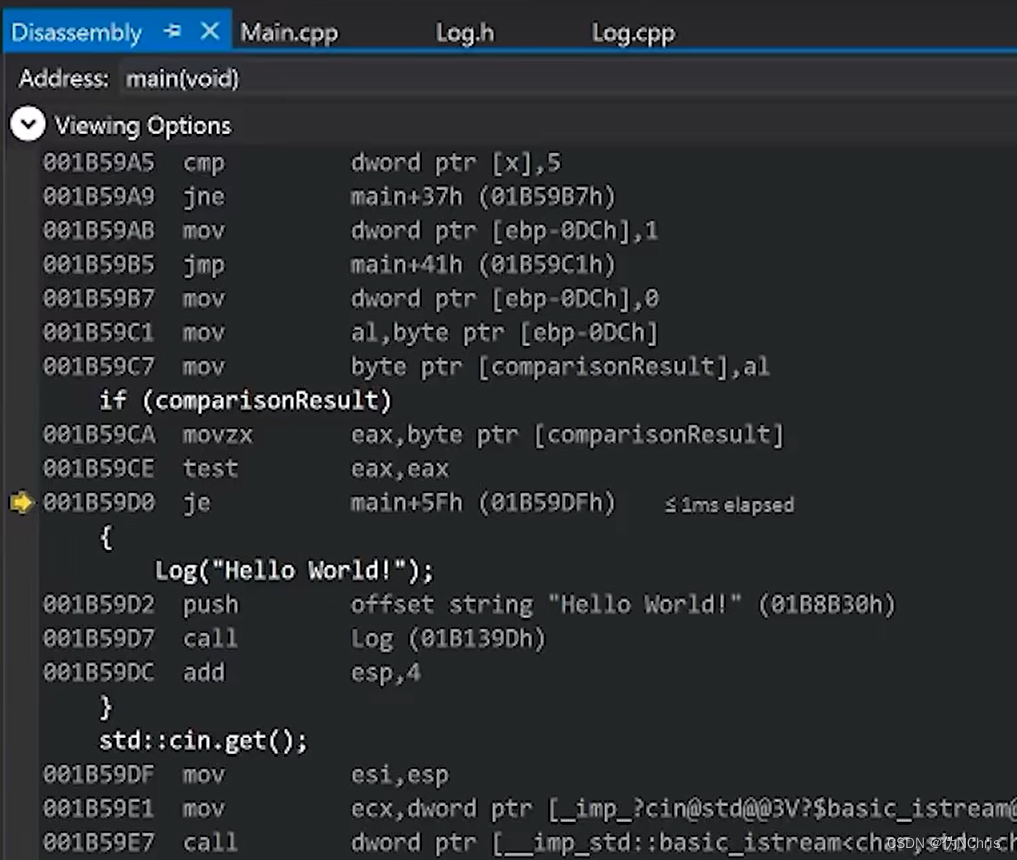
查看汇编 需要在DEBUG 模式中?
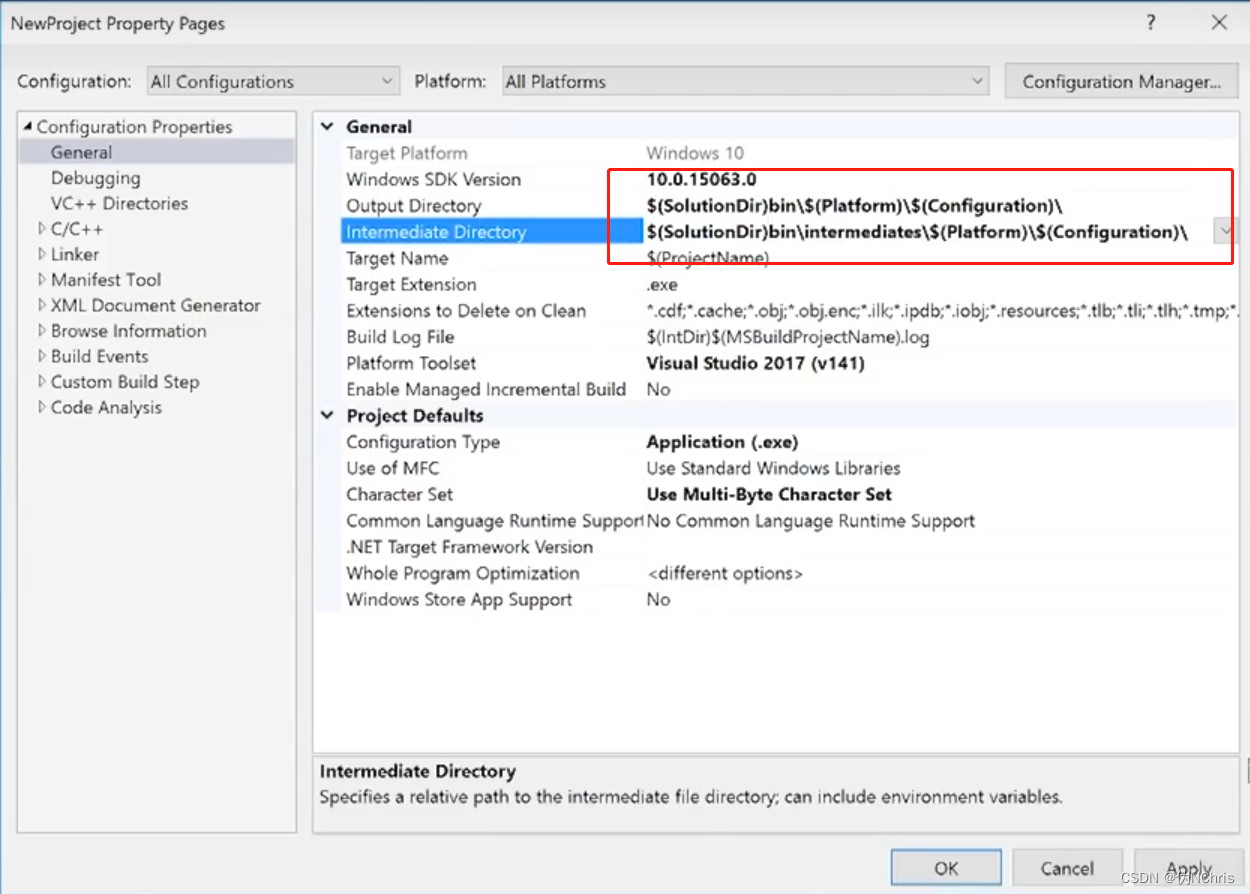
13. BEST Visual Studio Setup for C++ Projects!
主要讲解了如何初始化一个工程,将工程中的文件去分开到不同的文件夹中去。项目显示可以以文件格式来显示,也可以通过文件的路径来显示。
主要就是修改了如下图上的文件位置
14 loops in C++ (for loops , while loops)
代码多次执行的问题,讨论,不通过多次复制代码来执行,通过循环来执行。
for循环的基础格式
int main()
{
	for(int i = 0; i < 5;i++)
	{
		log("hello word");
	}
	std::cin.get();
}
如下代码也可以实现5次的循环输出 hello word
int main()
{
	int i = 0;
	bool condition = false;

	for(; condition ;)
	{
		log("hello word");
		i++;
		if(!(i < 5))
			condition = flase;
	}
	std::cin.get();
}
bool condition = false;

while(condition )
{
	log("hello word!");
}


do{

}while(condition );
15. Control Flow in C++ (continue, break, return)
continue:跳出单次循环,如果for执行5次,第三次循环触发continue,则第三次不执行,其他4次都执行
break:跳出大循环,如果第三次触发break,则45都不执行,直接出循环
return: 直接跳到大括号处,跳出子程序?
16 pointers in C++(指针)
笔者注:一直都说指针是C/C++的核心操作,也是非常容易引起混乱的操作,也许它也是比较容易的方式去理解其中精髓
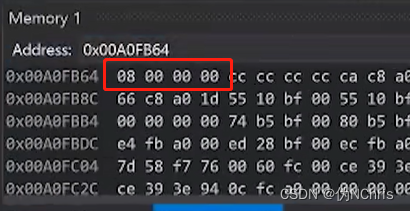
查看memory的数据,如下操作可以查看数据
debug>>windows>>memory
如下代码将var的值,传递到了ptr上,memory的值可以看到,就是var的值
int main()
{
	int var = 8;
	void* ptr = &var;
	std::cin.get();
}
如下所示*ptr = 10,则是对ptr这个地址进行赋值,这样值就从8改到了10
int main()
{
	int var = 8;
	void* ptr = &var;
	*ptr = 10;
	std::cin.get();
}
给指针分配一个固定的大小
int main()
{
	char* buffer = new char[8];
	memset(buffer,0,8);
	char** ptr = &buffer;//使得指针指向指针???
	delete[] buffer;// 删除buffer的数据
	std::cin.get();
}
可以看到这个数字的位置,被声明了
17 references in c++ (C++中的引用)
下面是引用的一个实例
最后输出的是6,a的值有被增加
void Increment(int* value)
{
	(*value)++;
}

int main()
{
	int a = 5;
	Increment(&a);
	log(a);
	std::cin.get();
}
这个代码和上面的代码运行输出的结果是一样的,可以详细参考其中的差异
void Increment(int& value)
{
	value++;
}

int main()
{
	int a = 5;
	Increment(a);
	log(a);
	std::cin.get();
}
指针和引用的另外一种用法
int main()
{
	int a = 5;
	int b = 8;
	int* ref = &a;//关联上a的地址
	*ref = 2;//给ref赋值2
	int* ref = &b;//关联上b的地址
	*ref = 1;//给ref赋值1

	log(a);//out put 2
	log(b);// out put 1
	std::cin.get();
}
18 classes in C++
下面展示了class的方式去声明代码
#define LOG(X) std::cout << X << std::endl

class Player
{
public://允许下面声明的信息,被外部使用
	int x,y;
	int speed;
};

void Move(Player& player ,int xa ,int ya)
{
	player.x += xa* player.speed;
	player.y += ya* player.speed;
}

int main()
{
	Player player;// a new objects
	Move(player,1,-1);
	std::cin.get();
}
下面就是把,move 放到class里面去写,推荐使用这样的方式去写,会简化代码
#define LOG(X) std::cout << X << std::endl
class Player
{
public://允许下面声明的信息,被外部使用
	int x,y;
	int speed;
	void Move(int xa ,int ya)
	{
		x += xa * speed;
		y += ya * speed;
	}
};
int main()
{
	Player player;// a new objects
	player,Move(1,-1);
	std::cin.get();
}
19 classes VS structs in C++
笔者看了两遍也没看明白人家要说啥~~~~尴了个尬
20 how to write a C++ class
通过下面的代码,展示了main函数中去调用class下的函数的方式
class中可以申明变量,常量,函数等信息,可以通过这样的方式实现数据的传递。
class log
{
public:
	const int LogLevelError = 0;
	const int LogLevelwarning = 1;
	const int LogLevelInfo = 2;
private:
	int m_Loglevel = LogLevelInfo ;
public:
	void SetLevel(int level)
	{
		m_Loglevel = level;
	}

	void Error(const char* message)
	{
		if(m_Loglevel  >= LogLevelError )
			std::cout << "[Error]: " << message << std::endl
	}

	void Warn(const char* message)
	{
		if(m_Loglevel  >= LogLevelwarning )
			std::cout << "[WARNING]: " << message << std::endl
	}

	void Info(const char* message)
	{
		if(m_Loglevel  >= LogLevelInfo )
			std::cout << "[Info]: " << message << std::endl
	}

}

int main()
{
	Log log;
	log.StLevel(log.LogLevelwarning );//通过这个实现了不同级别的输出,后面代码也可通过这样的方式实现不同级别的输出信息
	log.Warn("Hellow! ");
	log.Error("Hellow! ");
	log.Info("Hellow! ");
	std::cin.get();
}
21 Static in C++
Static 一般表示静态链接,声明的函数,或者字符串不再产生变化
如下展示了外部链接和内部链接的情况
static.cpp

int s_Variable = 5;
main.c

extern int s_Variable;

int main ()
{
	std::count << s_Variable <<std::endl;
	std::cin.get();
}
static.cpp改成如下的申明
static int s_Variable = 5;
所以static 变量可以全局使用??
22.static for classes and structs in c++
static 更改之后只有一个实例,所以实际的值以最后一个为准
所以下面的代码输出的值则是
5,8
5,8
#include <iostream>

#include"log.h"

struct  Entity
{
	static int x, y;
	void Print()
	{
		std::cout << x << ", " << y << std::endl;
	}
};

int Entity::x;
int Entity::y;

int main()
{
	Entity e;
	e.x = 2;
	e.y = 3;

	Entity e1;
	e1.x = 5;
	e1.y = 8;

	e.Print();
	e1.Print();
	std::cin.get();

}
因为静态变量对于私有的来说是无意义的,所以在实际的使用中可以更换成如下的方式去书写,可以将它看成是一个公共的空间去处理
#include <iostream>
struct  Entity
{
	static int x, y;
	static void Print()
	{
		std::cout << x << ", " << y << std::endl;
	}
};

int Entity::x;
int Entity::y;

int main()
{
	Entity::x = 2;
	Entity::y = 3;

	Entity::x = 5;
	Entity::y = 8;

	Entity::Print();
	Entity::Print();
	std::cin.get();
}
静态与非静态之间的访问关系,只能单向去使用,静态不能访问非静态的函数
也可以使用如下的方式去使用
static void Print(Entity a)
{
	std::cout << a.x << ", " << a.y << std::endl;
}
23 local static in C++(本地静态)(err)
?_ ?
讲了一些笔者看不懂的东西,下一课吧
24 ENUMS in C++ 枚举
如下面所示,枚举的格式是“char”,
枚举的数值则是从第一个开始,后边的逐个增大
所以 A = 5,则 B= 6,C = 7
ABC的代码值,会随顺序增大
#include <iostream>
enum Example : char
{
	A = 5,B,C
};

int main()
{
	Example value = B;
	if (value == 1)
	{
		// Do something here
	}

		std::cin.get();
}
下面展示了枚举在一个稍微完整一些的项目中的使用
还是使用了之前的 分级打印log的方式,在分级标志位上增加了枚举的使用,使得只要定义第一个值,后面的值就自动出现了
#include <iostream>

class Log
{
public:
	enum Level
	{
		LevelError = 0, LevelWaring, LevelInfo //从小到大变化 0 ,1,2
	};
private:
	Level m_LogLevel = LevelInfo;
public:
	void SetLevel(Level level)
	{
		m_LogLevel = level;
	}
	void Error(const char* message)
	{
		if (m_LogLevel >= LevelError)
			std::cout << "[ERROR]: " << message << std::endl;
	}

	void Warn(const char* message)
	{
		if (m_LogLevel >= LevelWaring)
			std::cout << "[Warn]: " << message << std::endl;
	}

	void Info(const char* message)
	{
		if (m_LogLevel >= LevelInfo)
			std::cout << "[Info]: " << message << std::endl;
	}

};

int main()
{
	Log log;
	log.SetLevel(Log::LevelError);
	log.Warn("hello!");
	log.Error("hello!");
	log.Info("Hello!");
	std::cin.get();

}
25 constructors in C++
下面主要是展示了没有传入变量的情况下,代码的结构
#include <iostream>

class Entity
{
public:
	Entity();
	~Entity();

	float X, Y;
	void Init()
	{
		X = 0.0f;
		Y = 0.0f;

	}
	void Print()
	{
		std::cout << X << "," << Y << std::endl;

	}
private:

};

//初始化class的时候,也会运行其中的程序
Entity::Entity()
{
	X = 0.0f;
	Y = 0.0f;
}

Entity::~Entity()
{
}

int main()
{
	Entity e;
	std::cout <<e.X << std::endl;
	e.Print();
	std::cin.get();

}
下面则是传入了一个浮点的参数
#include <iostream>

class Entity
{
public:
	float X, Y;
	Entity()
	{
	}

	Entity( float x, float y)
	{
		X = x;
		Y = y;
	}
	void Init()
	{
		X = 0.0f;
		Y = 0.0f;

	}
	void Print()
	{
		std::cout << X << "," << Y << std::endl;

	}
private:

};


int main()
{
	Entity e(10.0f,5.0f);
	std::cout <<e.X << std::endl;
	e.Print();
	std::cin.get();

}
26 Destructors in C++
#include <iostream>

class Entity
{
public:
	float X, Y;
	Entity()
	{
		X = 0.0f;
		Y = 0.0f;
		std::cout << " Created Entity!" << std::endl;
	}

	~Entity()
	{
		std::cout << " Destroyed Entity!" << std::endl;

	}
	void Init()
	{
		X = 0.0f;
		Y = 0.0f;

	}
	void Print()
	{
		std::cout << X << "," << Y << std::endl;

	}
private:

};

void Fucntion()
{
	Entity e;
	e.Print();
}

int main()
{
	Fucntion();
	std::cin.get();

}
27 inheritance in C++
继承代码
#include <iostream>

class Entity
{
public:
	float X, Y;


	void Move(float xa, float ya)
	{
		X += xa;
		Y += ya;
	}


};

class Player :public Entity
{
public:
	const char* Name;

	void PrintName()
	{
		std::cout << Name << std::endl;

	}

};

int main()
{
	std::cout << sizeof(Player) << std::endl;
	Player  player;
	player.Move(5,5);
	player.X = 2;
	player.Name = "Hello ";
	player.PrintName();

	std::cin.get();

}
28 Virtual Functions in C++ 中的接口 纯虚函数
下面是演示的代码,在增加和不增加virtual 的时候有输出信息的差异,也可以看做传递函数,在这代码中产生了差异
#include <iostream>
#include <string>

class Entity
{
public:
	virtual std::string GetName() { return "Entity"; }//virtual 修正覆盖??
};

class Player :public Entity
{
private:
	std::string m_Name;

public:
	Player(const std::string& name)
		:m_Name(name) {}

	std::string GetName() override { return m_Name; }//override 和上面的virtual呼应

};

int main()
{
	Entity* e = new Entity();
	std::cout << e->GetName() << std::endl; //输出Entity

	Player* p = new Player("Cherno");//将值传到player中
	std::cout << p->GetName() << std::endl;//输出 Cherno

	Entity* entity = p;
	std::cout << entity->GetName() << std::endl;//输出Entity


	std::cin.get();

}
29 interfaces in C++中的接口
展示了Class 如何相互链接?继承等关系,具体代码还需要一些时间去领悟相关信息
#include <iostream>
#include <string>

class Printable
{
public:
	virtual std::string GetClassName() = 0;

};
class Entity :public Printable
{
public:
	virtual std::string GetName() { return "Entity"; }//virtual 修正覆盖??
	std::string GetClassName() override { return "Entity"; }
};

class Player :public Entity
{
private:
	std::string m_Name;

public:
	Player(const std::string& name)
		:m_Name(name) {}

	std::string GetName() override { return m_Name; }//override 和上面的virtual呼应
	std::string GetClassName() override { return "Player"; }
};
void PrintName(Entity* entity)
{
	std::cout << entity->GetName() << std::endl;

}

void Print(Printable* obj)
{
	std::cout << obj->GetClassName() << std::endl;

}

class A:public Printable
{
public:
	std::string GetClassName() override { return "A"; }

private:

};

int main()
{
	Entity* e = new Entity();
	PrintName(e);

	Player* p = new Player("Cherno");//将值传到player中
	PrintName(e);

	Print(e);
	Print(p);
	Print(new A());

	std::cin.get();

}
30 C++中的数组
32 C++中的字符串
33 C++ 字符串字面量
34 C++ 中的const
const 代表了不可以被改变的量,如下图,a的值就是不能被改变
如下中的给a赋值2 ,则会被报编译错误
#include <iostream>
#include <string>
int main()
{
	const int a = 5;
	a = 2;
	std::cin.get();
}
int main()
{
	const int MAX_AGE = 90;
	const int* a = new int;//表示不得修改指针所指的内容
    int const* a = new int;//两句意义相同
	*a = 2//这条会报错

	a = (int*)&MAX_AGE;
	std::cout << *a << std::endl;

	std::cin.get();
}
int main()
{
	const int MAX_AGE = 90;
	 int* const a = new int;//表示不得修改指针所指的位置

	*a = 2

	a = (int*)&MAX_AGE;//这条会报错
	std::cout << *a << std::endl;

	std::cin.get();
}
下面这一段则是演示了,const 在下面函数中的用法
#include <iostream>
#include <string>
class Entity
{
private :
	int m_X, m_Y;

public:
	int GetX() const //代表这个累不会被改
	{
		return m_X;
	}

};

void PrintEntity(const Entity& e)
{
	std::cout << e.GetX() << std::endl;
}

int main()
{
	const int MAX_AGE = 90;
	 int* const a = new int;//表示不得修改指针所指的位置

	 *a = 2;

	std::cout << *a << std::endl;

	std::cin.get();
}
35 C++ 中的mutable关键字
mutable 定义允许在const 中更改的变量
#include <iostream>
#include <string>

class Entity
{
private:
	std::string m_Name;
	mutable int m_DebugCount = 0; //定义可以 被更改的函数

public:
	const std::string& GetName() const
	{
		m_DebugCount++;
		return m_Name;
	}
};

int main()
{
	const Entity e;
	e.GetName();
}
36 C++ 构造函数初始化列表
在calss类中,可以有多个不同的初始化函数,从而传递不同的参数进去?
基础用法,如下所示,传递参数
#include <iostream>
#include <string>

class Entity
{
private:
	std::string m_Name;

public:
	Entity()
	{
		m_Name = "Unknown";
	}

	Entity(const std::string& name)
	{
		m_Name = name;
	}
	const std::string& GetName() const
	{
		return m_Name;
	}
};

int main()
{
	Entity e0;
	std::cout << e0.GetName() << std::endl;
	Entity e1("Hellow !");
	std::cout << e1.GetName() << std::endl;

	std::cin.get();
}
如下代码产生了两次的Entity
#include <iostream>
#include <string>

class  Example
{
public:
	Example()
	{
		std::cout << "Created Entity !" << std::endl;
	}

	Example(int x)
	{
		std::cout << "Created Entity with " << x << "!" << std::endl;
	}
};

class Entity
{
private:
	std::string m_Name;
	Example m_Example; //第一次产生Entity
public:
	Entity()
	{
		m_Name = std::string("Unknown");
		m_Example = Example(8);//第二次产生Entity
	}

	Entity(const std::string& name)
		:m_Name(name)
	{
	}
	const std::string& GetName() const
	{
		return m_Name;
	}
};

int main()
{
	Entity e0;

	std::cin.get();
}
如下代码则是产生了一次的Entity ,需要对比两个部分的差异,得出结论
class Entity
{
private:
	std::string m_Name;
	Example m_Example; //第一次产生Entity
public:
	Entity()
		:m_Example(Example(8))
	{
		m_Name = std::string("Unknown");
	}

	Entity(const std::string& name)
		:m_Name(name)
	{
	}
	const std::string& GetName() const
	{
		return m_Name;
	}
};
或者也可以这样写
class Entity
{
private:
	std::string m_Name;
	Example m_Example; //第一次产生Entity
public:
	Entity()
		:m_Example(8)
	{
		m_Name = std::string("Unknown");
	}

	Entity(const std::string& name)
		:m_Name(name)
	{
	}
	const std::string& GetName() const
	{
		return m_Name;
	}
};
37 C++ 的三元操作符 (a? b:C)
下面就是整个操作的 展示
a? b:C
如果a为真,执行b,否则执行C
#include <iostream>
#include<string>

static int s_Level = 1;
static int s_Speed = 2;


int  main()
{
	if (s_Level > 5)
		s_Speed = 10;
	else
		s_Speed = 5;

	s_Speed = s_Level > 5 ? 10 : 5;

	s_Speed = s_Level > 5 ? s_Level > 10 ? 15 : 10 : 5;//减少了if的使用?不推荐嵌套使用
	std::cout << s_Speed << std::endl;

	std::string rank = s_Level > 10 ? "Master" : "Beginner";

	std::string otherRank;
	if (s_Level > 10)
		otherRank = "Master";
	else
	{
		otherRank = "Bigger";
	}
	std::cin.get();
}


 733
733


 被折叠的 条评论
为什么被折叠?
被折叠的 条评论
为什么被折叠?
 到【灌水乐园】发言


