


外部中断的介绍
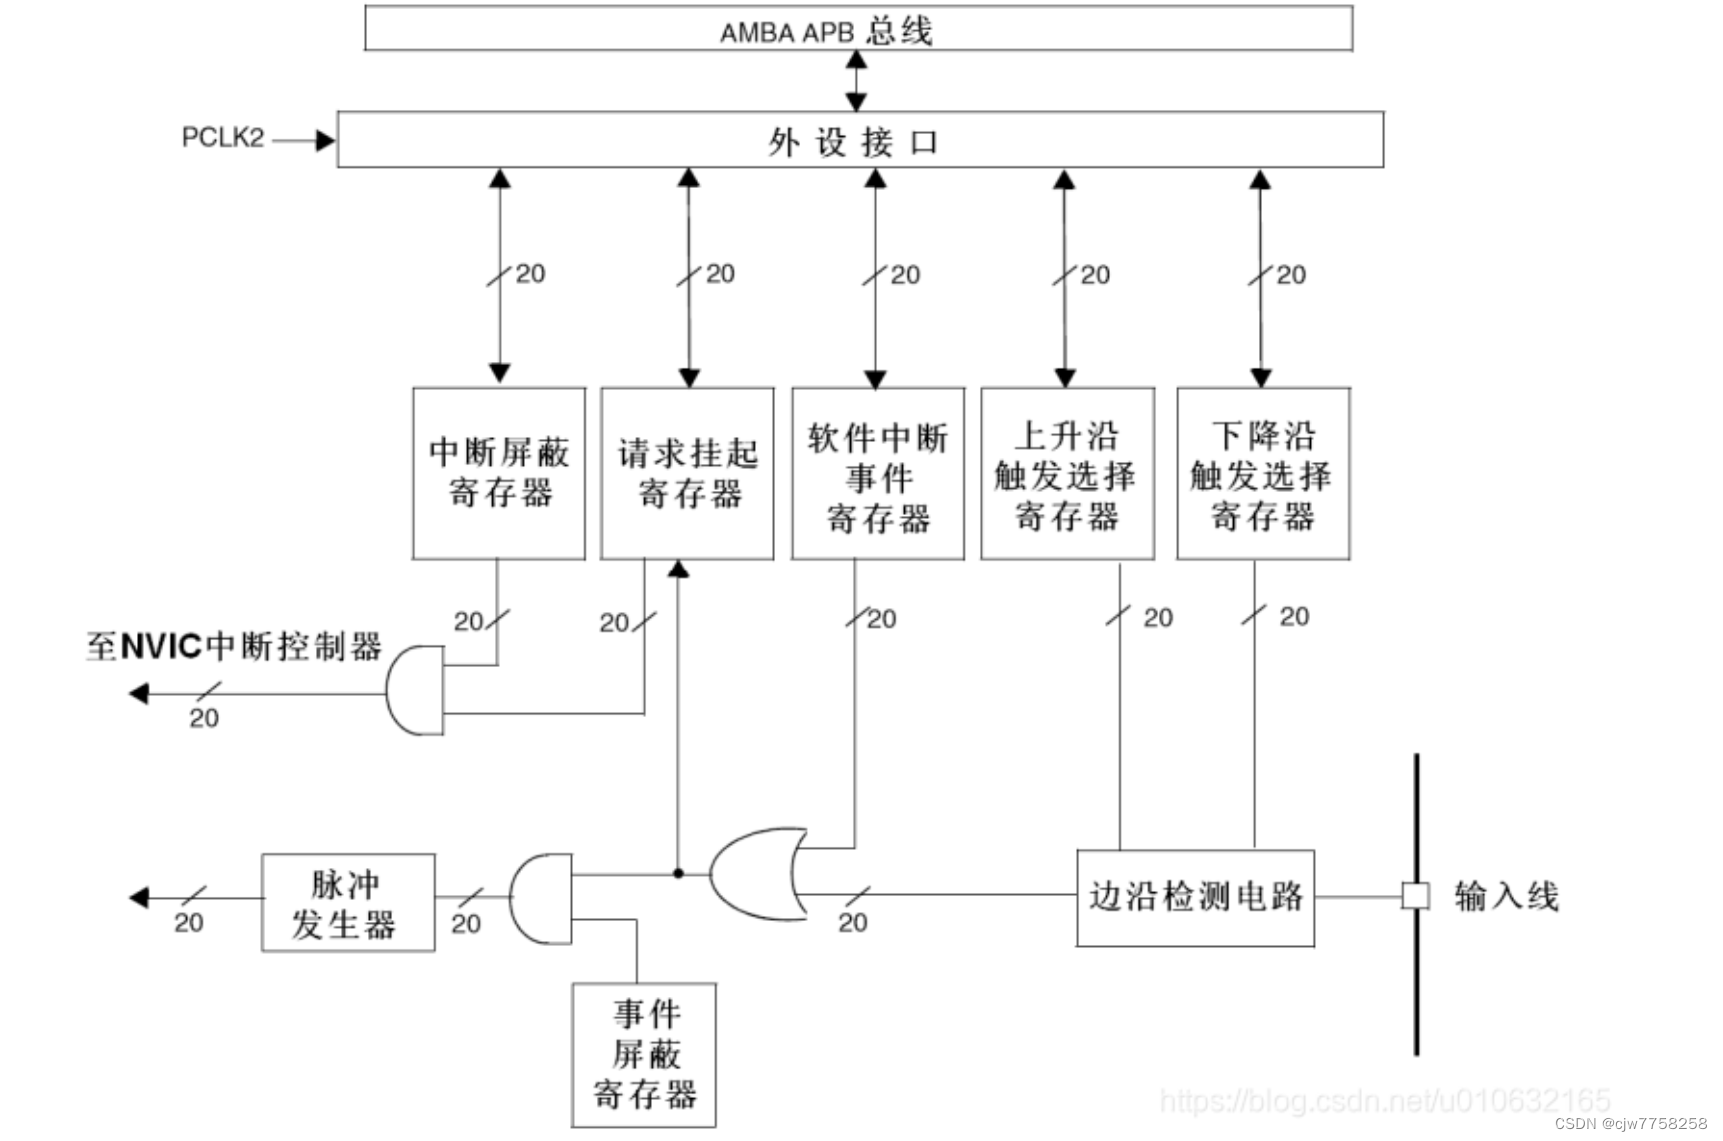
互联型STM32有20个能够产生事件/中断请求的边沿检测器,STM32F103系列有19个能够产生事件/中断请求的边沿检测器。
每个输入线可以独立地配置输入类型(脉冲或挂起)和对应的触发事件(上升沿或下降沿或者双边沿都触发)。
每个输入线都可以独立地被屏蔽。挂起寄存器保持着状态线的中断请求。
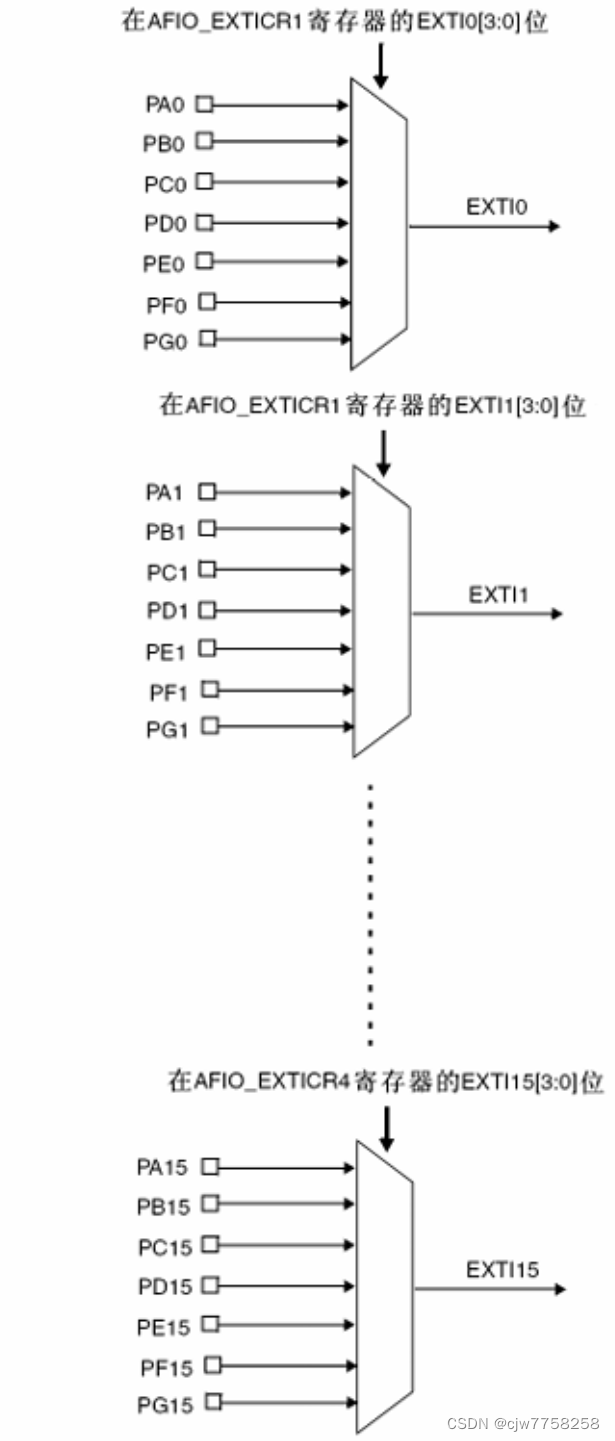
GPIO的映射关系
LED.C
#include "led.h"
void LED_Init(void)
{
  GPIO_InitTypeDef  GPIO_InitStructure;

  RCC_AHB1PeriphClockCmd(RCC_AHB1Periph_GPIOA, ENABLE);


  GPIO_InitStructure.GPIO_Pin = GPIO_Pin_6 | GPIO_Pin_7;
  GPIO_InitStructure.GPIO_Mode = GPIO_Mode_OUT;
  GPIO_InitStructure.GPIO_OType = GPIO_OType_PP;
  GPIO_InitStructure.GPIO_Speed = GPIO_Speed_100MHz;//100MHz
  GPIO_InitStructure.GPIO_PuPd = GPIO_PuPd_UP;
  GPIO_Init(GPIOA, &GPIO_InitStructure);
  GPIO_ResetBits(GPIOA, GPIO_Pin_7);

}
LED.H
#ifndef __LED_H
#define __LED_H
#include "sys.h"


#define LED0 PAout(6)	// DS0
#define LED1 PAout(7)	// DS1

void LED_Init(void);
#endif
Key.c
#include "key.h"
#include "delay.h"
#include "led.h"
void key_init(void)

{
	GPIO_InitTypeDef  GPIO_InitStructure;

  RCC_AHB1PeriphClockCmd(RCC_AHB1Periph_GPIOE, ENABLE);

  GPIO_InitStructure.GPIO_Pin = GPIO_Pin_4| GPIO_Pin_3;
  GPIO_InitStructure.GPIO_Mode = GPIO_Mode_IN;

  GPIO_InitStructure.GPIO_Speed = GPIO_Speed_100MHz;//100MHz
  GPIO_InitStructure.GPIO_PuPd = GPIO_PuPd_UP;
  GPIO_Init(GPIOE, &GPIO_InitStructure);
 }
Key.h
#ifndef KEY_H
#define KEY_H
#include "sys.h"

#define key0 PEin(4)
#define key1 PEin(3)
void key_init(void);
#endif
main
#include "sys.h"
#include "delay.h"
#include "usart.h"
#include "led.h"
#include "key.h"
#include "exits.h"
int main(void)
{
    NVIC_PriorityGroupConfig(NVIC_PriorityGroup_2);//设置系统中断优先级分组 2
	delay_init(168);
	LED_Init();
    key_init();
    EXTIX_Init();
	LED0=0;
	LED1=1;


	while(1)
	{
	}
}


 2350
2350

 被折叠的 条评论
为什么被折叠?
被折叠的 条评论
为什么被折叠?
 到【灌水乐园】发言


