


We’ve already showed you how to use Gmail’s IMAP support in Microsoft Outlook, Mozilla Thunderbird and even KMail, but what about the built-in mail client in Windows Vista… how could we leave that one out?
我们已经向您展示了如何在Microsoft Outlook , Mozilla Thunderbird甚至KMail中使用Gmail的IMAP支持,但是Windows Vista中的内置邮件客户端又如何呢?
It turns out that it’s quite a usable application, not entirely full-featured or extendable, but it handles the job with a lot better performance than the others we’ve looked at so far… not to mention being rather slick looking.
事实证明,这是一个非常有用的应用程序,不完全具有完整功能或可扩展性,但与目前为止我们所看过的其他应用程序相比,它以更好的性能处理了该工作……更不用说是相当精巧的外观了。
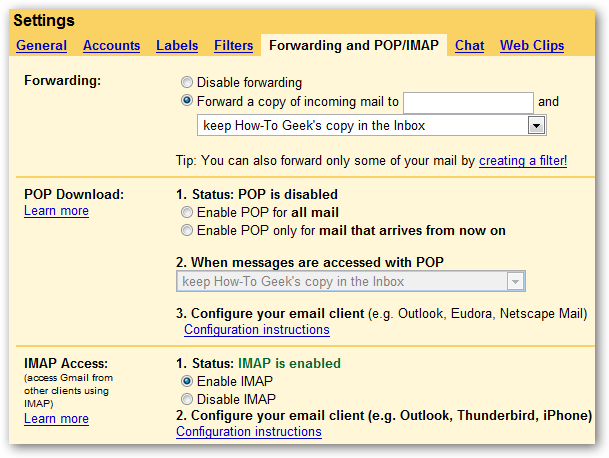
If you haven’t already enabled IMAP in Gmail, open up the settings page and choose Forwarding and POP/IMAP, and then select to Enable IMAP.
如果您尚未在Gmail中启用IMAP,请打开设置页面并选择转发和POP / IMAP,然后选择启用IMAP。
Open Windows Mail and choose Tools \ Accounts from the menu and then click on the Add button.
打开Windows Mail,然后从菜单中选择“工具\帐户”,然后单击“添加”按钮。

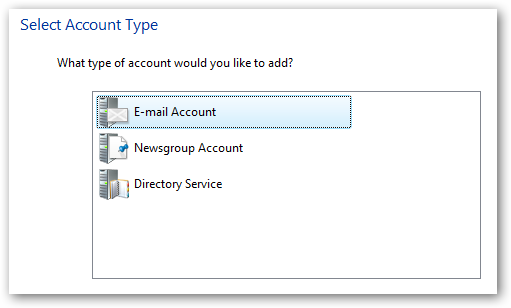
You’ll obviously want to select E-mail account and move to the next screen…
您显然要选择“电子邮件帐户”并转到下一个屏幕…
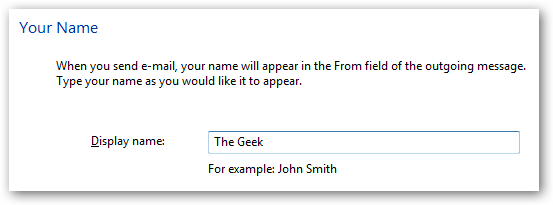
Enter your name.
输入你的名字。
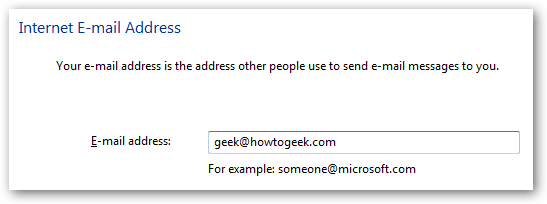
Enter your email address, using your Gmail email address here. You’ll note that mine is not @gmail.com because I’m using Gmail hosted for your domain.
在此处使用您的Gmail电子邮件地址输入您的电子邮件地址。 您会注意到,我不是@ gmail.com,因为我使用的是为您的域托管的Gmail。
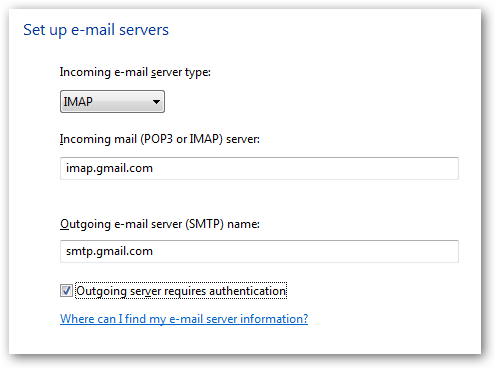
Finally, more than one option on the wizard page… choose IMAP from the drop-down, and then enter in the following values:
最后,向导页面上有多个选项……从下拉列表中选择IMAP,然后输入以下值:
- Incoming Server: imap.gmail.com 传入服务器:imap.gmail.com
- Outgoing Server: smtp.gmail.com 寄出伺服器:smtp.gmail.com
- Check “Outgoing server requires authentication” 选中“传出服务器需要身份验证”
Note: If you are outside of the US you may need to use imap.googlemail.com and smtp.googlemail.com instead of imap.gmail.com and smtp.gmail.com.
注意:如果您不在美国,则可能需要使用imap.googlemail.com和smtp.googlemail.com而不是imap.gmail.com和smtp.gmail.com。
On the next screen enter in your Gmail email address and your password.
在下一个屏幕上,输入您的Gmail电子邮件地址和密码。

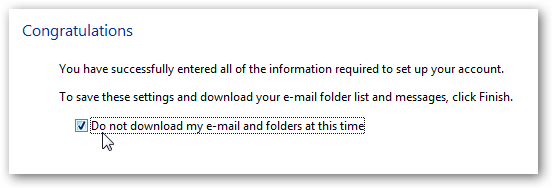
Very important: Check the box for “Do not download my e-mail and folders at this time”.
非常重要:选中“此时不要下载我的电子邮件和文件夹”复选框。
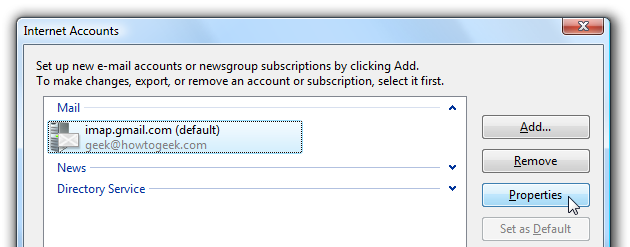
Click the Finish button to get back to the Internet Accounts dialog, and then select your new account and choose the Properties button.
单击完成按钮返回到“ Internet帐户”对话框,然后选择您的新帐户并选择“属性”按钮。
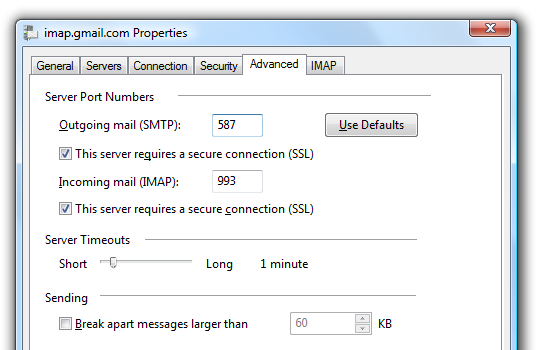
On the Advanced tab, you’ll want to first check both options for “This server requires a secure connection(SSL)”, and then verify that the ports are set to the following:
在“高级”选项卡上,您首先要选中“此服务器需要安全连接(SSL)”这两个选项,然后验证端口是否设置为以下各项:
- Outgoing mail (SMTP): 587 外寄邮件(SMTP):587
- Incoming mail (IMAP): 993 接收邮件(IMAP):993
Now choose the IMAP tab and remove the checkbox for “Store special folders on IMAP server”.
现在,选择“ IMAP”选项卡,然后删除“在IMAP服务器上存储特殊文件夹”复选框。
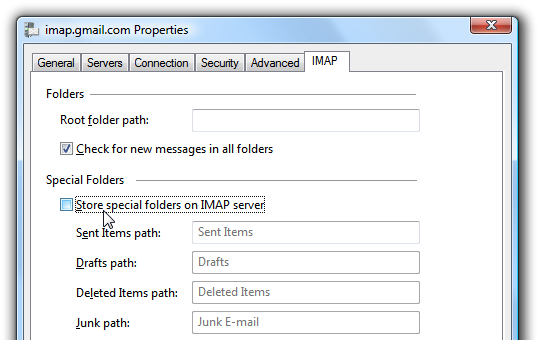
Informative Note: If you do not remove the checkbox here you will end up with duplicated sent items, and your deleted / junk mail will just end up being archived in a label. Your choice. If you don’t use labels in Gmail you could enter [Gmail] as the root folder path, and then adjust the values in the special folders section to match the Gmail folder names. It’s also worth noting that you cannot use [Gmail]\Spam here because Windows Mail will not accept the “\” or “/” characters in folder names.
信息性提示:如果不删除此处的复选框,最终将导致重复的已发送邮件,而删除/垃圾邮件将最终被存档在标签中。 你的选择。 如果您不在Gmail中使用标签,则可以输入[Gmail]作为根文件夹路径,然后调整特殊文件夹部分中的值以匹配Gmail文件夹名称。 还值得注意的是,您不能在此处使用[Gmail] \ Spam,因为Windows Mail将不接受文件夹名称中的“ \”或“ /”字符。
Important Setting
重要设置
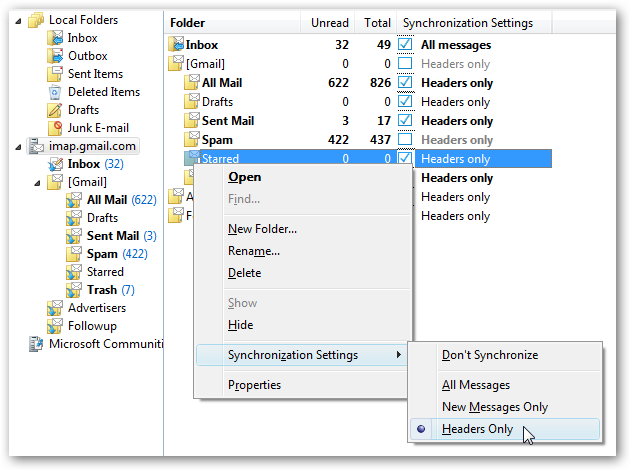
Now you can close out of the account settings dialogs, but before you start Sending/Receiving you’ll probably want to click on the “imap.gmail.com” item in the left hand folder pane and adjust these settings so Windows mail doesn’t try and download everything:
现在,您可以关闭“帐户设置”对话框,但是在开始发送/接收之前,您可能需要单击左侧文件夹窗格中的“ imap.gmail.com”项,并调整这些设置,以便Windows Mail不尝试下载所有内容:
- Remove the checkbox from [Gmail] 删除[Gmail]中的复选框
- Remove the checkbox from [Spam] 删除[垃圾邮件]中的复选框
- If you have a lot of messages, you should consider removing the checkbox from [All Mail] 如果您有很多邮件,则应考虑从[所有邮件]中删除该复选框
- Change all other folders to “Headers only”. (You could leave the Inbox set to All if you’d like) 将所有其他文件夹更改为“仅标题”。 (如果需要,您可以将“收件箱”设置为“全部”)
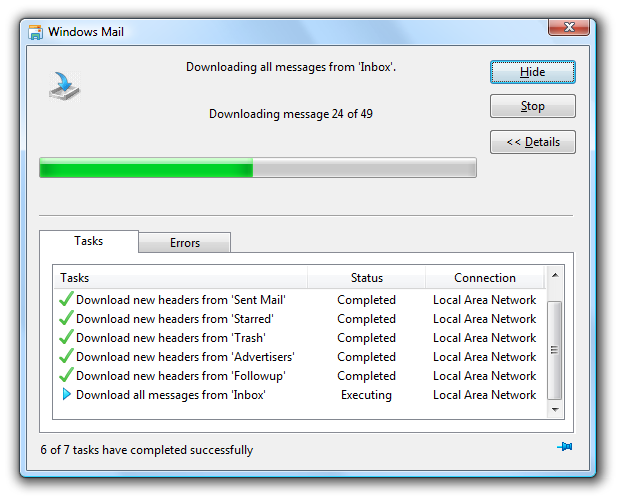
Now that you’ve made these changes, you can go ahead and hit the Send/Receive button, and hopefully everything should work perfectly now:
现在,您已经进行了这些更改,可以继续并单击“发送/接收”按钮,希望现在一切都可以正常工作:
Creating New Folders / Labels
创建新的文件夹/标签
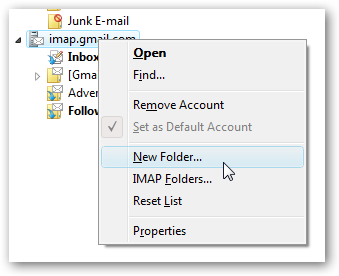
Gmail Labels are represented as folders on the Windows Mail side. You can easily create a new folder by right-clicking on the imap.gmail.com entry and choosing New Folder.
Gmail标签在Windows Mail端表示为文件夹。 右键单击imap.gmail.com条目,然后选择“新建文件夹”,即可轻松创建新文件夹。
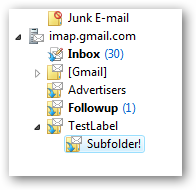
You can even create subfolders, which will show up in Gmail named “TestLabel/Subfolder!” for this example:
您甚至可以创建子文件夹,该子文件夹将显示在名为“ TestLabel / Subfolder!”的Gmail中。 对于此示例:
Dragging a message to the folder will assign the label in Gmail.
将邮件拖动到该文件夹将在Gmail中分配标签。
Deleting a Message from Gmail
从Gmail删除邮件
If you want to delete a message from Gmail you can’t just hit the delete button, because while it will delete the message from view, it simply archives it on the Gmail side.
如果您想从Gmail删除邮件,则不能只单击Delete按钮,因为虽然它将从视图中删除邮件,但它只是将其存档在Gmail端。
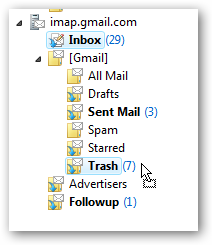
To delete the message drag it to the [Gmail] \ Trash folder.
要删除消息,请将其拖到[Gmail] \ Trash文件夹中。
Marking a Message as Spam in Gmail
在Gmail中将邮件标记为垃圾邮件
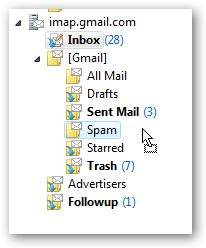
Because we can’t synchronize the spam folders, if you want to mark a message as spam in Gmail you’ll have to drag that message over to the [Gmail] \ Spam folder. Otherwise it’ll just end up being pushed into your All Mail archive.
由于我们无法同步垃圾邮件文件夹,因此,如果要在Gmail中将邮件标记为垃圾邮件,则必须将该邮件拖到[Gmail] \ Spam文件夹中。 否则,它将最终被推送到您的“所有邮件”存档中。
Using the Conversation View
使用对话视图
One of the nicer features in Gmail is the conversation view, and you can somewhat emulate that in Windows Mail by going to View \ Current View \ Group Messages by Conversation.
Gmail更好的功能之一就是对话视图,您可以通过转到“视图” \“当前视图” \“按对话分组”来在Windows Mail中进行一些模拟。
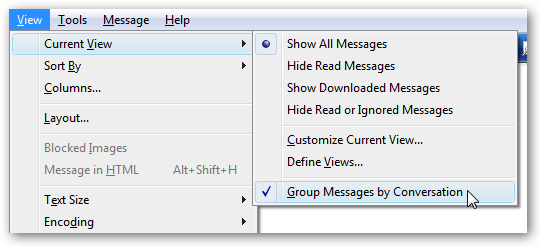
The threaded view is pretty nice, the only problem is that you won’t see your replies in the list, the way it works in Gmail.
线程视图非常好,唯一的问题是您不会在列表中看到您的回复,因为它在Gmail中的工作方式。

Starring a Message in Gmail
在Gmail中为邮件加注星标
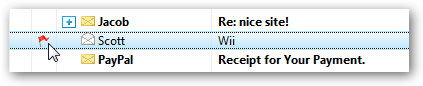
To star a message on the Gmail side, just click to “Flag” the message in Windows Mail.
要在Gmail一侧给邮件加注星标,只需在Windows Mail中单击“标记”邮件即可。
Obviously it works the other way too.
显然,它也以其他方式起作用。
Are We Done?
我们完了吗?
We sure are. Everything should be working quite well… unlike most of the other clients Windows Mail seems to work quite well for me in terms of performance. It’s not as integrated as Thunderbird can be, but very usable.
我们肯定是。 一切都应该运行良好……与大多数其他客户端不同,Windows Mail在性能方面似乎对我来说运行良好。 它不像Thunderbird那样集成,但是非常有用。
翻译自: https://www.howtogeek.com/howto/windows-vista/setting-up-gmail-imap-support-for-windows-vista-mail/


 1960
1960

 被折叠的 条评论
为什么被折叠?
被折叠的 条评论
为什么被折叠?
 到【灌水乐园】发言


