


minecraft
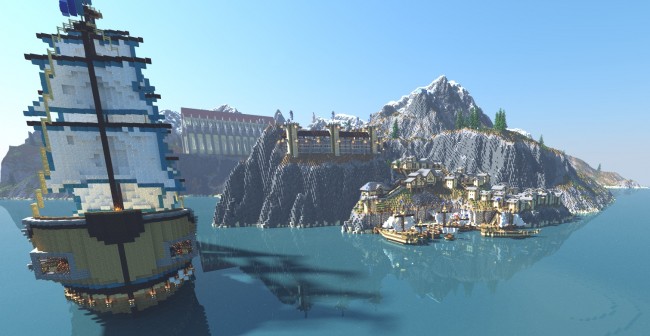
Do you have a really cool Minecraft world, and want to show it off? If so, Chunky will take very high quality pictures of your Minecraft worlds, which will show off your creations better than a simple in-game screenshot.
您是否有一个非常酷的Minecraft世界,并想炫耀它? 如果是这样,Chunky将为您的Minecraft世界拍摄非常高质量的图片,比简单的游戏内屏幕截图更好地展示您的作品。
安装 (Installation)
Chunky runs on Java and is cross platform. It can be downloaded from their website, or alternatively it can be compiled from source from their Github repository. Installation is fairly straightforward on most systems, especially if you only download the Java binaries — just click and run the program.
Chunky在Java上运行,并且是跨平台的。 可以从他们的网站上下载它,或者可以从其Github存储库中的源代码进行编译。 在大多数系统上,安装非常简单,尤其是如果您仅下载Java二进制文件时,只需单击并运行该程序即可。
使用矮胖 (Using Chunky)
Once Chunky loads up, it will ask you to select one of your Minecraft worlds. You can change the world at any time by clicking the “Change World” button.
当Chunky载入后,它将要求您选择一个我的世界世界。 您可以随时单击“更改世界”按钮来更改世界。
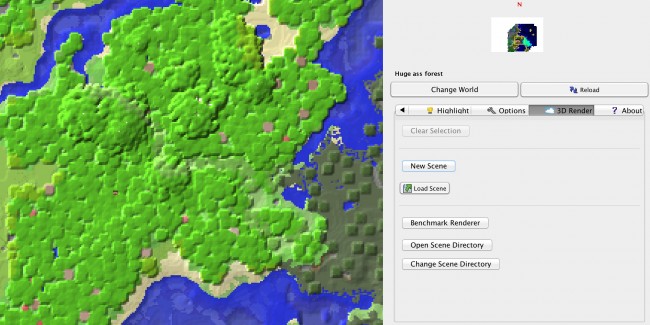
You can select the chunks you want to be included in your render by clicking them. If you zoom out, you can select multiple chunks at a time. Anything not inside these chunks will not be rendered, so if you have an idea of an angle you want to take a shot of, make sure to get enough chunks behind it and in the background so that your render will not be cut off.
您可以通过单击选择要包含在渲染中的块。 如果缩小,则可以一次选择多个块。 这些块中没有的任何内容都不会被渲染,因此,如果您想拍摄一个角度,请确保在其后方和背景中获得足够的块,以免截断渲染。
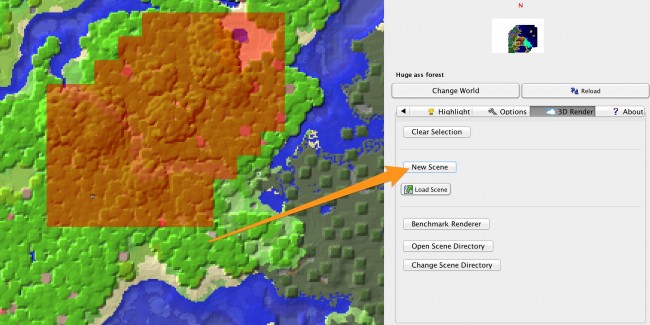
Once you’ve selected enough chunks, click the “New Scene” button, which will load all the chunks into memory and bring up the settings panel.
选择足够的块后,单击“新场景”按钮,这会将所有块加载到内存中并调出设置面板。
Chunky has many settings to configure, the most important of which being the angle at which Chunky will take the “picture”. Click into the preview window and use the mouse, W, A, S, and D to move around, as well as R and F to move up and down. Once you’ve got the perfect angle, you can move on to configuring Chunky’s many options.
Chunky有许多设置需要配置,其中最重要的是Chunky拍摄“照片”的角度。 单击进入预览窗口,然后使用鼠标W,A,S和D左右移动,并使用R和F上下移动。 一旦有了理想的角度,就可以继续配置Chunky的许多选项。
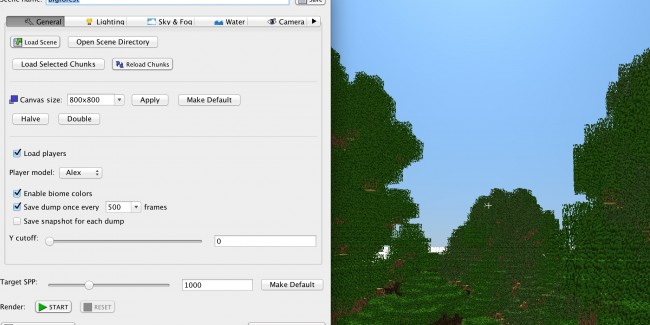
Under the “General Tab”, the only important option is the canvas size, or resolution. Smaller canvases will render faster, but look worse. Large canvases will look great but may take hours to render.
在“常规选项卡”下,唯一重要的选项是画布大小或分辨率。 较小的画布会渲染得更快,但看起来会更糟。 大画布看起来不错,但可能要花几个小时才能渲染。
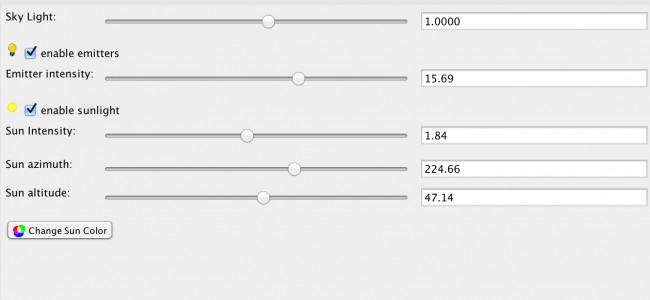
Under the “Lighting” tab, we’ll find options for the sun, as well as artificial emitters like Glowstone or Torches. You can set the intensity of both light sources, as well as the angle of the sun and the color.
在“照明”标签下,我们可以找到太阳的选项,以及像Glowstone或Torches这样的人造发射器。 您可以设置两个光源的强度,以及太阳和颜色的角度。
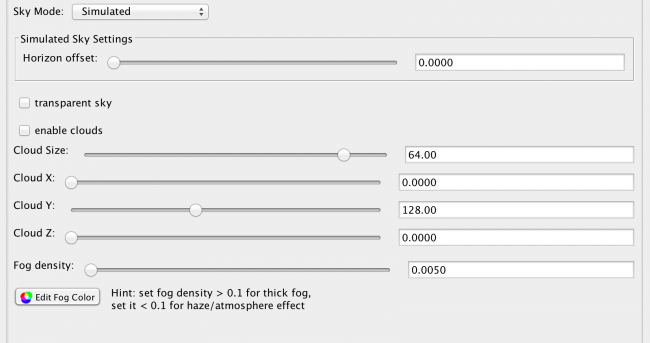
Under “Sky & Fog”, we find options for butts and fog density. Changing the fog density to greater than 0.1 results in a very foggy scene, and any value less than 0.01 is good for basic shots. You can also set custom skyboxes from here.
在“天空和雾”下,我们可以找到烟头和雾密度的选项。 将雾密度更改为大于0.1会导致非常雾的场景,任何小于0.01的值都适合基本拍摄。 您也可以从此处设置自定义的天空盒。
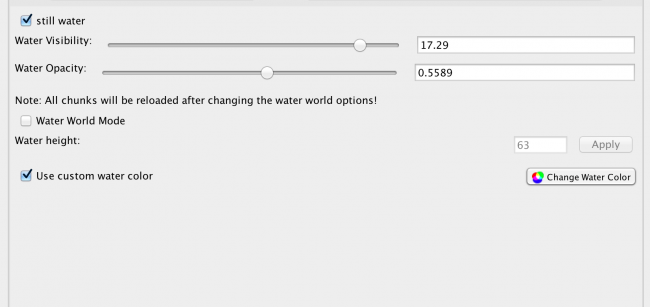
Next up is “Water”. The main option to configure here is whether or not you want still water, which will leave a prominent reflection, and the water’s visibility and opacity. You can also change the color, which is useful is you want a lighter or darker blue, or even a black or green. It’s up to you.
接下来是“水”。 在此配置的主要选项是是否要喝静水(水会留下明显的反射)以及水的可见性和不透明度。 您还可以更改颜色,这对于需要较浅或较深的蓝色,甚至是黑色或绿色非常有用。 由你决定。
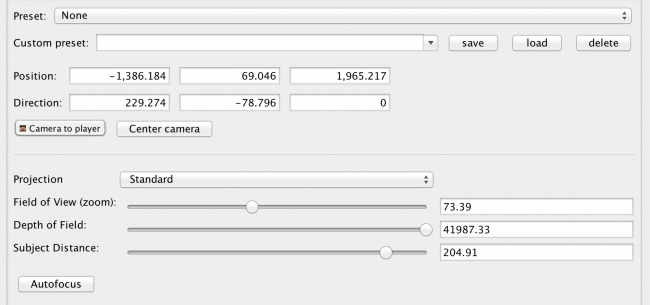
The last main tab is “Camera”, which contains many powerful options. The positional and directional values don’t really matter as we can change them from the preview editor. The “Projection” drop down changes the camera “lens”. We can do the “Standard” projection, which looks like regular Minecraft; “Parallel”, an isographic view that makes your city look like something out of The Sims; “Fisheye”, a lens that distorts your image but gets a very wide shot; and “Panoramic”, which will get a 360 degree shot of your world.
最后一个主选项卡是“相机”,其中包含许多强大的选项。 位置和方向值并不重要,因为我们可以从预览编辑器中更改它们。 “投影”下拉菜单更改相机的“镜头”。 我们可以进行“标准”投影,看起来像常规的《我的世界》。 “平行”,是使您的城市看起来像《模拟人生》中的东西的立体视图; “鱼眼镜头”,一种镜头,可以使您的图像失真,但镜头范围很广; 和“全景”,可以360度全方位拍摄您的世界。
The field of view can be raised and lowered to zoom the shot in and out, and the depth of field and subject distance (focus) can be tweaked, though it’s best to leave it to autofocus if you don’t know what you’re doing.
可以升高或降低视野以放大或缩小镜头,并且可以调整景深和被摄体距离(焦点),但是如果您不知道自己在做什么,最好将其置于自动对焦状态。在做。
Once you’ve got all the settings just right, click “Start” to begin the render. You can pause it or reset it at any time after this, though if you reset it all your progress will be lost.
完成所有设置后,单击“开始”开始渲染。 在此之后,您可以随时暂停或重置它,但是如果重置它,所有的进度都会丢失。

Keep in mind Chunky takes a while to render high quality images. At the bottom of the settings is “Target SPP”, which stands for ‘Samples Per Pixel’. The SPP is the quality of the image; with each pass over, the image becomes more and more clear. An SPP of 1,000 is the default, and looks pretty good. An SPP of over 9,000 will translate to a very high quality render. The higher the SPP, the longer it takes to render. You can save the image at any point in the render by clicking “Save Current Frame”.
请记住,矮胖需要一段时间才能渲染高质量图像。 设置的底部是“目标SPP”,代表“每像素样本数”。 SPP是图像的质量; 每次经过时,图像变得越来越清晰。 默认值为SPP 1,000,看起来非常不错。 超过9000的SPP将转化为高质量的渲染。 SPP越高,渲染花费的时间越长。 您可以通过单击“保存当前帧”在渲染器中的任何位置保存图像。
翻译自: https://www.howtogeek.com/237753/how-to-make-high-quality-renders-of-your-minecraft-creations/
minecraft


 1014
1014

 被折叠的 条评论
为什么被折叠?
被折叠的 条评论
为什么被折叠?
 到【灌水乐园】发言


