


chromebook刷机
For a long time, Chromebook users who also need access to the Android Debug Utility (ADB) and Fastboot for Android devices were left with one option: Crouton. Now, however, both ADB and Fastboot are included in Chrome OS. Here’s how to access them.
长期以来,需要同时使用Android调试实用程序 (ADB)和适用于Android设备的Fastboot的Chromebook用户只有一个选择:Crouton。 现在,Chrome操作系统中同时包含了ADB和Fastboot。 这是访问它们的方法。
第一:您的设备需要处于开发人员模式 (First: Your Device Needs to be in Developer Mode)
First things first: ADB and Fastboot are technically considered “developer” tools, so your Chromebook will need to be in Developer Mode before you’ll be able to access them. Just to make it clear, we’re not talking about the developer channel here—every Chromebook can be put into a sort of “unlocked” mode that allows for deeper system access and tweaks. This is called Developer Mode.
首先,第一件事:ADB和Fastboot在技术上被视为“开发人员”工具,因此您的Chromebook必须处于开发人员模式,才能访问它们。 只是为了清楚起见,我们在这里不是在谈论开发人员渠道 ,每个Chromebook都可以置于一种“解锁”模式,从而可以进行更深入的系统访问和调整。 这称为开发人员模式。
Fortunately, enabling Developer Mode is pretty straightforward and simple. There is one caveat, however: it will powerwash your device, so you’ll have to start over. The good news is that it’s a Chromebook, so this really shouldn’t take that long.
幸运的是,启用开发人员模式非常简单明了。 但是,有一个警告:它将对设备进行强力清洗,因此您必须重新开始。 好消息是这是一台Chromebook,因此使用它的时间不应该太长。
If you’re cool with that, hit up our guide on enabling Developer Mode. That should get you rolling and ready to go in a matter of a few minutes.
如果您对此感到满意,请查阅有关启用“开发人员模式”的指南 。 那应该让您滚动并准备在几分钟内就可以开始使用。
第二:加油 (Second: Get Your Crosh On)
In order to use ADB and Fastboot on your Chromebook, you’ll need to use something called Crosh—short for “Chrome Shell.” Think of it as a sort of lightweight terminal just for Chrome OS.
为了在Chromebook上使用ADB和Fastboot,您需要使用Crosh(“ Chrome Shell”的缩写)的名称。 可以将其视为仅适用于Chrome操作系统的一种轻量级终端。
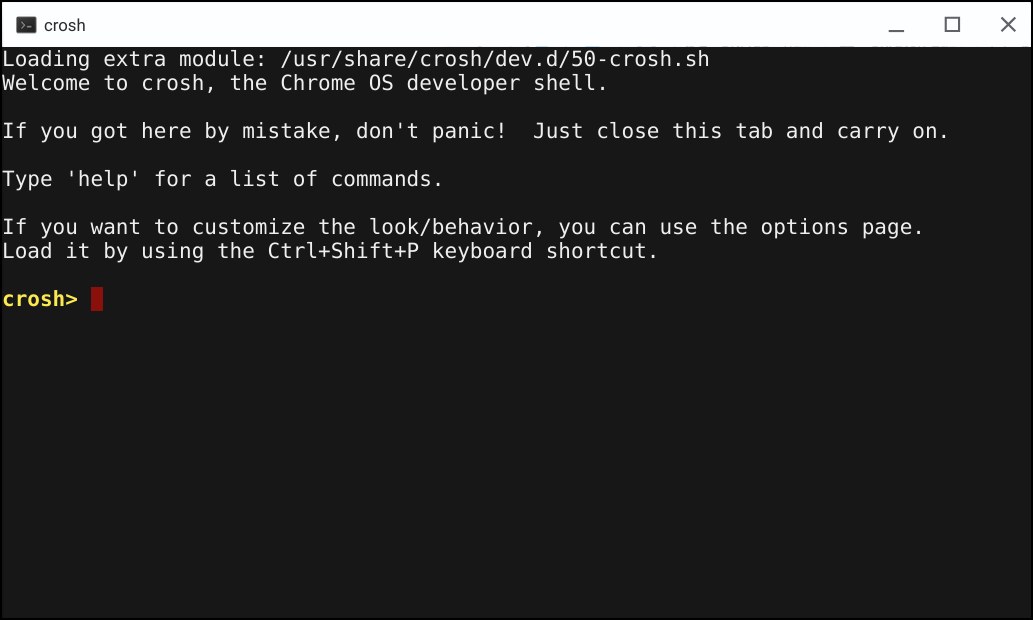
There are a couple of ways to access Crosh. To open it in a full browser window, just hit Ctrl+Alt+T on your keyboard.
有几种方法可以访问Crosh。 要在完整的浏览器窗口中打开它,只需按键盘上的Ctrl + Alt + T。
If you find yourself using Crosh fairly often, however, and would like it in a popout window (like a “real” terminal) there are two extensions you’ll need: Secure Shell and Crosh Window. With both installed, you’ll have a Crosh entry in your app drawer that launches Crosh in a nice, tidy little window. Personally, it’s my preferred method of using Crosh.
但是,如果您发现自己经常使用Crosh,并且希望在弹出窗口(例如“真实”终端)中使用Crosh,则需要两个扩展: Secure Shell和Crosh Window 。 两者都安装后,您将在应用程序抽屉中有一个Crosh条目,可在一个漂亮,整洁的小窗口中启动Crosh。 就个人而言,这是使用Crosh的首选方法。
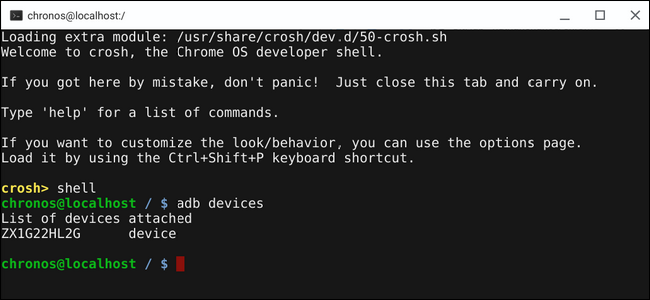
With a Crosh window fired up, you’re ready to rock and roll. You can’t just jump straight into ADB and Fastboot, however—you’ll need to enter one command to get a shell window first. Type the following:
在打开Crosh窗口后,您就可以摇滚了。 但是,您不能直接跳到ADB和Fastboot中,您需要输入一个命令才能首先获取Shell窗口。 输入以下内容:
shell
The prompt should change to read “chronos@localhost,” after which ADB and Fastboot should both be available to use like normal.
提示符应更改为“ chronos @ localhost”,此后,ADB和Fastboot都应该可以像平常一样使用。

可选:如果不起作用怎么办? (Optional: What if it Doesn’t Work?)
When I first tested this out, I couldn’t get it to work. ADB could see my Android devices, but it never requested access. Turns out Chrome OS still runs an old version of ABD/Fastboot (because Google, right?) so you’ll need to update it.
当我第一次测试时,我无法使其正常工作。 亚行可以看到我的Android设备,但从未请求访问。 事实证明,Chrome操作系统仍在运行旧版本的ABD / Fastboot(因为Google,对吗?),因此您需要对其进行更新。

But that’s where the problem comes into play: you can’t just update ADB and Fastboot like on a normal computer. There is, however, a solution. If you have an Intel-based Chromebook, a script exists that will update ADB and Fastboot to the newest versions, as well as move them to the “correct” location. After that, everything should run fine.
但这就是问题所在:您不能像在普通计算机上那样仅更新ADB和Fastboot。 但是,有一个解决方案。 如果您有基于Intel的Chromebook,则存在一个脚本,该脚本会将ADB和Fastboot更新到最新版本 ,并将它们移到“正确”的位置。 在那之后,一切应该运行良好。
The script itself is pretty straightforward, and all the instructions are posted on the GitHub page. We suggest reading through them before you start so you know exactly what’s going on behind the scenes. Everything is also open source, so if you’d like to look through the code, you can do that too.
该脚本本身非常简单,所有说明都发布在GitHub页面上。 我们建议您在开始学习之前先通读它们,以便准确了解幕后情况。 一切都是开源的,因此,如果您想看一下代码,也可以这样做。

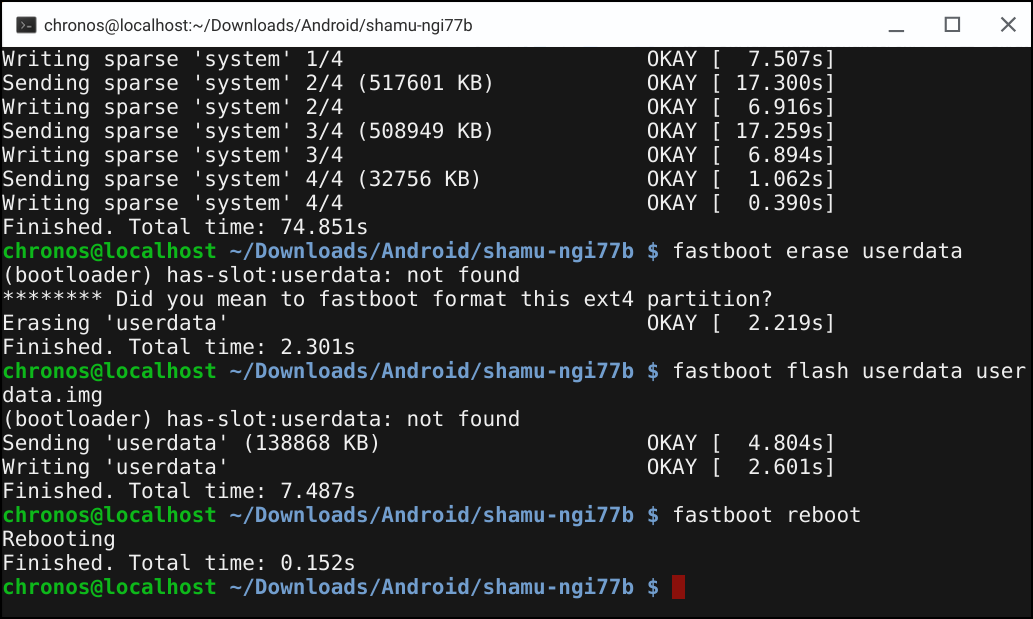
With ADB and Fastboot updated and moved, both commands should work flawlessly. I tested this on a Pixelbook (i5, developer channel) by flashing a stock ROM onto my Nexus 6 and it was perfect.
随着ADB和Fastboot的更新和移动,这两个命令都应该可以正常工作。 我在Pixelbook(i5,开发人员频道)上测试了此功能,方法是将备用ROM闪存到Nexus 6上,效果非常好。
翻译自: https://www.howtogeek.com/358285/how-to-use-adb-and-fastboot-on-a-chromebook/
chromebook刷机


 2013
2013


 被折叠的 条评论
为什么被折叠?
被折叠的 条评论
为什么被折叠?
 到【灌水乐园】发言


