


用台式机搭建服务器测试环境
For all the Linux fans out there, let’s have some of the most beautiful, customizable, feature-rich, and the best desktop environments in 2020!
对于所有在那里的Linux爱好者,让我们拥有2020年一些最美丽,可自定义,功能丰富和最佳的桌面环境!
What’s a desktop environment in Linux, btw?
顺便说一句,Linux中的桌面环境是什么?
For the uninitiated, a desktop environment is the first thing you see when your computer is ready for you to use. Windows and Mac users usually find the concept confusing, because both of these operating systems come pre-installed with their proprietary desktop environments.
对于刚开始使用的人,当您准备使用计算机时,首先会看到桌面环境。 Windows和Mac用户通常会感到混淆,因为这两个操作系统都预装有其专有的桌面环境。
With Linux, you get to cherry-pick each element of the UI that you want to place on your system. And that’s also made possible because of the different open-source desktop environments that are at your disposal!
使用Linux,您可以选择要放置在系统上的UI的每个元素。 由于您可以使用不同的开源桌面环境,这也使之成为可能!
2020年最佳桌面环境 (The Best Desktop Environments in 2020)
Here’s a quick summary of the 10 best desktop environments that we’ll be talking about in this article:
这是我们将在本文中讨论的10种最佳桌面环境的简要概述:
- Gnome – A complete package and the best desktop environment for beginners Gnome –面向初学者的完整软件包和最佳桌面环境
- XFCE – This is a very lightweight DE with the ability to add a lot of animations and UI customizations XFCE –这是一个非常轻量级的DE,能够添加很多动画和UI自定义
- LXDE – Another lightweight DE, except the animations LXDE –另一个轻量级DE,动画除外
- KDE – The most feature-rich desktop environment. KDE can give you superpowers! KDE –功能最丰富的桌面环境。 KDE可以给您超能力!
- Openbox – Though a window manager, minimal UI lovers swear by standalone Openbox! Openbox –尽管是窗口管理器,但最小的UI爱好者对独立的Openbox发誓!
- Liri Shell – The cutting edge DE that runs on Wayland Liri Shell –在Wayland上运行的最先进的DE
- i3 – My personal favorite window manager-cum-desktop environment, i3 is minimal, tiled, and just full of easter eggs i3 –我个人最喜欢的窗口管理器兼桌面环境,i3最小,平铺,并且充满了复活节彩蛋
- Mate – This is the old default DE on our well-loved Ubuntu alternative – Linux mint 伴侣 -这是我们广受欢迎的Ubuntu替代品上的旧默认DE-Linux mint
- Cinnamon – The new default on Linux mint. Cinnamon – Linux mint上的新默认设置。
- Enlightenment – The most configurable, and fastest one in the list 启发 -列表中配置最多,最快的一种
You may notice that a few of these are window managers, but they all can be used as standalone desktop environments, and you’d be amazed at how beautiful, and geek-friendly they can be. Let’s get right into the list!
您可能会注意到其中有一些是窗口管理器,但是它们都可以用作独立的桌面环境,您会惊讶于它们的美观和极客友好性。 让我们进入清单!
1. GNOME –最佳的初学者友好桌面环境 (1. GNOME – Best Beginner-Friendly Desktop Environment)
Official website: https://www.gnome.org/
官方网站: https : //www.gnome.org/
Themes: https://www.gnome-look.org/
主题: https : //www.gnome-look.org/
If you’ve ever used Linux, you know GNOME. This desktop environment has been an old friend of all those who wanted to transition from Windows to Linux. It’s easy, very beginner-friendly, and has just about anything that you’d expect from your desktop environment right out of the box.
如果您曾经使用过Linux,那么您就会知道GNOME。 在所有希望从Windows过渡到Linux的用户中,此桌面环境都是他们的老朋友。 它简单易用,非常适合初学者,几乎可以满足桌面环境中的所有期望。
Steps to install GNOME:
安装GNOME的步骤:
# CentOS or Red Hat Linux
sudo yum groupinstall "GNOME Desktop"

# Ubuntu/Debian based operating systems
sudo apt install tasksel                         #Tasksel installs related and dependent packages automatically
sudo tasksel install desktop gnome-desktop       #Using tasksel to install
2. XFCE –最佳轻量级桌面环境 (2. XFCE – Best Lightweight Desktop Environment )

Official Website: https://xfce.org/
官方网站: https : //xfce.org/
Themes: https://www.xfce-look.org/
主题: https : //www.xfce-look.org/
Have an old computer that you want to resurrect, or just love the ability to have more free memory for other applications? This desktop environment is for you. Configure it right, and you can get XFCE to run in less than 150mb of RAM at startup! I’ve been able to get it to 300mb with a lot of animations and UI modifications.
是否拥有一台想要重新使用的旧计算机,或者只是喜欢为其他应用程序提供更多可用内存的功能? 此桌面环境适合您。 正确配置它,您可以在启动时让XFCE在少于150mb的RAM中运行! 我已经能够通过许多动画和UI修改将其扩展到300mb。
Steps to install XFCE:
安装XFCE的步骤:
# CentOS/Red Hat Linux
yum groupinstall "Xfce" -y

# Ubuntu/Debian based operating systems
sudo apt install xfce4
3. LXDE –适用于低端计算机的最佳桌面环境 (3. LXDE – Best Desktop Environment for Lower End Computers)
Official Website: https://wiki.lxde.org/en/Main_Page
官方网站: https : //wiki.lxde.org/en/Main_Page
Themes (GTK themes): https://www.gnome-look.org/p/1013967/
主题(GTK主题): https : //www.gnome-look.org/p/1013967/
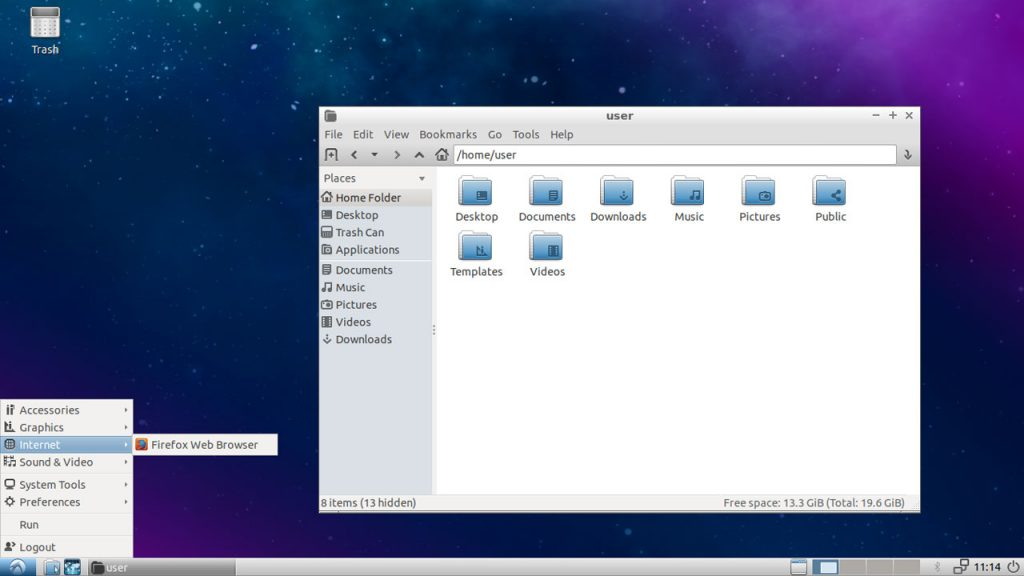
Lightweight and Low-resource can be considered the same, but in this case, there’s a difference. XFCE is a lightweight desktop environment even with a whole lot of built-in customizations and UI perks. LXDE, on the other hand, is a DE that is built to be as low-resource as possible. You certainly can add animations, but they need to be downloaded separately.
轻量级和低资源级可以被认为是相同的,但是在这种情况下,存在差异。 XFCE是一个轻量级的桌面环境,甚至具有大量的内置自定义项和UI特权。 另一方面,LXDE是一种DE,它被构建为尽可能少资源。 您当然可以添加动画,但是它们需要单独下载。
Steps to install LXDE:
安装LXDE的步骤:
# CentOS/Red Hat Linux
sudo yum install lxde

# Ubuntu/Debian based operating systems
sudo apt install lxde
4. KDE – Linux的超级DE (4. KDE – The Super-DE of Linux )
Official Website: https://kde.org/
官方网站: https : //kde.org/
Themes: https://store.kde.org/
主题: https : //store.kde.org/
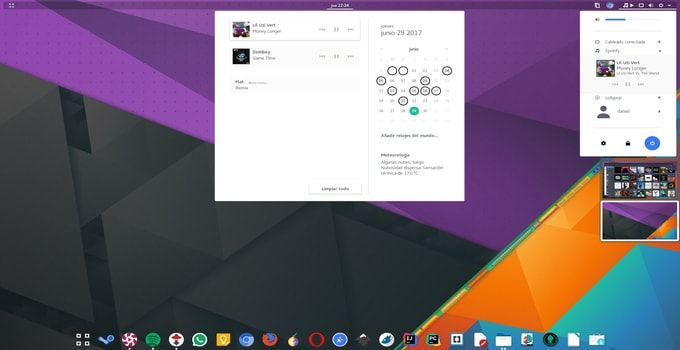
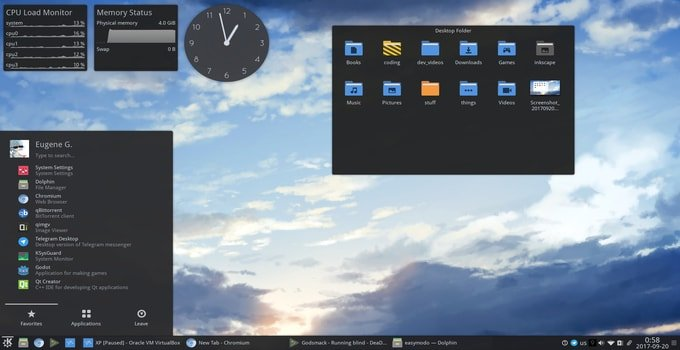
I call it the super DE for a reason. If you compare KDE with a group of people, KDE is the richest and the heaviest one. In terms of UI customization, KDE has it all. From transparent windows to blurred backgrounds, glass-look, to animations, and much more.
我称其为超级DE是有原因的。 如果将KDE与一群人进行比较,则KDE是最富有和最重的人。 在UI定制方面,KDE拥有了全部。 从透明的窗户到模糊的背景,从玻璃外观到动画,等等。
Steps to install KDE:
安装KDE的步骤:
# CentOS/Red Hat Linux
sudo yum groupinstall -y "KDE Plasma Workspaces"

# Ubuntu/Debian based operating systems
sudo apt install kde-plasma-desktop    # Gives a minimal KDE install with a few applications
sudo apt install kubuntu-desktop       # For a complete KDE install
5. Openbox –极简主义者的最爱 (5. Openbox – The Minimalist’s Favorite)
Official Website: http://openbox.org/wiki/Main_Page
官方网站: http : //openbox.org/wiki/Main_Page
Themes: http://openbox.org/download-themes.php
主题: http : //openbox.org/download-themes.php
People who’re deep into Linux, love Openbox’s simplicity. It’s extremely lightweight, and comes with only a text-based right-click menu that lists all your applications. The menu is customizable too, and you can add scripts or functions within the menu as a link.
深入Linux的人们喜欢Openbox的简单性。 它非常轻巧,并且仅带有列出所有应用程序的基于文本的右键单击菜单。 菜单也是可自定义的,您可以在菜单内添加脚本或功能作为链接。
Being a window manager, it gives you the option to customize every aspect of the environment since there’s no underlying desktop environment that we’re using when working with standalone Openbox.
作为窗口管理器,它使您可以选择自定义环境的各个方面,因为在使用独立Openbox时我们没有使用底层的桌面环境。
Steps to install Openbox:
安装Openbox的步骤:
# Either download and install, or use this epel repository to install Openbox on Centos
https://centos.pkgs.org/7/epel-x86_64/openbox-3.5.2-6.el7.x86_64.rpm.html

# Ubuntu/Debian based operating systems
sudo apt install openbox obconf
6. Liri Shell –尖端Wayland桌面环境 (6. Liri Shell – Cutting Edge Wayland Desktop Environment)
Official Website: https://liri.io/
官方网站: https : //liri.io/
Themes: Arch and Fedora come with theme packages at the moment
主题:Arch和Fedora目前带有主题包
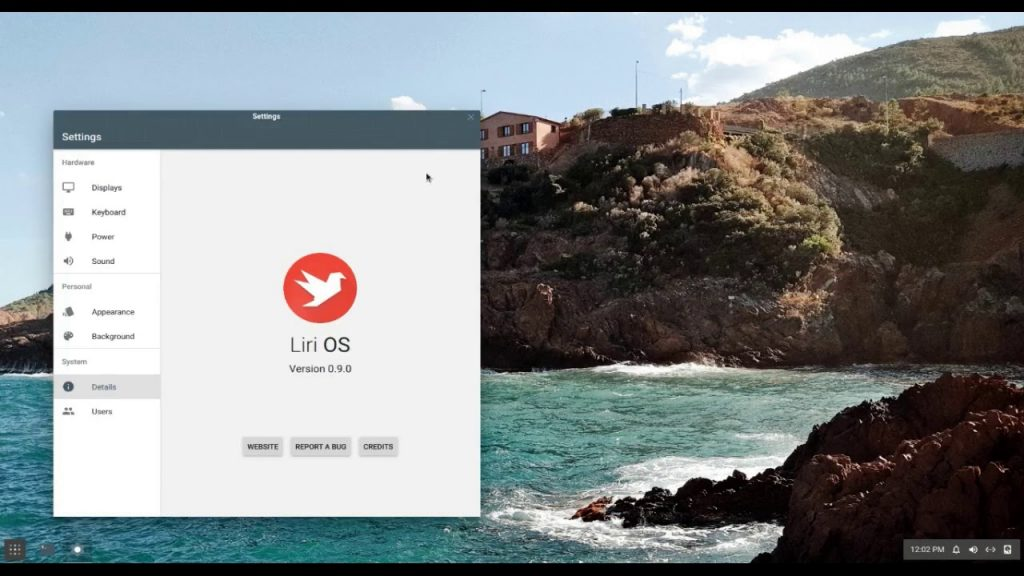
Though the majority of Linux users are still using X11 or no UI at all, Wayland has become the default in many Linux distributions already. Though there are many other desktop environments that work well with Wayland including KDE and Gnome, the Liri Shell seemed very promising. It’s a desktop environment that was built for Wayland and hence is more polished for the display server.
尽管大多数Linux用户仍在使用X11或根本没有使用UI,但是Wayland已经成为许多Linux发行版中的默认用户。 尽管还有很多其他与Wayland兼容的桌面环境,包括KDE和Gnome,但Liri Shell似乎非常有前途。 这是为Wayland构建的桌面环境,因此对于显示服务器而言更加完善。
You can easily install Liri shell on ArchLinux and Fedora with their pre-built packages. For other distributions, you can built the desktop environment from source.
您可以使用预构建的软件包在ArchLinux和Fedora上轻松安装Liri shell。 对于其他发行版,您可以从源代码构建桌面环境。
Visit their official download page for installation instructions: https://liri.io/download/
访问其官方下载页面以获取安装说明: https : //liri.io/download/
7. i3 –适用于最小的平铺桌面 (7. i3 – For Minimal Tiling Desktops)

Official Website: https://i3wm.org/
官方网站: https : //i3wm.org/
Themes: https://github.com/Kthulu120/i3wm-themes
主题: https : //github.com/Kthulu120/i3wm-themes
You may have noticed that the link to the themes is to a GitHub? That’s because i3 completely works based on configuration files. The themes you will find will be a combination of good color schemes and a well-configured window compositor.
您可能已经注意到,主题的链接是GitHub? 这是因为i3完全基于配置文件工作。 您会发现主题是良好的配色方案和配置良好的窗口合成器的结合。
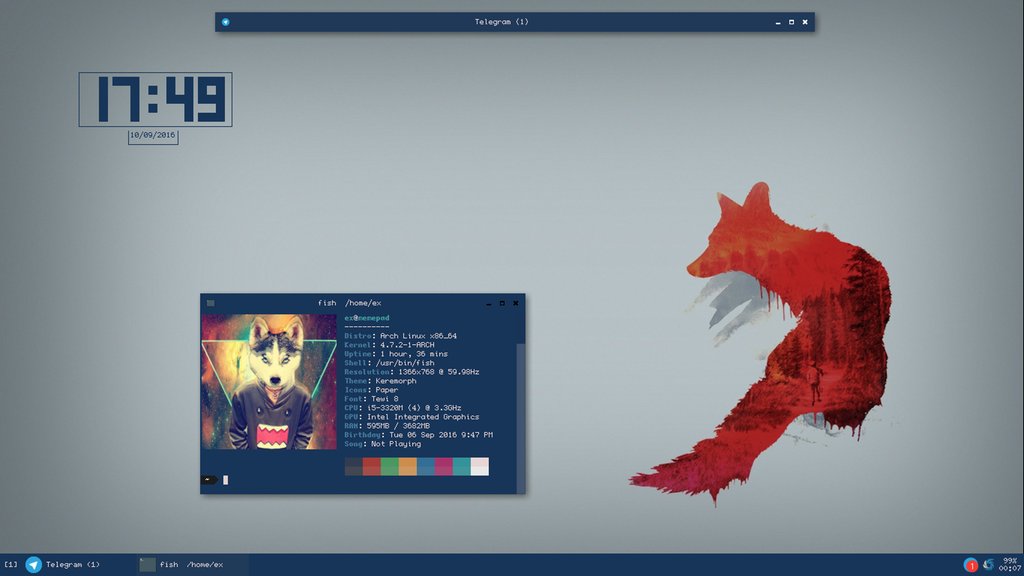
i3-wm is one of my most loved standalone window managers, qualifying it to easily fit under the desktop environment list! The configuration is just very easy, and you can change everything that you see on screen. This includes what information you see on the bottom panel, how windows behave, and keyboard shortcuts to move, align, and set up windows on the screen.
i3-wm是我最喜欢的独立窗口管理器之一,使它可以轻松容纳在桌面环境列表中! 配置非常简单,您可以更改屏幕上看到的所有内容。 这包括您在底部面板上看到的信息,窗口的行为方式以及在屏幕上移动,对齐和设置窗口的键盘快捷键。
#CentOS and Fedora
sudo dnf install i3 i3status dmenu i3lock xbacklight

#Debian and Ubuntu
sudo apt-get install i3 suckless-tools
8. MATE – GNOME 2恋人 (8. MATE – For GNOME 2 Lovers)

Official Website: https://mate-desktop.org/
官方网站: https : //mate-desktop.org/
Themes: https://mate-desktop.org/themes/
主题: https : //mate-desktop.org/themes/
People hated Gnome 3. And since Gnome 2 was no longer actively supported, the community came up with their own Gnome 2 fork, MATE.
人们讨厌Gnome3。由于Gnome 2不再得到积极支持,因此社区提出了自己的Gnome 2分支MATE。
MATE was created as a response to the drop in user experience when Gnome 3.x was launched. Being a fork, it’s very similar to Gnome’s predecessor and adds more features along with additional community support. This desktop environment caught attention when Linux Mint used MATE instead of Gnome 3 for its user interface.
创建MATE是为了响应Gnome 3.x启动时用户体验下降的问题。 作为一个分支,它与Gnome的前身非常相似,并添加了更多功能以及附加的社区支持。 当Linux Mint使用MATE代替Gnome 3作为其用户界面时,此桌面环境引起了人们的注意。
# Centos and Fedora
sudo dnf groupinstall -y "MATE Desktop"

#Debian/Ubuntu
sudo apt install mate-desktop-environment
9. Cinnamon – Linux Mint默认值 (9. Cinnamon – The Linux Mint Default)

Official Website: https://cinnamon-spices.linuxmint.com/
官方网站: https : //cinnamon-spices.linuxmint.com/
Themes: https://cinnamon-spices.linuxmint.com/themes
主题: https : //cinnamon-spices.linuxmint.com/themes
This one for the traditional lovers. Cinnamon gives your desktop a very traditional, stable, and elegant look. The desktop looks very similar to GNOME, with a scrollable menu, and a very Windows-style look. This entire look and feel make it easy for people still working on Windows 7 or older due to hardware limitations.
这一款适合传统爱好者。 Cinnamon为您的桌面提供了非常传统,稳定和优雅的外观。 桌面看起来与GNOME非常相似,具有可滚动的菜单和Windows风格的外观。 由于硬件限制,整个外观使仍在Windows 7或更旧版本上工作的人们容易使用。
#Fedora and Centos
sudo dnf groupinstall -y "Cinnamon Desktop"

# Debian and Ubuntu
sudo apt install -y task-cinnamon-desktop
10.启示–适用于配置和速度爱好者 (10. Enlightenment – For Configuration and Speed Lovers)

Official website: http://www.enlightenment.org/
官方网站: http : //www.enlightenment.org/
Themes: https://www.enlightenment-themes.org/
主题: https : //www.enlightenment-themes.org/
Enlightenment is fast and extremely configurable. Being one of the very old window manger and desktop environments, their development team had the time to make a built a very matured product for Linux users.
启蒙是快速的并且可配置的。 作为非常老的窗口管理器和桌面环境之一,他们的开发团队有时间为Linux用户制作出非常成熟的产品。
Though you won’t see this desktop environment a lot, people who use it, don’t want to give it away for anything else. Enlightenment allows for very high configurability making it loved by the original Linux lovers.
尽管您不会经常看到此桌面环境,但使用它的人并不想将其赠送给其他人。 Enlightenment允许非常高的可配置性,使其受到原始Linux爱好者的喜爱。
# Centos and Fedora
sudo dnf install efl

# Debian and Ubuntu
Refer to https://www.enlightenment.org/docs/distros/debian-start.md
最后... (And finally…)
Which ones your favorite and what’s special about it? Tell us in the comments below. Also, if you have some really beautiful desktop configuration for one of the DEs listed here, don’t forget to share it with us!
您最喜欢哪个?有什么特别之处? 在下面的评论中告诉我们。 另外,如果您为此处列出的一个DE拥有一些非常漂亮的桌面配置,请不要忘记与我们分享!
翻译自: https://www.journaldev.com/41160/top-best-desktop-environments
用台式机搭建服务器测试环境


 2万+
2万+

 被折叠的 条评论
为什么被折叠?
被折叠的 条评论
为什么被折叠?
 到【灌水乐园】发言


