


subversion
Disclaimer - People have been injured and emotionally scarred listening to my technical tips. This may violate your terms of service. If your ISP calls your house and is mean to you, or if you lose all your personal data because of my tips, know that we never spoke. I don't know you. Seriously, who is this?! Stop calling!
免责声明-人们在听我的技术提示时受到了伤害,并在情感上感到伤痕累累。 这可能会违反您的服务条款。 如果您的ISP打电话给您,对您来说很卑鄙,或者如果您由于我的提示而丢失了所有个人数据,请知道我们从不讲话。 我不认识你说真的,这是谁? 别打了
I put most of my docs in Live Mesh, and I host must of my Open Source projects at CodePlex, but I have a bunch of code and presentations that usually just float around. Tweet Sandwich is a good example.
我将大部分文档放在Live Mesh中,并且必须在CodePlex托管我的开源项目,但是我有一堆代码和演示文稿通常只是在浮动。 Tweet Sandwich是一个很好的例子。
I decided I'd try to host a Subversion Server. I don't want to use the machine I host my blog on, as I want the data in my house. Since I already have this lovely Windows Home Server that's saved my marriage, I figured why not host it there?
我决定尝试托管一个Subversion服务器。 我不想使用托管博客的计算机,因为我希望将数据存储在我的房子中。 由于我已经有了可以保存我婚姻的可爱的Windows Home Server ,因此我想到了为什么不在那里托管它?
1.登录到家庭服务器 (1. Logging into your Home Server)
If you want to install software on your Home Server (and they are headless usually - no monitor) you have to use Remote Desktop. From inside my house, I run "mstsc /console" or "mstsc /admin" from the Start | Run dialog, the connect to my machine called "Server."
如果要在家庭服务器上安装软件(它们通常没有头,没有监视器),则必须使用远程桌面。 从我的房子内部,从开始|运行“ mstsc / console”或“ mstsc / admin”。 运行对话框,连接到我的机器上称为“服务器”。
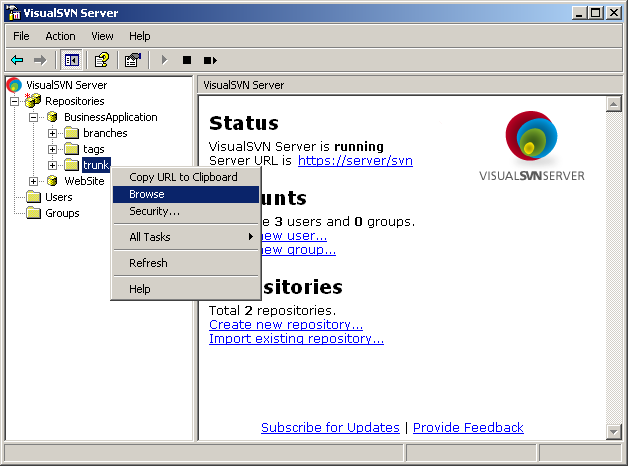
2.安装Visual SVN服务器 (2. Install Visual SVN Server)
I usually download software to the desktop, ignore the "holy crap don't do this" warning (although be aware) then open an administrator command prompt and run the MSI from there. I downloaded and installed VisualSVN Server, which is the absolute easiest way that I know of to get Subversion (SVN) on Windows. I installed it on the machine on port 8443. That's not 443, but rather 8443. It's kind of like the secondary SSL port. I could put it anywhere, of course, but 8080 is to 80 as 8443 is to 443. It's easy to remember and less likely that your ISP would block it outgoing from your house. You can test if you have open ports with this online tool.
我通常将软件下载到桌面上,忽略“尽管不知道该怎么做”警告(尽管请注意),然后打开管理员命令提示符并从那里运行MSI。 我下载并安装了VisualSVN Server ,这是我知道在Windows上获得Subversion(SVN)的绝对最简单的方法。 我将其安装在计算机上的端口8443上。它不是443,而是8443。有点像辅助SSL端口。 我当然可以把它放到任何地方,但是8080等于80,而8443等于443。这很容易记住,而且您的ISP阻止它从您的房屋传出的可能性也较小。 您可以使用此在线工具测试端口是否打开。
3.选择存储并备份 (3. Chose Storage and Back It Up)
Windows Home Server is a different beast as it supports a RAID-like storage system. You are NEVER supposed to put anything on the D: (Data) drive directly. Always access data through shares like \\server\svnwhatever.
Windows Home Server是另一种野兽,因为它支持类似RAID的存储系统。 绝对不要将任何东西直接放在D:(Data)驱动器上。 始终通过\\ server \ svnwhatever之类的共享访问数据。
Here's the only/most wonky part of this whole thing. If you have a better idea or you work for the Home Server team, let me know if this is dangerous and I'll update this part of the post.
这是整个过程中唯一/最不方便的部分。 如果您有更好的主意或为家庭服务器团队工作,请告诉我这是否很危险,我将在此部分中进行更新。
I made a folder on the D: drive (against recommendations) called D:\repos and I told Subversion that was the place to put stuff. Then I made a new Share called \\SERVER\SVNBackup and set duplicate to true. Then, I installed the Windows 2003 Resource Kit in order to get the RoboCopy tool, and I copied RoboCopy to C:\windows so it's in the path.
我在D:驱动器上(相对于建议)创建了一个名为D:\ repos的文件夹,然后我告诉Subversion这是放置内容的地方。 然后,我创建了一个名为\\ SERVER \ SVNBackup的新Share,并将重复项设置为true。 然后,我安装了Windows 2003 Resource Kit以获得RoboCopy工具,然后将RoboCopy复制到C:\ windows,因此它位于路径中。
Finally, I made a batch file that looked like this:
最后,我制作了一个如下所示的批处理文件:
robocopy /mir d:\repos \\server\svnbackup
robocopy / mir d:\ repos \\ server \ svnbackup
This "mirrors" the D:\repos folder to the \\server\svnbackup. I then used the "Add Schedule Task" wizard and made this run every night at 2am. This way I get backup and duplication in a nightly snapshot.
这会将D:\ repos文件夹“镜像”到\\ server \ svnbackup 。 然后,我使用“添加计划任务”向导,并使其每天晚上2点运行一次。 这样,我就可以在每晚快照中进行备份和复制。
Alternatively, I probably could have mapped a permanent local Z:\ drive on the Home Server to \\server\svn or some share, and told VisualSVN Server to use that. However, that itself seemed wonky? My way seems to work. Thoughts?
或者,我可能已经将Home Server上的永久本地Z:\驱动器映射到\\ server \ svn或某些共享,并告诉VisualSVN Server使用它。 但是,这本身似乎很奇怪? 我的方法似乎有效。 有什么想法吗?
 ()
()

4.转发端口 (4. Forward Port)
I then logged into my local router and set up a port-forwarding rule to make sure that 8443 was accessible from the outside. Check your router or visit http://192.168.1.1 (usually) to figure it out.
然后,我登录到本地路由器并设置端口转发规则,以确保可以从外部访问8443。 检查您的路由器或访问http://192.168.1.1 (通常)以找出答案。
5.获取一个外部DNS名称(可选) (5. Get an External DNS name (Optional))
You can certainly just visit http://www.whatismyipaddress.com and remember your address if you like. You can also hard-code it in your hosts file on the machine that will be your client.
当然,您可以访问http://www.whatismyipaddress.com并记住您的地址(如果需要)。 您也可以在将其作为客户端的计算机上的主机文件中对其进行硬编码。
You might consider using a service like DynDNS and get a custom domain like yourname.dyndns.org. There are applets that will run in the tray on your Windows Home Server and keep that IP address in sync if it changes.
您可能会考虑使用DynDNS之类的服务,并获得一个自定义域,例如yourname.dyndns.org。 Windows Home Server托盘中将运行一些小程序,如果更改,该IP地址将保持同步。
Windows Home Server also includes options to get your own Home Server-provided domain under the "Settings" dialog in the Home Server Console. You can be http://foofoo.homeserver.com or a number of choices. This domain name is associated with your Windows Live ID and the IP is automatically updated by the Home Server.
Windows Home Server还包括用于在Home Server控制台的“设置”对话框下获取自己的Home Server提供的域的选项。 您可以是http://foofoo.homeserver.com或多种选择。 该域名与您的Windows Live ID关联,并且IP由Home Server自动更新。
Note, you can also log into your Home Server remotely, if you've enabled it. Here's me logging into my Home Server from elsewhere. Notice you can see what machines are online at home in the background there. I can RDP (Remote Desktop Protocol) into those machines if I like, and I can also remote into my Home Server itself.
请注意,如果已启用,则还可以远程登录Home Server。 这是我从其他位置登录到我的家庭服务器。 注意,您可以在后台看到哪些机器在线在家。 如果愿意,我可以将RDP(远程桌面协议)插入这些计算机,也可以远程访问Home Server本身。
Incidentally you can also view and download files from your shares, so choose strong passwords.
顺便说一句,您还可以查看和下载共享中的文件,因此请选择强密码。
When you connect to your new Visual SVN Server instance over another port, your browser will likely complain that the certificate isn't trusted and it'll turn your Address Bar red and scary. Bummer, but be aware.
当您通过另一个端口连接到新的Visual SVN Server实例时,您的浏览器可能会抱怨该证书不受信任,这会使您的地址栏变成红色和恐怖。 Bummer,但要注意。
Now I can SVN Checkout https://mymagicdomain.homeserver.com:8443/svn/presentations/trunk as I please.
现在,我可以根据需要SVN Checkout https://mymagicdomain.homeserver.com:8443/svn/presentations/trunk 。
翻译自: https://www.hanselman.com/blog/running-a-subversion-server-off-your-windows-home-server
subversion


 2万+
2万+

 被折叠的 条评论
为什么被折叠?
被折叠的 条评论
为什么被折叠?
 到【灌水乐园】发言


