


UI基础-第二天
人生就像卫生纸,没事的时候尽量少扯;时间就像卫生纸,看着挺多,用着挺少…
UI控件概览
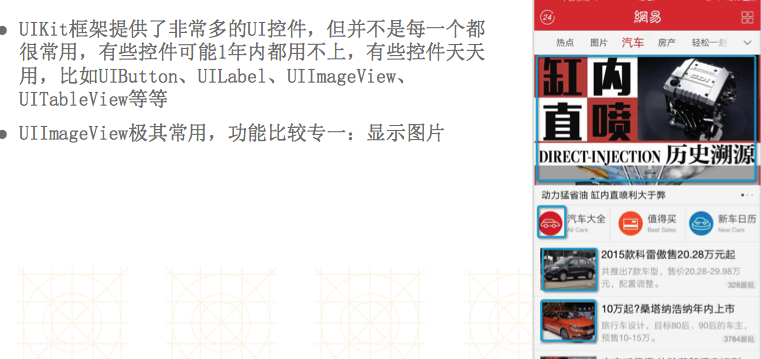
可能用的上的控
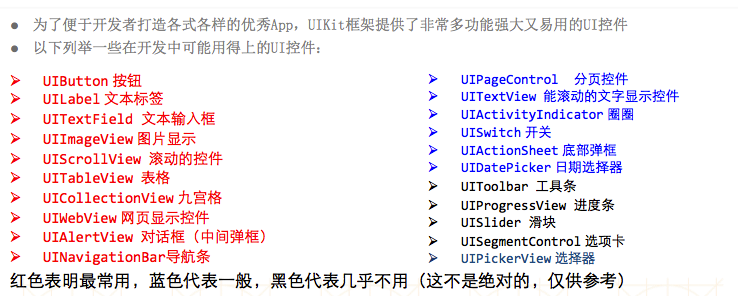
*提示:不要直接去搜索控件的使用方法,这没必要。原因如下:
[1]有些控件可能一年用不到1次,可以等用到的时候再学。
[2]IOS中控件的用法都是相似相通的,掌握最主要、最常用的控件,就可以快速上手其他控件。
[3]面试中一定不会问到和这个有关的问题,放心吧。
UILabel - 文本标签
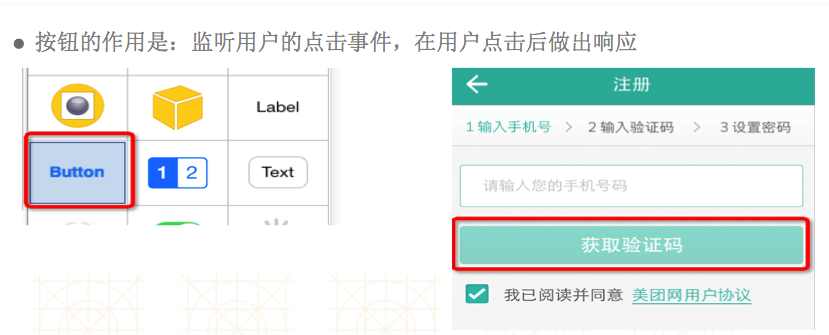
UIButton - 按钮
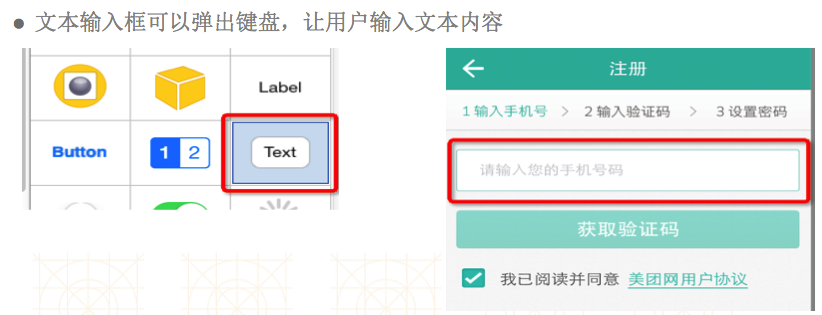
UITextField - 文本输入框
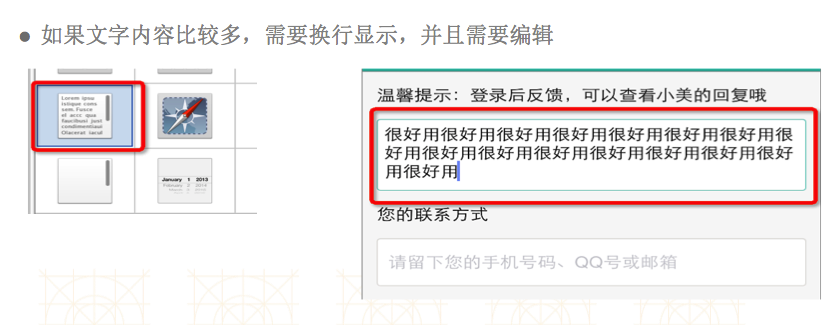
UITextView - 能滚动的文字显示控件
UIProgressView - 进度条

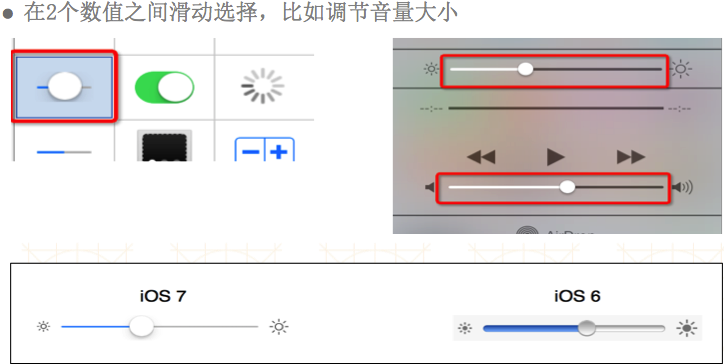
UISlider - 滑块
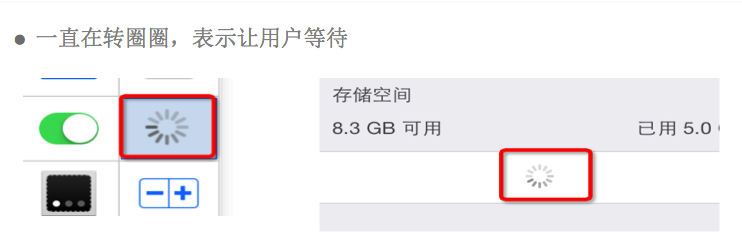
UIActivityIndicator - 圈圈(菊花)
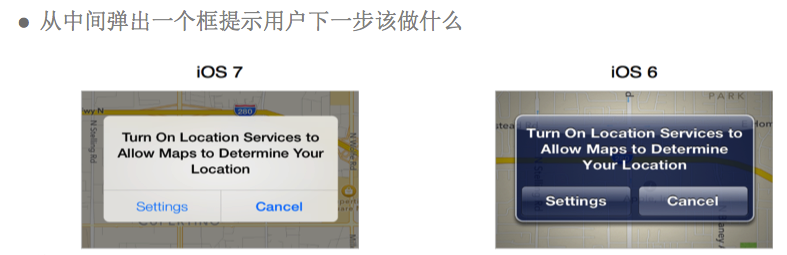
UIAlertView - 对话框(中间弹框)
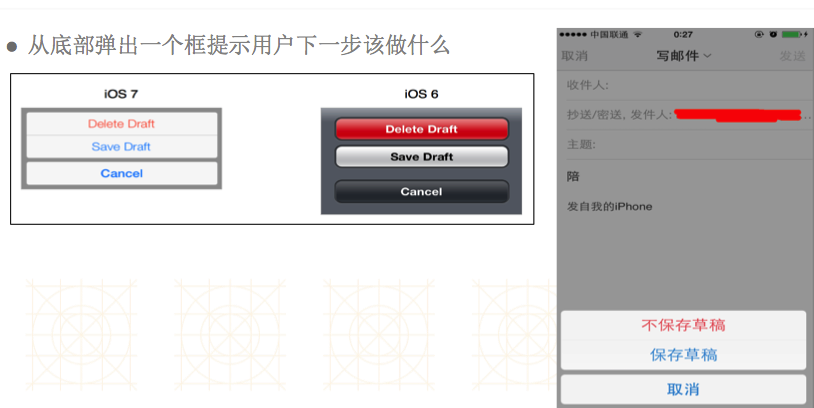
UIActionSheet - 底部弹框
UIScrollView - 滚动的控件
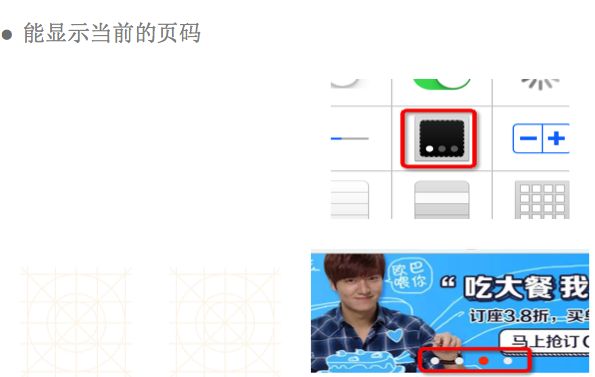
UIPageControl - 分页控件
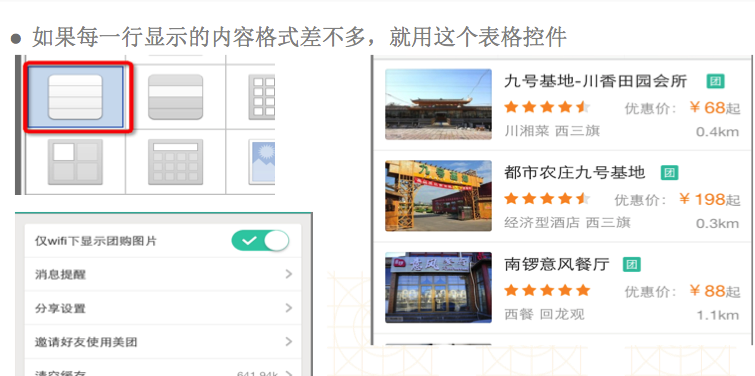
UITableView - 表格
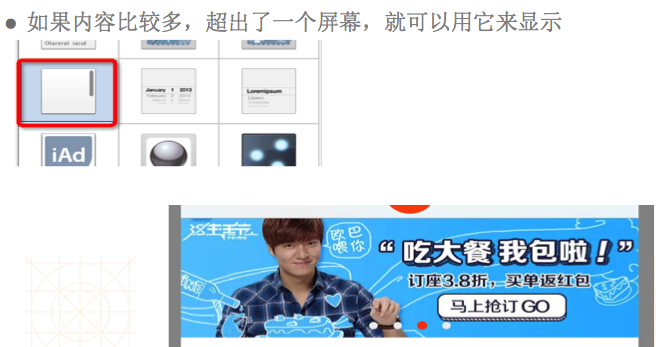
UICollectionView - 九宫格

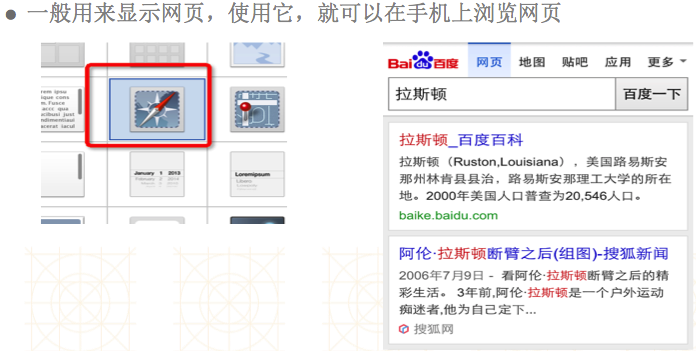
UIWebView - 网页显示控件
UISwitch - 开关

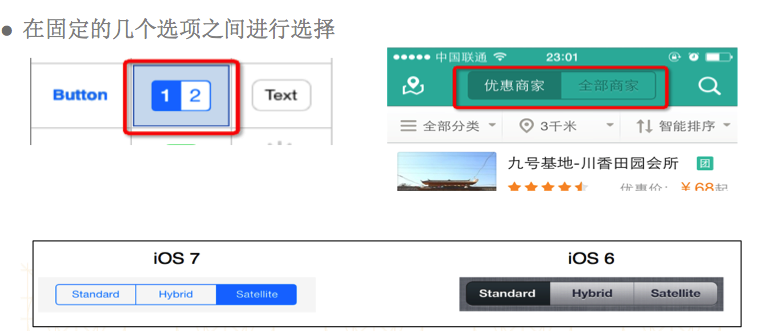
UISegmentControl - 选项卡
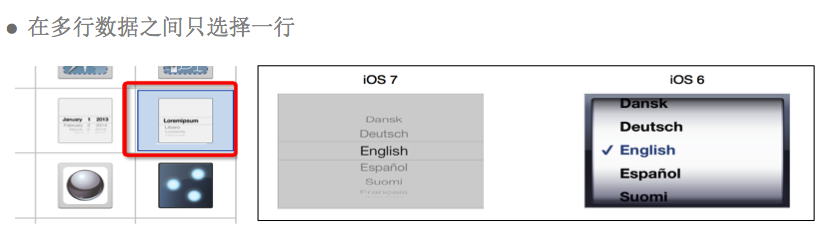
UIPickerView - 选择器
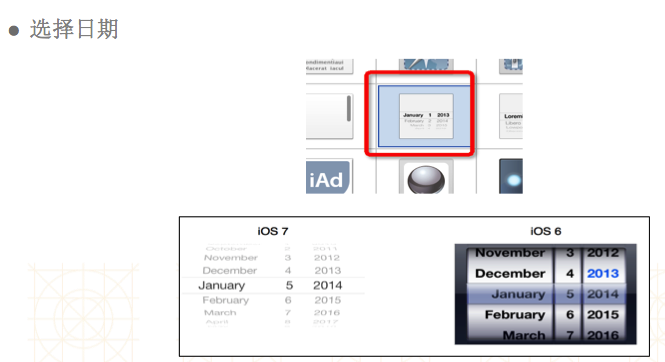
UIDatePicker - 日期选择器
UIToolbar- 工具条
UINavigationBar - 导航条
基础控件
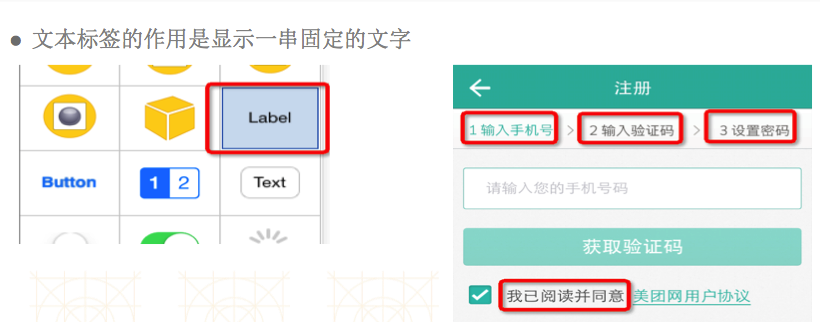
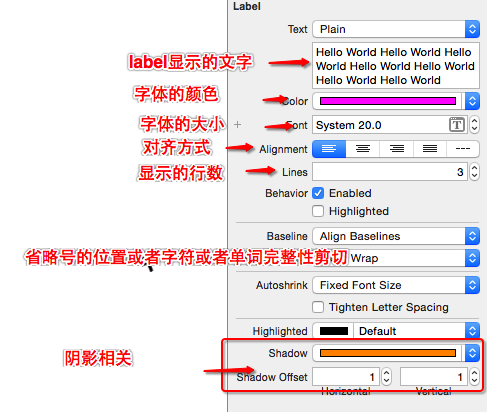
UILabel
什么是UILabel
UILabel的常见属性

- @property (nonatomic,copy) NSString *text;
显示文字
@property (nonatomic,retain) UIFont *font;
字体
@property (nonatomic,retain) UIColor *textColor;
文字颜色
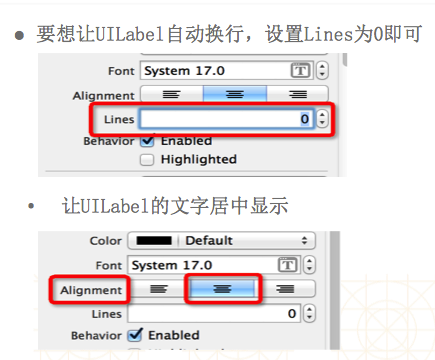
@property(nonatomic) NSTextAlignment textAlignment;
对齐模式(比如左对齐,居中对齐,右对齐)
@property(nonatomic) NSInteger numberOfLines;
文字行数
@property(nonatomic) NSLineBreakMode lineBreakMode;
- 换行模式
UIFont
. UIFont代表字体,常见创建方法有以下几个:
+(UIFont *)systemFontOfSize:(CGFloat)fontSize;系统默认字体
+(UIFont *)boldSystemFontOfSize:(CGFloat)fontSize:粗体
+(UIFont *)italicSystemFontOfSize:(CGFloat)fontSize:斜体
. UILabel的基本设置
UIImageView
什么是UIImageView
UIImageView的常见属性
- @property (nonatomic,retain)UIImage *image;
- 显示图片
- @property (nonatomic,copy)NSArray *animationImages;
- 显示的动画图片
- @property (nonatomic)NSTimeInerval animationDuration;
- 动画图片的持续时间
- @property(nonatomic)NSInteger animationRepeatCount;
- 动画的播放次数(默认是0,代表无限播放)UIImageView的常见方法
-(void)startAnimating;//开始动画
-(void)stopAnimating;//停止动画
-(BOOL)isAnimating;//是否正在执行动画
UIImage
. 一个UIImage对象代表一张图片,一般通过imageNamed:方法就可以通过文件名加载项目中的图片
UIImage *image = [UIImage imageNamed:@”lufy”];
加法计算器
MainStoryboard
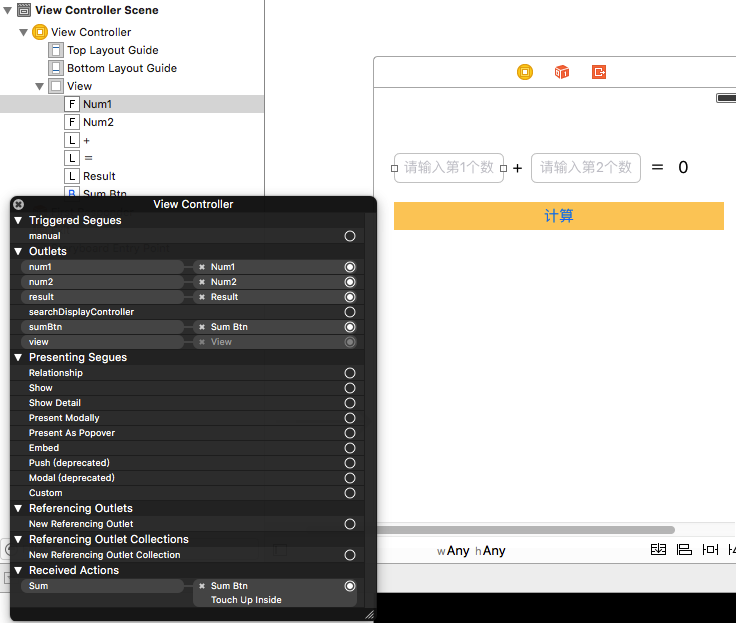
#import "ViewController.h"

@interface ViewController ()
@property (weak, nonatomic) IBOutlet UITextField *num1;
@property (weak, nonatomic) IBOutlet UITextField *num2;
@property (weak, nonatomic) IBOutlet UIButton *sumBtn;
@property (weak, nonatomic) IBOutlet UILabel *result;

@end

@implementation ViewController

- (void)viewDidLoad {
    [super viewDidLoad];
    // Do any additional setup after loading the view, typically from a nib.
}
- (IBAction)Sum {
    //1.拿到两个字符串
    NSString *num1String = self.num1.text;
    NSString *num2String = self.num2.text;

    //为了更好的用户体验
    //判断
    if (num1String.length == 0) {
        //创建对象
//        UIAlertView *alert = [[UIAlertView alloc]initWithTitle:@"输入有误" message:@"请输入第一个数" delegate:nil cancelButtonTitle:@"知道了" otherButtonTitles:nil, nil];
//        [alert show];
        [self showInfo:@"请输入第一个数"];
        return;
    }
    if (num2String.length == 0) {
        //创建对象
//        UIAlertView *alert = [[UIAlertView alloc]initWithTitle:@"输入有误" message:@"请输入第2个数" delegate:nil cancelButtonTitle:@"知道了" otherButtonTitles:nil, nil];
//        [alert show];
        [self showInfo:@"请输入第二个数"];
        return;
    }

    //如果想都有数值才可以点,加入下面一条即可
//    self.sumBtn.enabled = num1String.length && num2String;


    //2.把字符串转成数值
    NSInteger number1 = [num1String integerValue];
    NSInteger number2 = [num2String integerValue];

    //3.相加
    NSInteger resule = number1 + number2;

    //4.显示结果
    self.result.text = [NSString stringWithFormat:@"%zd",resule];
}

//封装alertView方法
- (void)showInfo:(NSString *)info
{
    //创建对象
    UIAlertView *alert = [[UIAlertView alloc]initWithTitle:@"输入有误" message:info delegate:nil cancelButtonTitle:@"知道了" otherButtonTitles:nil, nil];
    //显示
    [alert show];
}

- (void)didReceiveMemoryWarning {
    [super didReceiveMemoryWarning];
    // Dispose of any resources that can be recreated.
}

@end
UILabel的使用
代码创建UILabel
 //1.创建UILabel对象
    UILabel *label = [[UILabel alloc]init];
    //2.设置frame
    label.frame = CGRectMake(100, 100, 202, 175);
    //3.设置背景颜色
    label.backgroundColor = [UIColor redColor];
    //4.设置文字
    label.text = @"alsldadlkaslkasldkaslkdlaskldkaslkdlaskdlaskldkas";
    //5.居中
    label.textAlignment = NSTextAlignmentCenter;
    //6.色获知字体大小
    label.font = [UIFont systemFontOfSize:20.f];
    label.font = [UIFont boldSystemFontOfSize:25.f];
    label.font = [UIFont italicSystemFontOfSize:20.f];
    //7.设置文字的颜色
    label.textColor = [UIColor whiteColor];
    //8.设置阴影
    label.shadowColor = [UIColor blackColor];
    label.shadowOffset = CGSizeMake(-2, 1);

    //9.设置行数(0:自动换行)
    label.numberOfLines = 1;
    //10.显示模式
    label.lineBreakMode = NSLineBreakByTruncatingHead;
    /*
     NSLineBreakByWordWrapping = 0,  // 单词包裹,换行的时候会以一个单词换行
     NSLineBreakByCharWrapping,     // 字符包裹换行,换行的时候会以一个字符换行
     NSLineBreakByClipping,     // 裁剪超出的内容
     NSLineBreakByTruncatingHead,   // 一行中头部省略(注意:numberOfLines要为1): "...wxyz"
     NSLineBreakByTruncatingTail,   // 一行中尾部省略: "abcd..."
     NSLineBreakByTruncatingMiddle  // 一行中中间部省略:  "ab...yz"
     */
    //211添加到控制器的view中
    [self.view addSubview:label];
UIImageView的基本使用
代码创建
   //1.创建UIImageView对象
    UIImageView *imageView = [[UIImageView alloc]init];

    //2.设置frame
    imageView.frame = CGRectMake(100, 100, 250, 200);
    //3.设置背景
    imageView.backgroundColor = [UIColor greenColor];
    //4.设置图片(png不需要后缀)
    imageView.image = [UIImage imageNamed:@"1"];
    /**

     UIViewContentModeRedraw, // 重新绘制 (核心绘图) drawRact

     //带有Scale,标明图片有可能被拉伸或压缩
     UIViewContentModeScaleToFill, // 完全的压缩或拉伸

     // Aspect 比例,缩放是带有比例的
     UIViewContentModeScaleAspectFit, // 宽高比不变 Fit 适应
     UIViewContentModeScaleAspectFill, // 宽高比不变 Fill 填充

     //不带有Scale,标明图片不可能被拉伸或压缩
     UIViewContentModeCenter,
     UIViewContentModeTop,
     UIViewContentModeBottom,
     UIViewContentModeLeft,
     UIViewContentModeRight,
     UIViewContentModeTopLeft,
     UIViewContentModeTopRight,
     UIViewContentModeBottomLeft,
     UIViewContentModeBottomRight,
     */
    //5.设置图片的内容模式
    imageView.contentMode = UIViewContentModeScaleAspectFill;
    //6.加到控制器的view中
    [self.view addSubview:imageView];
    //裁剪多余的部分
    imageView.clipsToBounds = YES;
毛玻璃效果
 //毛玻璃效果
    //1.创建UIImageView对象
    UIImageView *imageView = [[UIImageView alloc]init];
    //2.设置尺寸
//    imageView.frame = CGRectMake(0, 0, self.view.bounds.size.width, self.view.bounds.size.height);
    imageView.frame = self.view.bounds;
    //3.设置背景颜色
    imageView.backgroundColor = [UIColor redColor];
    //4.设置背景图片
    imageView.image = [UIImage imageNamed:@"1"];
    //5.设置图片的内容模式
    imageView.contentMode = UIViewContentModeScaleAspectFill;
    //6.加毛玻璃
    //6.1创建UIToolBar对象
    UIToolbar *toolBar = [[UIToolbar alloc]init];
    //6.2设置toolBar的frame
    toolBar.frame = imageView.bounds;
    //6.3设置毛玻璃样式
    toolBar.barStyle = UIBarStyleBlack;
    toolBar.alpha = 0.98;
    //6.4加到imageView中
    [imageView addSubview:toolBar];
    //加到控制器的view中
    [self.view addSubview:imageView];
UIImageView的frame的设置
    // 设置frame的方式
    // 方式一
      UIImageView *imageView = [[UIImageView alloc] init];
      imageView.image = [UIImage imageNamed:@"1"];

//    imageView.frame = CGRectMake(100, 100, 267, 400);
//    imageView.frame = (CGRect){{100, 100},{267, 400}};
    */

    // 方式二
    /*
    UIImageView *imageView = [[UIImageView alloc] init];
    // 创建一个UIImage对象
    UIImage *image = [UIImage imageNamed:@"1"];
    // 设置frame
    imageView.frame = CGRectMake(100, 10, image.size.width, image.size.height);
    // 设置图片
    imageView.image = image;
     */

    // 方式三
    /*
    // 创建一个UIImage对象
    UIImage *image = [UIImage imageNamed:@"1"];
    UIImageView *imageView = [[UIImageView alloc] initWithFrame:CGRectMake(100, 10, image.size.width, image.size.height)];
    imageView.image = image;
     */

    // 方式四

    // 创建一个UIimageview对象
    // 注意: initWithImage 默认就有尺寸--->图片的尺寸
    UIImageView *imageView = [[UIImageView alloc] initWithImage:[UIImage imageNamed:@"1"]];

    // 改变位置
//    imageView.center = CGPointMake(200, 150);

    imageView.center = CGPointMake(self.view.frame.size.width * 0.5, self.view.frame.size.height * 0.5);

    [self.view addSubview:imageView];
播放序列桢动画
#import "ViewController.h"

@interface ViewController ()
/**属性*/
@property (weak, nonatomic) IBOutlet UIImageView *showImage;

@end

@implementation ViewController

- (void)viewDidLoad {
    [super viewDidLoad];
    // Do any additional setup after loading the view, typically from a nib.
}

#pragma mark - 开始动画
- (IBAction)startAnim {
    //1.记在所有的图片
    NSMutableArray<UIImage *> *arrayM = [NSMutableArray array];
    for (int i = 0; i<20; i++) {
        //获取图片的名称
        NSString *imageNmae = [NSString stringWithFormat:@"%d.jpg",i+1];
        //创建UIImage对象
        UIImage *image = [UIImage imageNamed:imageNmae];
        //加入数组
        [arrayM addObject:image];
    }

    //设置动画图片
    self.showImage.animationImages = arrayM;
    //设置动画的播放次数
    self.showImage.animationRepeatCount = 0;

    //设置播放时长
    //1秒30桢,一张图片 = 1/30 = 0.03333 20 * 0.03333
    self.showImage.animationDuration = 1.0;
    //开始动画
    [self.showImage startAnimating];
}
#pragma mark - 结束动画
- (IBAction)stopAnim {
    [self.showImage stopAnimating];
}

- (void)didReceiveMemoryWarning {
    [super didReceiveMemoryWarning];
    // Dispose of any resources that can be recreated.
}

@end
资源存放问题
#import "ViewController.h"

/**
   加载图片的方式:
   1. imageNamed:
   2. imageWithContentsOfFile:

   1. 加载Assets.xcassets这里面的图片:
    1> 打包后变成Assets.car
    2> 拿不到路径
    3> 只能通过imageNamed:来加载图片
    4> 不能通过imageWithContentsOfFile:来加载图片

   2. 放到项目中的图片:
    1> 可以拿到路径
    2> 能通过imageNamed:来加载图片
    3> 也能通过imageWithContentsOfFile:来加载图片

 */

@interface ViewController ()

@property (weak, nonatomic) IBOutlet UIImageView *imageView;

@end

@implementation ViewController

- (void)viewDidLoad {
    [super viewDidLoad];
   // 图片的设置方式

    // 方式一
//    self.imageView.image = [UIImage imageNamed:@"1"];

    // 方式二
    // 路径
    NSString *path = [[NSBundle mainBundle] pathForResource:@"1" ofType:@"png"];
    self.imageView.image = [UIImage imageWithContentsOfFile:path];
}

@end
拳皇动画
#import "ViewController.h"
#import <AVFoundation/AVFoundation.h>

@interface ViewController ()
@property (weak, nonatomic) IBOutlet UIImageView *showImage;
@property (nonatomic,strong)AVPlayer *aplay;
@end

@implementation ViewController

- (void)viewDidLoad {
    [super viewDidLoad];
    // Do any additional setup after loading the view, typically from a nib.
    [self stand];

    self.aplay = [[AVPlayer alloc]init];
}

- (void)didReceiveMemoryWarning {
    [super didReceiveMemoryWarning];
    // Dispose of any resources that can be recreated.
}

- (void)jiazaiImageWitnCount:(int)count Name:(NSString *)name recount:(int)recount stand:(BOOL)isStand MusicName:(NSString *)musicName{


    /**
     图片的两种加载方式:
     1> imageNamed:
     a. 就算指向它的指针被销毁,该资源也不会被从内存中干掉
     b. 放到Assets.xcassets的图片,默认就有缓存
     c. 图片经常被使用

     2> imageWithContentsOfFile:
     a. 指向它的指针被销毁,该资源会被从内存中干掉
     b. 放到项目中的图片就不由缓存
     c. 不经常用,大批量的图片

     */

    //加载所有图片
    NSMutableArray<UIImage *> *arrayM = [NSMutableArray array];
    for (int i = 0; i<count; i++) {
        NSString *imageName = [NSString stringWithFormat:@"%@_%d",name,i+1];
//        UIImage *image = [UIImage imageNamed:imageName];
        NSString *imagePath = [[NSBundle mainBundle]pathForResource:imageName ofType:@"png"];
        UIImage *image = [UIImage imageWithContentsOfFile:imagePath];
        [arrayM addObject:image];

    }
    //设置动画图潘
    self.showImage.animationImages = arrayM;
    //是否重复
//    if (!isRepeat) {
        self.showImage.animationRepeatCount = recount;
//
//    }
    //设置播放时长
    self.showImage.animationDuration = 0.033 * count;
    //开始播放
    [self.showImage startAnimating];


//    [self performSelector:@selector(stand) withObject:nil afterDelay:self.showImage.animationDuration];
    if (!isStand) {

        NSURL *url = [[NSBundle mainBundle]URLForResource:musicName withExtension:nil];
        AVPlayerItem *item = [[AVPlayerItem alloc]initWithURL:url];
        [self.aplay replaceCurrentItemWithPlayerItem:item];
        [self.aplay play];
        //调节速率
        self.aplay.rate = 2;

        // 6.站立(延迟)
        // Selector 方法
        // Object 参数
        // afterDelay 时间
        //    NSSelectorFromString(<#NSString * _Nonnull aSelectorName#>) 效果一样
        [self performSelector:@selector(stand) withObject:nil afterDelay:self.showImage.animationDuration];
    }
}

/**大招*/
- (IBAction)daZhao {
//    if (![self.showImage isAnimating]) {
//    }

    [self jiazaiImageWitnCount:87 Name:@"dazhao" recount:1 stand:NO MusicName:@"dazhao.mp3"];

}
/**小招*/
- (IBAction)xiaoZhao {
//    if (![self.showImage isAnimating]) {
//
//    }
    [self jiazaiImageWitnCount:39 Name:@"xiaozhao3" recount:1 stand:NO MusicName:@"xiaozhao3.mp3"];
}
/**死亡*/
- (IBAction)Dead {
//    if (![self.showImage isAnimating]) {
//
//    }
    [self jiazaiImageWitnCount:23 Name:@"dead"  recount:1 stand:NO MusicName:nil];
}
/**装逼*/
- (IBAction)zhuangBi {
//    if (![self.showImage isAnimating]) {
//
//    }
    [self jiazaiImageWitnCount:29 Name:@"install_b"  recount:1 stand:NO MusicName:nil];
}
/**跑步*/
- (IBAction)run {
//    if (![self.showImage isAnimating]) {
//
//    }
    [self jiazaiImageWitnCount:6 Name:@"run"  recount:1 stand:NO MusicName:nil];
}
- (IBAction)gameOver {
    self.showImage.animationImages = nil;
}

/**站立*/
- (IBAction)stand {
    [self jiazaiImageWitnCount:10 Name:@"stand"  recount:0 stand:YES MusicName:nil];
}

@end
IOS音效播放
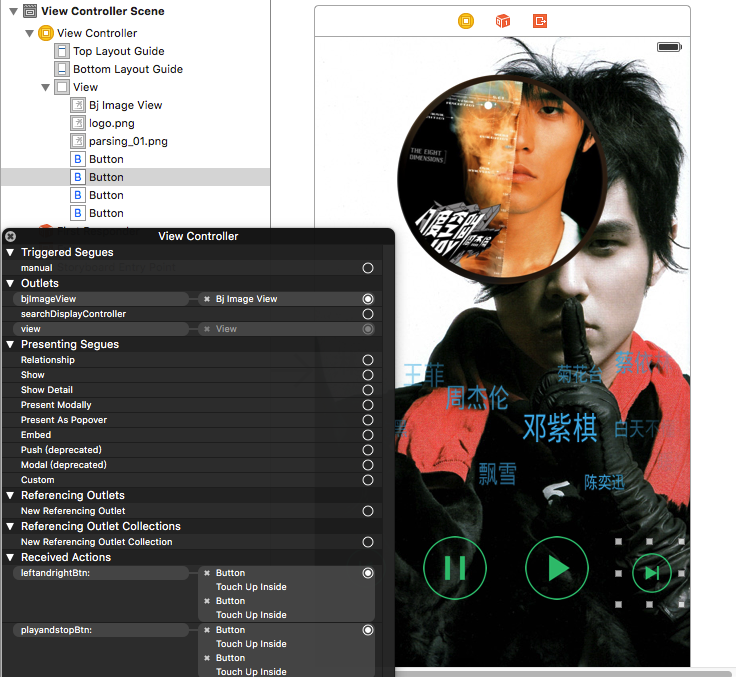
#import "ViewController.h"
#import <AVFoundation/AVFoundation.h>

@interface ViewController ()
@property (weak, nonatomic) IBOutlet UIImageView *bjImageView;
@property (nonatomic,strong)AVPlayer *player;
@end

@implementation ViewController

- (void)viewDidLoad {
    [super viewDidLoad];
    // Do any additional setup after loading the view, typically from a nib.
    //1.加毛玻璃效果
    UIToolbar *toolbar = [[UIToolbar alloc]init];
    //2.设置frame
    toolbar.frame = self.bjImageView.bounds;
    //3.设置样式和透明度
    toolbar.barStyle = UIBarStyleBlack;
    toolbar.alpha = 0.98;
    //4.加到背景图片上
    [self. bjImageView addSubview:toolbar];
    //5.创建播放器
//    NSString *path = [[NSBundle mainBundle]pathForResource:@"mySong1.mp3" ofType:nil];
//    NSURL *url = [NSURL fileURLWithPath:path];
    //资源的URL地址
    NSURL *url = [[NSBundle mainBundle]URLForResource:@"mySong1.mp3" withExtension:nil];
    //创建播放器曲目
    AVPlayerItem *playerItem = [[AVPlayerItem alloc]initWithURL:url];
    //创建播放器
    self.player = [[AVPlayer alloc]initWithPlayerItem:playerItem];
}

- (void)didReceiveMemoryWarning {
    [super didReceiveMemoryWarning];
    // Dispose of any resources that can be recreated.
}

/**播放暂停*/

- (IBAction)playandstopBtn:(UIButton *)sender {
    switch (sender.tag) {
        case 1:
            [self.player play]; //播放
            break;
        case 2:
            [self.player pause]; // 暂停
            break;
        default:
            break;
    }
}

/**切换歌曲*/
- (IBAction)leftandrightBtn:(UIButton *)sender {
    //歌曲名称
    NSString *musicName = nil;
    switch (sender.tag) {
        case 3:
            musicName = @"mySong2.mp3";
            break;
        case 4:
            musicName = @"mySong3.mp3";
            break;
        default:
            break;
    }

    NSURL *url = [[NSBundle mainBundle]URLForResource:musicName withExtension:nil];
    AVPlayerItem *item = [[AVPlayerItem alloc]initWithURL:url];
    [self.player replaceCurrentItemWithPlayerItem:item];

    [self.player play];
}

@end


 555
555

 被折叠的 条评论
为什么被折叠?
被折叠的 条评论
为什么被折叠?
 到【灌水乐园】发言


