


移动选定的对象
MOVE --输入移动命令
<单击需要移动的对象> --选中预移动对象
<空格确认> --确认选定对象
指定基点或 [位移(D)] --移动方式
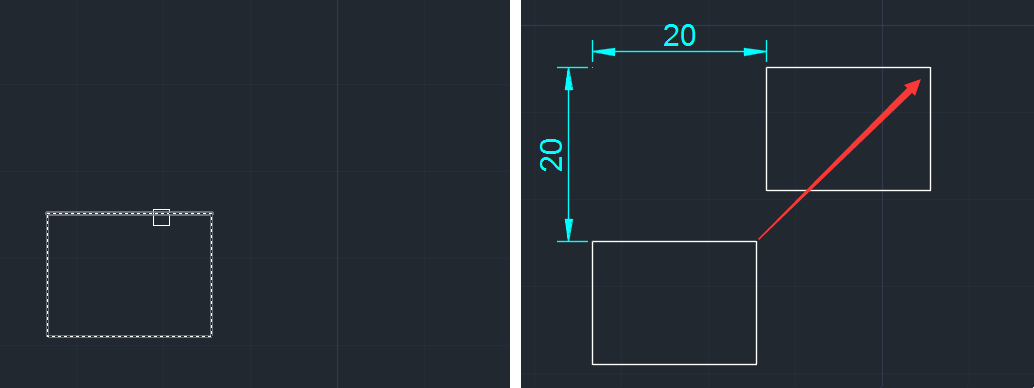
移动(一)
命令: M MOVE
选择对象: 找到 1 个 -- 选中矩形
选择对象: -- 空格确认选中
指定基点或 [位移(D)] <位移>: d -- 位移方式
指定位移 <10.0000, 0.0000, 0.0000>: @20,20 -- 相对位移量(X+20,Y+20)
效果:
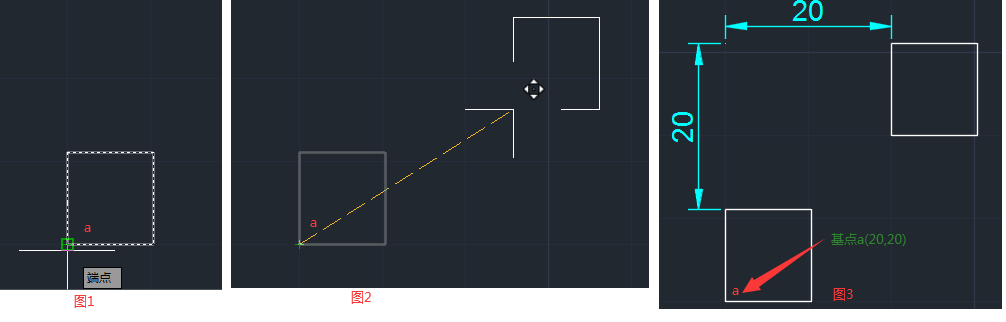
移动(二)
命令: M MOVE
选择对象: 找到 1 个 -- 选中矩形
选择对象: -- 空格确认
指定基点或 [位移(D)] <位移>: -- 选定基点 图1中 a 点坐标(20,20)
指定第二个点或 <使用第一个点作为位移>: --- 鼠标移动到第二个点 图2
指定第二个点或 <使用第一个点作为位移>: --这里可以直接空格,则按照基点的坐标移动,相对移动为(X+20,Y+20)图3


 199
199

 被折叠的 条评论
为什么被折叠?
被折叠的 条评论
为什么被折叠?
 到【灌水乐园】发言


