


本篇博文最后修改时间:2017年01月06日,11:06。
一、简介
本文介绍如何实现多项问答题。
二、实验平台
开发平台:Eclipse IDE for Java Developers(Version: Luna Service Release 2 (4.4.2))
安卓系统: Android 4.3
手机:红米1S
三、版权声明
博主:甜甜的大香瓜
声明:喝水不忘挖井人,转载请注明出处。
原文地址:http://blog.csdn.NET/feilusia
联系方式:897503845@qq.com
香瓜BLE之CC2541群:127442605
香瓜BLE之CC2640群:557278427
五、基础知识
暂无
六、实验步骤
1、创建新的类——TrueFalse
1)右键单击 com.bignerdranch.android.geoquiz 类包,选择New—— Class

在TrueFalse.java中添加构造函数。
package com.example.linjie;

/**
 * @author Administrator
 *
 */
public class TrueFalse {
	private int mQuestion;
	private boolean mTrueQuestion;

	public TrueFalse(int question, boolean trueQuestion){
		mQuestion = question;
		mTrueQuestion = trueQuestion;
	}
}
2)生成getter与setter方法
打开Eclipse首选项对话框(Mac用户选择Eclipse菜单,Windows用户选择Windows ——Preferences菜单)。
并填充如下图:
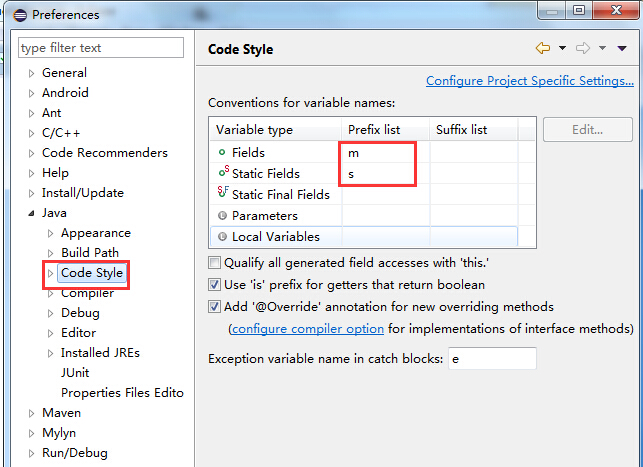
在TrueFalse.java中会自动添加set和get等方法
package com.example.linjie;

/**
 * @author Administrator
 *
 */
public class TrueFalse {
	private int mQuestion;
	private boolean mTrueQuestion;

	public TrueFalse(int question, boolean trueQuestion){
		mQuestion = question;
		mTrueQuestion = trueQuestion;
	}

	public int getQuestion() {
		return mQuestion;
	}

	public void setQuestion(int question) {
		mQuestion = question;
	}

	public boolean isTrueQuestion() {
		return mTrueQuestion;
	}

	public void setTrueQuestion(boolean trueQuestion) {
		mTrueQuestion = trueQuestion;
	}

}
3)模型——控制器——视图(Model-View-Controller,简称MVC)
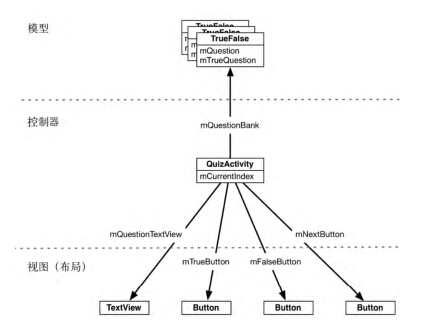
这样就能通过控制器把视图和模型分开,视图也就是UI,而模型则是存储重要数据。
2、视图层
1)组件activity_main.xml
<LinearLayout xmlns:android="http://schemas.android.com/apk/res/android"
  android:layout_width="match_parent"
  android:layout_height="match_parent"
  android:gravity="center"
  android:orientation="vertical" >


  <TextView
    android:id="@+id/question_text_view"
    android:layout_width="wrap_content"
    android:layout_height="wrap_content"
    android:padding="100dp"


    />


  <LinearLayout
    android:layout_width="wrap_content"
    android:layout_height="wrap_content"
    android:orientation="horizontal">


    <Button
      android:id="@+id/true_button"
      android:layout_width="wrap_content"
      android:layout_height="wrap_content"
      android:text="@string/true_button" />


    <Button
      android:id="@+id/false_button"
      android:layout_width="wrap_content"
      android:layout_height="wrap_content"
      android:text="@string/false_button" />


  </LinearLayout>


  <LinearLayout
    android:layout_width="wrap_content"
    android:layout_height="wrap_content"
    android:orientation="horizontal">


    <Button
      android:id="@+id/prev_button"
      android:layout_width="wrap_content"
      android:layout_height="wrap_content"
      android:text="@string/prev_button"
      android:drawableLeft="@drawable/arrow_left"
      android:drawablePadding="4dp"
       />

    <Button
      android:id="@+id/next_button"
      android:layout_width="wrap_content"
      android:layout_height="wrap_content"
      android:text="@string/next_button"
      android:drawableRight="@drawable/arrow_right"
      android:drawablePadding="4dp"
       />

  </LinearLayout>

</LinearLayout>
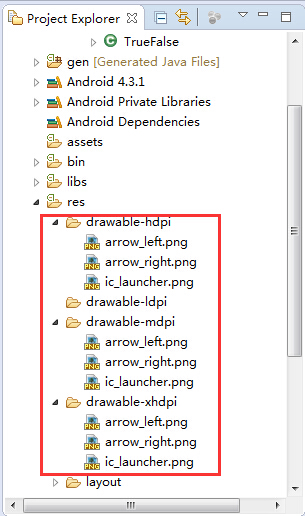
2)添加“左”和“右”的图标
在下图的三个文件夹中添加3种不同像素的“左”“右”图标
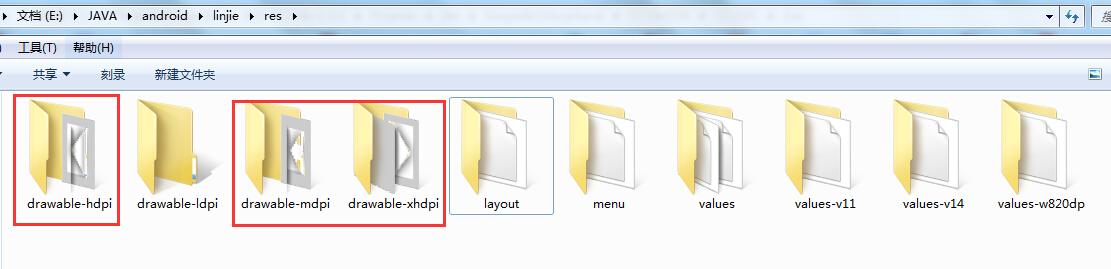
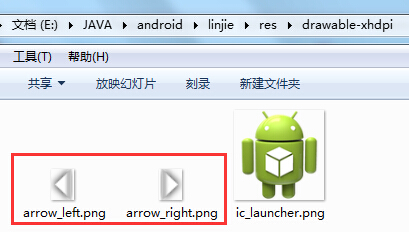
并将图标拖拽到项目工程中:
3、字符串srings.xml
<?xml version="1.0" encoding="utf-8"?>
<resources>
    <string name="app_name">甜甜的大香瓜之真心话测试</string>

  <string name="question_one">问题一:香瓜哥很帅吗?</string>
  <string name="question_one_correct_toast">你也很帅了啦!~</string>
  <string name="question_one_incorrect_toast">纳尼?再给你一次机会!</string>

  <string name="question_two">问题二:你长得好看吗?</string>
  <string name="question_two_correct_toast">再照照镜子,再照照镜子,再照照镜子……</string>
  <string name="question_two_incorrect_toast">我就喜欢诚实的人!</string>

  <string name="question_three">问题三:这个app很棒吧?</string>

  <string name="question_three_correct_toast">哇哈哈哈,还~好~了~啦~</string>
  <string name="question_three_incorrect_toast">您好,此按键已失灵!</string>

  <string name="true_button">是</string>
  <string name="false_button">否</string>


  <string name="prev_button">上一页</string>
  <string name="next_button">下一页</string>

    <string name="action_settings">Settings</string>


</resources>
四、更新控制层MainActivity.java
package com.example.linjie;

import android.app.Activity;
import android.os.Bundle;
import android.view.Menu;
import android.view.MenuItem;
import android.view.View;
import android.widget.Button;
import android.widget.TextView;
import android.widget.Toast;


public class MainActivity extends Activity {

	private Button mTrueButton;
	private Button mFalseButton;
	private Button mNextButton;
	private Button mPrevButton;
	private TextView mQuestionTextView;

	private TrueFalse[] mQuestionBank = new TrueFalse[]{
			new TrueFalse(R.string.question_one, true),
			new TrueFalse(R.string.question_two, false),
			new TrueFalse(R.string.question_three, true),
	};

	private int mCurrentIndex = 0;

	public void updateQuestion(){
		int question = mQuestionBank[mCurrentIndex].getQuestion();
		mQuestionTextView.setText(question);
	}

	public void checkAnswer(boolean userPressedTrue){
		boolean answerIsTrue = mQuestionBank[mCurrentIndex].isTrueQuestion();

		int messageResId = 0;

		switch(mCurrentIndex){
		case 0:
			if(userPressedTrue == true){
				messageResId = R.string.question_one_correct_toast;
			}else{
				messageResId = R.string.question_one_incorrect_toast;
			}

			Toast.makeText(this, messageResId, Toast.LENGTH_SHORT).show();

			if(userPressedTrue == answerIsTrue){
	        	mCurrentIndex = (mCurrentIndex + 1) % mQuestionBank.length;
	      	  	updateQuestion();
			}

			break;
		case 1:
			if(userPressedTrue == true){
				messageResId = R.string.question_two_correct_toast;
			}else{
				messageResId = R.string.question_two_incorrect_toast;
			}

			Toast.makeText(this, messageResId, Toast.LENGTH_SHORT).show();

			if(userPressedTrue == answerIsTrue){
	        	mCurrentIndex = (mCurrentIndex + 1) % mQuestionBank.length;
	      	  	updateQuestion();
			}

			break;
		case 2:
			if(userPressedTrue == true){
				messageResId = R.string.question_three_correct_toast;
			}else{
				messageResId = R.string.question_three_incorrect_toast;
			}

			Toast.makeText(this, messageResId, Toast.LENGTH_SHORT).show();

			if(userPressedTrue == answerIsTrue){
	        	mCurrentIndex = (mCurrentIndex + 1) % mQuestionBank.length;
	      	  	updateQuestion();
			}

			break;
		}
	}

	@Override
	protected void onCreate(Bundle savedInstanceState) {
		super.onCreate(savedInstanceState);
		setContentView(R.layout.activity_main);

		mQuestionTextView = (TextView)findViewById(R.id.question_text_view);
  	  	updateQuestion();

        mTrueButton = (Button)findViewById(R.id.true_button);
        mTrueButton.setOnClickListener(new View.OnClickListener() {
            @Override
            public void onClick(View v) {
            	checkAnswer(true);
            }
        });

        mFalseButton = (Button)findViewById(R.id.false_button);
        mFalseButton.setOnClickListener(new View.OnClickListener() {
            @Override
            public void onClick(View v) {
            	checkAnswer(false);
            }
        });


        mNextButton = (Button)findViewById(R.id.next_button);	//前进按键
        mNextButton.setOnClickListener(new View.OnClickListener() {
            @Override
            public void onClick(View v) {
            	mCurrentIndex = (mCurrentIndex + 1) % mQuestionBank.length;
          	  	updateQuestion();
            }
        });

        mPrevButton = (Button)findViewById(R.id.prev_button);		//后退按键
        mPrevButton.setOnClickListener(new View.OnClickListener() {
            @Override
            public void onClick(View v) {
            	if(mCurrentIndex == 0){
            		mCurrentIndex = mQuestionBank.length - 1;
            	}else{
                	mCurrentIndex = mCurrentIndex - 1;
            	}
          	  	updateQuestion();
            }
        });
	}

	@Override
	public boolean onCreateOptionsMenu(Menu menu) {
		// Inflate the menu; this adds items to the action bar if it is present.
		getMenuInflater().inflate(R.menu.main, menu);
		return true;
	}

	@Override
	public boolean onOptionsItemSelected(MenuItem item) {
		// Handle action bar item clicks here. The action bar will
		// automatically handle clicks on the Home/Up button, so long
		// as you specify a parent activity in AndroidManifest.xml.
		int id = item.getItemId();
		if (id == R.id.action_settings) {
			return true;
		}
		return super.onOptionsItemSelected(item);
	}
}
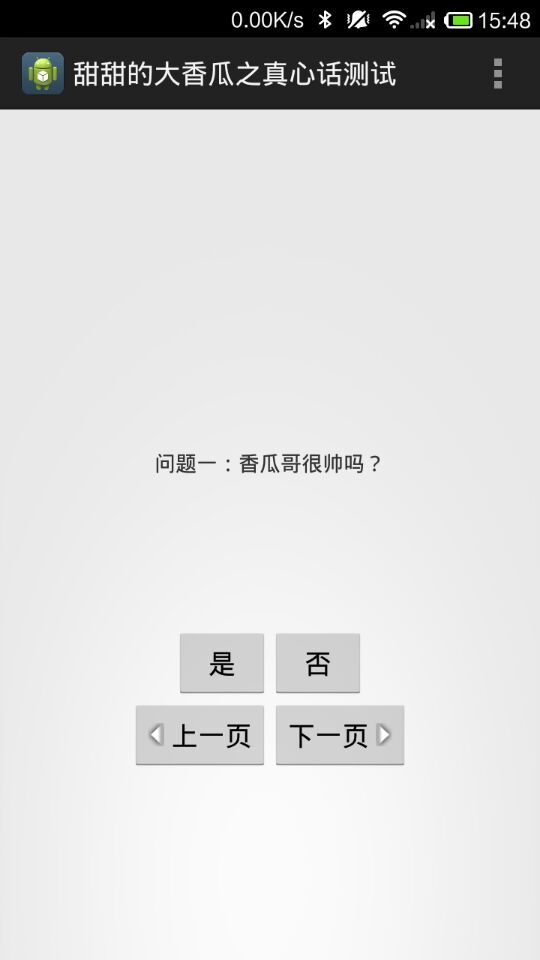
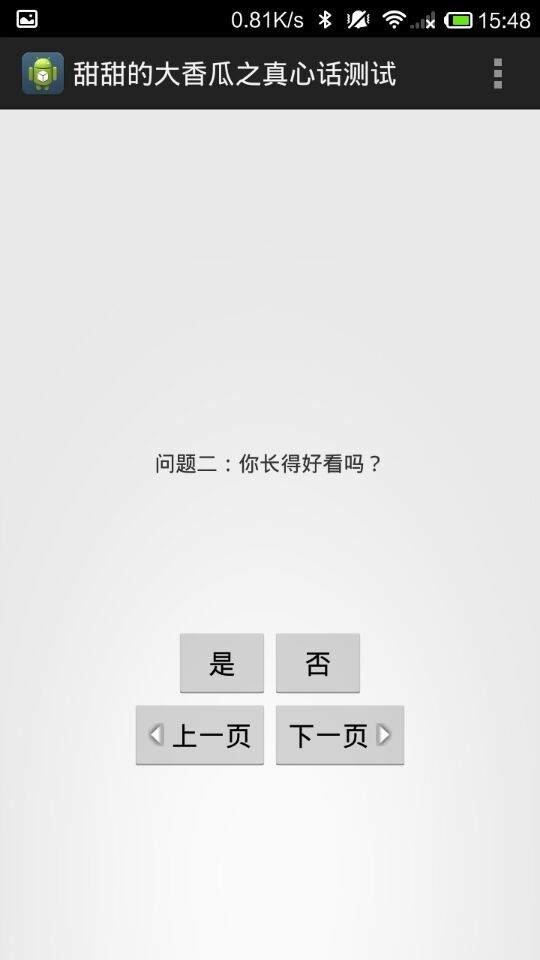
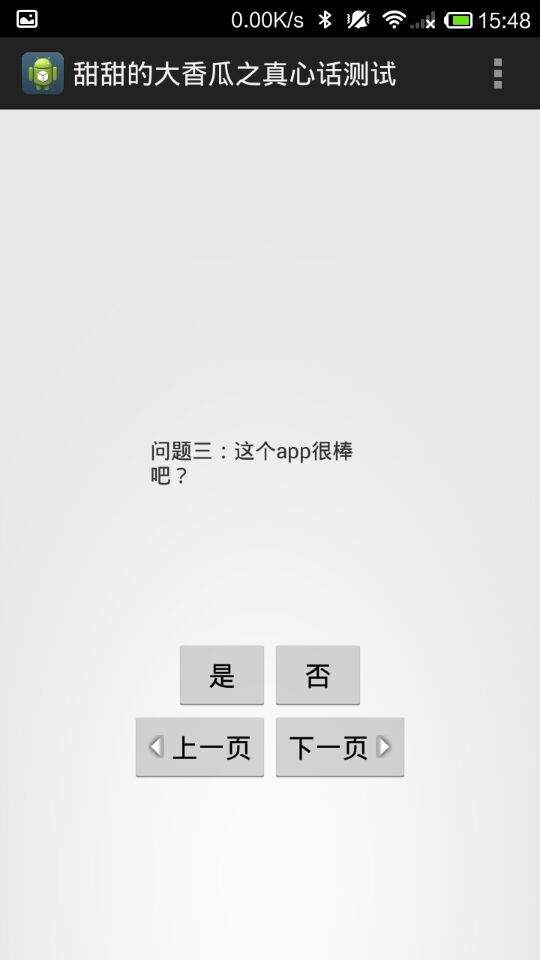
此时可以点击“上一页”和“下一页”进行上下翻页,也可以点击“是”和“否”进行答题,答对了会进入下一题,答错则继续答题。
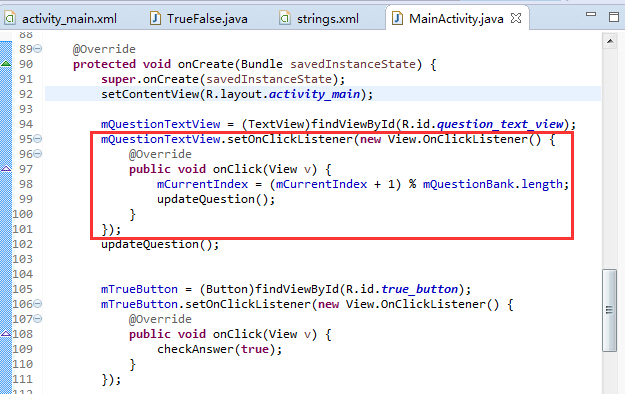
注:如果想点击问题的文字也能进入下一题,则需要给text增加一个监听器:


 125
125

 被折叠的 条评论
为什么被折叠?
被折叠的 条评论
为什么被折叠?
 到【灌水乐园】发言


