


目录
4.3 详解 3 种基本布局
一个丰富的界面是由很多个控件组成的,那么我们如何才能让各个控件都有条不紊地摆放在界面上,而不是乱糟糟的呢?这就需要借助布局来实现了。布局是一种可用于放置很多控件的容 器,它可以按照一定的规律调整内部控件的位置,从而编写出精美的界面。当然,布局的内部除了放置控件外,也可以放置布局,通过多层布局的嵌套,我们就能够完成一些比较复杂的界面实现,图4.15 很好地展示了它们之间的关系。

下面我们就来详细学习一下 Android 中3种最基本的布局。先做好准备工作,新建一个 UILayoutTest 项目,并让 Android Studio 自动帮我们创建好 Activity ,Activity 名和布局名都使用默认值。
4.3.4 LinearLayout
LinearLayout 又称作线性布局,是一种非常常用的布局。正如它的名字所描述的一样,这个布 局会将它所包含的控件在线性方向上依次排列。相信你之前也已经注意到了,我们在上一节中 学习控件用法时,所有的控件就都是放在 LinearLayout 布局里的,因此上一节中的控件也确实是在垂直方向上线性排列的。
既然是线性排列,肯定就不只有一个方向,那为什么上一节中的控件都是在垂直方向排列的 呢?这是由于我们通过 android:orientation 属性指定了排列方向是 vertical ,如果指定的是horizontal ,控件就会在水平方向上排列了。下面我们通过实战来体会一下,修改 activity_main.xml 中的代码,如下所示:
<LinearLayout
    xmlns:android="http://schemas.android.com/apk/res/android"
    xmlns:app="http://schemas.android.com/apk/res-auto"
    xmlns:tools="http://schemas.android.com/tools"
    android:layout_width="match_parent"
    android:layout_height="match_parent"
    android:orientation="vertical"
    tools:context=".MainActivity">

    <Button
        android:id="@+id/button1"
        android:layout_width="wrap_content"
        android:layout_height="wrap_content"
        android:text="Button 1"/>

    <Button
        android:id="@+id/button2"
        android:layout_width="wrap_content"
        android:layout_height="wrap_content"
        android:text="Button 2"/>

    <Button
        android:id="@+id/button3"
        android:layout_width="wrap_content"
        android:layout_height="wrap_content"
        android:text="Button 3"/>

</LinearLayout>
我们在 LinearLayout 中添加了 3 个 Button ,每个 Button 的长和宽都是 wrap_content,并指定了排列方向是 vertical。现在运行一下程序,效果如 图4.16 所示。

然后我们修改一下 LinearLayout 的排列方向,如下所示:
<LinearLayout
    xmlns:android="http://schemas.android.com/apk/res/android"
    xmlns:app="http://schemas.android.com/apk/res-auto"
    xmlns:tools="http://schemas.android.com/tools"
    android:background="#DDDDDD"
    android:layout_width="match_parent"
    android:layout_height="match_parent"
    android:orientation="horizontal"
    tools:context=".MainActivity">

    <Button
        android:id="@+id/button1"
        android:layout_width="wrap_content"
        android:layout_height="wrap_content"
        android:text="Button 1"/>

    <Button
        android:id="@+id/button2"
        android:layout_width="wrap_content"
        android:layout_height="wrap_content"
        android:text="Button 2"/>

    <Button
        android:id="@+id/button3"
        android:layout_width="wrap_content"
        android:layout_height="wrap_content"
        android:text="Button 3"/>

</LinearLayout>
这里将 android:orientation 属性的值改成了 horizontal,这就意味着要让 LinearLayout 中的控件在水平方向上依次排列。当然,如果不指定 android:orientation 属性的值,默认的排列方向就是 horizontal。重新运行一下程序,效果如 图4.17 所示。
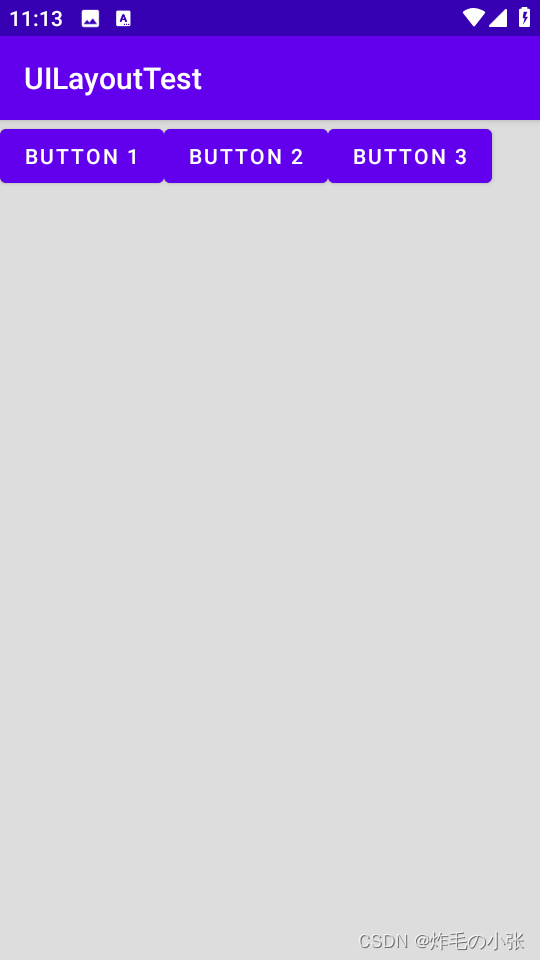
需要注意,如果 LinearLayout 的排列方向是 horizontal,内部的控件就绝对不能将宽度指定 为 match_parent,否则,单独一个控件就会将整个水平方向占满,其他的控件就没有可放置的位置了。同样的道理,如果 LinearLayout 的排列方向是 vertical,内部的控件就不能将高度指定为match_parent。
下面来看 android:layout_gravity 属性,它和我们上一节中学到的 android:gravity 属性看起来有些相似,这两个属性有什么区别呢?其实从名字就可以看出,android:gravity 用于指定文字在控件中的对齐方式,而 android:layou
 最低0.47元/天 解锁文章


 580
580


 被折叠的 条评论
为什么被折叠?
被折叠的 条评论
为什么被折叠?
 到【灌水乐园】发言


