


Unity上对于图像的处理,如果单纯使用代码,那么很遗憾,程序基本会跑死,毕竟是直接对像素的操作,读取写入都是比较耗费CPU和内存的。
所以,这次因为项目需要想实现类似哈哈镜的效果,想来想去,还是觉得用unity的Shader比较好,毕竟不需要CPU做什么,只用GPU就可以了。
话说GPU也是很强大的。
下面简单说一下Shader(其实我也是新手,学习的话,参考http://blog.csdn.net/poem_qianmo/article/details/40723789
)这是位大牛,我的一些基础知识是在里面学习的。
这次我是来分享几个Shader的,对于具体的内容原理什么的,我就不讲了,也讲不来 ,只能大致说一下,我也在学习。
1、哈哈镜效果(放大)
下面是解释,将就着看一下

编译无误的话,我们看一下在Unity中的效果
新建一个Plane,导入一张图片,然后拖到Plane上面,在选择我们刚才创建的Shader

可以看到,下面的三个参数就是我们创建的在Propertes里面,随便挑以下参数,下面是效果


好吧,糟蹋了美女。。。
算法是我从Java里面改过来的,细节就不要问我了,我是代码搬运工。。
2、哈哈镜缩小模式
我直接上代码咯,因为基本没有变什么
看看效果(其实第二个还蛮可爱的)


3、再来个对称的
看效果

额,这妹子即使对称了,看着还是挺好看(花痴ing)附上原图

暂时就这么多吧,还有其他特效,以后慢慢更新
Article index
- 1 – Fish Eye Shader
- 2 – Barrel Distortion Shaders
- 3 – Dome Distortion Shader
- 4 – Another Very Cool Fish Eye Shader
- 5 – Shadertoy FishEye / Anti-FishEye Shader
- 6 – Fish Eye Lens Shader
Here is a collection of some post processing filters in GLSL I found on the web about fish eye and other barrel / dome distortion. For each filter, I coded a small demo with GLSL Hacker that shows the effect in action. You will find all demos in the code sample pack in the host_api/PostFX/FishEye/ folder. All demos require the latest DEV version (0.6.3.13) of GLSL Hacker (Windows, OS X and Linux).
As usual, all the following GLSL shaders can be used in any OpenGL application with minor changes only (shader inputs).
Other types of post processing filters can be found in the Shader Library.
1 – Fish Eye Shader

This fish eye shader is based on the following links:
Vertex shader:
#version 120
varying vec4 Vertex_UV;
uniform mat4 gxl3d_ModelViewProjectionMatrix;
void main()
{
  gl_Position = gxl3d_ModelViewProjectionMatrix * gl_Vertex;
  Vertex_UV = gl_MultiTexCoord0;
}
Fragment shader:
version 120
uniform sampler2D tex0;
varying vec4 Vertex_UV;
const float PI = 3.1415926535;

void main()
{
  float aperture = 178.0;
  float apertureHalf = 0.5 * aperture * (PI / 180.0);
  float maxFactor = sin(apertureHalf);

  vec2 uv;
  vec2 xy = 2.0 * Vertex_UV.xy - 1.0;
  float d = length(xy);
  if (d < (2.0-maxFactor))
  {
    d = length(xy * maxFactor);
    float z = sqrt(1.0 - d * d);
    float r = atan(d, z) / PI;
    float phi = atan(xy.y, xy.x);

    uv.x = r * cos(phi) + 0.5;
    uv.y = r * sin(phi) + 0.5;
  }
  else
  {
    uv = Vertex_UV.xy;
  }
  vec4 c = texture2D(tex0, uv);
  gl_FragColor = c;
}
2 – Barrel Distortion Shaders
2.1 – Barrel Distortion Pixel Shader

Barrel distortion in the pixel shader
These shaders are based on the following links:
Barrel distortion is a lens effect which causes images to be spherised or inflated (source).
The first barrel distortion demo shows a regular post processing filter that runs the filter in the pixel shader:
Vertex shader:
#version 120
varying vec4 Vertex_UV;
uniform mat4 gxl3d_ModelViewProjectionMatrix;
void main()
{
  gl_Position = gxl3d_ModelViewProjectionMatrix * gl_Vertex;
  Vertex_UV = gl_MultiTexCoord0;
}
Fragment shader:
#version 120
uniform sampler2D tex0;
varying vec4 Vertex_UV;
const float PI = 3.1415926535;
uniform float BarrelPower;

vec2 Distort(vec2 p)
{
    float theta  = atan(p.y, p.x);
    float radius = length(p);
    radius = pow(radius, BarrelPower);
    p.x = radius * cos(theta);
    p.y = radius * sin(theta);
    return 0.5 * (p + 1.0);
}

void main()
{
  vec2 xy = 2.0 * Vertex_UV.xy - 1.0;
  vec2 uv;
  float d = length(xy);
  if (d < 1.0)
  {
    uv = Distort(xy);
  }
  else
  {
    uv = Vertex_UV.xy;
  }
  vec4 c = texture2D(tex0, uv);
  gl_FragColor = c;
}
2.2 - Barrel Distortion Vertex Shader
In the second barrel distortion demo, the main processing is done in the vertex shader and requires a tessellated fullscreen quad. In the demo, the post processing quad is made up of 30x30 subdivisions:
Vertex shader:
#version 120
varying vec4 Vertex_UV;
uniform mat4 gxl3d_ModelViewProjectionMatrix;
uniform float BarrelPower;

vec4 Distort(vec4 p)
{
    vec2 v = p.xy / p.w;
    // Convert to polar coords:
    float radius = length(v);
    if (radius > 0)
    {
      float theta = atan(v.y,v.x);

      // Distort:
      radius = pow(radius, BarrelPower);

      // Convert back to Cartesian:
      v.x = radius * cos(theta);
      v.y = radius * sin(theta);
      p.xy = v.xy * p.w;
    }
    return p;
}

void main()
{
  vec4 P = gxl3d_ModelViewProjectionMatrix * gl_Vertex;
  gl_Position = Distort(P);
  Vertex_UV = gl_MultiTexCoord0;
}
Fragment shader:
uniform sampler2D tex0;
varying vec4 Vertex_UV;
uniform int wireframe;

void main()
{
  vec4 c = vec4(1.0);
  if (wireframe == 0)
  {
    vec2 uv = Vertex_UV.xy;
    c = texture2D(tex0, uv);
  }
  gl_FragColor = c;
}

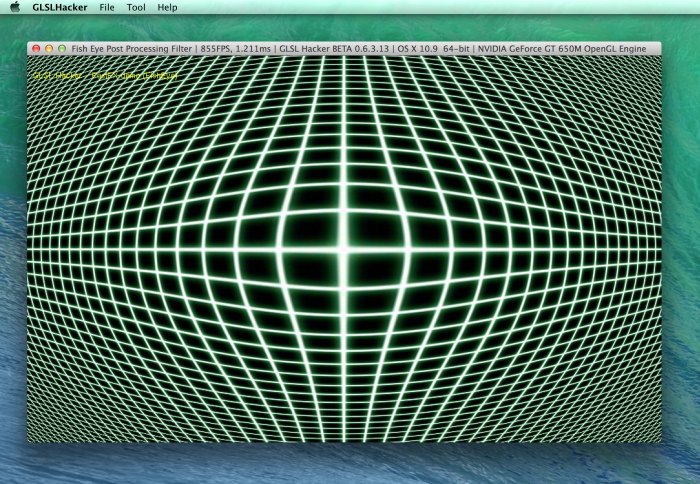
Barrel distortion in the vertex shader - wireframe mode

Barrel distortion in the vertex shader - solid + textured mode
3 – Dome Distortion Shader
This shader is based on the following links:
- Realtime Dome Imaging and Interaction: Towards Immersive Design Environments
- GPU Programming for Dome Projection
Dome projection requires a fish eye projector lens, which necessarily distorts the image. A fisheye lens is needed for the projector to display across the nearly 180° of the dome. This necessarily introduces a distortion of the graphics that is being displayed through it. The trick is to then “pre-distort” the graphics in the opposite direction before sending it on to the projector.
The following GLSL program (which is not a post processing filter because it directly acts on the 3D object) shows the pre-distort effect:
Vertex shader:
#version 120
varying vec4 Vertex_UV;
uniform mat4 gxl3d_ModelViewMatrix;
uniform mat4 gxl3d_ProjectionMatrix;

uniform int do_distorsion;

const float PI = 3.1415926535;

void main()
{
  vec4 P = gxl3d_ModelViewMatrix * gl_Vertex;
  if (do_distorsion == 1)
  {
    float rxy = length(P.xy);
    if (rxy > 0)
    {
      float phi = atan(rxy, -P.z);
      float lens_radius = phi * 180.0 / PI * 2.0;
      P.xy *= (lens_radius / rxy);
    }
  }
  gl_Position = gxl3d_ProjectionMatrix * P;
  Vertex_UV = gl_MultiTexCoord0 * 10.0;
}
Fragment shader:
#version 120
void main()
{
  gl_FragColor = vec4(1.0, 1.0, 1.0, 1.0);
}

Dome distortion enabled

Dome distortion disabled
4 – Another Very Cool Fish Eye Shader

I found this very cool GLSL fish eye shader in this demo:
GLSL Vertex shader:
#version 120
varying vec4 Vertex_UV;
varying vec4 posDevSpace;
uniform mat4 gxl3d_ModelViewProjectionMatrix;
void main()
{
  gl_Position = gxl3d_ModelViewProjectionMatrix * gl_Vertex;
  Vertex_UV = gl_MultiTexCoord0;
  posDevSpace = gl_Position / gl_Position.z;
  posDevSpace = vec4(0.5, 0.5, 1.0, 1.0) + (posDevSpace + vec4(1.0, 1.0, 0.0, 0.0));
}
GLSL Fragment shader:
#version 120
uniform sampler2D tex0;
varying vec4 Vertex_UV;
const float PI = 3.1415926535;

varying vec4 posDevSpace;
uniform float lensradius; // 3
uniform float signcurvature; // 10

#define EPSILON 0.000011

void main(void)
{
    float curvature = abs(signcurvature);
    float extent = lensradius;
    float optics = extent / log2(curvature * extent + 1.0) / 1.4427;
    vec4 PP = posDevSpace - vec4 (1.5, 1.5, 0.0, 1.0);
    float P0 = PP[0];
    float P1 = PP[1];
    float radius = sqrt(P0 * P0 + P1 * P1);

    float cosangle = P0 / radius;
    float sinangle = P1 / radius;

    float rad1, rad2, newradius;
    rad1 = (exp2((radius / optics) * 1.4427) - 1.0) / curvature;
    rad2 = optics * log2(1.0 + curvature * radius) / 1.4427;
    newradius = signcurvature > 0.0 ? rad1 : rad2;

    vec4 FE = vec4 (0.0, 0.0, 0.0, 1.0);
    FE[0] = newradius * cosangle + 0.5;
    FE[1] = newradius * sinangle + 0.5;
    FE = radius <= extent ? FE : posDevSpace;
    FE = curvature < EPSILON ? posDevSpace : FE;

    gl_FragColor = texture2D(tex0, vec2(FE));
}
5 – Shadertoy FishEye / Anti-FishEye Shader
This is another variation of the fish eye effect, this time from a Shadertoy demo:
GLSL Vertex shader:
#version 120
uniform mat4 gxl3d_ModelViewProjectionMatrix;
void main()
{
  gl_Position = gxl3d_ModelViewProjectionMatrix * gl_Vertex;
}
GLSL Fragment shader:
#version 120
uniform sampler2D iChannel0;
uniform vec2 iResolution;
uniform vec2 iMouse;

#define EPSILON 0.000011

void main(void)//Drag mouse over rendering area
{
  //normalized coords with some cheat
  vec2 p = gl_FragCoord.xy / iResolution.x;

  //screen proportion
  float prop = iResolution.x / iResolution.y;
  //center coords
  vec2 m = vec2(0.5, 0.5 / prop);
  //vector from center to current fragment
  vec2 d = p - m;
  // distance of pixel from center
  float r = sqrt(dot(d, d));
  //amount of effect
  float power = ( 2.0 * 3.141592 / (2.0 * sqrt(dot(m, m))) ) *
		(iMouse.x / iResolution.x - 0.5);
  //radius of 1:1 effect
  float bind;
  if (power > 0.0) bind = sqrt(dot(m, m));//stick to corners
  else {if (prop < 1.0) bind = m.x; else bind = m.y;}//stick to borders

  //Weird formulas
  vec2 uv;
  if (power > 0.0)//fisheye
    uv = m + normalize(d) * tan(r * power) * bind / tan( bind * power);
  else if (power < 0.0)//antifisheye
   uv = m + normalize(d) * atan(r * -power * 10.0) * bind / atan(-power * bind * 10.0);
  else
    uv = p;//no effect for power = 1.0

  //Second part of cheat
  //for round effect, not elliptical
  vec3 col = texture2D(iChannel0, vec2(uv.x, -uv.y * prop)).xyz;

  gl_FragColor = vec4(col, 1.0);
}

Fish eye shader in action

Anti-Fish eye shader in action
6 – Fish Eye Lens Shader

This cool fish eye lens demo is based on the code from this link:
GLSL Vertex shader:
#version 120
uniform mat4 gxl3d_ModelViewProjectionMatrix;
void main()
{
  gl_Position = gxl3d_ModelViewProjectionMatrix * gl_Vertex;
}
GLSL Fragment shader:
#version 120
uniform sampler2D tex0;
uniform vec2 resolution;
uniform vec2 mouse;
uniform float lensSize; // 0.4

void main(void)
{
    vec2 p = gl_FragCoord.xy / resolution.xy;
    vec2 m = mouse.xy / resolution.xy;

    vec2 d = p - m;
    float r = sqrt(dot(d, d)); // distance of pixel from mouse

    vec2 uv;
    vec3 col = vec3(0.0, 0.0, 0.0);
    if (r > lensSize+0.01)
    {
        uv = p;
        col = texture2D(tex0, vec2(uv.x, -uv.y)).xyz;
    }
    else if (r < lensSize-0.01)
    {
        // Thanks to Paul Bourke for these formulas; see
        // http://paulbourke.net/miscellaneous/lenscorrection/
        // and .../lenscorrection/lens.c
        // Choose one formula to uncomment:
        // SQUAREXY:
        // uv = m + vec2(d.x * abs(d.x), d.y * abs(d.y));
        // SQUARER:
        uv = m + d * r; // a.k.a. m + normalize(d) * r * r
        // SINER:
        // uv = m + normalize(d) * sin(r * 3.14159 * 0.5);
        // ASINR:
        // uv = m + normalize(d) * asin(r) / (3.14159 * 0.5);
        col = texture2D(tex0, vec2(uv.x, -uv.y)).xyz;
    }
    gl_FragColor = vec4(col, 1.0);
}


 1536
1536

 被折叠的 条评论
为什么被折叠?
被折叠的 条评论
为什么被折叠?
 到【灌水乐园】发言


