


>- **🍨 本文为[🔗365天深度学习训练营](https://mp.weixin.qq.com/s/xLjALoOD8HPZcH563En8bQ) 中的学习记录博客**
>- ** 参考文章:365天深度学习训练营-第5周:运动鞋品牌识别(训练营内部成员可读)**
>- **🍖 原作者:[K同学啊](https://mp.weixin.qq.com/s/xLjALoOD8HPZcH563En8bQ)**
1.实验准备
设置GPU:
import tensorflow as tf
gpus=tf.config.list_physical_devices("GPU")
if gpus:
    gpus0=gpus[0]
    tf.config.experimental.set_memory_growth(gpu0,True)
    tf.config.set_visible_devices([gpus0],"GPUS")
设置数据路径
data_dir="./49-data/"
data_dir=pathlib.Path(data_dir)
image_count=len(list(data_dir.glob('*/*.png')))
print("图片总数:",image_count)
batch_size=32
img_height=224
img_width=224
数据探索
image_count=len(list(data_dir.glob('*/*.png')))
print("图片总数:",image_count)

#图片总数1200
打印所有的数据类别
class_names=train_ds.class_names
print(class_names)
['Dark', 'Green', 'Light', 'Medium'] 设置训练参数
batch_size=32
img_height=224
img_width=224
#加载训练集到tensorflow中
train_ds=tf.keras.preprocessing.image_dataset_from_directory(
data_dir,
validation_split=0.1,
subset="training",
label_mode="categorical",
seed=123,
image_size=(img_height,img_width),
batch_size=batch_size
)
#加载验证集集到tensorflow中
val_ds=tf.keras.preprocessing.image_dataset_from_directory(
data_dir,
validation_split=0.1,
subset="validation",
label_mode="categorical",
seed=123,
image_size=(img_height,img_width),
batch_size=batch_size
)
打印标签类别
class_names=train_ds.class_names
print(class_names)
['Angelina Jolie', 'Brad Pitt', 'Denzel Washington', 'Hugh Jackman', 'Jennifer Lawrence', 'Johnny Depp', 'Kate Winslet', 'Leonardo DiCaprio', 'Megan Fox', 'Natalie Portman', 'Nicole Kidman', 'Robert Downey Jr', 'Sandra Bullock', 'Scarlett Johansson', 'Tom Cruise', 'Tom Hanks', 'Will Smith']
可视化视图
import matplotlib.pyplot as plt
plt.figure(figsize=(20,10))
for images,labels in train_ds.take(1):
    for i in range(10):
        ax=plt.subplot(2,5,i+1)
        plt.imshow(images[i].numpy().astype("uint8"))
        plt.title(class_names[np.argmax(labels[i])])
        plt.axis("off")
plt.axis("off") 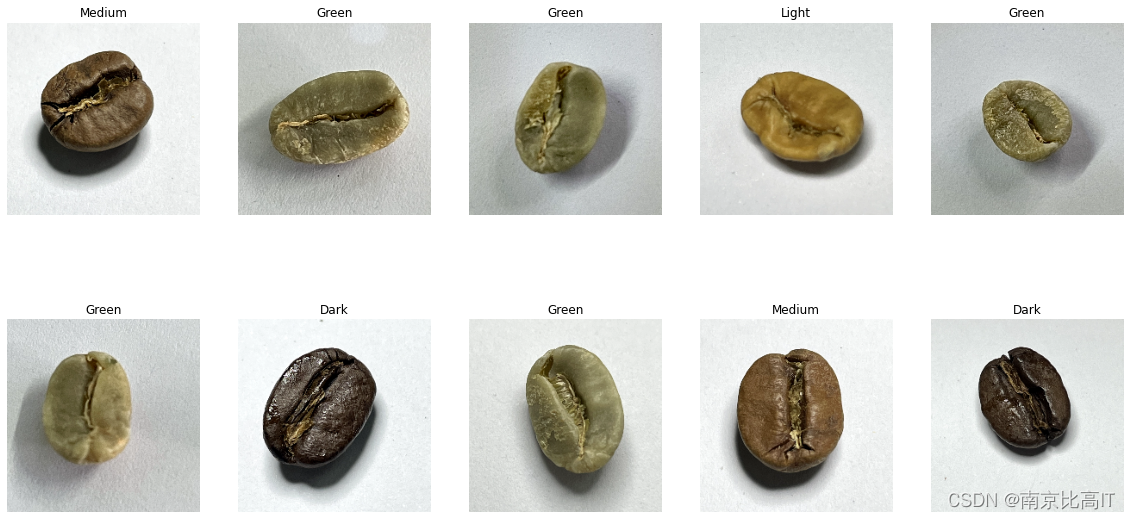
检查输入数据形状
for image_batch,labels_batch in train_ds:
    print(image_batch.shape)
    print(labels_batch.shape)
    break
打乱数据和设置加速
AUTOTUNE=tf.data.AUTOTUNE
train_ds=train_ds.cache().shuffle(1000).prefetch(buffer_size=AUTOTUNE)
val_ds=val_ds.cache().prefetch(buffer_size=AUTOTUNE)
数据标准化
normalization_layer=layers.experimental.preprocessing.Rescaling(1./255)
train_ds=train_ds.map(lambda x,y:(normalization_layer(x),y))
val_ds=val_ds.map(lambda x,y:(normalization_layer(x),y))
image_batch,labels_batch=next(iter(val_ds))
first_image=image_batch[0]
print(np.min(first_image),np.max(first_image))
#0.0 0.9960785
2.模型训练
设置模型
from tensorflow.keras import layers,models,Input
from tensorflow.keras.models import Model
from tensorflow.keras.layers import Conv2D,MaxPooling2D,Dense,Flatten,Dropout
def VGG16(nb_classes,input_shape):
    input_tensor=Input(shape=input_shape)
    x=Conv2D(64,(3,3),activation='relu',padding='same',name='block1_conv1')(input_tensor)
    x=Conv2D(64,(3,3),activation='relu',padding='same',name='block1_conv2')(x)
    x=MaxPooling2D((2,2),strides=(2,2),name='block1_pool')(x)

    x=Conv2D(128,(3,3),activation='relu',padding='same',name='block2_conv1')(x)
    x=Conv2D(128,(3,3),activation='relu',padding='same',name='block2_conv2')(x)
    x=MaxPooling2D((2,2),strides=(2,2),name='block2_pool')(x)

    x=Conv2D(256,(3,3),activation='relu',padding='same',name='block3_conv1')(x)
    x=Conv2D(256,(3,3),activation='relu',padding='same',name='block3_conv2')(x)
    x=MaxPooling2D((2,2),strides=(2,2),name='block3_pool')(x)

    x=Conv2D(512,(3,3),activation='relu',padding='same',name='block4_conv1')(x)
    x=Conv2D(512,(3,3),activation='relu',padding='same',name='block4_conv2')(x)
    x=Conv2D(512,(3,3),activation='relu',padding='same',name='block4_conv3')(x)
    x=MaxPooling2D((2,2),strides=(2,2),name='block4_pool')(x)

    x=Conv2D(512,(3,3),activation='relu',padding='same',name='block5_conv1')(x)
    x=Conv2D(512,(3,3),activation='relu',padding='same',name='block5_conv2')(x)
    x=Conv2D(512,(3,3),activation='relu',padding='same',name='block5_conv3')(x)
    x=MaxPooling2D((2,2),strides=(2,2),name='block5_pool')(x)

    x=Flatten()(x)
    x=Dense(4090,activation='relu',name='fc1')(x)
    x=Dense(4090,activation='relu',name='fc2')(x)
    output_tensor=Dense(nb_classes,activation='softmax',name='predictions')(x)
    model=Model(input_tensor,output_tensor)
    return model
model=VGG16(len(class_names),(img_width,img_height,3))
model.summary()
设置训练参数
#设置训练参数
init_learing_rate=1e-4
lr_schedule=tf.keras.optimizers.schedules.ExponentialDecay(
init_learing_rate,
decay_rate=0.92,
decay_steps=30,
staircase=True
)
optimizer=tf.keras.optimizers.Adam(learning_rate=lr_schedule)
model.compile(optimizer=optimizer,loss=tf.keras.losses.SparseCategoricalCrossentropy(from_logits=True),
metrics=['accuracy'])
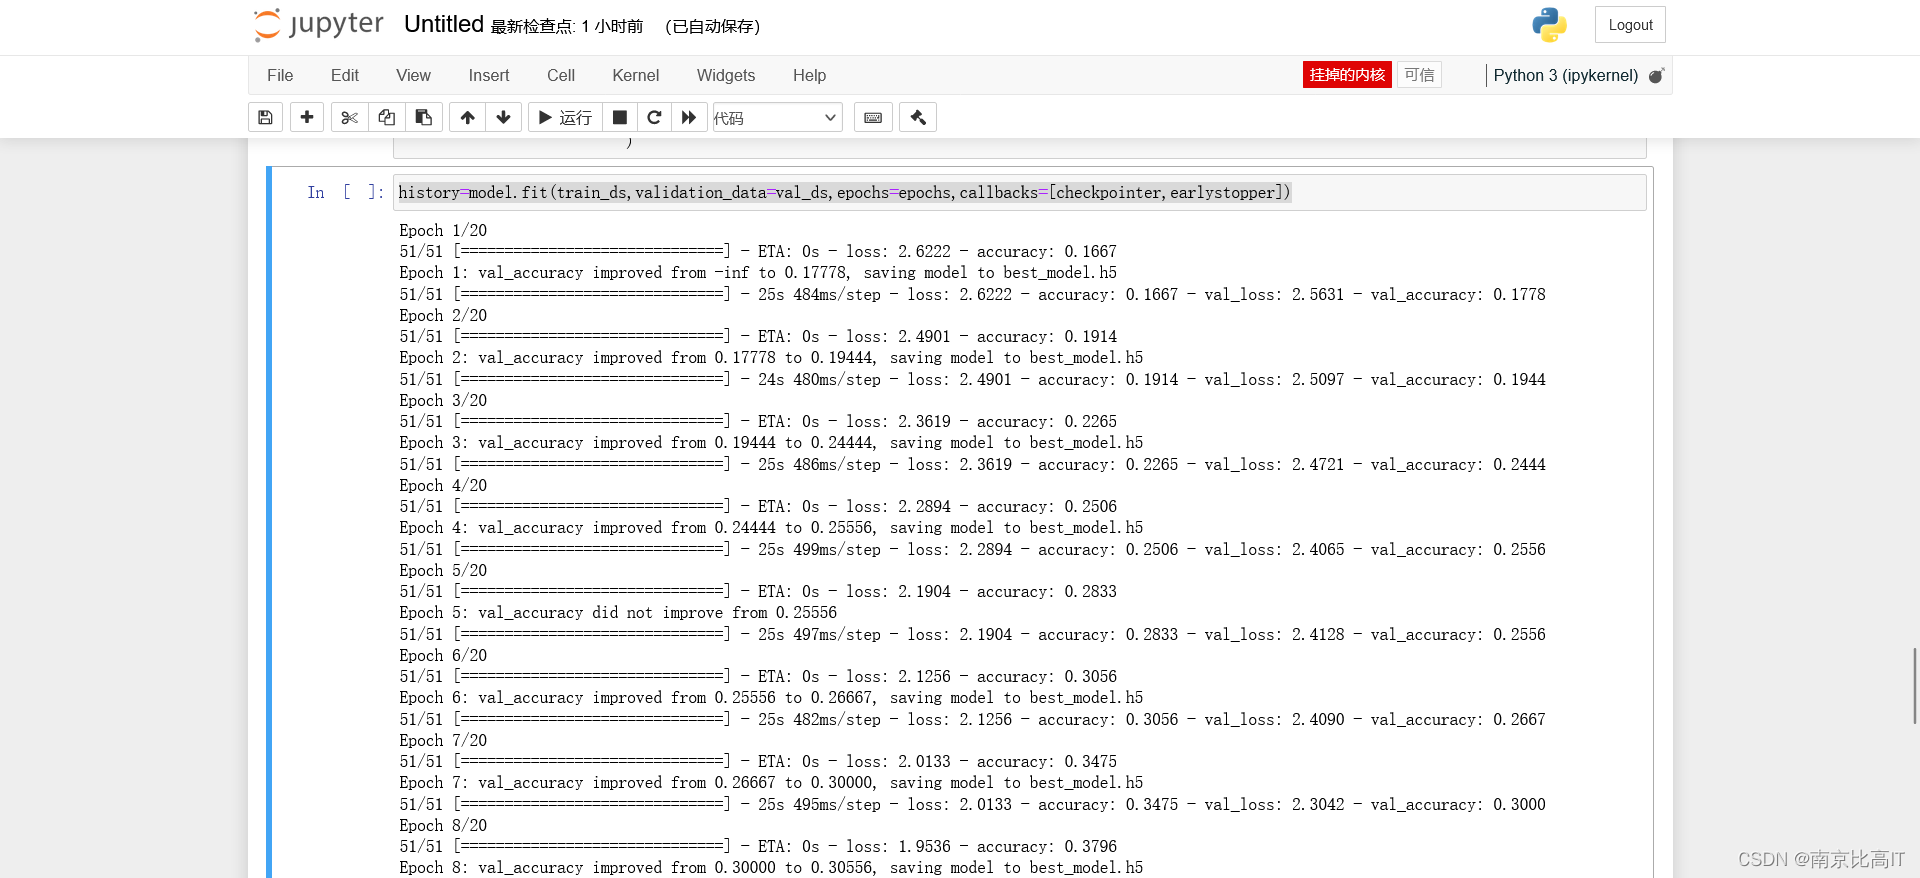
epochs=20开始训练
history=model.fit(train_ds,validation_data=val_ds,epochs=epochs,callbacks=[checkpointer,earlystopper])history=model.fit(
train_ds,
validation_data=val_ds,
epochs=epochs
)
可视化训练结果
acc=history.history['accuracy']
val_acc=history.history['val_accuracy']
loss=history.history['loss']
val_loss=history.history['val_accuracy']
epochs=range(len(loss))
plt.figure(figsize=(12,4))
plt.subplot(1,2,1)
plt.plot(epochs,acc,label='Training Accuracy')
plt.plot(epochs,val_acc,label='Validation Accuracy')
plt.legend(loc='lower right')
plt.title('Training and Validation Accuracy')
plt.subplot(1,2,2)
plt.plot(1,2,3)
plt.plot(epochs,loss,label='Training Loss')
plt.plot(epochs,val_loss,label='Validation Loss')
plt.legend(loc='upper right')
plt.title('Training and Validation Loss')
plt.show() 
3.实验总结
本文使用VGG网络进行实现,根据上图可知模型效果还不错,通过这次浅浅的尝试发现VGG网络效果不错,可以将其用在过往的天气识别、彩色图片识别、好莱坞识别中进行效果改善,这也是对比实验,但未来如果要探索深度神经网络我们需要一定的算力才行,切需要学习绘制网络的结构,本文缺少绘制网络的结果,将在下周补上,敬请期待哦


 1557
1557


 被折叠的 条评论
为什么被折叠?
被折叠的 条评论
为什么被折叠?
 到【灌水乐园】发言


