


目录
基础理论
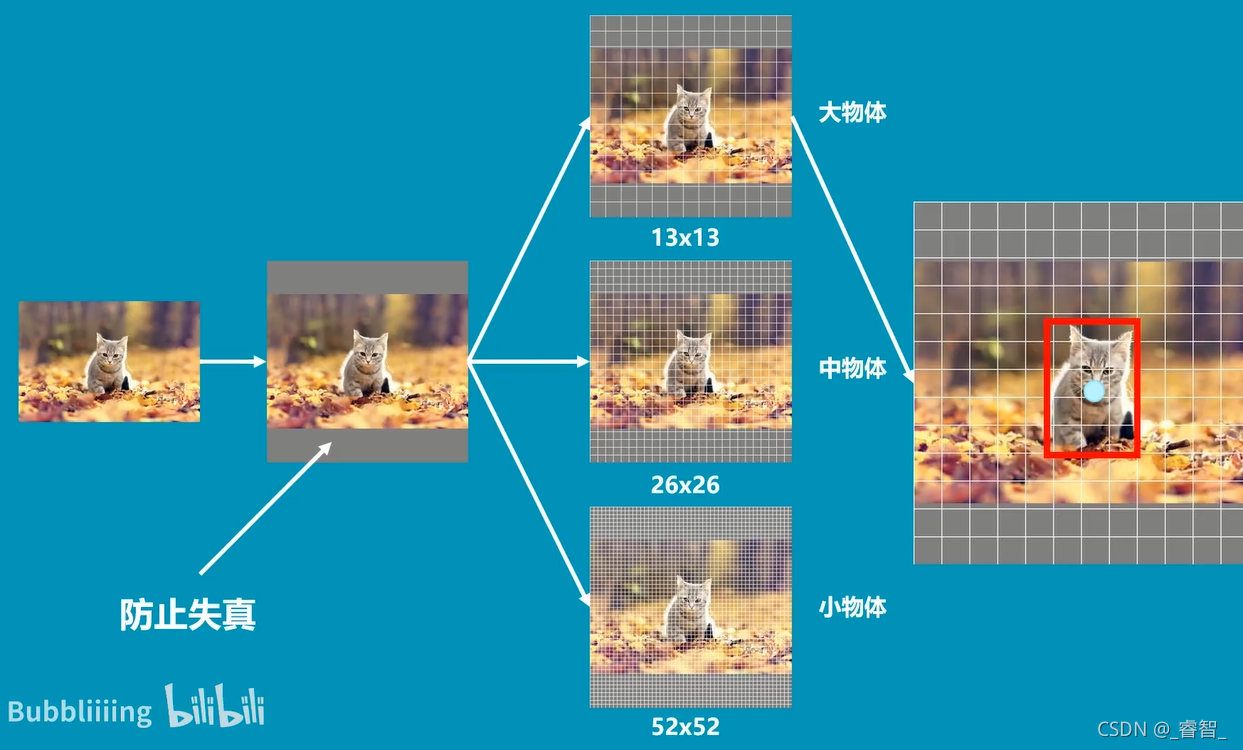
图像被划分成3个图像:
图像在多次卷积压缩后,小物体容易消失,所以我们分别用52*52、26*26、13*13的网格检测小物体、中物体、大物体。
(猫是大物体,所以用13*13的网格检测)

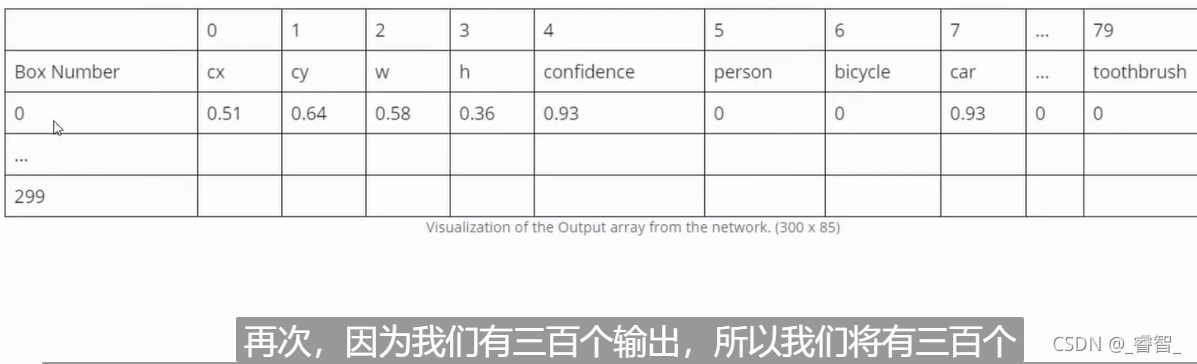
输出层output:

一、 读取文件
需要三个文件:
coco.names、yolov3.cfg、yolov3.weights。
下载地址:
https://download.csdn.net/download/great_yzl/34365174
(也可以去yolo官网下载,不过coco.names文件不知道有没有)
yolov3.cfg、yolov3.weights都是官方给定的模型(已经设置训练好的,直接拿来用即可)。
# 读取文件
def ReadFile():
    global name_list
    name_list = []
    # 读取文件
    with open('coco.names') as f:
        name_list = f.read().split('\n')
    print(name_list)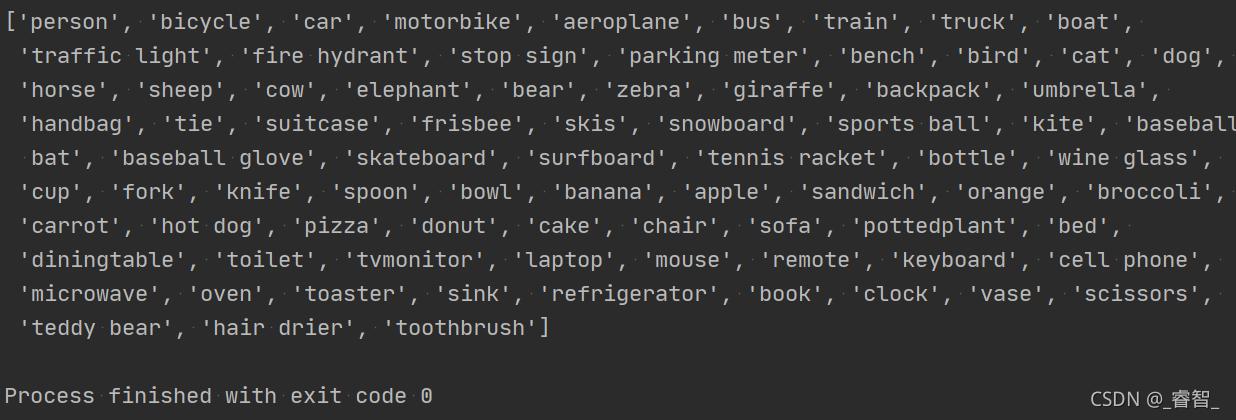
二、神经网络初始化
1、搭建神经网络
根据yolov3官方的设置和权重
global network
    model_configuration = 'yolov3.cfg'  # 配置模型
    model_weights = 'yolov3.weights'    # 权重
    # 1、创建神经网络
    network = cv2.dnn.readNetFromDarknet(model_configuration, model_weights)
    #                                     配置模型       权重
2、GPU加速
# 2、GPU加速
    network.setPreferableBackend(cv2.dnn.DNN_BACKEND_OPENCV)    # 设置opencv作为后端
    network.setPreferableTarget(cv2.dnn.DNN_TARGET_CPU)
三、打开摄像头、按帧读取图像
def Capture_Init():
    global capture, w, h
    capture = cv2.VideoCapture(0)
    w, h = 320, 320
while True:
global img
success, img = capture.read()
# img = cv2.imread("Resource/test4.jpg")
cv2.imshow('img', img)
# 设置每帧间隔时间(q键退出)
cv2.waitKey(1)
# if cv2.waitKey(1) & 0XFF == ord("q"):
# break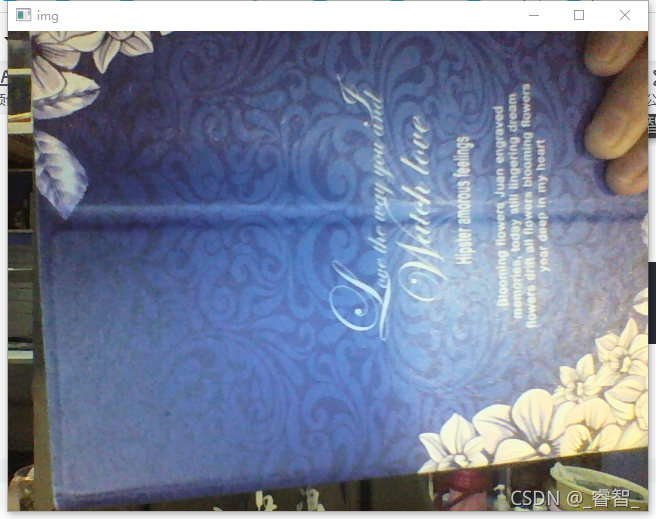
四、向神经网络输入
# 向神经网络输入
        Input_to_Network(img)
把img的数据变换一下,作为blob输入到image中。
# 向神经网络输入
def Input_to_Network(image):
    # 把image转换成blob数据类型(归一化等一系列数据类型转换)(这种方式网络可以理解)
    blob = cv2.dnn.blobFromImage(image, 1 / 255, (w, h), [0, 0, 0], 1, crop=False)
    #                            图像 归一化   宽,高              裁剪结果

    # 设置神经网络输入
    network.setInput(blob)
    print(blob)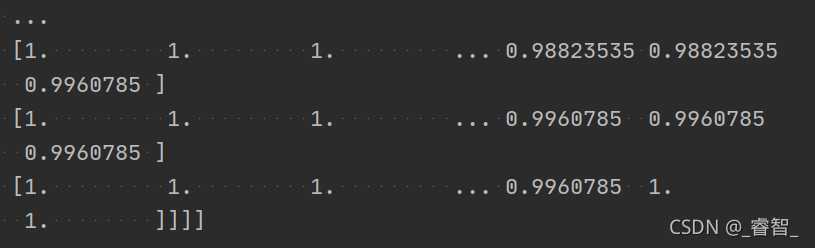
五、获取神经网络输出
1、获取各层名称
# 神经网络各层名称
    layersNames = network.getLayerNames()
    print(layersNames)
2、获取输出层名称
# 2、获取神经网络输出层名称
    outputNames = [(layersNames[i[0] - 1]) for i in network.getUnconnectedOutLayers()]
print(outputNames)![]()
3、获取输出层图像(内容)
# 3、获取输出层图像(内容)
    # outputs:3个特征图:分别为小、中、大。(13*13、26*26、52*52)
    # 每个特征图又输出85个类别
    outputs = network.forward(outputNames)
    # print(outputs[0].shape)
    # print(outputs[1].shape)
    # print(outputs[2].shape)
    # print(outputs[0][0])
    return outputs
# 获取神经网络输出
def Network_Output():
# 神经网络各层名称
layersNames = network.getLayerNames()
# 神经网络输出层名称
outputNames = [(layersNames[i[0] - 1]) for i in network.getUnconnectedOutLayers()]
# outputs:3个特征图:分别为小、中、大。(13*13、26*26、52*52)
# 每个特征图又输出85个类别
outputs = network.forward(outputNames)
# print(outputs[0].shape)
# print(outputs[1].shape)
# print(outputs[2].shape)
# print(outputs[0][0])
return outputs得到图中的一系列结果:
预测框坐标、长宽、置信度、各分类的预测分数。
[5.9418369e-02 7.4009120e-02 5.7651168e-01 1.6734526e-01 6.5560471e-07
0.0000000e+00 0.0000000e+00 0.0000000e+00 0.0000000e+00 0.0000000e+00
0.0000000e+00 0.0000000e+00 0.0000000e+00 0.0000000e+00 0.0000000e+00
0.0000000e+00 0.0000000e+00 0.0000000e+00 0.0000000e+00 0.0000000e+00
0.0000000e+00 0.0000000e+00 0.0000000e+00 0.0000000e+00 0.0000000e+00
0.0000000e+00 0.0000000e+00 0.0000000e+00 0.0000000e+00 0.0000000e+00
0.0000000e+00 0.0000000e+00 0.0000000e+00 0.0000000e+00 0.0000000e+00
0.0000000e+00 0.0000000e+00 0.0000000e+00 0.0000000e+00 0.0000000e+00
0.0000000e+00 0.0000000e+00 0.0000000e+00 0.0000000e+00 0.0000000e+00
0.0000000e+00 0.0000000e+00 0.0000000e+00 0.0000000e+00 0.0000000e+00
0.0000000e+00 0.0000000e+00 0.0000000e+00 0.0000000e+00 0.0000000e+00
0.0000000e+00 0.0000000e+00 0.0000000e+00 0.0000000e+00 0.0000000e+00
0.0000000e+00 0.0000000e+00 0.0000000e+00 0.0000000e+00 0.0000000e+00
0.0000000e+00 0.0000000e+00 0.0000000e+00 0.0000000e+00 0.0000000e+00
0.0000000e+00 0.0000000e+00 0.0000000e+00 0.0000000e+00 0.0000000e+00
0.0000000e+00 0.0000000e+00 0.0000000e+00 0.0000000e+00 0.0000000e+00
0.0000000e+00 0.0000000e+00 0.0000000e+00 0.0000000e+00 0.0000000e+00]
六、框出物体
# 框出物体
def GetObject(outputs, image):
    # 创建参数列表
    h_p, w_p, c_p = image.shape # 图像的高、宽、通道数
    bboxes = []                 # 预测框
    classIds = []               # 分类索引
    confidences = []            # 置信度
1、获取所有预测框情况
逐特征图输出
# 逐特征图输出
    for output in outputs:
逐框输出
# 逐框输出
        for one_class in output:
单预测框结果
# 算出每个框的预测情况
            # 先得到其85分类,每个分类的得分,再获取最大得分的下标作为索引,最后得到其置信度
            scores = one_class[5:]          # 获取所有得分
            classId = np.argmax(scores)     # 获取分类索引
            confidence = scores[classId]    # 获取置信度
置信度过半时,把预测框认为可能的预测结果存入列表
# 加入预测到的物体(认为可能的物体)
            if confidence > 0.5:
                # 获取预测框宽高、坐标
                w_b, h_b = int(one_class[2] * w_p), int(one_class[3] * h_p)
                x, y = int((one_class[0] * w_p) - w_b / 2), int((one_class[1] * h_p) - h_b / 2)
                # (中心点x、y坐标)
                bbox = [x, y, w_b, h_b]
                # 把参数加入列表(预测框参数、分类索引、置信度)
                bboxes.append(bbox)                     # 预测框参数
                classIds.append(classId)                # 分类索引
                confidences.append(float(confidence))   # 置信度
                print(confidences)
2、保留一个预测框
根据置信度、NMS进行非极大值抑制。 (前面对置信度已经有过一次过滤,这次可以不再设置置信度阈值)。
# 保留一个预测框(从置信度阈值、NMS阈值进行设置)
    indices = cv2.dnn.NMSBoxes(bboxes, confidences, 0.5,     0.1)
    #                         预测框    置信度       置信度阈值  NMS阈值(非极大值抑制)
3、画出预测框
# 输出预测框
    for i in indices:
        i = i[0]
        box = bboxes[i]
        x, y, w, h = box[0], box[1], box[2], box[3]
        # print(x,y,w,h)
        cv2.rectangle(image, (x, y), (x + w, y + h), (255, 0, 255), 2)
        cv2.putText(image, f'{name_list[classIds[i]].upper()} {int(confidences[i] * 100)}%',
                   (x, y - 10), cv2.FONT_HERSHEY_SIMPLEX, 0.6, (255, 0, 255), 2)
cv2.imshow('image', image) 
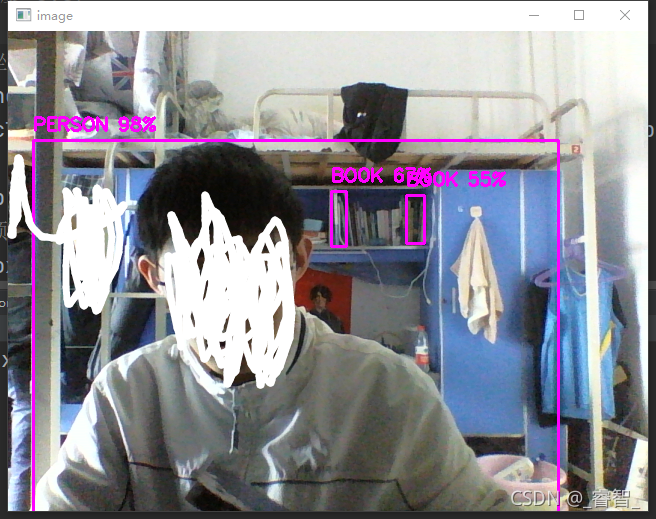
预测最大的问题就是比较慢,用tiny的话足够快,但是不准确,还有很大的提升空间。
总代码
import cv2
import numpy as np


# 读取文件
def ReadFile():
    global name_list
    name_list = []
    # 读取文件
    with open('yolo/coco.names') as f:
        name_list = f.read().split('\n')
    # print(name_list)


# 搭建神经网络
def Network_Init():
    global network
    model_configuration = 'yolo/yolov3.cfg'  # 配置模型
    model_weights = 'yolo/yolov3.weights'    # 权重
    # 1、创建神经网络
    network = cv2.dnn.readNetFromDarknet(model_configuration, model_weights)
    #                                     配置模型       权重

    # 2、GPU加速
    network.setPreferableBackend(cv2.dnn.DNN_BACKEND_OPENCV)    # 设置opencv作为后端
    network.setPreferableTarget(cv2.dnn.DNN_TARGET_CPU)
    # print(network)


# 打开摄像头
def Capture_Init():
    global capture, w, h
    capture = cv2.VideoCapture(0)
    w, h = 320, 320


# 向神经网络输入
def Input_to_Network(image):
    # 把image转换成blob数据类型(归一化等一系列数据类型转换)(这种方式网络可以理解)
    blob = cv2.dnn.blobFromImage(image, 1 / 255, (w, h), [0, 0, 0], 1, crop=False)
    #                            图像 归一化   宽,高              裁剪结果

    # 设置神经网络输入
    network.setInput(blob)
    # print(blob)


# 获取神经网络输出
def Network_Output():
    # 1、获取神经网络各层名称
    layersNames = network.getLayerNames()

    # 2、获取神经网络输出层名称
    outputNames = [(layersNames[i[0] - 1]) for i in network.getUnconnectedOutLayers()]
    # print(outputNames)

    # 3、获取输出层图像(内容)
    # outputs:3个特征图:分别为小、中、大。(13*13、26*26、52*52)
    # 每个特征图又输出85个类别
    outputs = network.forward(outputNames)
    # print(outputs[0].shape)
    # print(outputs[1].shape)
    # print(outputs[2].shape)
    # print(outputs[0][0])
    return outputs


# 框出物体
def GetObject(outputs, image):
    # 创建参数列表
    h_p, w_p, c_p = image.shape # 图像的高、宽、通道数
    bboxes = []                 # 预测框
    classIds = []               # 分类索引
    confidences = []            # 置信度

    # 1、获取所有预测框的情况
    # outputs:小、中、大三个特征图
    # output:小、中、大单个特征图
    # oneclass:小、中、大每个分类
    # 逐特征图输出
    for output in outputs:
        # 逐框输出
        for one_class in output:
            # 算出每个框的预测结果
            # 先得到其85分类,每个分类的得分,再获取最大得分的下标作为索引,最后得到其置信度
            scores = one_class[5:]          # 获取所有得分
            classId = np.argmax(scores)     # 获取分类索引
            confidence = scores[classId]    # 获取置信度

            # 加入预测到的物体(认为可能的物体)
            if confidence > 0.5:
                # 获取预测框宽高、坐标
                w_b, h_b = int(one_class[2] * w_p), int(one_class[3] * h_p)
                x, y = int((one_class[0] * w_p) - w_b / 2), int((one_class[1] * h_p) - h_b / 2)
                # (中心点x、y坐标)
                bbox = [x, y, w_b, h_b]
                # 把参数加入列表(预测框参数、分类索引、置信度)
                bboxes.append(bbox)                     # 预测框参数
                classIds.append(classId)                # 分类索引
                confidences.append(float(confidence))   # 置信度
                print(confidences)

    # 保留一个预测框(从置信度阈值、NMS阈值进行设置)
    indices = cv2.dnn.NMSBoxes(bboxes, confidences, 0.5,     0.1)
    #                         预测框    置信度       置信度阈值  NMS阈值(非极大值抑制)

    # 输出预测框
    for i in indices:
        i = i[0]
        box = bboxes[i]
        x, y, w, h = box[0], box[1], box[2], box[3]
        # print(x,y,w,h)
        cv2.rectangle(image, (x, y), (x + w, y + h), (255, 0, 255), 2)
        cv2.putText(image, f'{name_list[classIds[i]].upper()} {int(confidences[i] * 100)}%',
                   (x, y - 10), cv2.FONT_HERSHEY_SIMPLEX, 0.6, (255, 0, 255), 2)
    cv2.imshow('image', image)


if __name__ == '__main__':
    ReadFile()          #读取文件
    Network_Init()      #神经网络初始化
    Capture_Init()      #摄像头初始化

    while True:
        global img
        # success, img = capture.read()
        img = cv2.imread("Resource/test4.jpg")

        # 向神经网络输入
        Input_to_Network(img)

        # 获取神经网络输出
        outputs = Network_Output()

        # 框出物体
        GetObject(outputs, img)

        # 设置每帧间隔时间(q键退出)
        cv2.waitKey(1)
        # if cv2.waitKey(1) & 0XFF == ord("q"):
        #     break

    cv2.waitKey(0)


 136
136


 被折叠的 条评论
为什么被折叠?
被折叠的 条评论
为什么被折叠?
 到【灌水乐园】发言


